- Боремся с ростом файла Windows.edb службы поиска Windows
- Перестройка поискового индекса WindowsSearch
- Уменьшаем размер Windows.edb дефрагментацией с помощью утилиты Esentutl
- Удаление и пересоздание файла Windows.edb
- Перенос файла Windows.edb на другой диск
- Патч для предотвращения чрезмерного роста файла Windows.edb в Windows 8 / Windows Server 2012
- Почему сильно растет размер файла Windows.edb
- 3 Ways To Delete Search History In File Explorer in Windows 10
- Clear File Explorer History Using Folder Options
- Clear History From Windows Registry
- Disable File Explorer History Feature Using Group Policy Editor
- 10+ Tools for Finding and Deleting Duplicate Files on Windows
- Most Read
- Downloads
- Third party tools to find duplicate files
- Visualize Those Large Files
- Finding Duplicate Files on macOS
Боремся с ростом файла Windows.edb службы поиска Windows
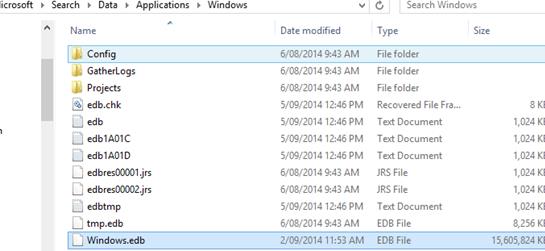
Файл Windows.edb представляет собой индексную базу данных службы поиска Windows (Windows Search). Поисковый индекс позволяет пользователям выполнять быстрый поиск данных и файлов на диске по индексной базе файлов, электронных писем в pst файлах и другого контента. Индексирование выполняется в фоновом режиме процессом SearchIndexer.exe . Естественно, чем больше файлов в системе, тем больший размер может быть у файла Windows.edb. В некоторых случаях он может вырастать до десятков и даже сотен Гб, занимая все свободное место на системном диске.
Файл Windows.edb является скрытым и по-умолчанию хранится в каталоге C:\ProgramData\Microsoft\Search\Data\Applications\Windows\.
Например, в моем случае файла Windows.edb вырос до 15,5 Гб (а это почти 15% на моем 100 Гб SSD диске).
Текущий размер файла Windows.edb в Windows можно получить следующей командой PowerShell:

Далее рассмотрим, как уменьшить размер индексного файла Windows.edb службы поиска Windows.
Перестройка поискового индекса WindowsSearch
Самый “правильный”, но не самый эффективный способ уменьшить размер файла Windows.edb – выполнить переиндексацию данных на диске. Для этого откройте Панель Управления -> Indexing Options -> Advanced и нажмите кнопку Rebuild (для открытия этого диалогового окна достаточно выполнить команду: Control srchadmin.dll ). 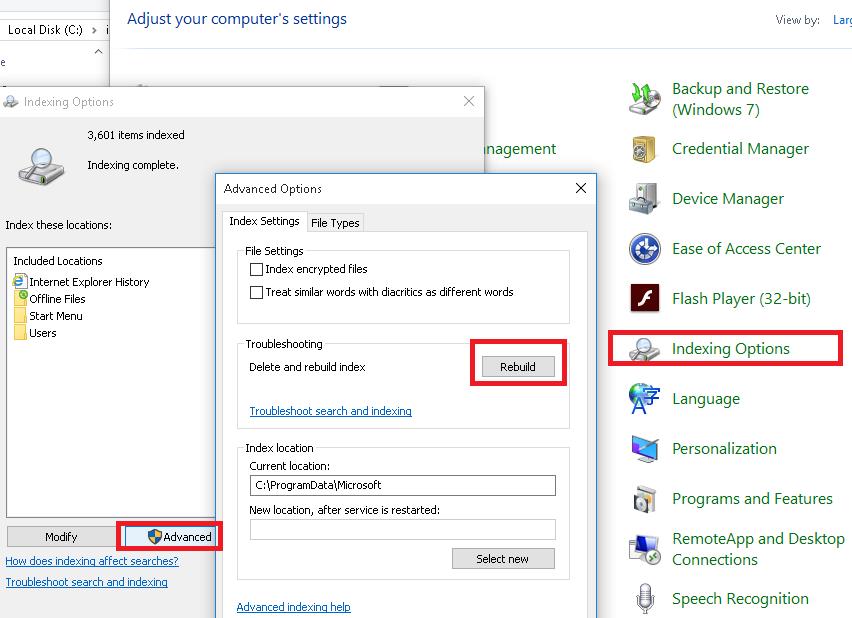
Через некоторое, Windows Search закончит полную переиндексацию данных на диске и размер edb файла несколько уменьшится время (у меня на компьютере ребилд поискового индекса занял несколько часов).
Уменьшаем размер Windows.edb дефрагментацией с помощью утилиты Esentutl
Индексный файл службы поиска Windows представляет собой базу в формате EDB. Вы можете выполнить дефрагментацию EDB базы с помощью стандартной утилиты обслуживания таких баз — esentutl.exe (Extensible Storage Engine Utilities — должна быть хорошо знакома администраторам Exchange). Дефрагментация базы выполняется в офлайн режиме (база не должна использоваться), поэтому сначала придется остановить службы поиска. Все эти операции можно объединить в один bat/cmd скрипт:
sc config wsearch start=disabled
sc stop wsearch
esentutl.exe /d %ProgramData%\Microsoft\Search\Data\Applications\Windows\Windows.edb
sc config wsearch start=delayed-auto
sc start wsearch
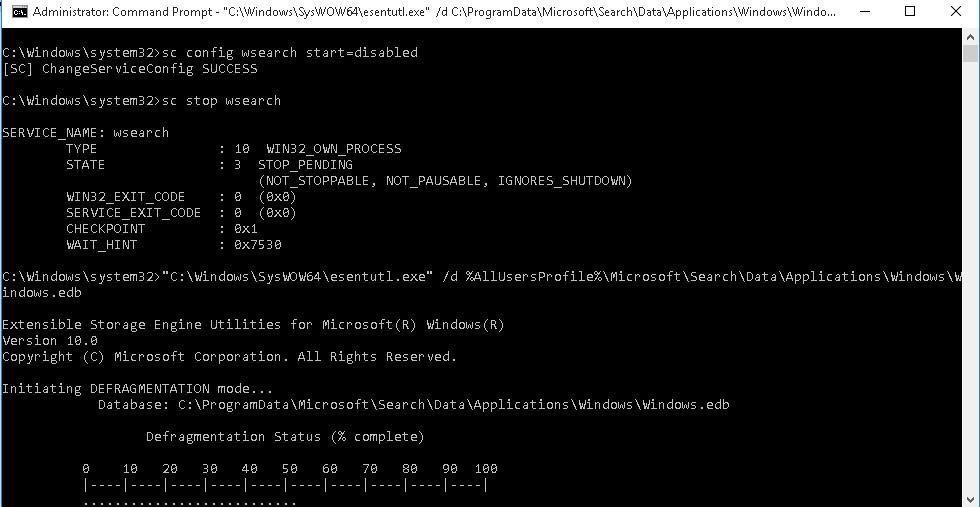
При работе утилита esentutl выводит прогресс выполнения дефрагментации файла EDB на экран.
Это означает что ваша система 64 битная и для выполнения дефрагментации нужно использовать x32 версию esentutl. В этом случае третья команда будет выглядеть так:
«C:\Windows\SysWOW64\esentutl.exe» /d %AllUsersProfile%\Microsoft\Search\Data\Applications\Windows\Windows.edb
В моем случае размер файла Windows.edb после дефрагментации уменьшился на 30%.
Удаление и пересоздание файла Windows.edb
Если места на диске критически мало, можно удалить файл Windows.edb. Это действие безопасно, т.к. вы не теряете никакие данные, сбрасывается только поисковый индекс. Для удаления файла Windows.edb остановите службу Windows Search, затем удалите файл и запустите службу.
net stop «Windows Search»
REG ADD «HKLM\SOFTWARE\Microsoft\Windows Search» /v SetupCompletedSuccessfully /t REG_DWORD /d 0 /f
del %PROGRAMDATA%\Microsoft\Search\Data\Applications\Windows\Windows.edb
net start «Windows Search»
После перезапуска, служба Windows Search начнет процесс переиндексации данных на дисках компьютера и пересоздаст файл Windows.edb (в процессе полной переиндексации производительность системы может снизится).
Перенос файла Windows.edb на другой диск
В некоторых случаях, когда размер файла постоянно увеличивается Windows.edb, имеет смысл перенести индексную базу поиска Windows на другой диск (раздел). Тем самым экстремальный рост поисковой базы не приведет к остановке ОС из-за исчерпания свободного места на системном разделе. Довольно часто файл Windows.edb переносят на на терминальных серверах RDS, на которых пользователи активно работают с файлами, личными папками и другим индексируемым контентом.
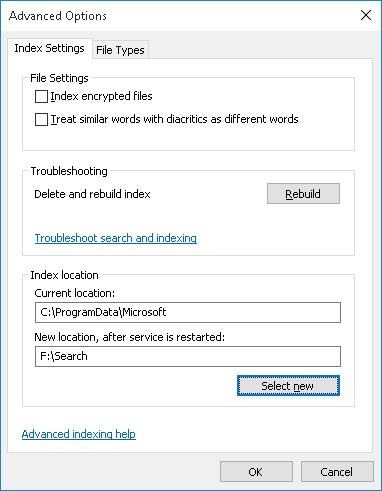
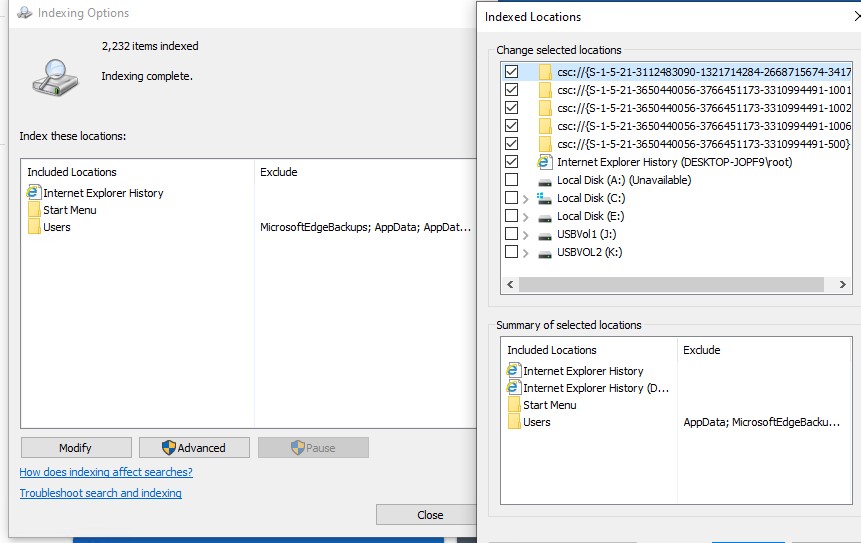
Для смены местоположения файла перейдите в Control Panel –> Indexing Options -> Advanced -> Index location-> New Location и укажите путь к новому местоположению файла Windows.edb и нажмите OK.
Перезапустите службу поиска:
Restart-Service wsearch
Патч для предотвращения чрезмерного роста файла Windows.edb в Windows 8 / Windows Server 2012
Для решения проблема постоянного роста размера файла Windows.edb в Windows 8 и Windows Server 2012 было выпущено специальное исправление, которое включено в состав пакета обновлений от мая 2013 года – KB 2836988. Рекомендуется вручную скачать и установить его в данных версиях Windows. Обратите внимание, что обновление не уменьшает текущий размер файла Windows.edb, а только исправляет проблемы, вызывающие его чрезмерный рост. Для уменьшения размера edb файла вам нужно перестроить поисковый индекс или выполнить дефрагментацию как описано выше.
Почему сильно растет размер файла Windows.edb
Если после дефрагментации и/или перестройки поискового индекса, его размер опять начинает сильно расти, попробуйте следуующие методики, которые могут помочь решить проблему.
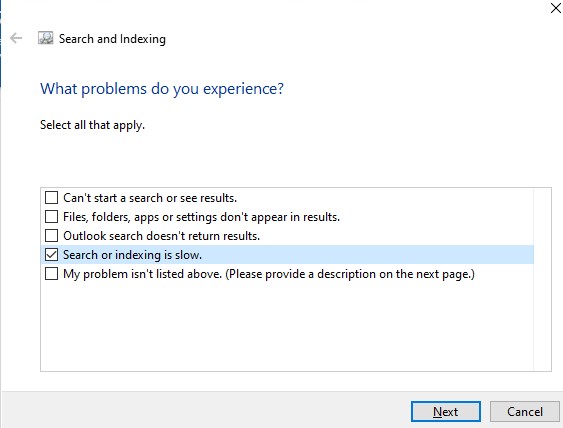
- Запустите встроенное средство исправления неполадок поиска Windows 10 (SearchandIndexingTroubleshooter). Чтобы запустить его, выполните команду: msdt.exe -ep SystemSettings_Troubleshoot_L2 -id SearchDiagnostic . В списке проблем выберите, что поиск или индексация выполняется медленно (Search or indexing is slow). Далее мастер устранения неполадок попробуем вернуть службу Windows Search в нормальное состояние;

- Старайтесь индексировать только необходимые контент. Исключайте из поискового индекса элементы, поиск в которых вы не используете. Нажмите кнопку Modify в настройках индексирования и в окне Indexing Location отключите пути и приложения, которые не нужно индексировать. После изменения настроек путей индексирования нужно каждый раз перестраивать индекс Advanced ->Rebuild;
3 Ways To Delete Search History In File Explorer in Windows 10
Windows Explorer comes with a search feature through which users can find specific files or folders. By default, all your searches from the search box are saved into its history. The next time you type in the search box, it will show recently typed similar terms in the drop-down dialog.
You can delete your Windows File Explorer history after using the system, or disable the feature that is keeping the history. In this article, I am going to provide you all possible ways that can help you in deleting Search History In Windows File Explorer.
Clear File Explorer History Using Folder Options
You can clear your File Explorer history manually by going to Folder Options. This will delete all previous history.
- Open Windows File Explorer, and go to the Tools tab from top the of the window and go with Folder Options in the list.
- This will open a new dialog of Folder Options. At the bottom of the window, you can see an option that says “Clear File Explorer History”, click on the Clear button, and press Ok to apply the changes.
All of your older history that was saved, will be gone, and from the next time you type in search box, it will again save as a history of File Explorer. Be double sure before clearing the history, because it will not ask you for any confirmation.
Clear History From Windows Registry
Sometimes if you want to delete a specific history entry from File Explorer, then you can do it through Registry Editor, which also allows you to delete all history items at the same time. Apply following steps.
- Open Run dialog by pressing “Windows key +R” and type regedit.exe. the Registry Editor window will open. Move to the following key in the registry Editor.
“HKEY_CURRENT_USER\Software\Microsoft\Windows\CurrentVersion\Explorer\WordWheelQuery”. - In the right-hand window, you will see numbered entries. These all are searches you made in File Explorer. Double click on each of them to check which search it is.
- You can delete each key individually by right clicking and select Delete, but if you want to delete the complete history at once, then right-click on the WordWheelQuery key, and go for Delete option from the list.
- This will delete all the history records of File Explorer searches. Close all open windows.
- When you enter the same search again in File Explorer, your suggestion will no longer be available.
Disable File Explorer History Feature Using Group Policy Editor
If you want to remove the feature that File Explorer will never keep track of your search history, you can do it using the Group Policy Editor. Follow the steps below for disabling file explorer history.
- Open Run dialog by pressing “Windows key +R” and type gpedit.msc. The Group Policy Editor window will open. Move to the following key in the Group Policy Editor window.
“User Configuration\Administrative Templates\Windows Components\File Explorer”.
Double click on File Explorer to expand it further to right-hand window. Look for the key “Turn off the display of recent search entries in File Explorer …”. - Double click to open its Properties window. Select the option of Enabled to enable this feature. Click Apply then OK. Close all open windows.
Now you can use the system privately, and search whatever you want to, and after using the system by applying any of above mentioned method, remove the traces of your searches. No one will get to know about your use of the system.
10+ Tools for Finding and Deleting Duplicate Files on Windows
Most Read
Downloads
- Balabolka 2.15.0.781 Filed in Office Applications
- Speedify 11.1.06 similar apps in Internet Tools
- YUMI 2.0.8.54 similar apps in Operating Systems
- Universal USB Installer 2.0.0.22 similar apps in Operating Systems
- Advanced Codecs for Windows 14.9.75 similar apps in Codecs
We’ve covered many ways that you can save space on your storage drives over the years, most recently discussing how to manually go through large files and testing cleanup utilities, resetting Windows to its default state without losing your files, and methods for deleting the Windows.old backup, in all scenarios potentially reclaiming several gigabytes of storage in the process. Deleting duplicate files on your system could easily result in clean out that is similarly sizable if only a few large files are found.
Windows doesn’t make it easy to deal with duplicate files all by itself. While there are many options for accomplishing this sort of task with batch files or PowerShell scripts, we assume most people would prefer something that doesn’t involve a command prompt.
Without installing third party software, your only option is running a search for a specific file via Windows Explorer and manually deleting the duplicates that appear. This isn’t helpful, of course, if you don’t know which files have duplicates.
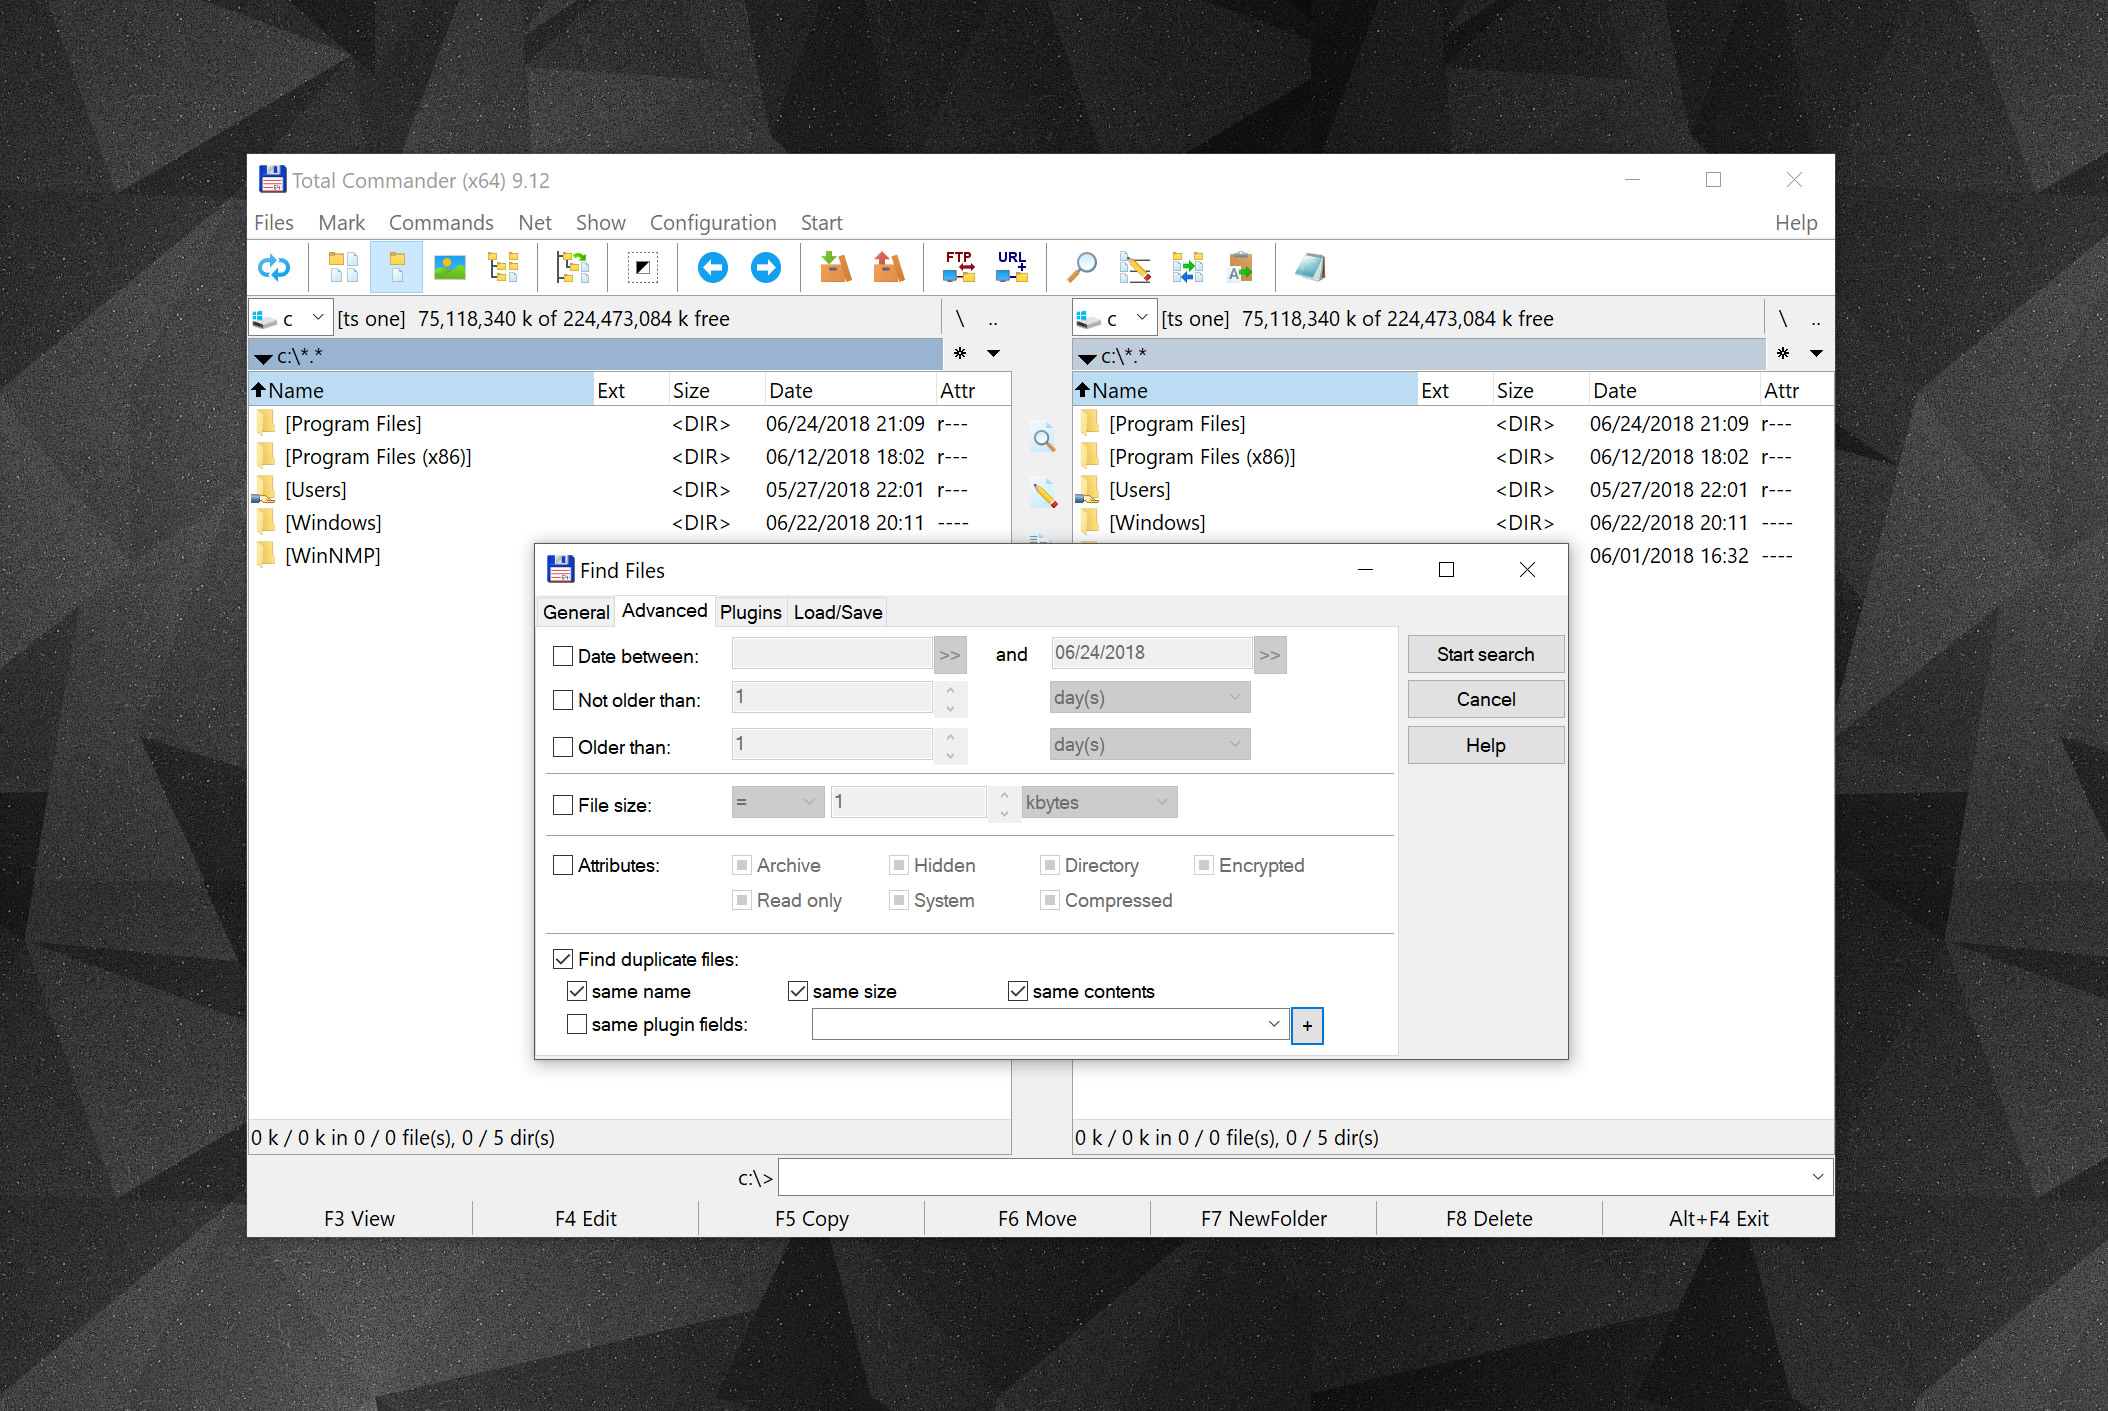
Those of you using the powerful File Explorer alternative Total Commander may know already that it includes the ability to search for duplicate files (it’s on the second search page) among the dozens of other features it provides over the Windows File Explorer aimed at power users.
If you’d rather not add any additional third party software to your system or learn your way around a new file explorer, it’s worth mentioning that CCleaner has a duplicate file finder built in (Tools > Duplicate Finder), if you happen to use that already. Note however we’re not as fond of CCleaner as we used to be and there are better alternatives these days.
Third party tools to find duplicate files
You’re probably going to need one of these tools.
We’ve installed all of the above and unless you’re after some specific feature, CloneSpy gets our recommendation for having a light, albeit somewhat cluttered interface. CloneSpy displays just enough options by default, it’s also free and can be run in «portable» mode without being fully installed, which we tend to like for this kind of utilities.

For a more intuitive interface with simpler functionality than the above, we like Wise Duplicate Finder:

On the premium end of things, Duplicate Cleaner is easily the most popular duplicate tool in our download section, touting loads of features and displaying them in a modern-looking interface that is responsive and scales well with a custom Windows DPI.
If you only plan to run a few quick scans and then uninstall it, the software offers a 15 day trial but costs $29.95 for a lifetime license.

Although you have to uncheck crapware during its installation, Auslogics Duplicate File Finder is free and features a GUI that is about as modern feeling as Duplicate Cleaner yet walks you through the scanning process with a series of prompts instead of opening to a switchboard full of options.

As a final mention, DupScout seems like a decent alternative to CloneSpy if don’t care about having a portable installation yet want a relatively clean interface that isn’t quite as dated or barren (add a profile on the left to get started).

Visualize Those Large Files
Didn’t free up as much space as you thought?
Try looking for large files with one of these drive visualization tools.

Finding Duplicate Files on macOS
Duplicate File Finder Remover on the Mac App Store comes highly recommended, with a ton of features on top of a very intuitive UI. Some advanced features are available at a cost, but that’s entirely optional.
Two more recommended apps for macOS users: Trend Micro’s Dr. Cleaner is free and offers a disk cleaner and big file finder. While Disk Inventory X is a dedicated tool to show the sizes of files and folders in a treemap graph, similar to the Windows example above.


