- Linux / UNIX List Open Files for Process
- UNIX List Open Files For Process
- FreeBSD list open files per process
- Linux List Open Files For Process
- Using lsof to display the processes using the most file handles
- Conclusion
- 5 Commands to View the Content of a File in Linux Command Line
- 5 commands to view files in Linux
- 1. Cat
- 3. Less
- 4. Head
- 5. Tail
- Bonus: Strings command
- Команда file в Linux
- Синтаксис и опции file
- Примеры использования file
- Выводы
- The Linux LS Command – How to List Files in a Directory + Option Flags
- Prerequisites
- The Linux ls Command
- How to list Files in a Directory with Options
- List files in the current working directory
- List files in another directory
- List files in the root directory
- List files in the parent directory
- List files in the user’s home directory (/home/user)
- List only directories
- List files with subdirectories
- List files recursively
- List files with their sizes
- List files in long format
- List files in long format with readable file sizes
- List files including hidden files
- List files in long format including hidden files
- List files and sort by date and time
- List files and sort by file size
- List files and output the result to a file
- Conclusion
Linux / UNIX List Open Files for Process
H ow do I list all open files for a Linux or UNIX process using command line options? How can I show open files per process under Linux?
Both Linux and Unix-like operating systems come with various utilities to find out open files associated with the process.
| Tutorial details | |
|---|---|
| Difficulty level | Easy |
| Root privileges | Yes |
| Requirements | None |
| Est. reading time | 3 minutes |
UNIX List Open Files For Process
First use the ps command command to get PID of process, enter:
$ ps -aef | grep
Next pass this PID to pfiles command under Solaris Unix:
$ pfiles
$ pfiles 3533
See pfiles command documentation> for more information or type the following man command:
% man pfiles
FreeBSD list open files per process
On FreeBSD use the fstat command along with the ps command:
# ps aux | grep -i openvpn # filter outputs using the grep command #
# fstat -p
# fstat -p 1219
We can count open files count for openvpn process as follows using the wc command:
# fstat -p 1219 | grep -v ^USER | wc -l
The -p option passed to the fstat to report all files open by the specified process.
FreeBSD pstat command in action
Linux List Open Files For Process
First you need to find out PID of process. Simply use any one of the following command to obtain process id:
# ps aux | grep
$ ps -C
For example, find out PID of firefox web-browser, enter:
$ ps -C firefox -o pid=
Output:
To list opne files for firefox process, enter:
$ ls -l /proc/7857/fd
Sample output:
- No ads and tracking
- In-depth guides for developers and sysadmins at Opensourceflare✨
- Join my Patreon to support independent content creators and start reading latest guides:
- How to set up Redis sentinel cluster on Ubuntu or Debian Linux
- How To Set Up SSH Keys With YubiKey as two-factor authentication (U2F/FIDO2)
- How to set up Mariadb Galera cluster on Ubuntu or Debian Linux
- A podman tutorial for beginners – part I (run Linux containers without Docker and in daemonless mode)
- How to protect Linux against rogue USB devices using USBGuard
Join Patreon ➔
For privileged process use the sudo command and to count open files use the wc command on Linux as follows:
# Get process pid
sudo ps -C Xorg -o pid
sudo ls -l /proc/$
# Say pid is 9497 for Xorg, then
sudo ls -l /proc/9497/fd | wc -l
We can use bash for loop as follows too:
Listing Open Files on Linux
Using lsof to display the processes using the most file handles
The lsof command list open files under all Linux distributions or UNIX-like operating system. Type the following command to list open file for process ID 351:
$ lsof -p 351
In this example display and count all open files for top 10 processes on Linux operating systems or server:
# lsof | awk ‘
## force numeric sort by passing the ‘-n’ option to the sort ##
# lsof | awk ‘
- lsof – Run the lsof to display all open files and send output to the awk
- awk ‘
‘ – Display first field i.e. process name only - uniq -c – Omit duplicate lines while prefix lines by the number of occurrences
- sort -r – Reverse sort
- head – Display top 10 process along with open files count
Conclusion
Now you know how to find open files per process on Linux, FreeBSD, and Unix-like systems using various command-line options. See how to increase the system-wide/user-wide number of available (open) file handles on Linux for more information.
🐧 Get the latest tutorials on Linux, Open Source & DevOps via
Источник
5 Commands to View the Content of a File in Linux Command Line
If you are new to Linux and you are confined to a terminal, you might wonder how to view a file in the command line.
Reading a file in Linux terminal is not the same as opening file in Notepad. Since you are in the command line mode, you should use commands to read file in Linux.
Don’t worry. It’s not at all complicated to display a file in Linux. It’s easy as well essential that you learn how to read files in the line.
Here are five commands that let you view the content of a file in Linux terminal.
5 commands to view files in Linux
Before you how to view a file in Unix like systems, let me clarify that when I am referring to text files here. There are different tools and commands if you want to read binary files.
1. Cat
This is the simplest and perhaps the most popular command to view a file in Linux.
Cat simply prints the content of the file to standard display i.e. your screen. It cannot be simpler than this, can it?
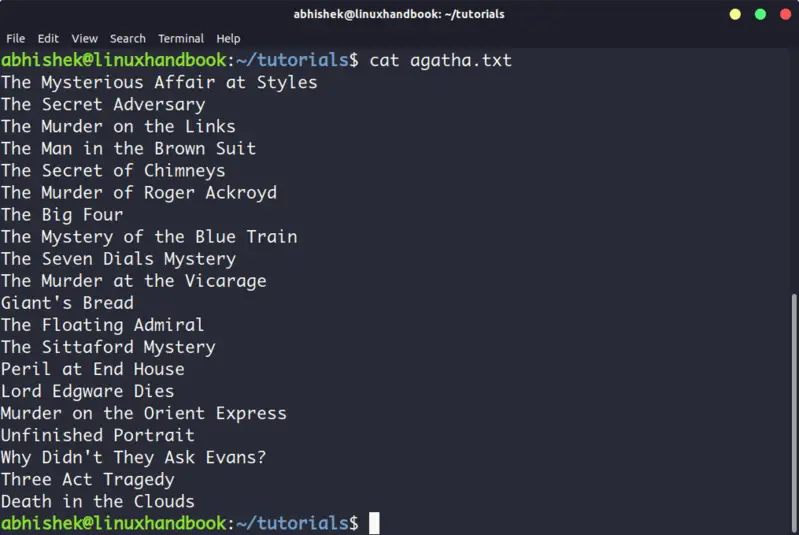 cat displays the content of the file on the screen
Cat becomes a powerful command when used with its options. I recommend reading this detailed tutorial on using cat command.
The problem with cat command is that it displays the text on the screen. Imagine if you use cat command with a file that has 2000 lines. Your entire screen will be flooded with the 200 lines and that’s not the ideal situation.
So, what do you do in such a case? Use less command in Linux (explained later).
The nl command is almost like the cat command. The only difference is that it prepends line numbers while displaying the text in the terminal.
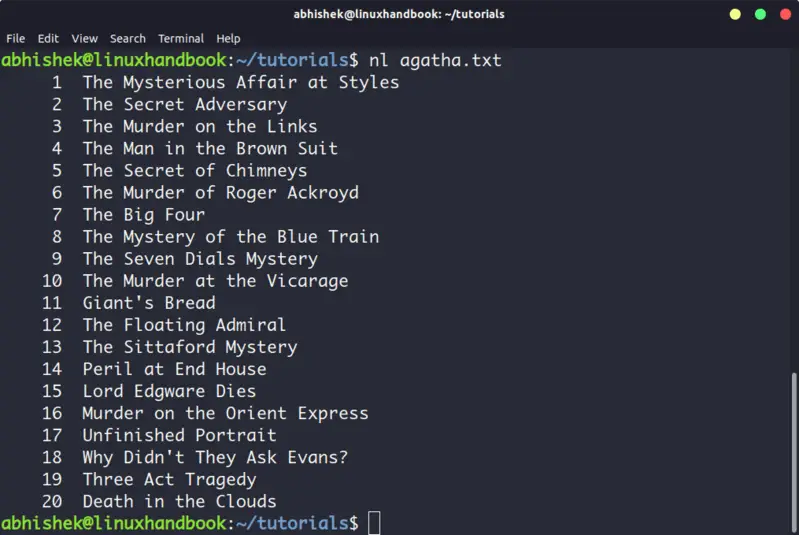 nl command displays text with line numbers
There are a few options with nl command that allows you to control the numbering. You can check its man page for more details.
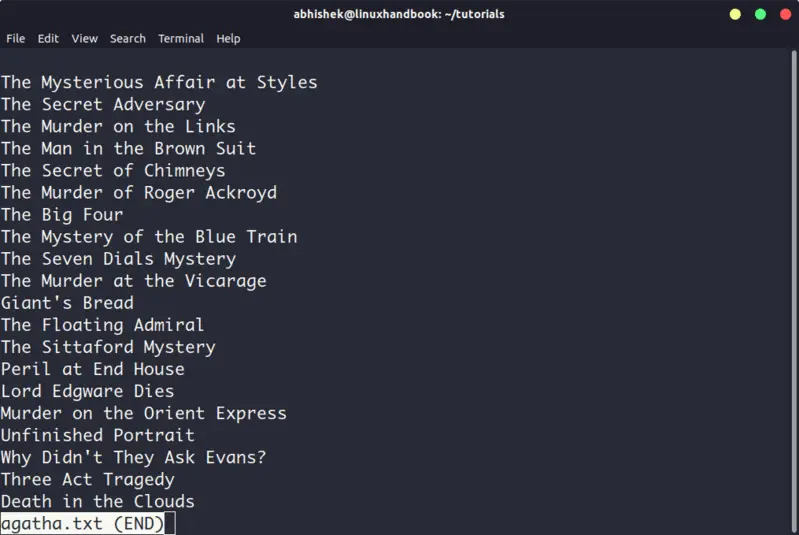
3. Less
Less command views the file one page at a time. The best thing is that you exit less (by pressing q), there are no lines displayed on the screen. Your terminal remains clean and pristine.
I strongly recommend learning a few options of the Less command so that you can use it more effectively.
There is also more command which was used in olden days but less command has more friendly features. This is why you might come across the humorous term ‘less is more’.
4. Head
Head command is another way of viewing text file but with a slight difference. The head command displays the first 10 lines of a text file by default.
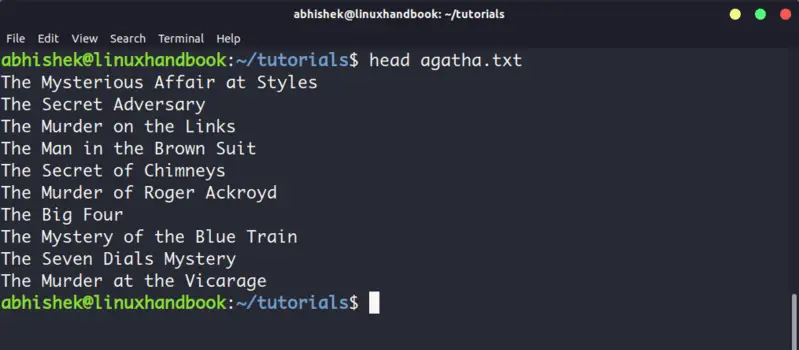
You can change this behavior by using options with head command but the fundamental principle remains the same: head command starts operating from the head (beginning) of the file.
5. Tail
Tail command in Linux is similar and yet opposite to the head command. While head command displays file from the beginning, the tail command displays file from the end.
By default, tail command displays the last 10 lines of a file.

Head and Tail commands can be combined to display selected lines from a file. You can also use tail command to see the changes made to a file in real time.
Bonus: Strings command
Okay! I promised to show only the commands for viewing text file. And this one deals with both text and binary files.
Strings command displays the readable text from a binary file.
No, it doesn’t convert binary files into text files. If the binary file consists of actual readable text, strings command displays those text on your screen. You can use the file command to find the type of a file in Linux.
Conclusion
Some Linux users use Vim to view the text file but I think that’s overkill. My favorite command to open a file in Linux is the less command. It leaves the screen clear and has several options that makes viewing text file a lot easier.
Since you now know ways to view files, maybe you would be interested in knowing how to edit text files in Linux. Cut and Paste are two such commands that you can use for editing text in Linux terminal. You may also read about creating files in Linux command line.
Источник
Команда file в Linux
Команда file — одна из самых полезных, поскольку позволяет узнать тип данных, которые на самом деле содержатся внутри документа. Если у вас есть какой-либо файл, взятый из ненадёжного источника, не поленитесь проверить его с помощью этой команды, прежде чем нажать кнопку Открыть. Возможно, такая предосторожность покажется лишней, но она оградит вас от «встречи» с нежелательным контентом.
В большинстве дистрибутивов Linux утилита file (работу которой и запускает одноимённая команда) входит в стандартный набор программного обеспечения.
Синтаксис и опции file
Синтаксис команды file достаточно простой. Записывать её в эмуляторе терминала или консоли следует так:
file опции название_документа
Что же касается опций, то их у этой команды несколько десятков. Мы рассмотрим лишь основные:
- -b, —brief — запрет на демонстрацию имен и адресов файлов в выводе команды;
- -i, —mime — определение MIME-типа документа по его заголовку;
- —mime-type, —mime-encoding — определение конкретного элемента MIME;
- -f, —files-from — анализ документов, адреса которых указаны в простом текстовом файле;
- -l, —list — список паттернов и их длина;
- -s, —special-files — предотвращение проблем, которые могут возникнуть при чтении утилитой специальных файлов;
- -P — анализ определенной части файла, которая обозначается различными параметрами;
- -r, —raw — отказ от вывода /ooo вместо непечатных символов;
- -z — анализ содержимого сжатых документов.
Для того, чтобы ознакомиться с полным списком опций, выполните в терминале команду:
Примеры использования file
Если вам нужно всего лишь посмотреть тип файла, использовать опции не обязательно. Достаточно прописать имя команды, а также название файла и путь к нему, при условии, что он находится не в корневой папке:
Случается, что нужно проверить не один, а несколько файлов. Чтобы не выполнять команду много раз подряд, перечисляйте названия всех файлов через пробел:
file /home/main-user/losst/test-file1.zip /home/main-user/losst/test-file2.tiff

Как видно на примере, картинки с расширениями gif и tiff в действительности оказались текстовыми документами, а архив с расширением zip — PDF документом. Кстати, команда file даёт возможность не только проверить, является ли архив архивом, но и заглянуть внутрь, чтобы узнать, что в нём содержится. Для этой цели используется опция -z:
file -z /home/main-user/losst/testarchive.zip

Как вы успели заметить, команда, возвращая ответ, постоянно выводит названия файлов, что в некоторых случаях бывает удобно, но зачастую только усложняет чтение результатов. Отключить эту функцию легко — воспользуйтесь опцией -b:
file -b /home/main-user/losst/test-file.gif /home/main-user/losst/test-file1.zip /home/main-user/losst/test-file2.tiff

Иногда нужно узнать не просто тип файла, а его MIME-тип. В таком случае на помощь приходит опция -i:
file -i -b /home/main-user/losst/fileA.sbin /home/main-user/losst/fileG.aspx /home/main-user/losst/fileH.lua

Нередко по каким-либо причинам утилита не может найти указанный файл: например, вы ошиблись буквой в его названии или неверно указали папку, в которой он находится. Тогда вывод информации об этом файле предваряет фраза cannot open. Впрочем, есть возможность видоизменить результат, добавив в него сообщение об ошибке. Для этого используйте опцию -E.
Сравните вывод команды с опцией -E и без неё:
file -E -b /home/main-user/losst/test-file1.zip /home/main-user/losst/test-file4.raw /home/main-user/losst/test-file.gif
file -b /home/main-user/losst/test-file1.zip /home/main-user/losst/test-file4.raw /home/main-user/losst/test-file.gif

Еще один способ работы с утилитой file — запись названий и адресов документов в простой текстовый файл. Применяя этот способ на практике, не забывайте добавлять к команде опцию —files-from, после которой указывайте имя файла, содержащего список документов, и путь к нему.
file —files-from /home/main-user/losst/list_of_files.txt

Выводы
Команда file помогает избежать ситуаций, когда вам приходится открывать подозрительные файлы, не будучи уверенными в их содержимом. Также вы можете использовать её для проверки содержимого нескольких архивов, если есть необходимость найти потерявшийся в большом массиве файлов документ, но нет желания просматривать все архивы вручную.
Источник
The Linux LS Command – How to List Files in a Directory + Option Flags
Since the creation of Unix in the 1970s, a lot of operating systems have used it as their foundation. Many of these operating systems failed, while others succeeded.
Linux is one of the most popular Unix based operating systems. It’s open source, and is used all over the world across many industries.
One amazing feature of the Linux operating system is the Command Line Interface (CLI) which allows users to interact with their computer from a shell. The Linux shell is a REPL (Read, Evaluate, Print, Loop) environment where users can enter a command and the shell runs it and returns a result.
The ls command is one of the many Linux commands that allow a user to list files or directories from the CLI.
In this article, we’ll go in depth on the ls command and some of the most important flags you’ll need day-to-day.
Prerequisites
- A computer with directories and files
- Have one of the Linux distros installed
- Basic knowledge of navigating around the CLI
- A smile on your face 🙂
The Linux ls Command
The ls command is used to list files or directories in Linux and other Unix-based operating systems.
Just like you navigate in your File explorer or Finder with a GUI, the ls command allows you to list all files or directories in the current directory by default, and further interact with them via the command line.
Launch your terminal and type ls to see this in action:

How to list Files in a Directory with Options
The ls command also accepts some flags (also known as options) which are additional information that changes how files or directories are listed in your terminal.
In other words, flags change how the ls command works:
PS: The word contents used in throughout the article refers to the files and directories being listed, not the actual contents of the files/directories ?
List files in the current working directory
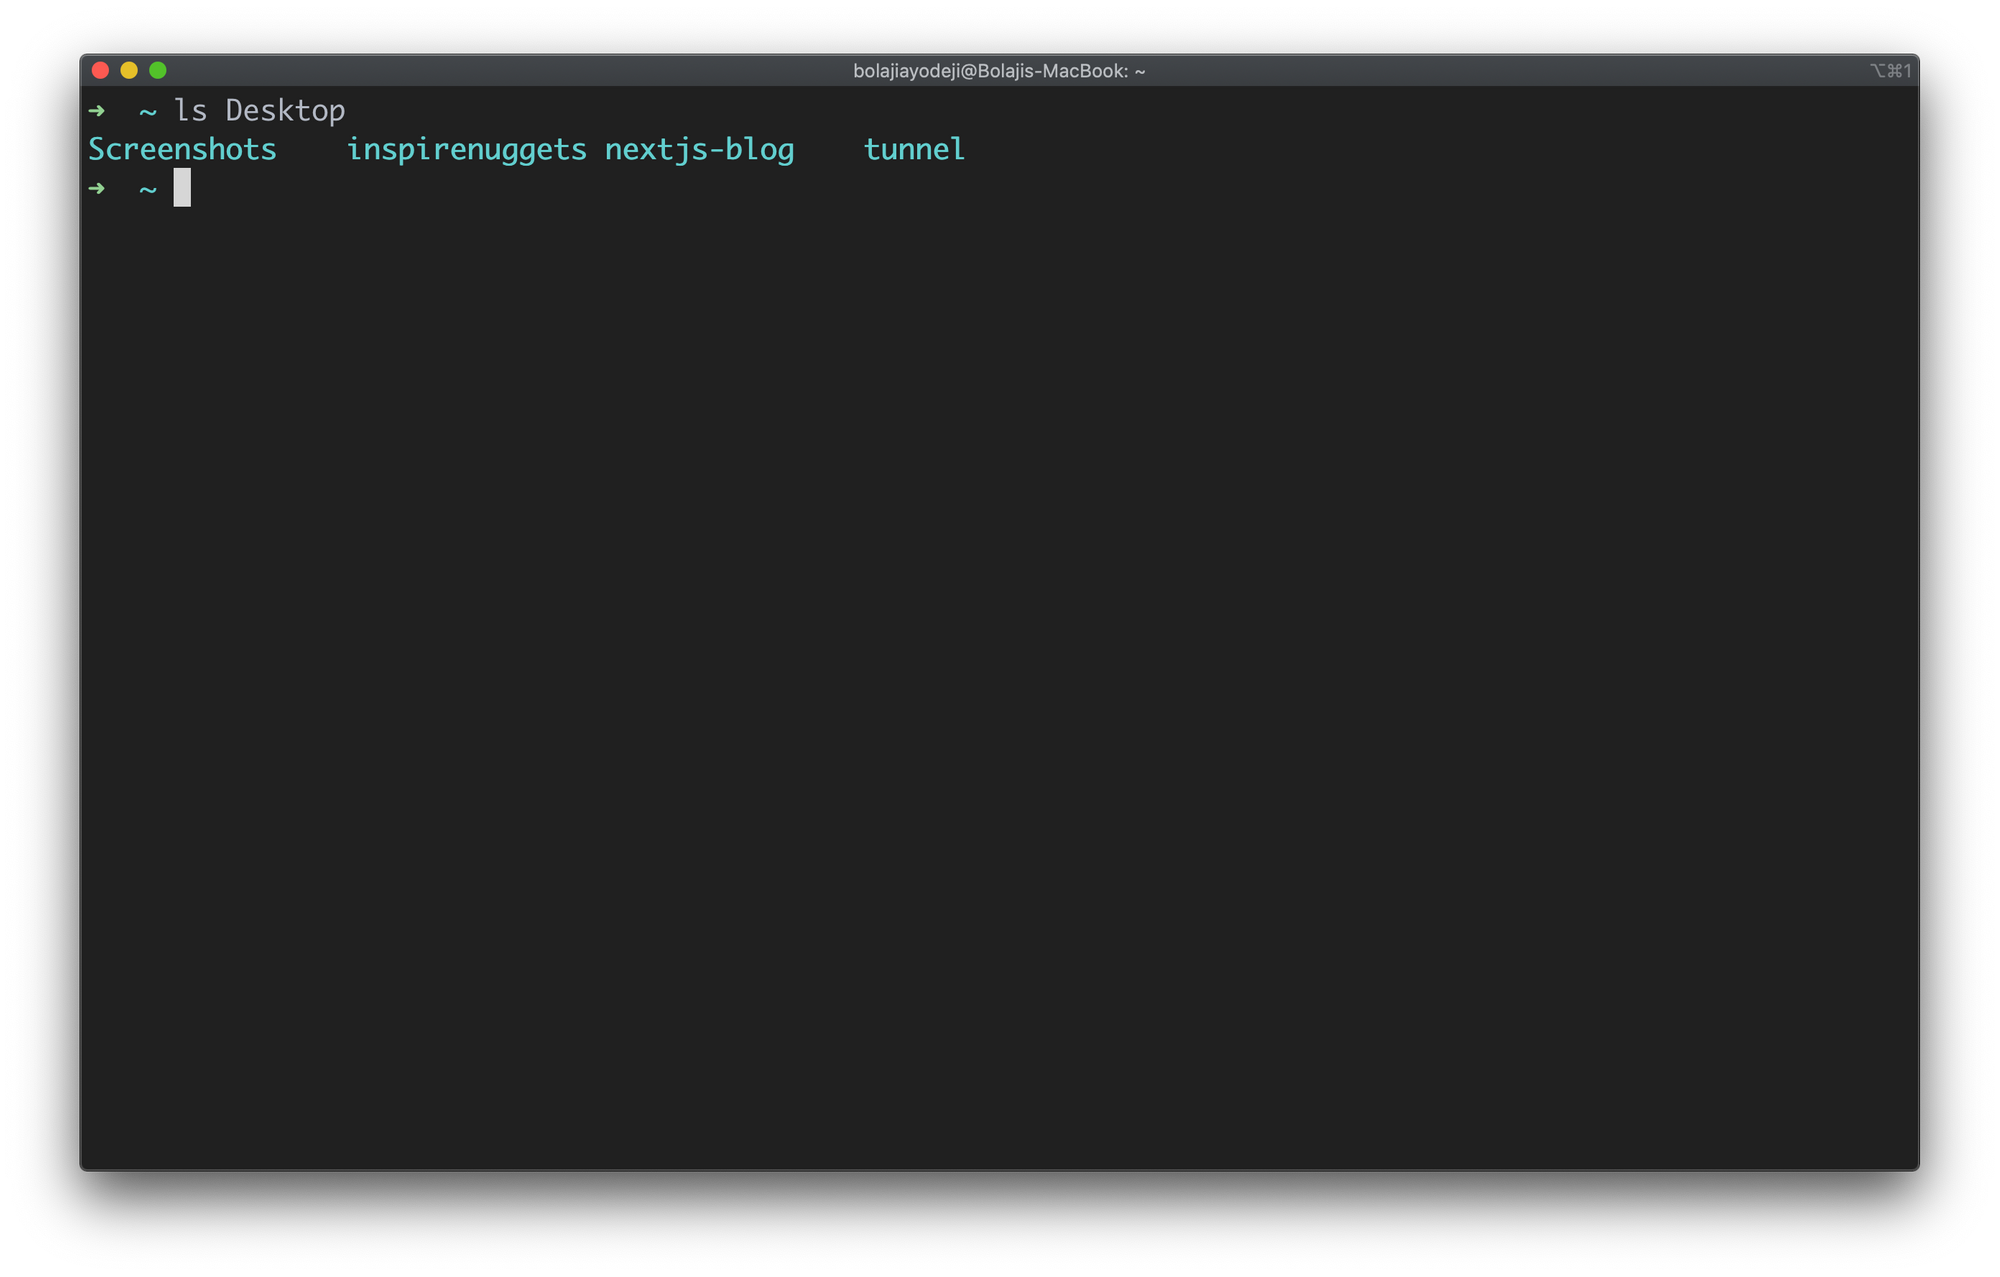
Type the ls command to list the contents of the current working directory:
List files in another directory
Type the ls [directory path here] command to list the contents of another directory:
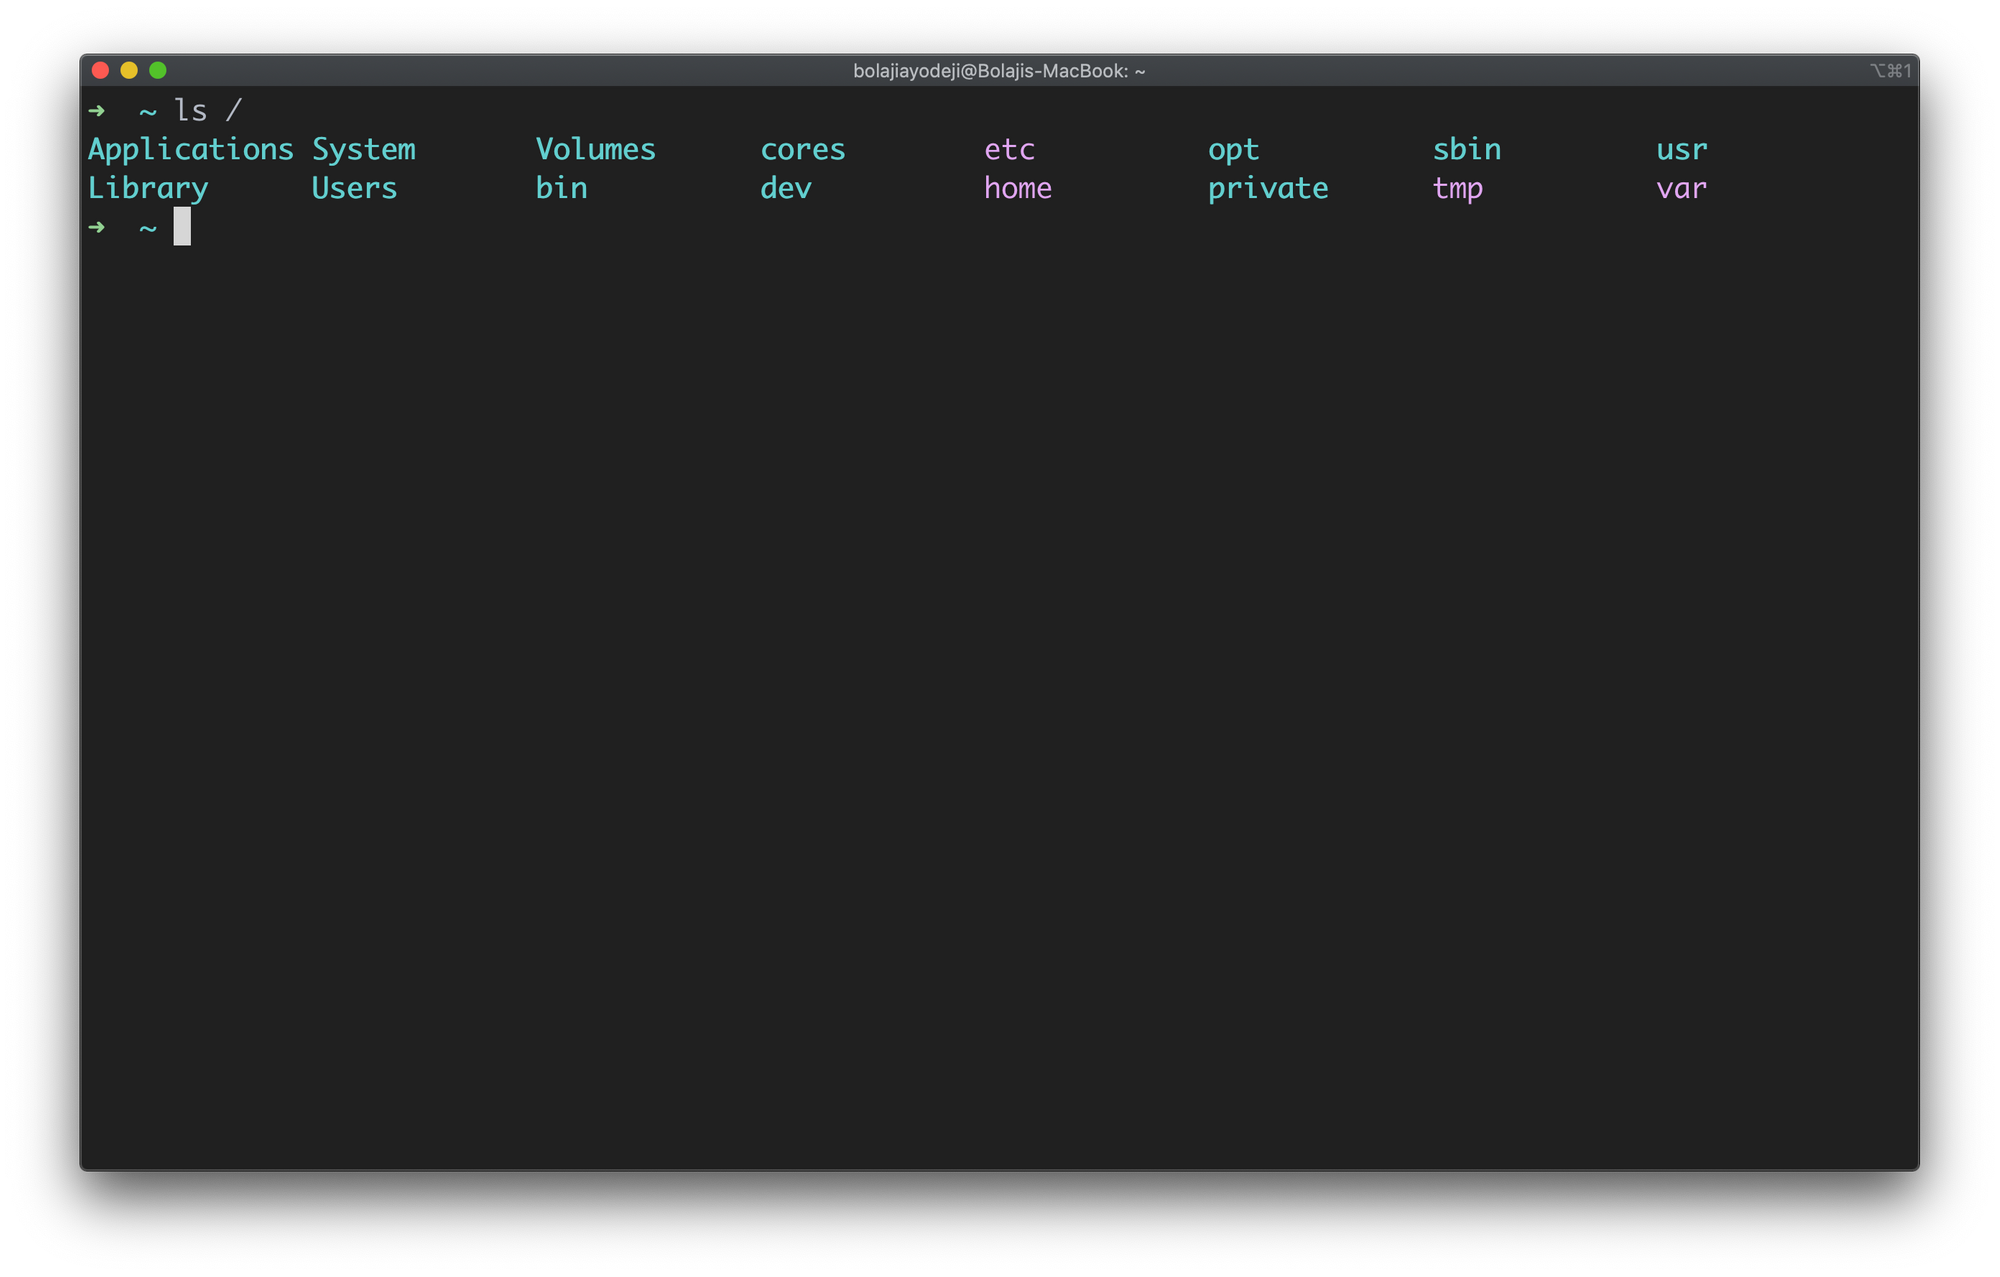
List files in the root directory
Type the ls / command to list the contents of the root directory:
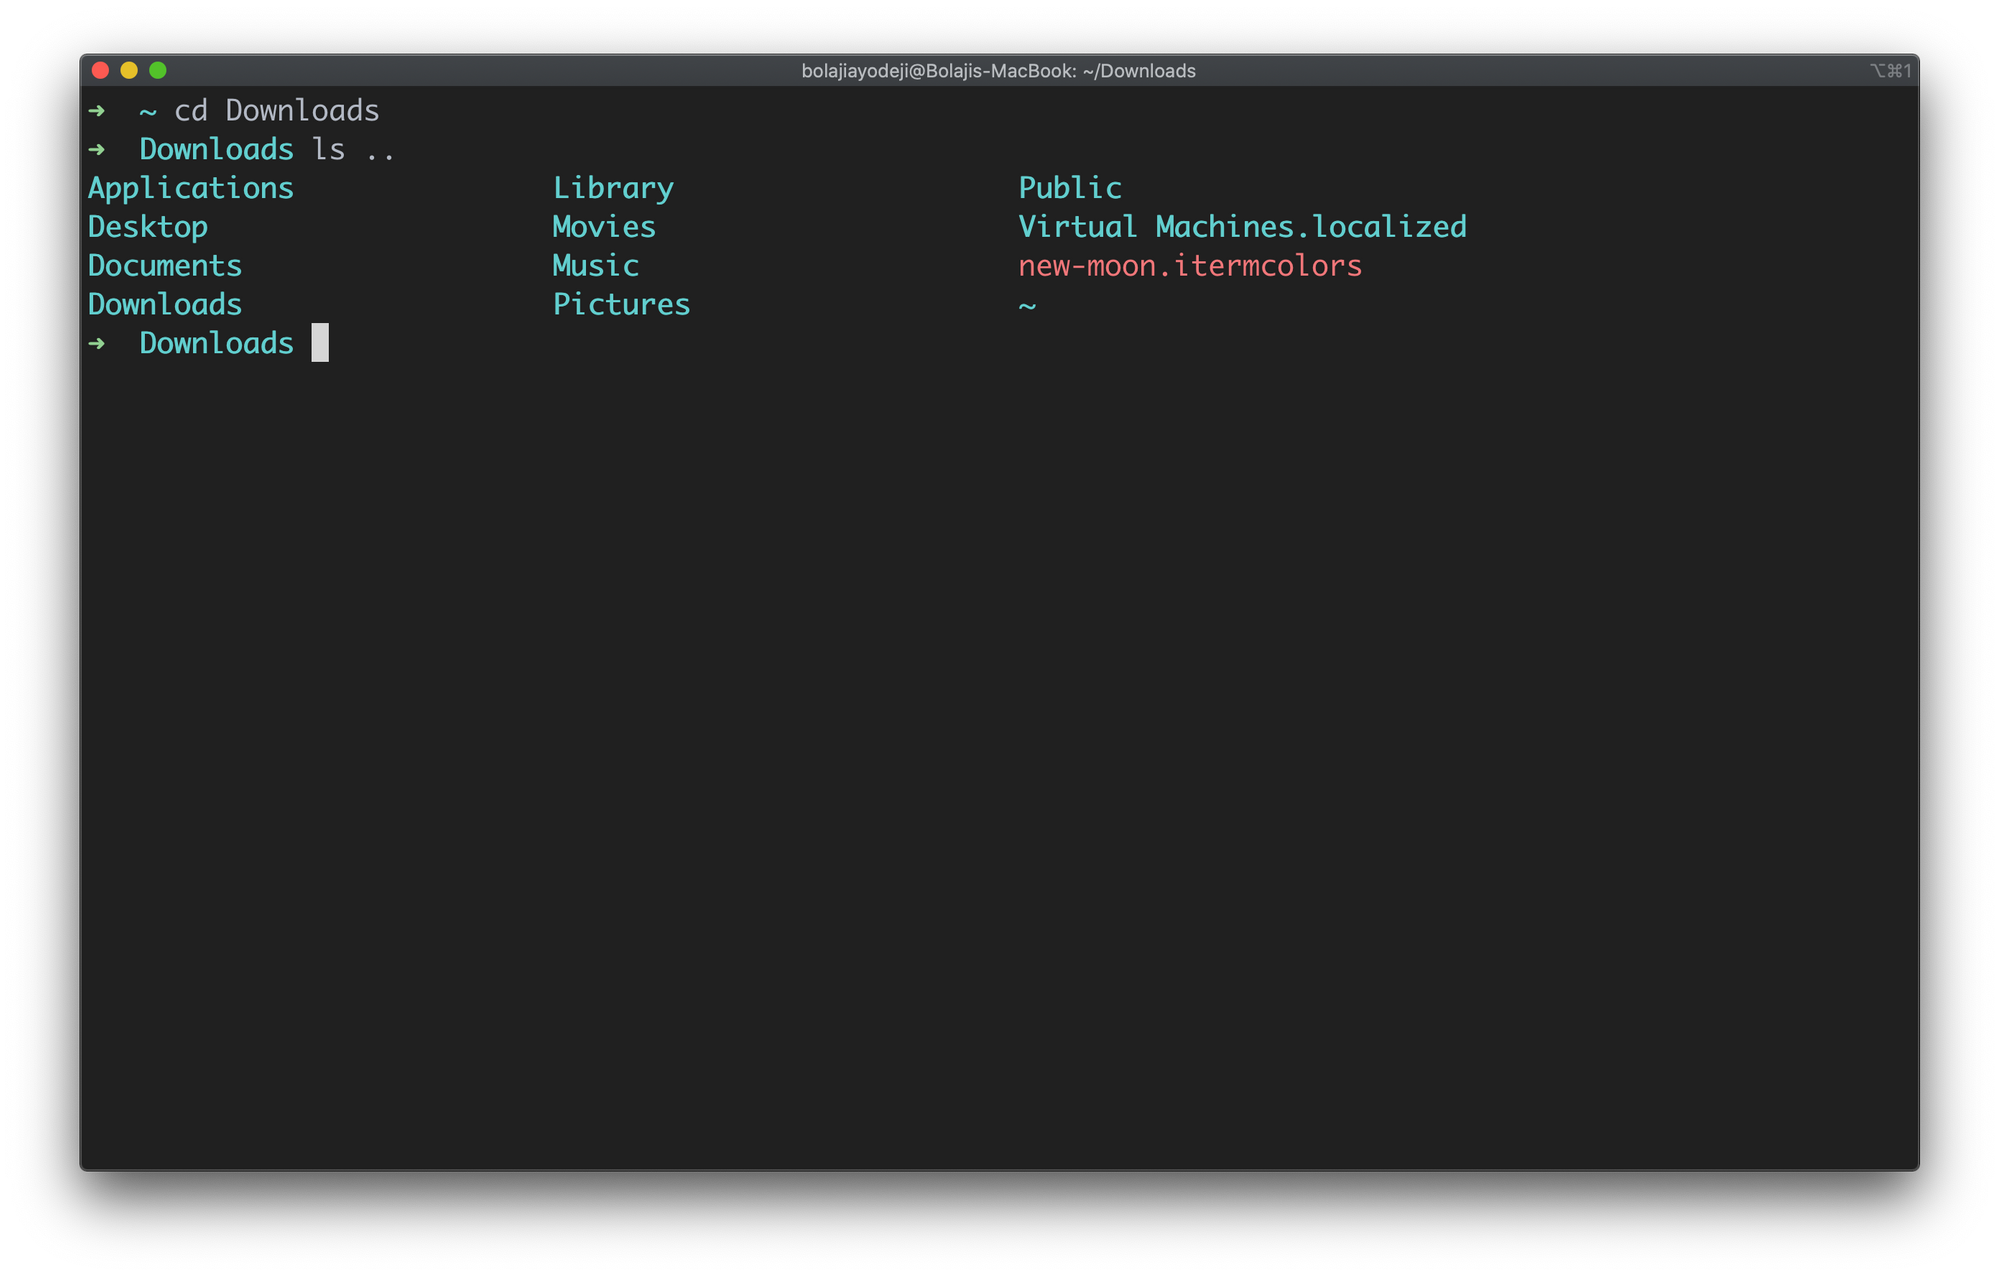
List files in the parent directory
Type the ls .. command to list the contents of the parent directory one level above. Use ls ../.. for contents two levels above:
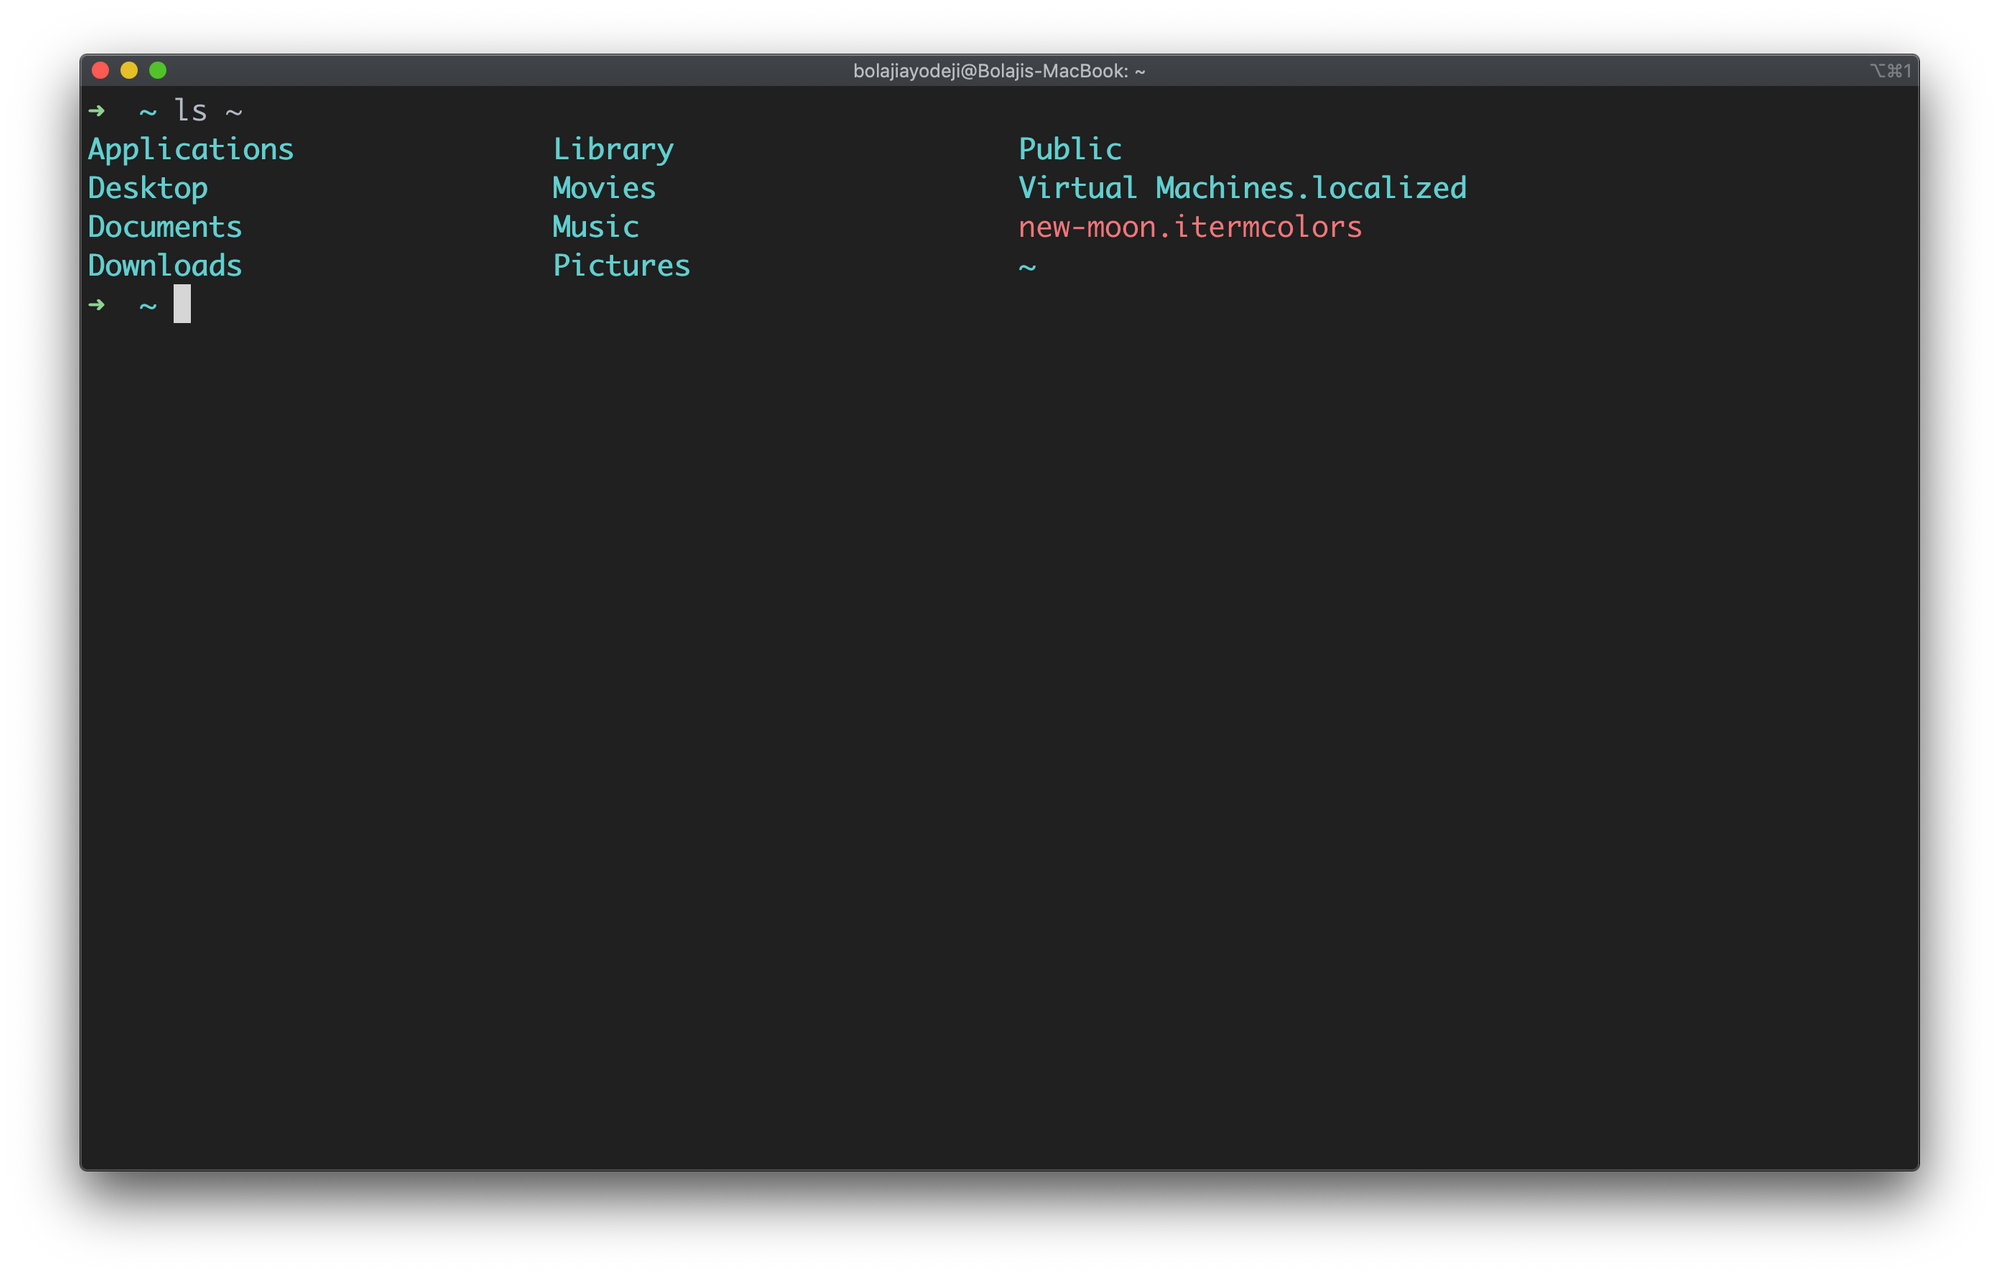
List files in the user’s home directory (/home/user)
command to list the contents in the users’s home directory:
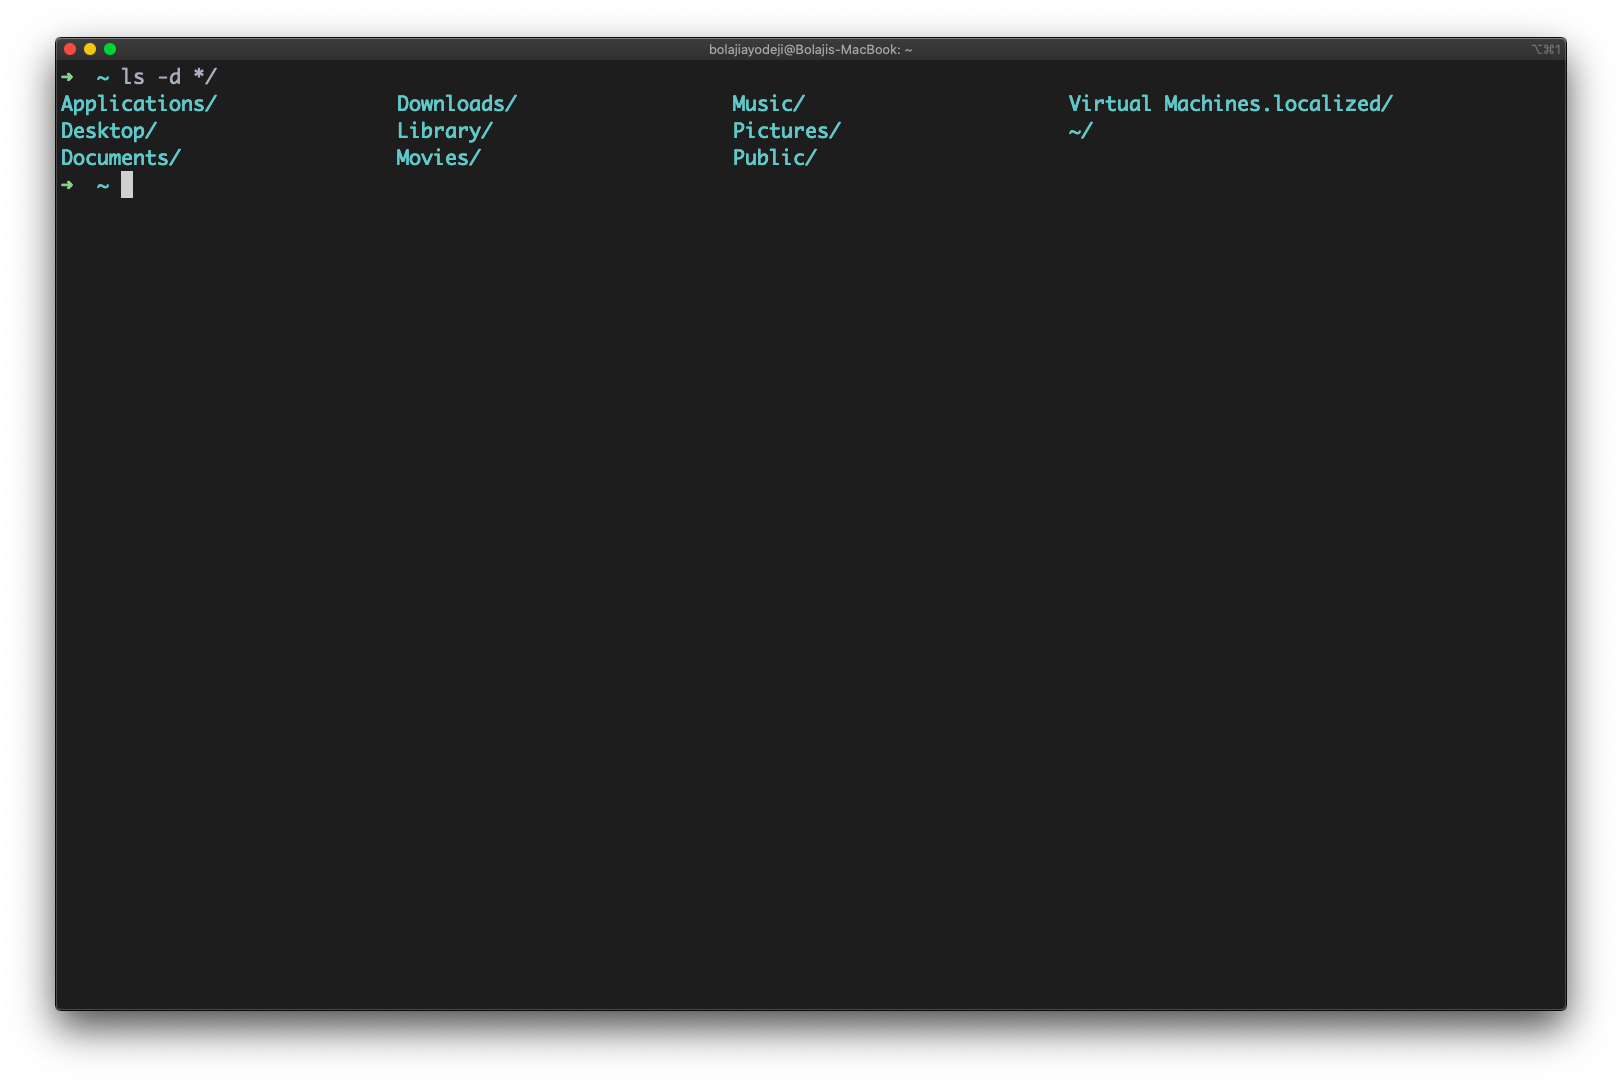
List only directories
Type the ls -d */ command to list only directories:
List files with subdirectories
Type the ls * command to list the contents of the directory with it’s subdirectories:

List files recursively
Type the ls -R command to list all files and directories with their corresponding subdirectories down to the last file:

If you have a lot of files, this can take a very long time to complete as every single file in each directory will be printed out. You can instead specify a directory to run this command in, like so: ls Downloads -R
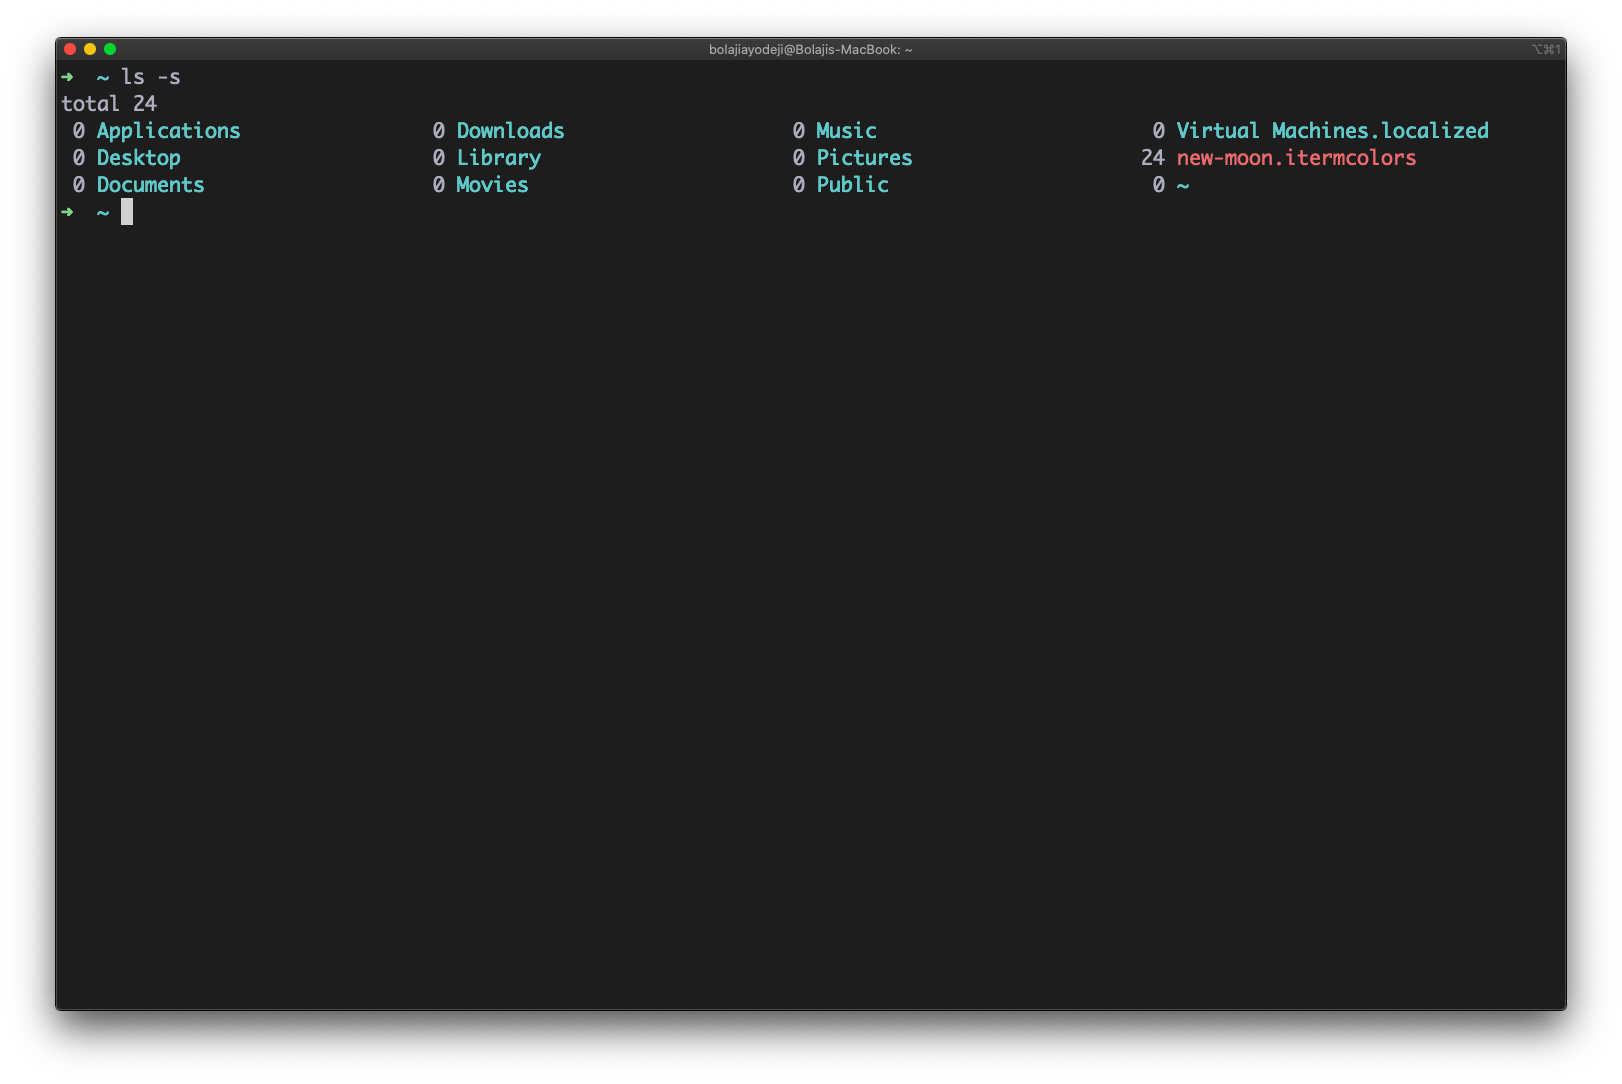
List files with their sizes
Type the ls -s command (the s is lowercase) to list files or directories with their sizes:
List files in long format
Type the ls -l command to list the contents of the directory in a table format with columns including:
- content permissions
- number of links to the content
- owner of the content
- group owner of the content
- size of the content in bytes
- last modified date / time of the content
- file or directory name

List files in long format with readable file sizes
Type the ls -lh command to list the files or directories in the same table format above, but with another column representing the size of each file/directory:
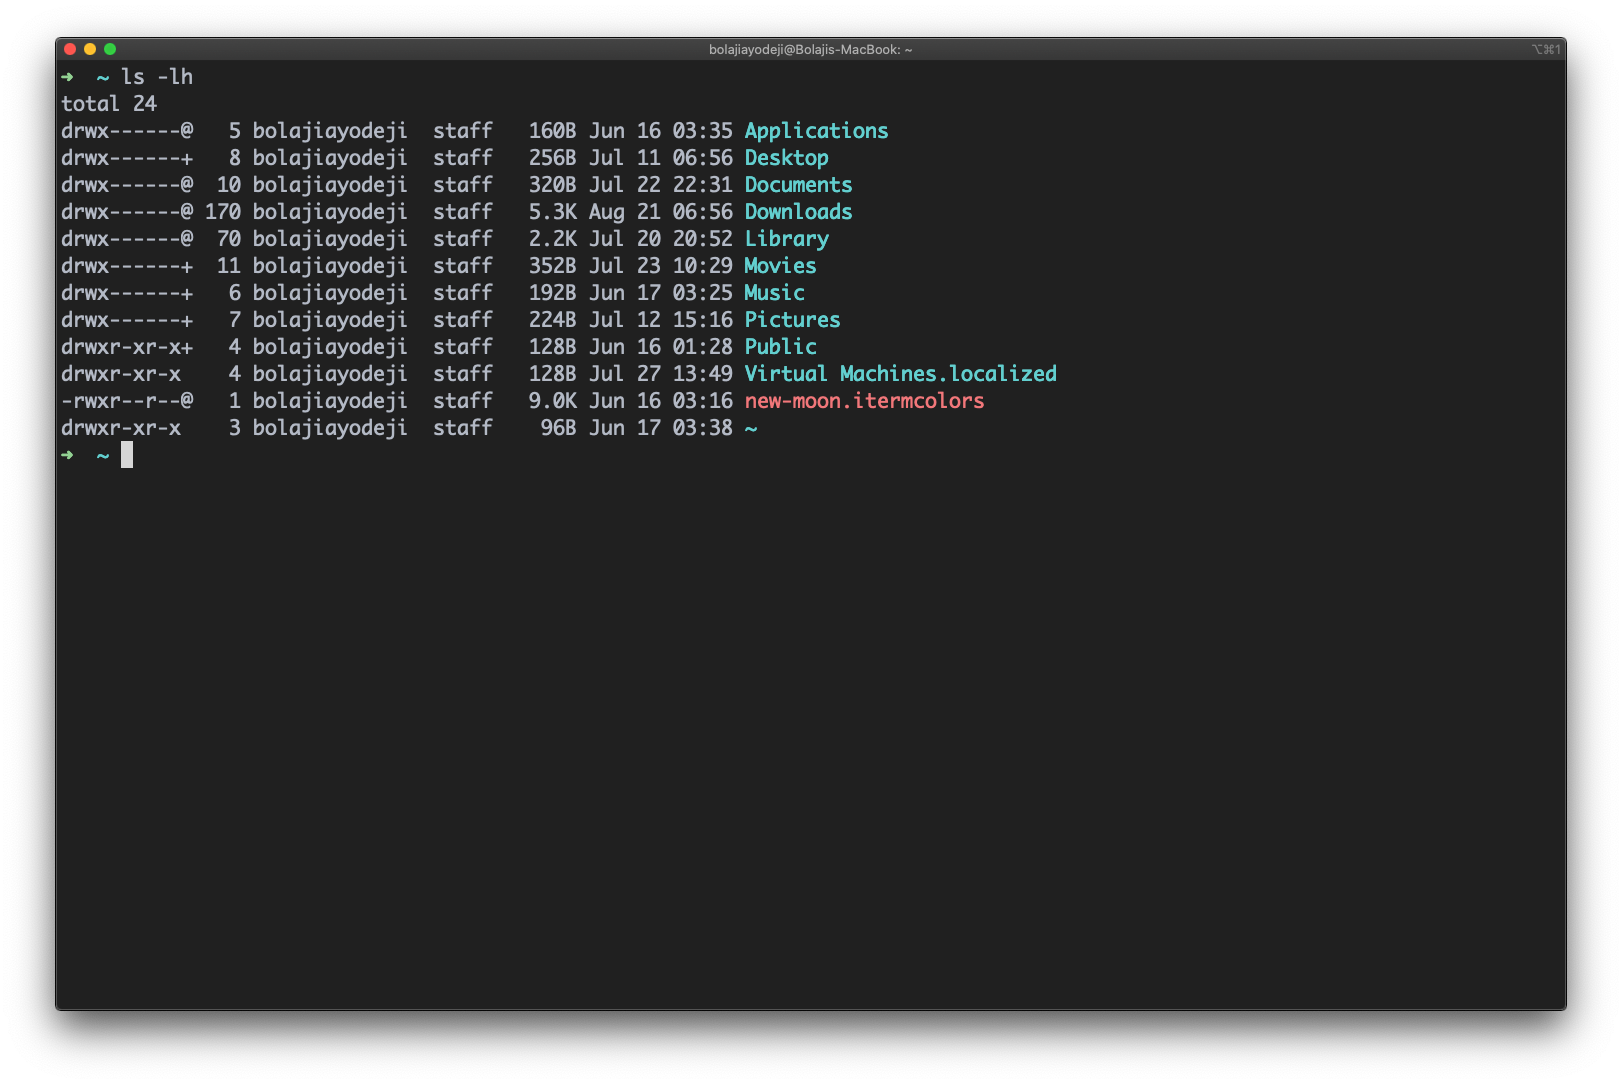
Note that sizes are listed in bytes (B), megabytes (MB), gigabytes (GB), or terabytes (TB) when the file or directory’s size is larger than 1024 bytes.
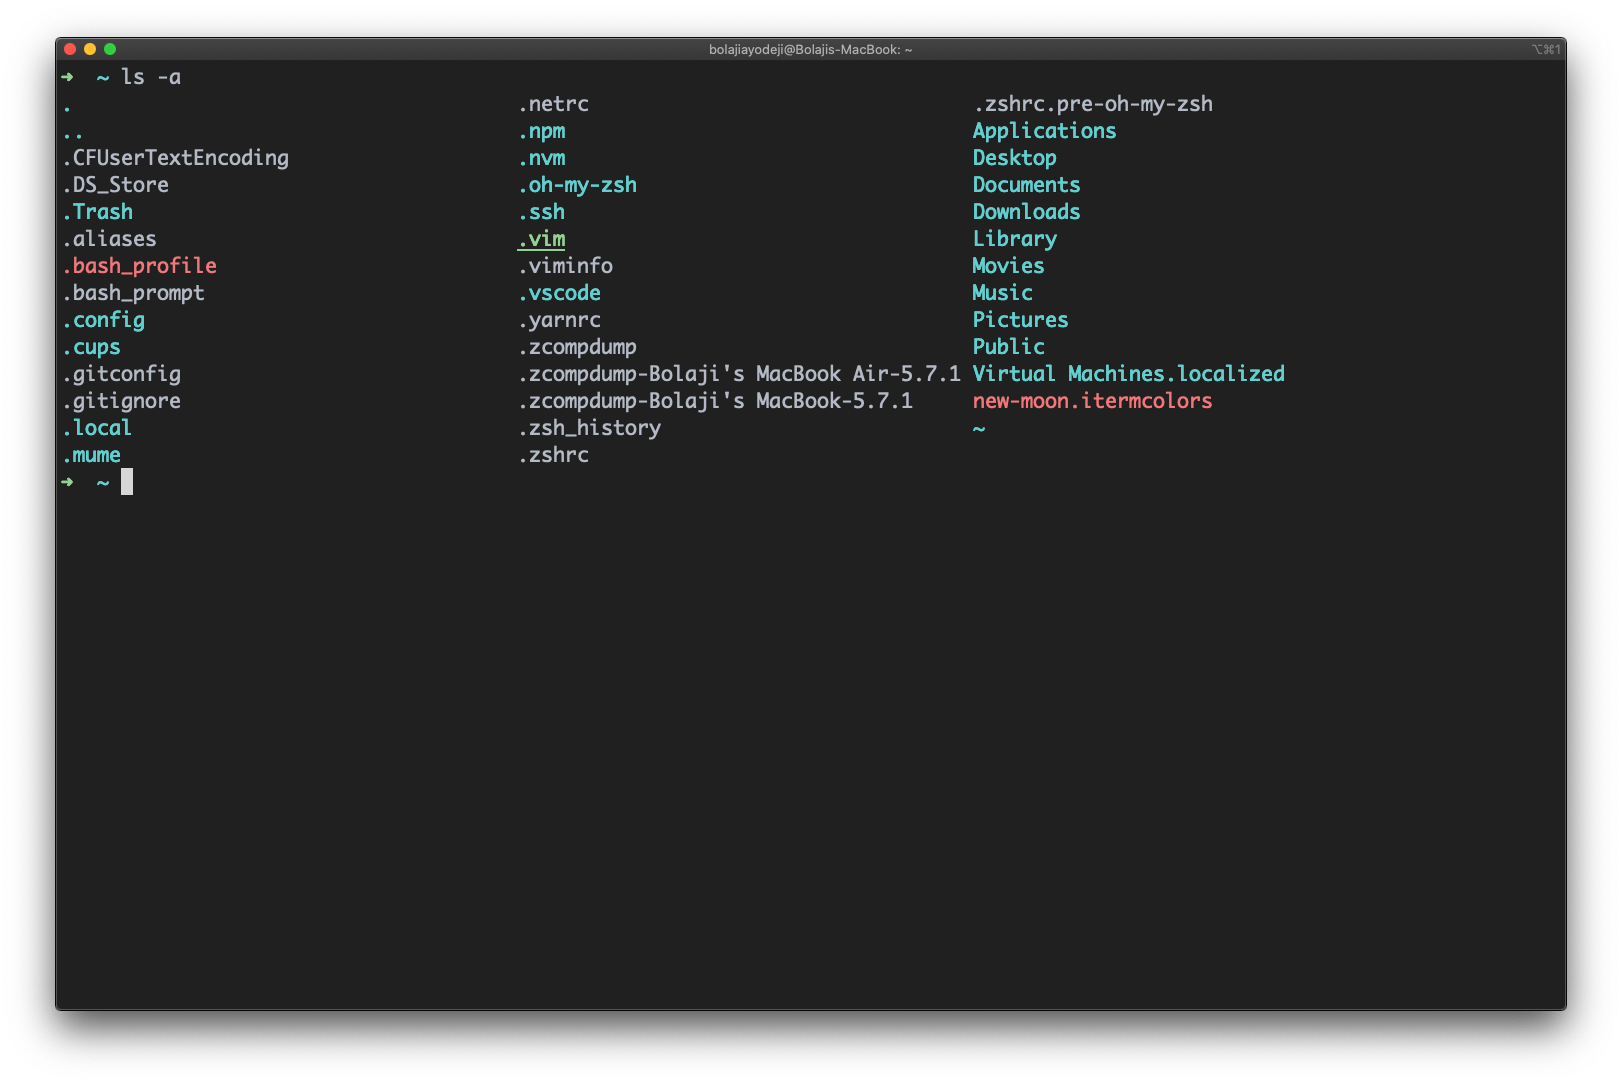
List files including hidden files
Type the ls -a command to list files or directories including hidden files or directories. In Linux, anything that begins with a . is considered a hidden file:
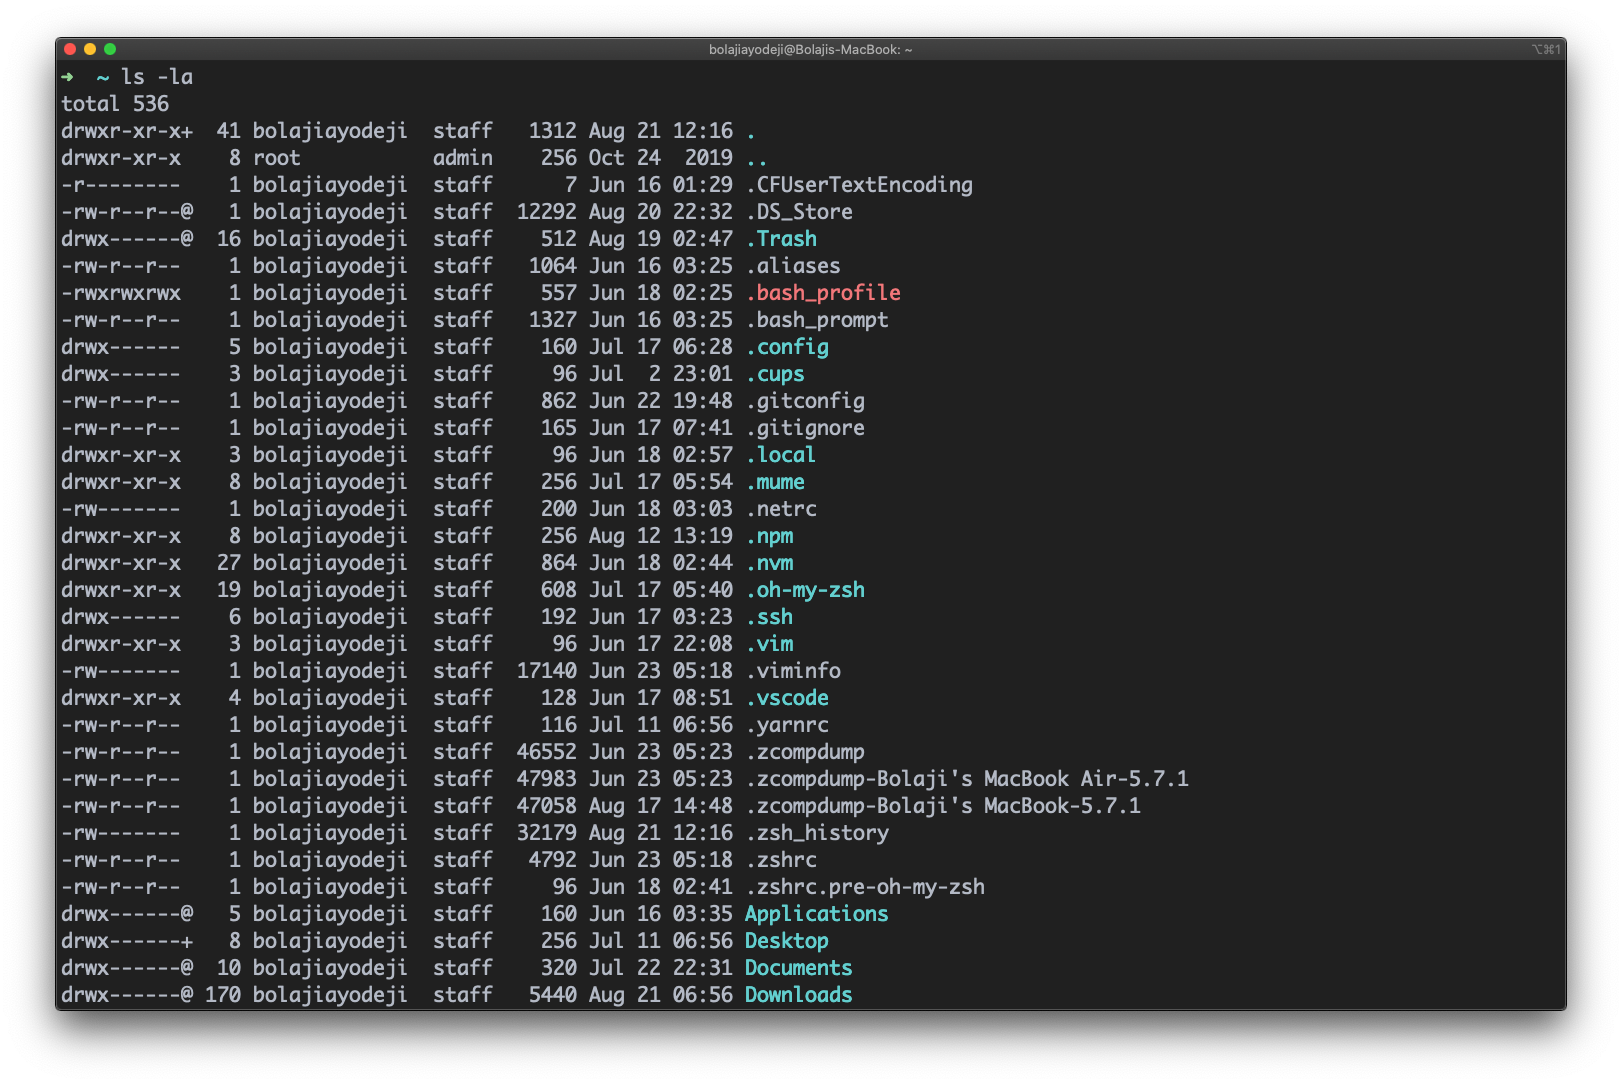
List files in long format including hidden files
Type the ls -l -a or ls -a -l or ls -la or ls -al command to list files or directories in a table format with extra information including hidden files or directories:
List files and sort by date and time
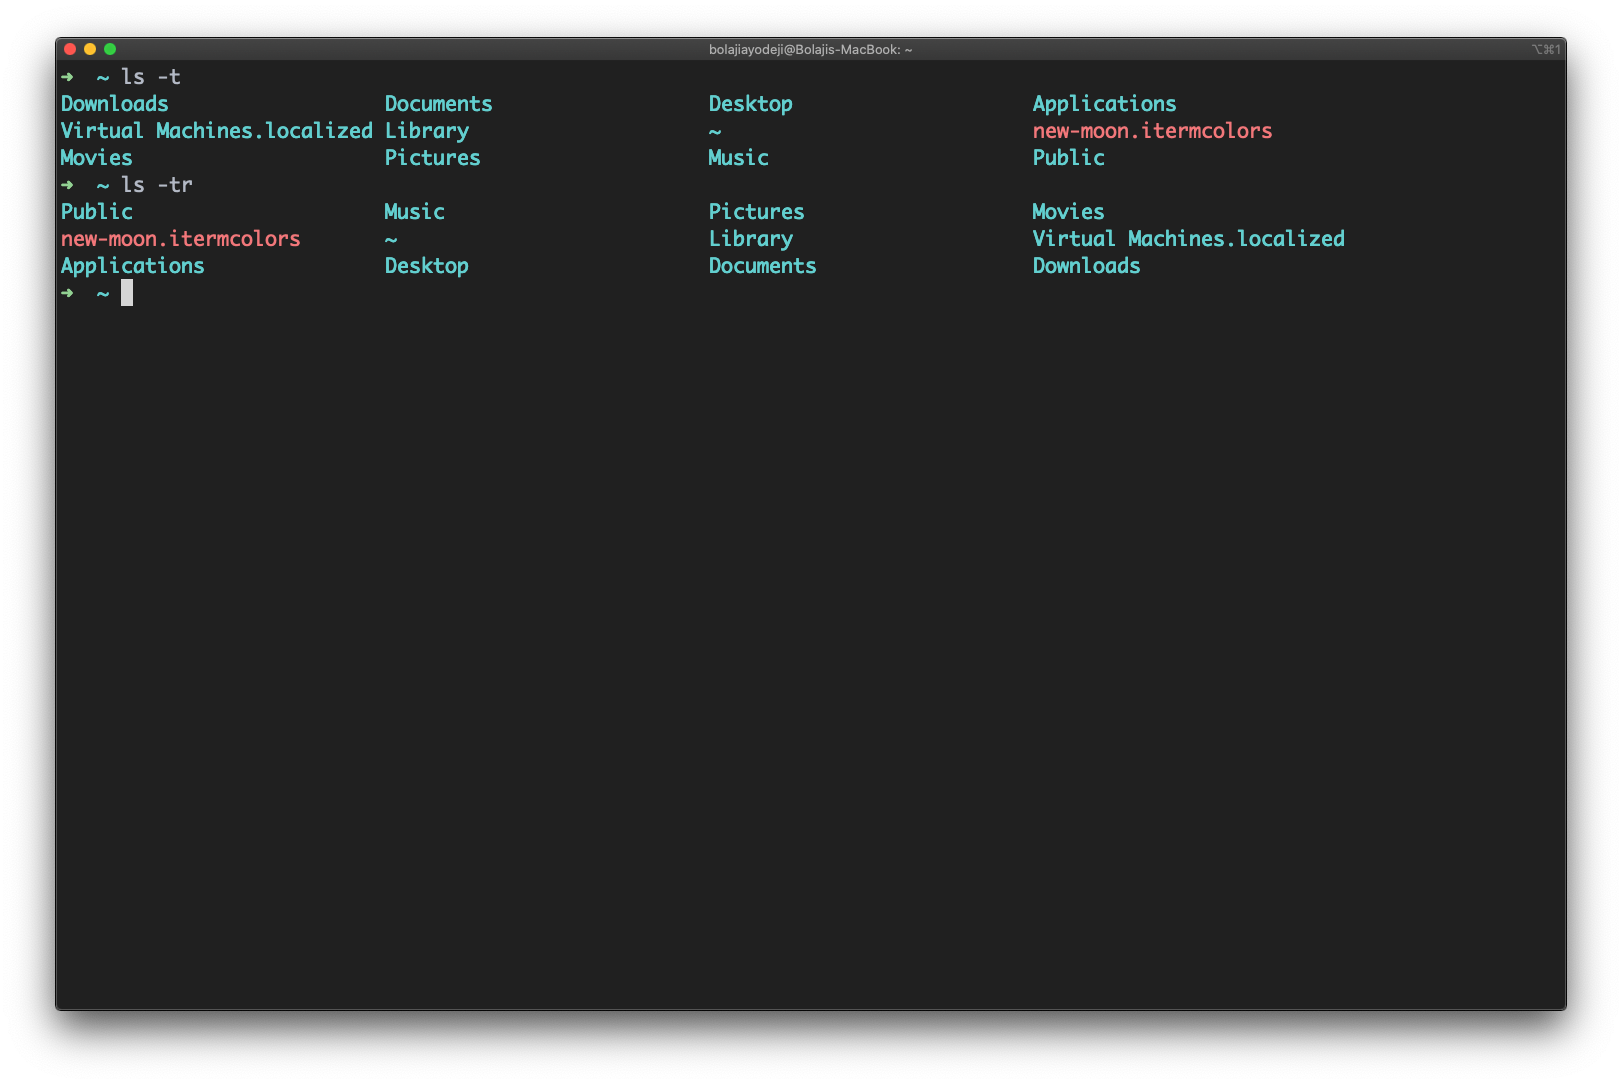
Type the ls -t command to list files or directories and sort by last modified date and time in descending order (biggest to smallest).
You can also add a -r flag to reverse the sorting order like so: ls -tr :
List files and sort by file size
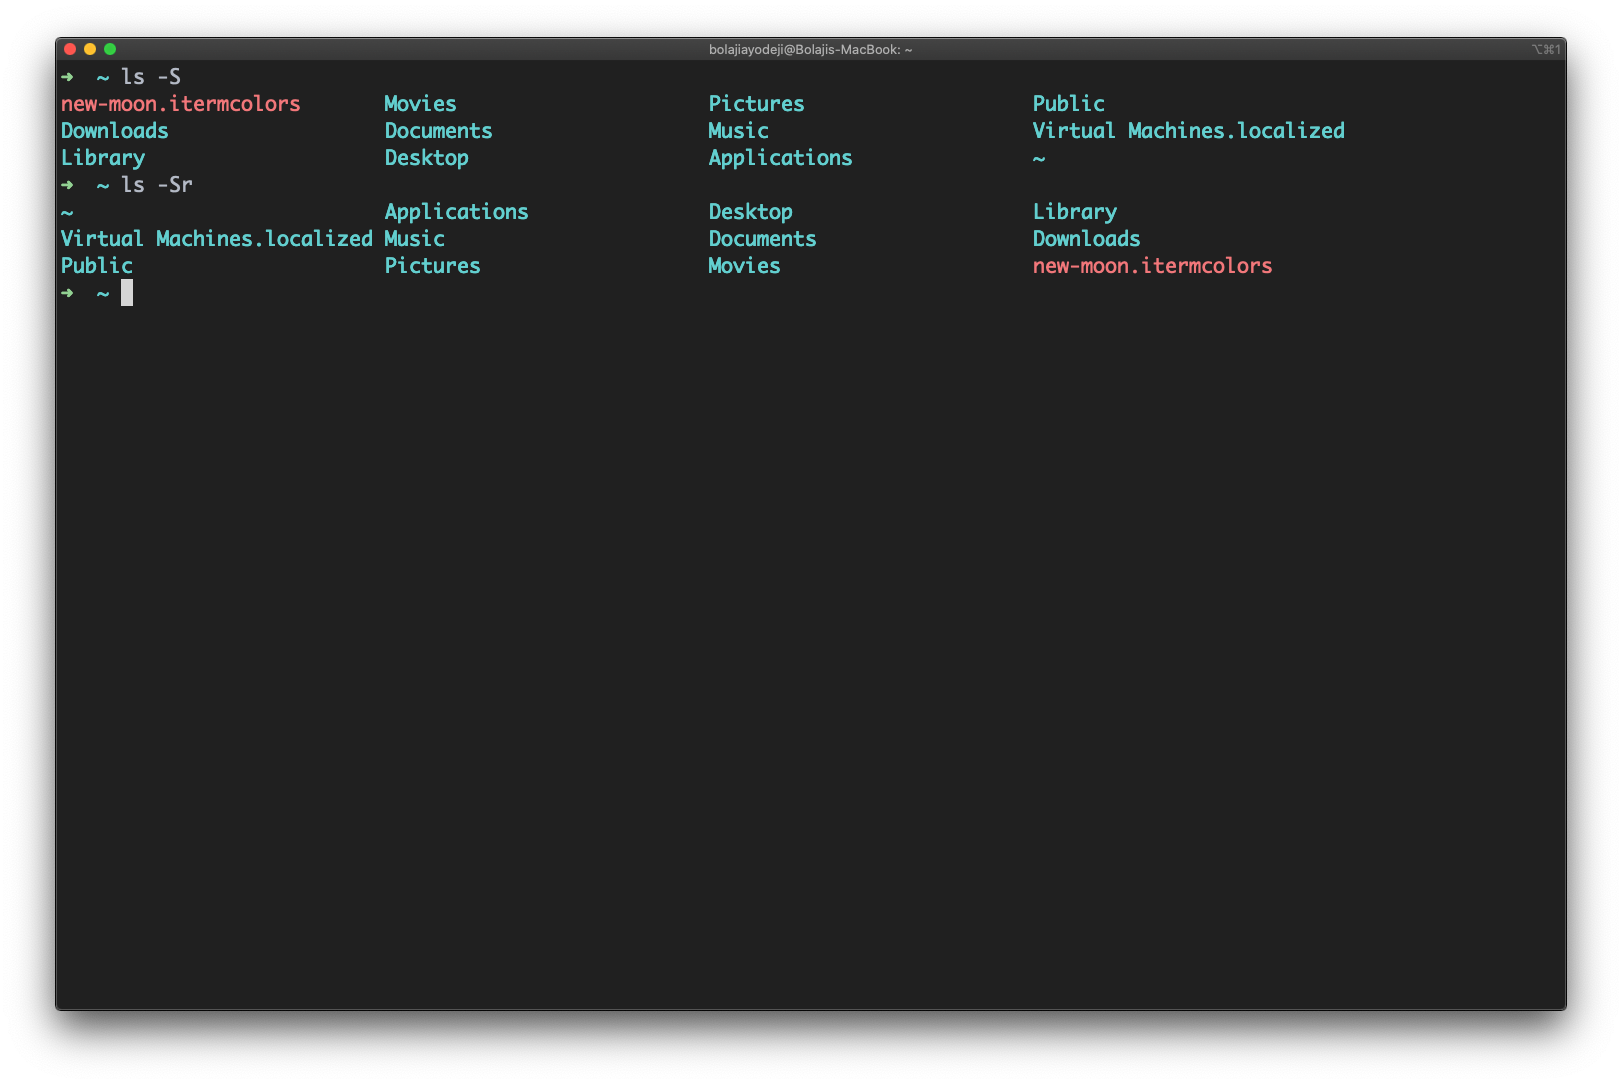
Type the ls -S (the S is uppercase) command to list files or directories and sort by date or time in descending order (biggest to smallest).
You can also add a -r flag to reverse the sorting order like so: ls -Sr :
List files and output the result to a file
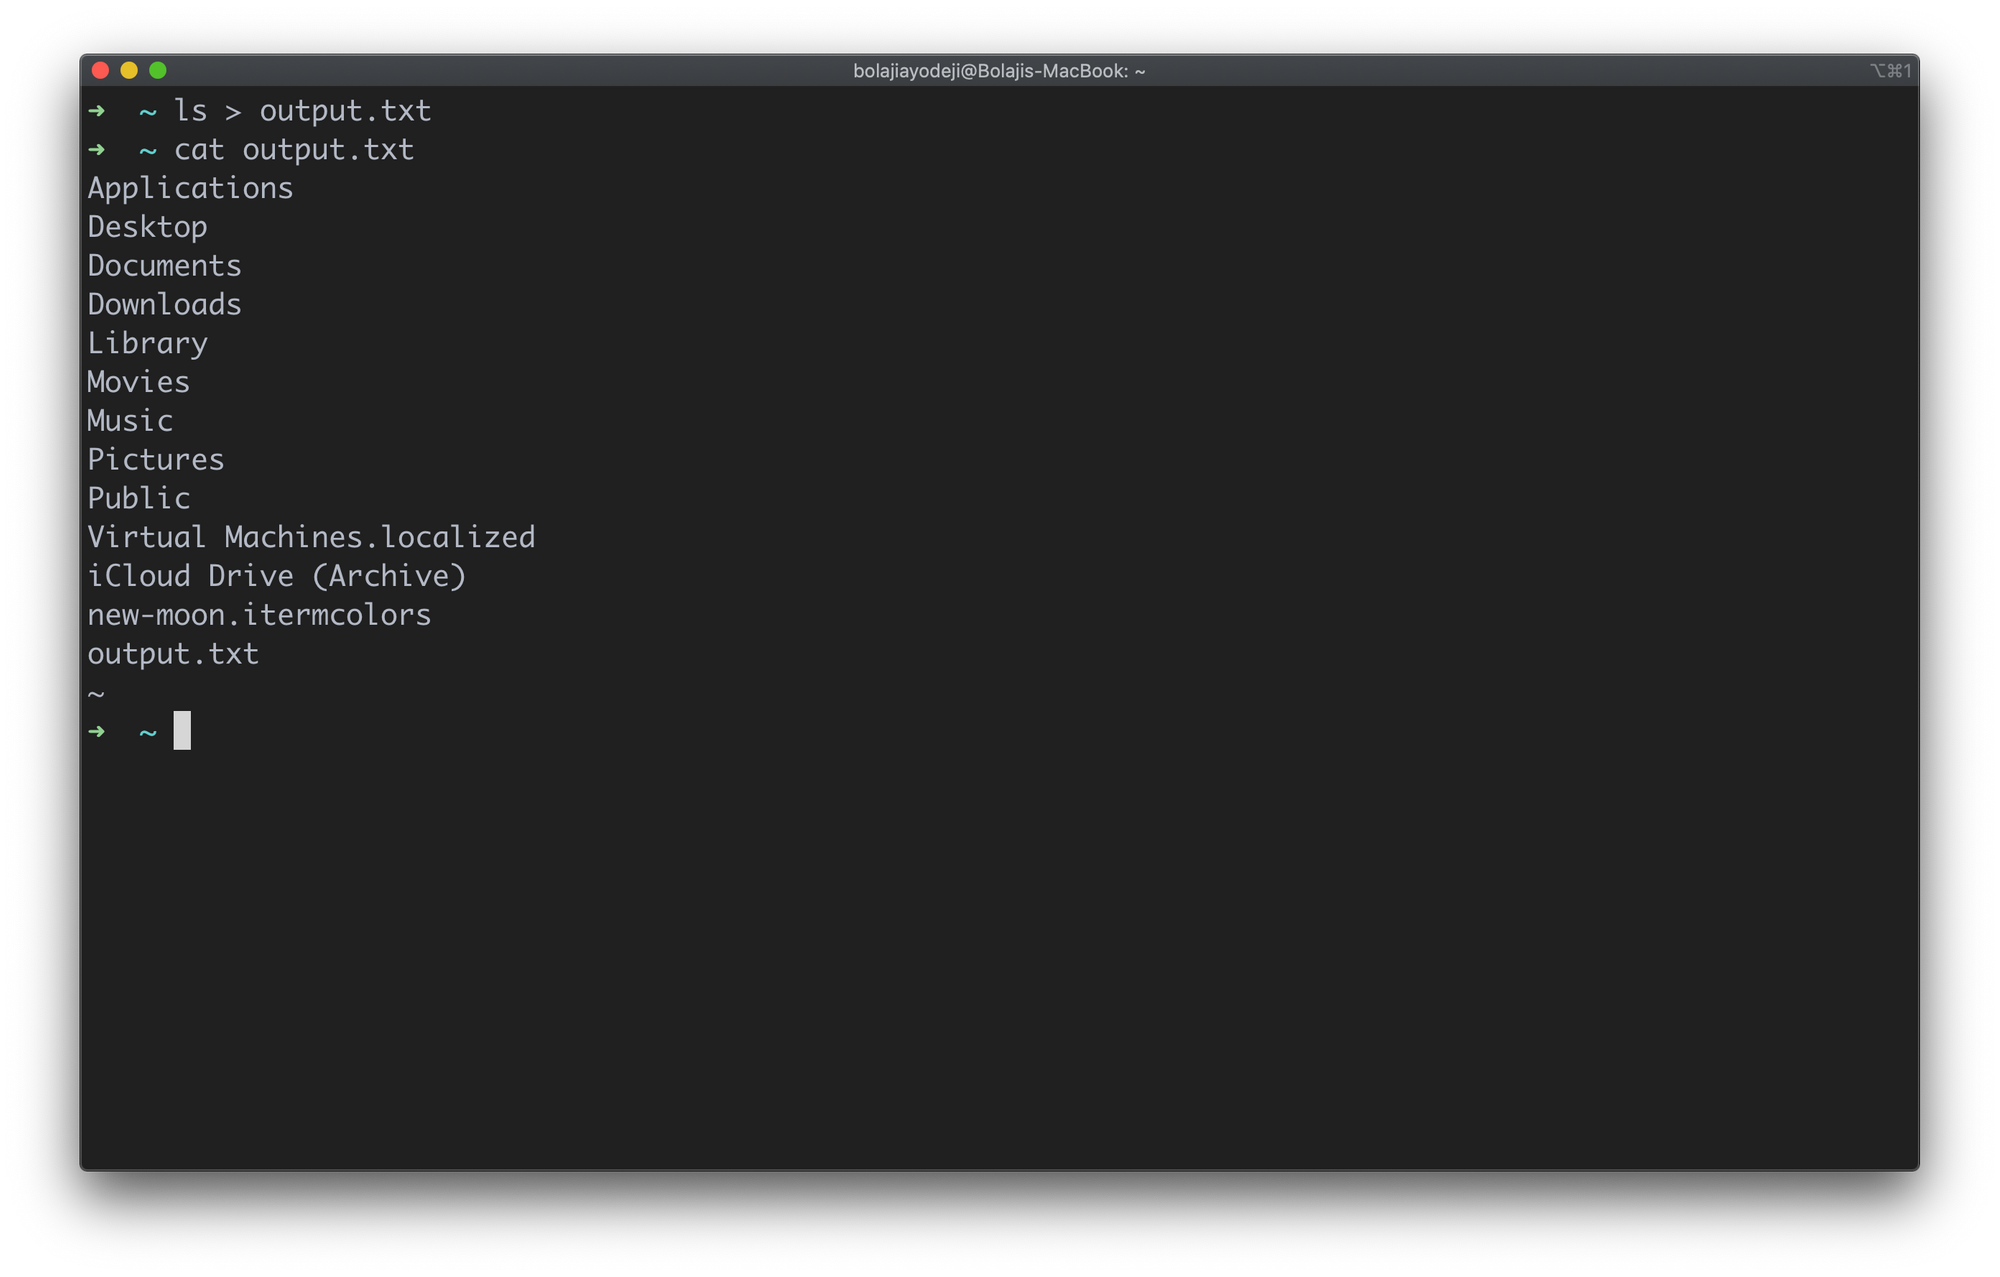
Type the ls > output.txt command to print the output of the preceding command into an output.txt file. You can use any of the flags discussed before like -la — the key point here is that the result will be outputted into a file and not logged to the command line.
Then you can use the file as you see fit, or log the contents of the file with cat output.txt :
 .
.
Conclusion
There are tons of other commands and combinations you can explore to list out files and directories based on your needs. One thing to remember is the ability to combine multiple commands together at once.
Imagine you want to list a file in long format, including hidden files, and sort by file size. The command would be ls -alS , which is a combination of ls -l , ls -a , and ls -S .
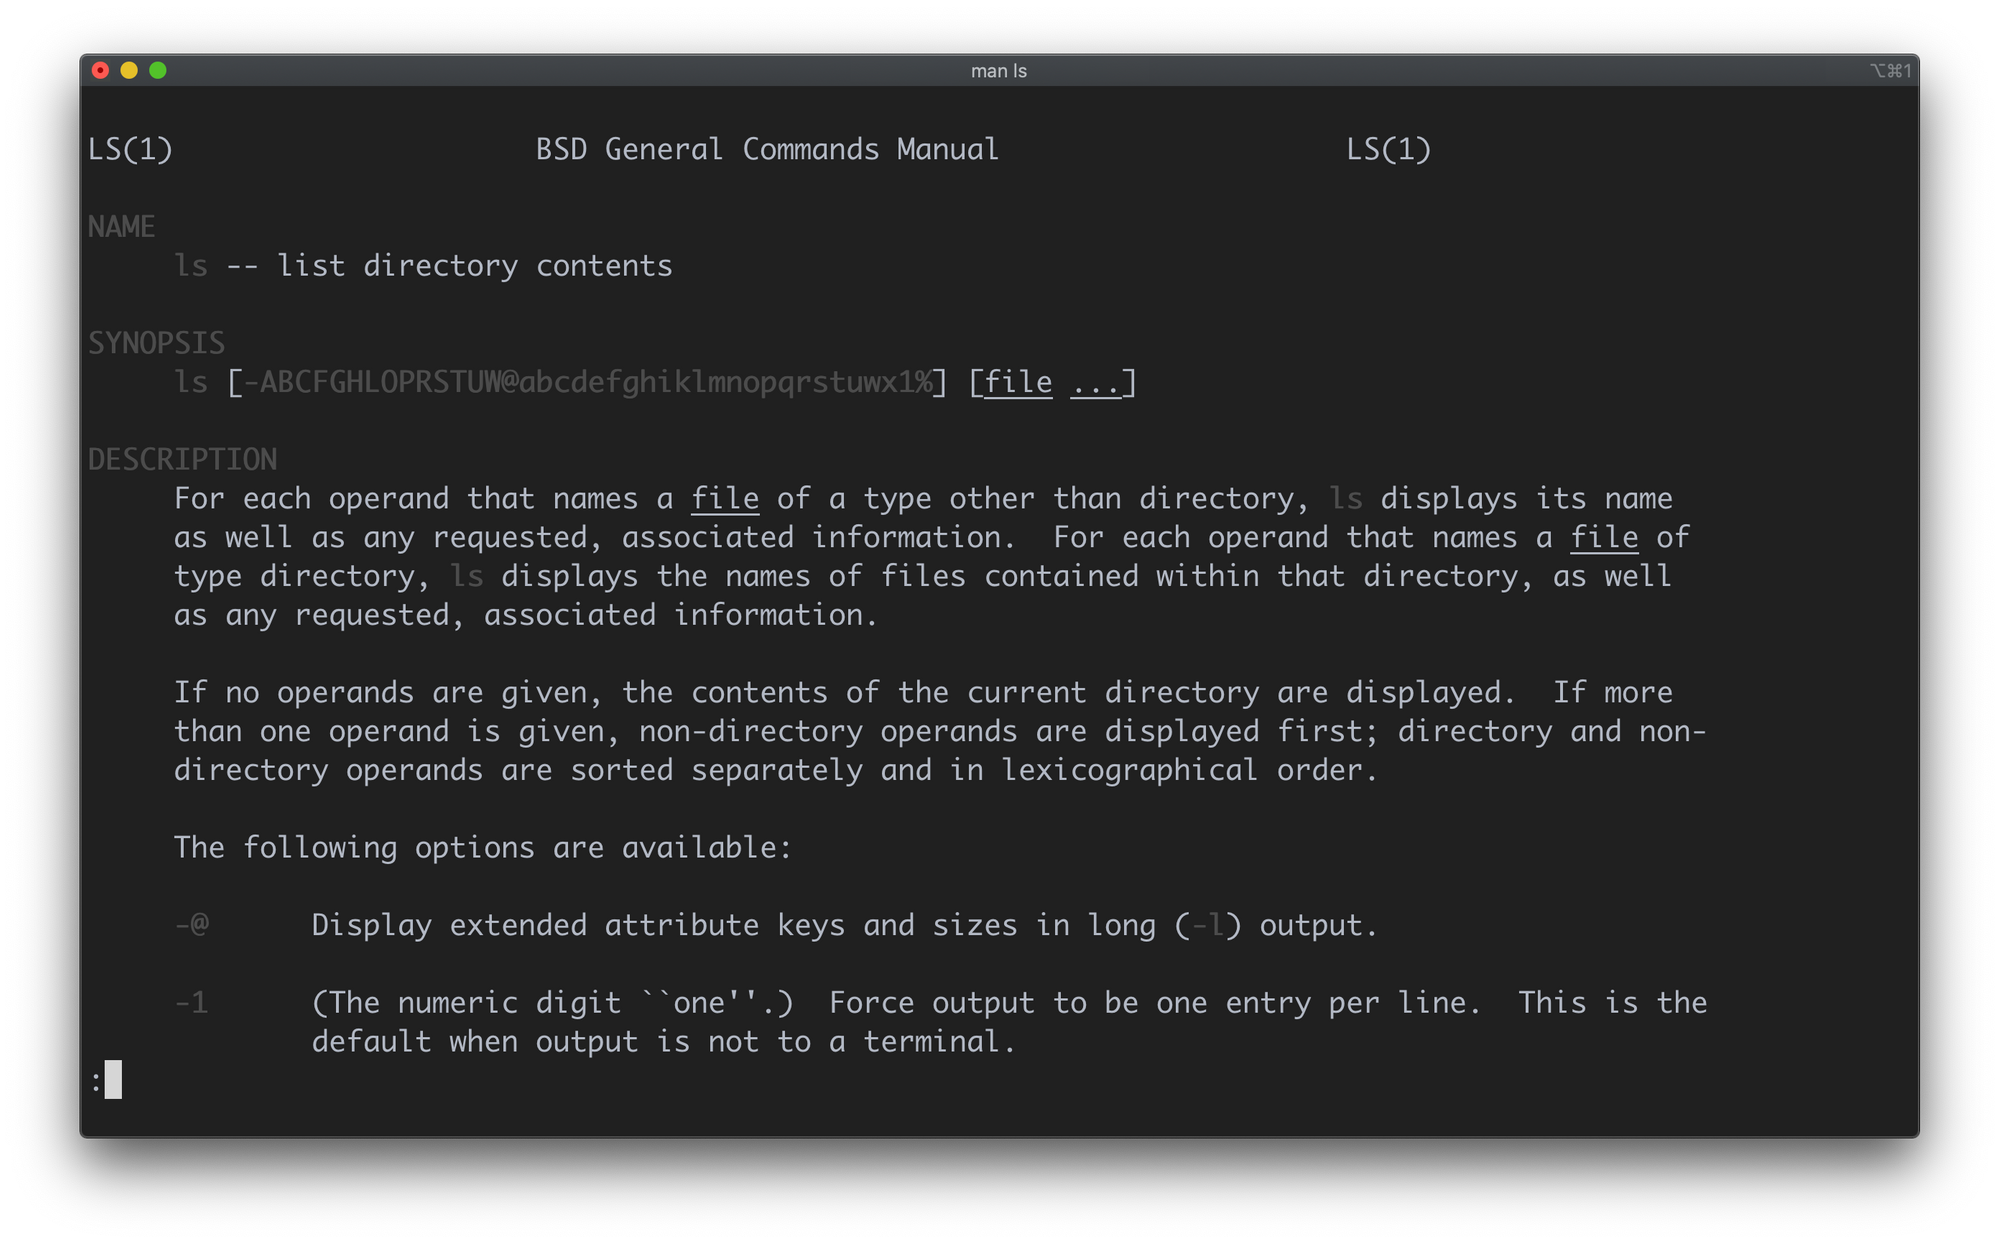
If you forget any command or are unsure about what to do, you can run ls —help or man ls which will display a manual with all possible options for the ls command:
Thanks for reading!
Software Engineer, Content Creator & Developer Advocate.
If you read this far, tweet to the author to show them you care. Tweet a thanks
Learn to code for free. freeCodeCamp’s open source curriculum has helped more than 40,000 people get jobs as developers. Get started
freeCodeCamp is a donor-supported tax-exempt 501(c)(3) nonprofit organization (United States Federal Tax Identification Number: 82-0779546)
Our mission: to help people learn to code for free. We accomplish this by creating thousands of videos, articles, and interactive coding lessons — all freely available to the public. We also have thousands of freeCodeCamp study groups around the world.
Donations to freeCodeCamp go toward our education initiatives and help pay for servers, services, and staff.
Источник


