- How to Check Which Apache Modules are Enabled/Loaded in Linux
- Check Enabled Apache Modules
- If You Appreciate What We Do Here On TecMint, You Should Consider:
- Related Posts
- 11 thoughts on “How to Check Which Apache Modules are Enabled/Loaded in Linux”
- Linux: Find out what kernel drivers (modules) are loaded
- lsmod command
- Get more information about the driver
- Модули ядра Linux
- Модули ядра Linux
- Все модули
- Что загружено?
- Запуск модулей ядра
- Удаление модулей ядра
- Блокирование загрузки модулей
- Автозагрузка модулей
- Установка модулей ядра Linux
- Выводы
How to Check Which Apache Modules are Enabled/Loaded in Linux
In this guide, we will briefly talk about the Apache web server front-end and how to list or check which Apache modules have been enabled on your server.
Apache is built, based on the principle of modularity, this way, it enables web server administrators to add different modules to extend its primary functionalities and enhance apache performance as well.
Some of the common Apache modules include:
- mod_ssl – which offers HTTPS for Apache.
- mod_rewrite – which allows for matching url patterns with regular expressions, and perform a transparent redirect using .htaccess tricks, or apply a HTTP status code response.
- mod_security – which offers you to protect Apache against Brute Force or DDoS attacks.
- mod_status – that allows you to monitor Apache web server load and page statics.
In Linux, the apachectl or apache2ctl command is used to control Apache HTTP server interface, it is a front-end to Apache.
You can display the usage information for apache2ctl as below:
apache2ctl can function in two possible modes, a Sys V init mode and pass-through mode. In the SysV init mode, apache2ctl takes simple, one-word commands in the form below:
For instance, to start Apache and check its status, run these two commands with root user privileges by employing the sudo command, in case you are a normal user:
And when operating in pass-through mode, apache2ctl can take all the Apache arguments in the following syntax:
All the Apache-arguments can be listed as follows:
Check Enabled Apache Modules
Therefore, in order to check which modules are enabled on your Apache web server, run the applicable command below for your distribution, where -t -D DUMP_MODULES is a Apache-argument to show all enabled/loaded modules:
That’s all! in this simple tutorial, we explained how to use the Apache front-end tools to list enabled/loaded apache modules. Keep in mind that you can get in touch using the feedback form below to send us your questions or comments concerning this guide.
If You Appreciate What We Do Here On TecMint, You Should Consider:
TecMint is the fastest growing and most trusted community site for any kind of Linux Articles, Guides and Books on the web. Millions of people visit TecMint! to search or browse the thousands of published articles available FREELY to all.
If you like what you are reading, please consider buying us a coffee ( or 2 ) as a token of appreciation.

We are thankful for your never ending support.
Related Posts
![]()
![]()
![]()
![]()
![]()
![]()
11 thoughts on “How to Check Which Apache Modules are Enabled/Loaded in Linux”
Can i know the modules path using apachectl ?
![]()
Aaron, have you actually tried disabling these modules yourself? I have, and I had issues.
Apache server comes with MPM prefork by default (at least on RHEL 7), therefore you cannot simply disable mpm_prefork_module.
You also need to load a CGI module appropriate to the MPM, therefore mod_cgi with the prefork MPM.
As i stated, “It is perhaps a good idea to know why you want disable a certain module(s) before actually doing that”. The effects of disabling these modules various from one user’s system to another. Therefore, if you get issues afterwards, you probably need them, you can enable them once again.
However, thanks for mentioning that, i hope Apache users out there will benefit from your feedback.
The idea is pretty simple, why would you have dozens of auth* modules loaded if you don’t use them? It’s wiser to disable them unless you have a reason not to. Performance is always a bonus, but not my main concert when it comes to auth* modules.
And you haven’t answered my question really.
I actually disabled a few of them, however, i provided the list based on the description here: http://httpd.apache.org/docs/2.4/mod/ since @sado wanted to know which ones are reasonably safe to disable on Apache (say on CentOS 7). You can always consider your system requirements before disabling any Apache module.
I have a feeling that you posted the list without probably realising that some modules cannot be disabled.
![]()
You seem to have a lot of auth* modules loaded?
Do you know which ones are reasonably save to disable on Apache (say on CentOS 7)?
All modules you are seeing from the output of the command in the article are the ones loaded by default on Linux Mint(Ubuntu base). It is perhaps a good idea to know why you want disable a certain module(s) before actually doing that.
However, since apache loads all these modules into memory, this can heavily reduce your memory and system performance. You may consider disabling the modules below:
mpm_prefork_module (static)
authn_alias_module (shared)
authn_anon_module (shared)
authn_dbm_module (shared)
authn_default_module (shared)
authz_owner_module (shared)
authz_dbm_module (shared)
authz_default_module (shared)
ldap_module (shared)
authnz_ldap_module (shared)
include_module (shared)
env_module (shared)
ext_filter_module (shared)
mime_magic_module (shared)
usertrack_module (shared)
dav_module (shared)
status_module (shared)
autoindex_module (shared)
info_module (shared)
dav_fs_module (shared)
vhost_alias_module (shared)
negotiation_module (shared)
actions_module (shared)
speling_module (shared)
userdir_module (shared)
substitute_module (shared)
proxy_balancer_module (shared)
proxy_ftp_module (shared)
proxy_http_module (shared)
proxy_ajp_module (shared)
proxy_connect_module (shared)
cache_module (shared)
suexec_module (shared)
disk_cache_module (shared)
cgi_module (shared)
version_module (shared)
Once you have turned off any module(s), you can enable it again, that is if you need to use it.
if they are marked shared is this means they are disabled?
Источник
Linux: Find out what kernel drivers (modules) are loaded

lsmod command
You need to use lsmod command to show the status of modules in the Linux Kernel. Simply type the lsmod at a shell prompt to list all loaded modules:
$ lsmod
Sample outputs:
Get more information about the driver
To get more information about specific driver use modinfo command. The syntax is:
modinfo < driver-name >
To see information about a Linux Kernel module called e1000, enter:
$ modinfo e1000
Sample outputs:
- No ads and tracking
- In-depth guides for developers and sysadmins at Opensourceflare✨
- Join my Patreon to support independent content creators and start reading latest guides:
- How to set up Redis sentinel cluster on Ubuntu or Debian Linux
- How To Set Up SSH Keys With YubiKey as two-factor authentication (U2F/FIDO2)
- How to set up Mariadb Galera cluster on Ubuntu or Debian Linux
- A podman tutorial for beginners – part I (run Linux containers without Docker and in daemonless mode)
- How to protect Linux against rogue USB devices using USBGuard
Join Patreon ➔
See modinfo and lsmod man pages for more info.
🐧 Get the latest tutorials on Linux, Open Source & DevOps via
Источник
Модули ядра Linux
Как вы знаете из статьи что такое ядро Linux, ядро является монолитным. Это значит, что весь исполняемый код сосредоточен в одном файле. Такая архитектура имеет некоторые недостатки, например, невозможность установки новых драйверов без пересборки ядра. Но разработчики нашли решение и этой проблеме, добавив систему модулей.
Ядро Linux позволяет драйверам оборудования, файловых систем, и некоторым другим компонентам быть скомпилированными отдельно — как модули, а не как часть самого ядра. Таким образом, вы можете обновлять драйвера не пересобирая ядро, а также динамически расширять его функциональность. А еще это значит, что вы можете включить в ядре только самое необходимое, а все остальное подключать с помощью модулей. Это очень просто.
Модули ядра Linux
В этой статье мы рассмотрим модули ядра Linux, основы работы с ними, просмотр уже загруженных модулей, загрузку, установку и отключение модулей. А также полное отключение, добавление в черный список и добавление новых модулей ядра.
Модули ядра Linux собираются только под определенную версию ядра, есть способ запуска модуля независимо от версии ядра, если они совместимы с помощью dkms, но об этом мы поговорим позже.
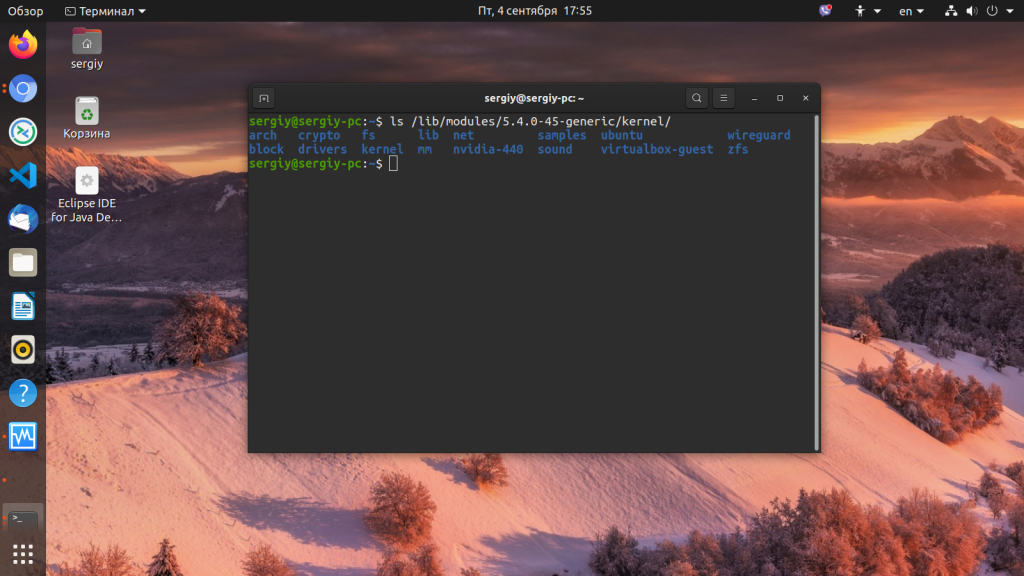
Находятся все модули в папке /lib/modules/. Учитывая, что модули рассчитаны только для определенной версии ядра, то в этой папке создается отдельная подпапка, для каждой установленной в системе версии ядра. В этой папке находятся сами модули и дополнительные конфигурационные файлы, модули отсортированы по категориям, в зависимости от назначения например:
Перед тем как переходить к практике, давайте коротко рассмотрим основные команды для управления модулями.
- lsmod — посмотреть загруженные модули
- modinfo — информация о модуле
- insmod — загрузить модуль
- rmmod — удалить модуль
Работа с модулями ядра Linux выполняется, в основном, с помощью этих команд, но могут использовать и другие.
Все модули
Такая задача возникает нечасто, но если вы хотите посмотреть все установленные модули ядра Linux в системе, делается очень просто. Все модули расположены в папке /lib/modules, а поэтому очень просто вычислить их все одной командой, или даже просто зайти в папку файловым менеджером и посмотреть.
В Ubuntu команда будет выглядеть вот так:
dpkg -S *.ko | grep /lib/modules
Можно смастерить такую конструкцию с помощью find:
find /lib/modules -name *.ko
Можем искать только для текущего ядра:
find /lib/modules/$(uname -r) -name *.ko

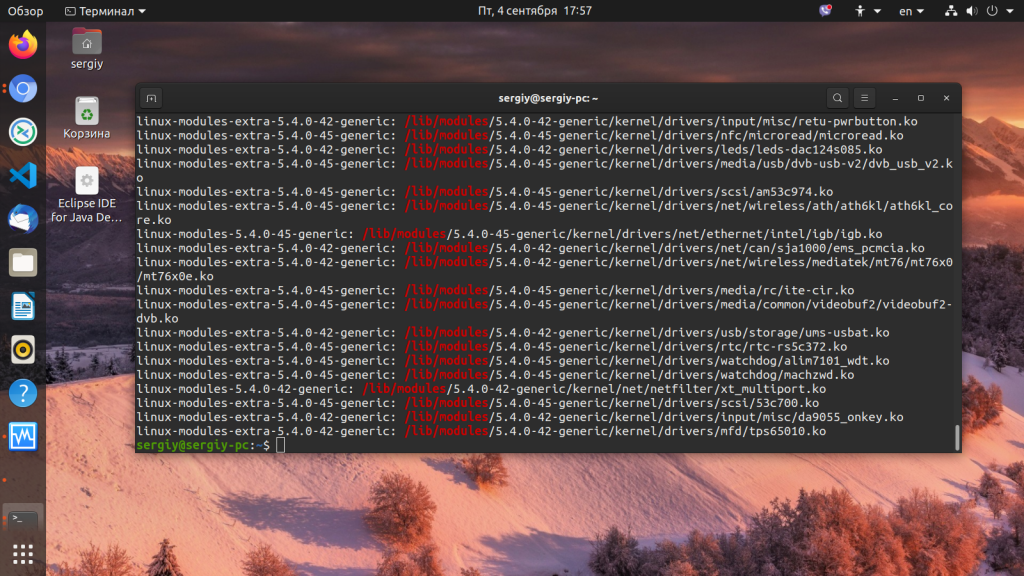
Также, все модули записаны в конфигурационном файле /lib/modules/modules.aliases, поэтому мы можем просто посмотреть его содержимое:
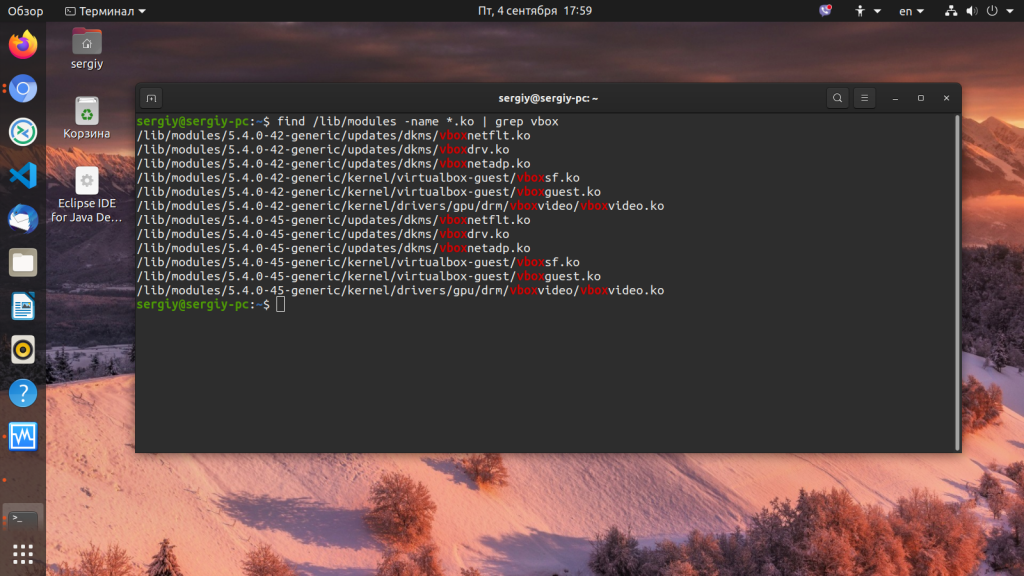
Если хотим проверить установлен ли определенный модуль ядра Linux, отфильтруем вывод любой из команд с помощью grep:
find /lib/modules -name *.ko | grep vbox
Что загружено?
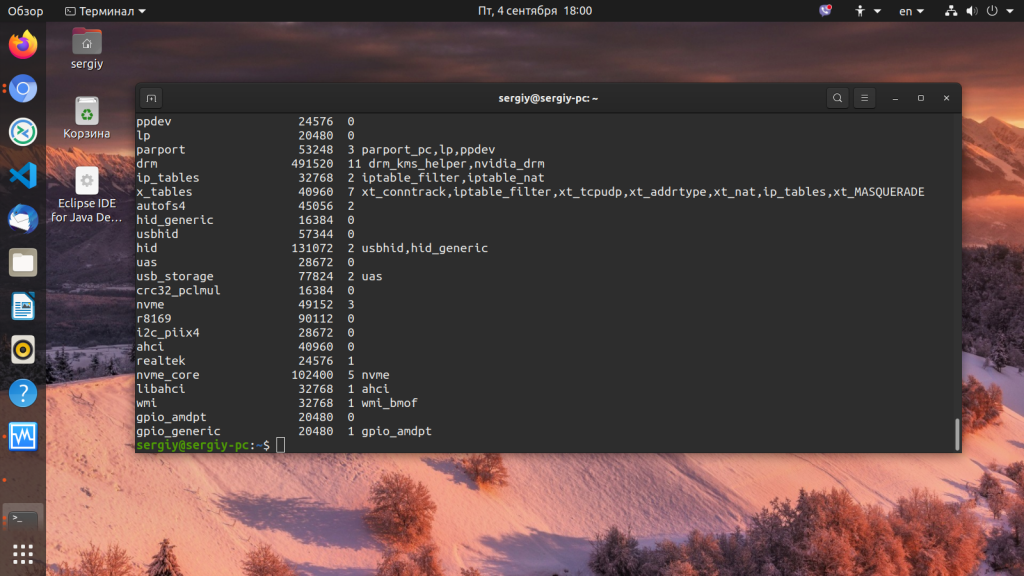
Все информация о загруженных модулях хранится в файле /proc/modules, мы можем ее вывести командой:
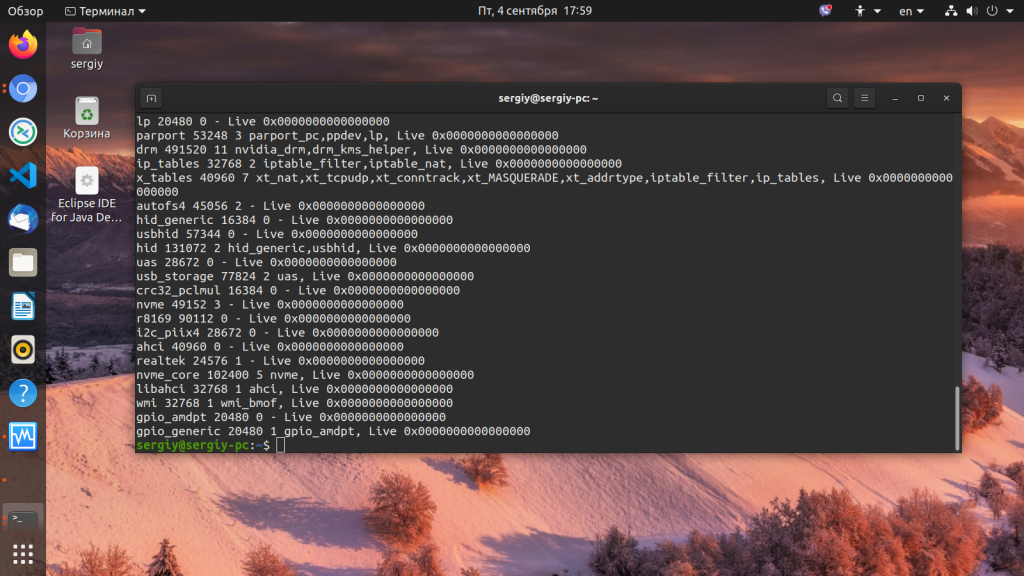
Но для этого дела есть более цивилизованные методы. Это утилита lsmod и modinfo. Чтобы посмотреть загруженные модули ядра linux выполните:
Удобно проверять загружен ли модуль с помощью grep:
sudo lsmod | grep vbox
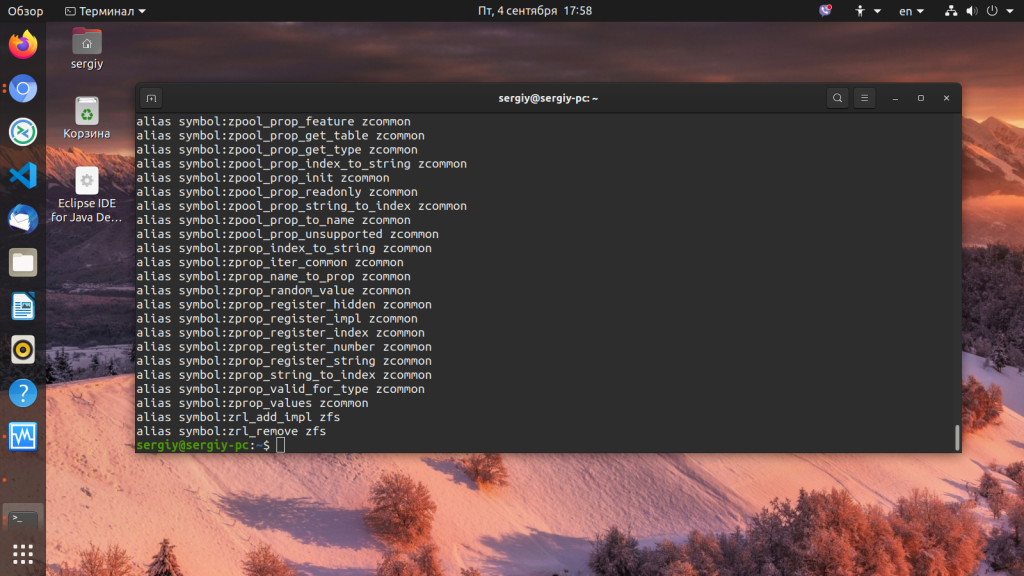
А более подробную информацию о каждом модуле можно получить с помощью утилиты modinfo:
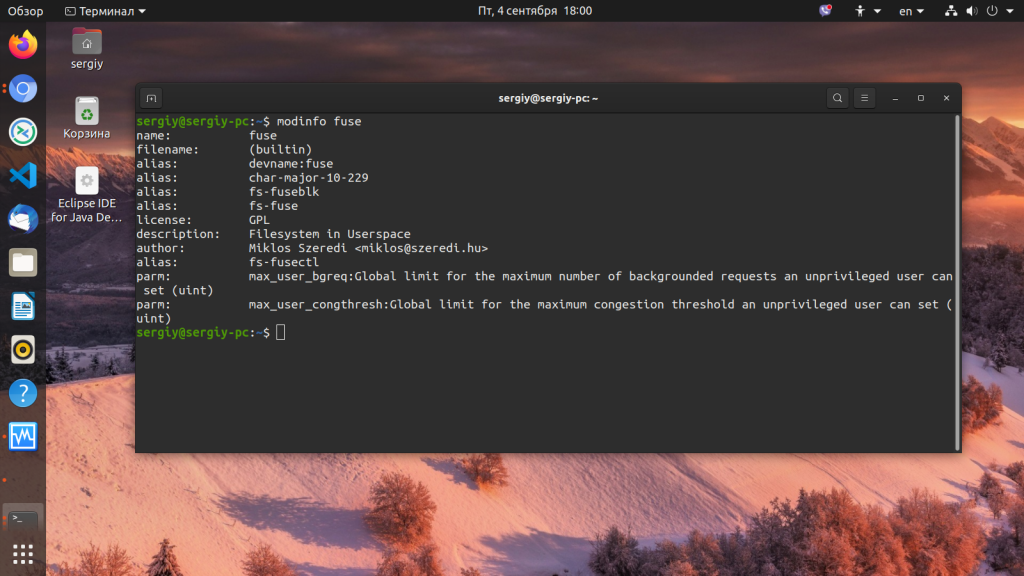
Здесь вы можете увидеть файл модуля, его лицензию, автора и зависимости. Зависимости — это те модули, которые должны быть загружены для его нормальной работы. К сожалению, не для всех модулей доступно нормальное описание, но вы можете попробовать посмотреть описание зависимостей модуля.
Запуск модулей ядра
Загрузить модуль ядра Linux можно с помощью команд modprobe или insmod. Например, загрузим модуль vboxdrv
sudo modprobe vboxdrv
Чтобы загрузить модуль ядра linux с помощью insmod необходимо передать адрес файла модуля:
sudo insmod /lib/modules/4.1.20-11-default/weak-updates/misc/vboxdrv.ko
Напоминаю, что его можно узнать с помощью команды modinfo. Запуск модуля ядра Linux предпочтительно выполнять с помощью modprobe, поскольку эта команда не только находит файл модуля в файловой системе, но и загружает все его зависимости.
Удаление модулей ядра
Здесь аналогично две команды — modprobe, позволяет удалить модуль если ей передать опцию -r, а также есть команда rmmod. Начнем с modprobe:
sudo modprobe -r vboxdrv
Другая команда в этом случае выглядит немного проще:
sudo rmmod vboxdrv
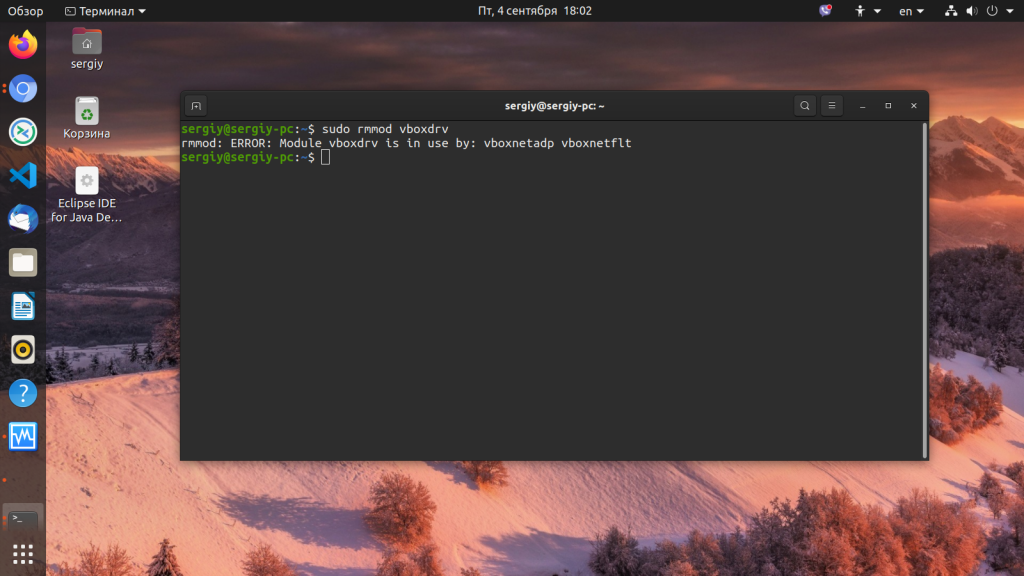
Если вы получили ошибку во время выгрузки модуля, например: rmmod: ERROR: Module vboxdrv is in use by: vboxnetadp vboxnetflt, значит он еще используется другими модулями, и сначала нужно выгрузить их. В данном случае это vboxnetadp и vboxnetflt. Правильно отработавшая команда не должна ничего возвращать.
rmmod vboxnetadp vboxnetflt
Блокирование загрузки модулей
Иногда, во время загрузки системы для используемых нами устройств, загружаются не те модули ядра Linux, они либо не поддерживают нужную функциональность либо конфликтуют с другими модулями. Ярким примером можно назвать загрузку драйвера b43 вместо brcmsmac для беспроводных адаптеров Broadcom. Чтобы решить эту проблему вы можете добавлять модули в черный список. Для этого достаточно добавить одну строчку в файл /etc/modprobe.d/blacklist.conf:
sudo vi /etc/modprobe.d/blacklist.conf

Этот код добавит в черный список модуль b43.
Автозагрузка модулей
Кроме чёрного списка существует отдельный каталог, в котором можно настроить автоматическую загрузку модулей при старте системы. Это /etc/modules.load.d/. Этот каталог тоже содержит конфигурационные файлы с расширением *.conf, в которых перечислены все модули, которые надо загружать при старте системы. Для добавления своего модуля можно воспользоваться файлом /etc/modules.load.d/modules.conf. Например, добавим brcmsmac:
sudo vi /etc/modules.load.d/modules.conf

Установка модулей ядра Linux
Собранные для этой версии ядра модули вы можете просто скопировать в нужную папку, собственно, мы так и поступаем, когда собираем ядро из исходников. Но с проприетарными драйверами и другими внешними драйверами, не поставляемыми в комплекте с ядром дело обстоит иначе. Эти модули поддерживают несколько версий ядра, но для их установки используется специальная технология — DKMS (Dynamic Kernel Module Support). Причем модуль, установленный таким образом один раз, будет пересобираться для каждой новой версии ядра автоматически. Обычно такие модули поставляются в виде пакетов, которые устанавливаются как и все другие приложения пакетным менеджером. Ручная установка модулей с помощью dkms выходит за рамки данной статьи.
Выводы
Скорее всего, вам редко придется возиться с этими модулями. Но работа с модулями ядра будет необходима, если ваш дистрибутив не поддерживает аппаратное обеспечение вашего устройства из коробки, а также когда вы работаете со сторонним программным обеспечением, таким как VirtualBox, Vmware и т д. Но очень полезно знать как обращаться с модулями, когда вам нужно добавить или удалить их. Даже если у вас нет необходимости в этом сейчас, вы можете протестировать, как все работает, чтобы быть вооруженным потом.
Источник


