- How to change a Windows 10 user account type and why you might want to
- How to change user account type using Settings
- How to change user account type using User Accounts
- How to change user account type using Control Panel
- How to change user account type using PowerShell
- How to change user account type using Command Prompt
- More Windows 10 resources
- Halo: MCC’s live service elements make it better, not worse
- Microsoft’s Surface Duo is not ‘failing up’
- Here’s what you can do if Windows 10 update KB5001330 is causing issues
- These are the best PC sticks when you’re on the move
- Create a local user or administrator account in Windows 10
- how to change username on pc located in c:/users in windows 10 pro?
- Replies (1)
How to change a Windows 10 user account type and why you might want to
 Source: Windows Central
On Windows 10, you have two main account types for users, including Administrator and Standard User, each one offering a different set of privileges to use a device and apps. The Administrator type provides complete system control, which means that users can change settings globally, install apps, execute elevated tasks, and perform pretty much anything.
In comparison, the Standard User account type is more restrictive. Users with the standard account can work with apps, but they can’t install new applications. They can change settings, but only those that won’t affect other accounts, which means that global system configurations aren’t allowed. If an app or a command requires elevation, they’ll need administrative credentials to complete the task.
Usually, it’s recommended to use an account with standard privileges as it offers a more secure environment. However, depending on the situation, it may be necessary to change the account type from Standard User to Administrator (or in reverse), and Windows 10 includes multiple ways to complete the process using Settings, Control Panel, User Accounts, PowerShell, and Command Prompt.
In this Windows 10 guide, we’ll walk you through virtually every method that you can use to change the account type on your device.
Quick tip: If you’re looking to make your primary account standard, it’s best to create a new administrator account first, and then use the new account to change your old account to standard and make administrative changes.
How to change user account type using Settings
To change the account type with Settings, use these steps:
- Open Settings.
- Click on Accounts.
- Click on Family & other users.
- Under the «Your family» or «Other users» section, select the user account.
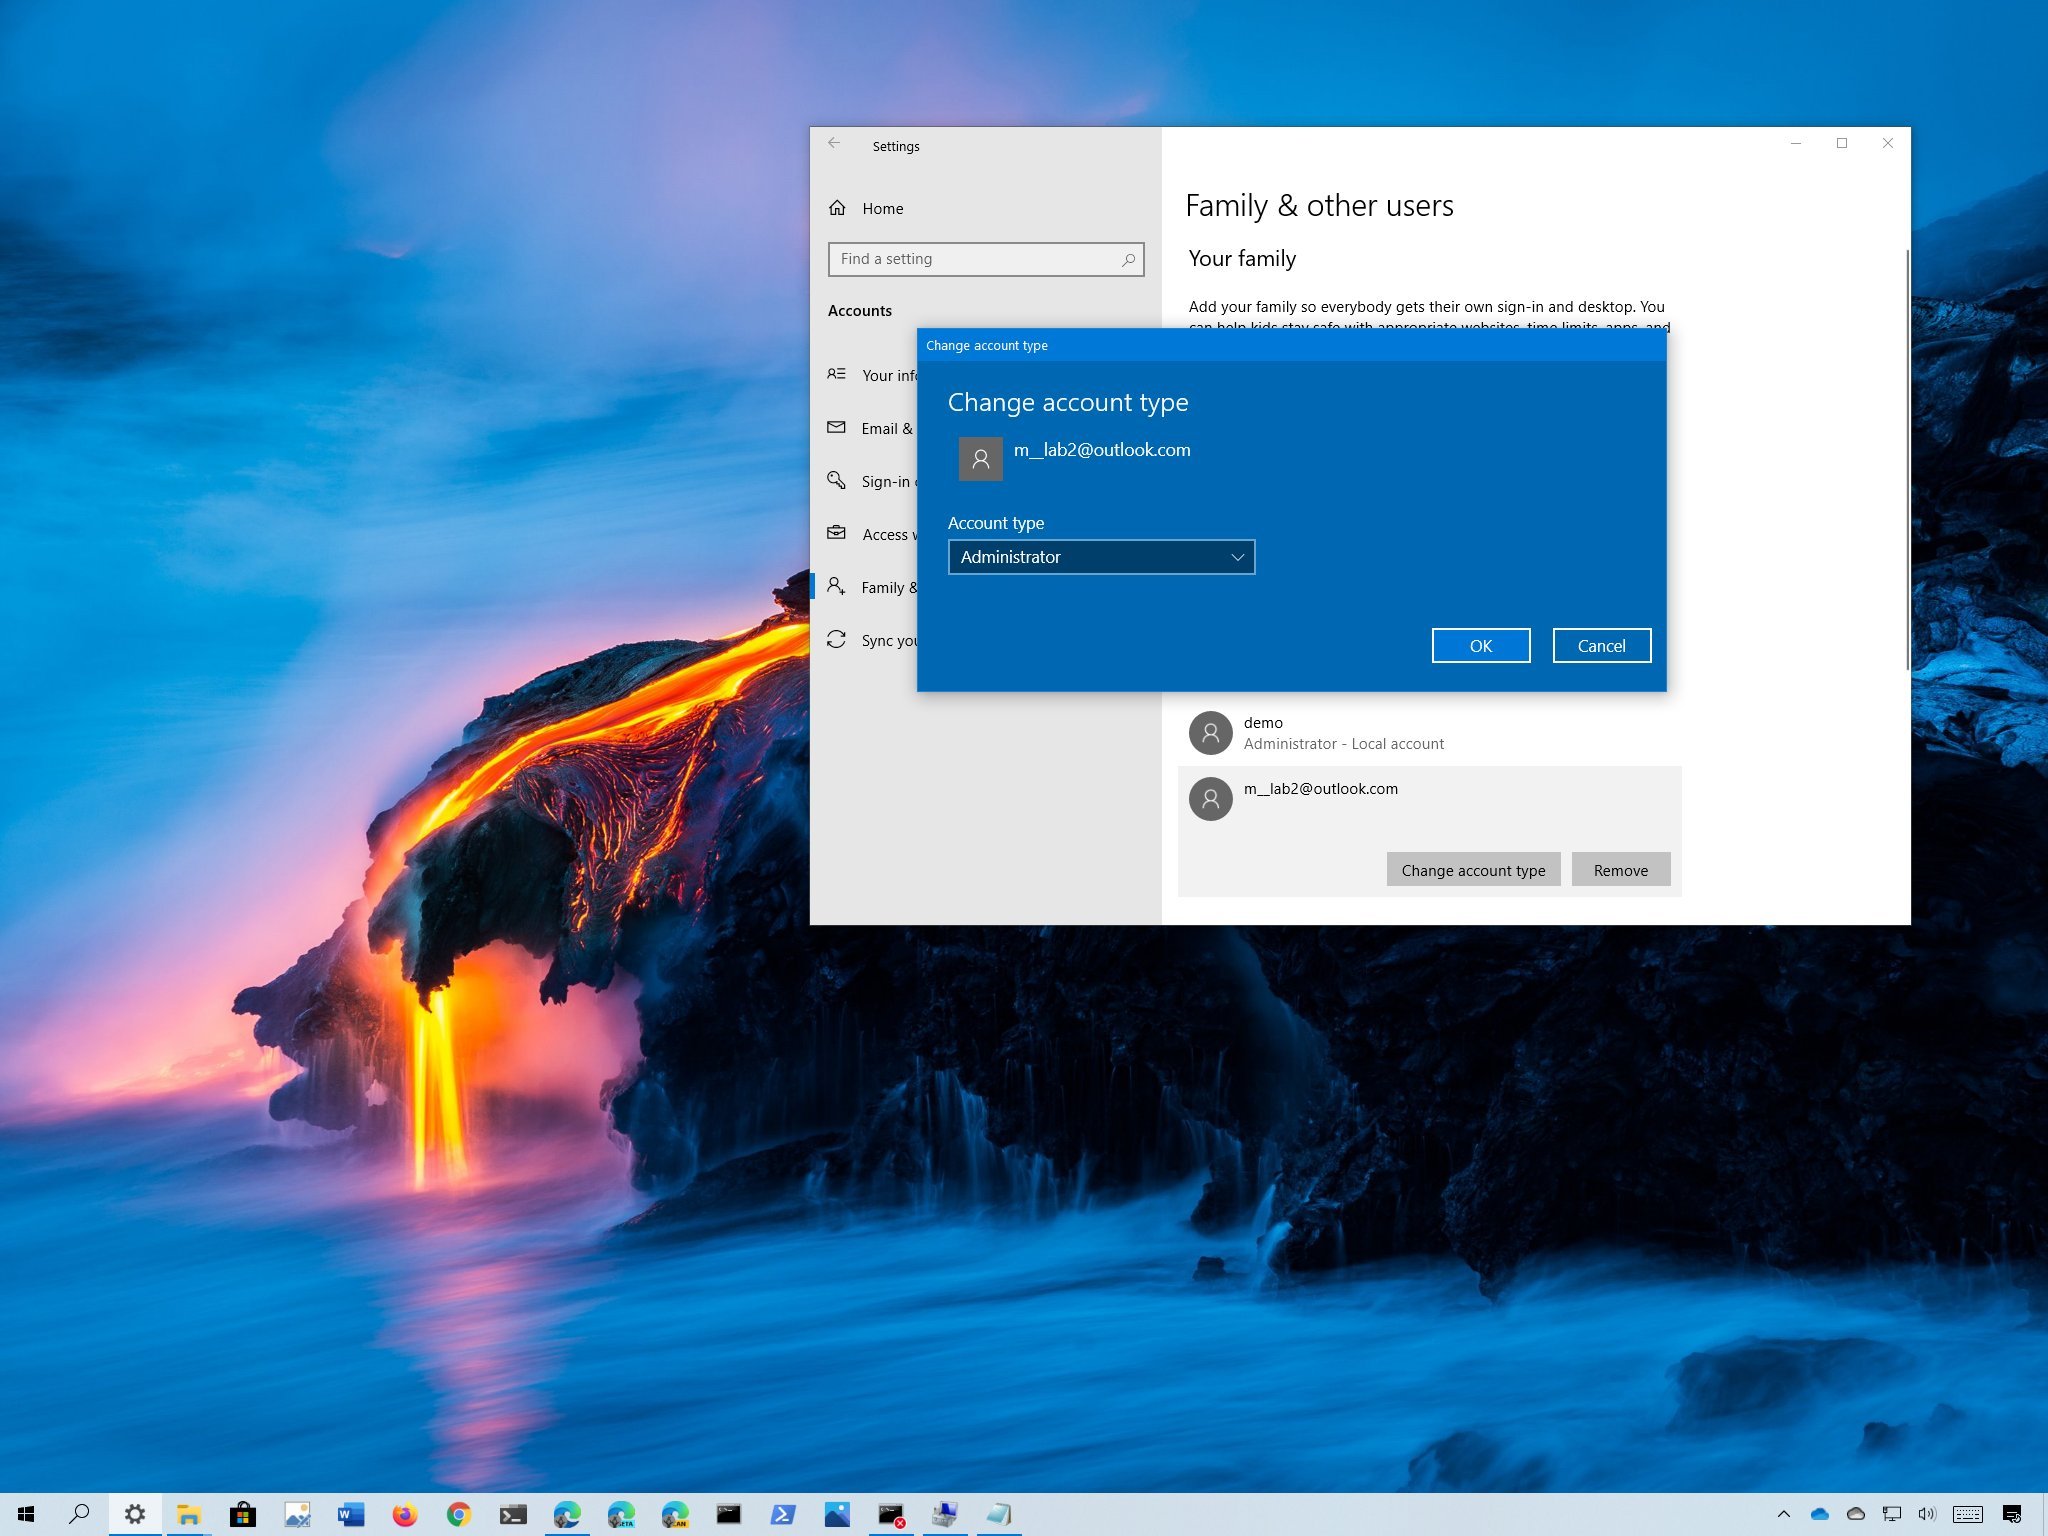
Click the Change account type button.
 Source: Windows Central
Select the Administrator or Standard User account type.
 Source: Windows Central
Once you complete the steps, restart your computer to start using the account with the new privilege level.
How to change user account type using User Accounts
To set an account to Standard user or Administrator type using User Accounts (netplwiz), use these steps:
- Open Start.
- Search for netplwiz and click the top result to open the «User Accounts» experience.
- Select the account that you wish to change.
Click the Properties button.
 Source: Windows Central
Select the Standard user or Administrator account type depending on your requirements.
Source: Windows Central
Quick tip: You can also select the Other membership option, which allows you to choose different user groups, such as Power Users, Backup Operators, Remote Desktop Users, etc.
Once you complete the steps, restart the device to apply the changes and start using the new account type on Windows 10.
How to change user account type using Control Panel
To change an account type using Control Panel, use these steps:
- Open Control Panel.
Under the «User Accounts» section, click the Change account type option.
Source: Windows Central
Select the account that you want to change.
Source: Windows Central
Click the Change the account type option.
Source: Windows Central
Select either Standard or Administrator as required.
Source: Windows Central
After you complete the steps, the next time the user signs in to the account, it’ll be limited to the permissions allowed by the user group that you specified.
How to change user account type using PowerShell
To change a Windows 10 account type with PowerShell, use these steps:
- Open Start.
- Search for PowerShell, right-click the top result, and select the Run as administrator option.
Type the following command to change the account type to «Standard User» and press Enter:
Remove-LocalGroupMember -Group «Administrators» -Member «ACCOUNT-NAME»
Source: Windows Central
In the command, make sure to change the ACCOUNT-NAME for the actual name of the account that you want to change. If you’re trying to change an account using a Microsoft account, then the account name would be the first five letters of the email address.
Type the following command to change the account type to «Administrator» and press Enter:
Add-LocalGroupMember -Group «Administrators» -Member «ACCOUNT-NAME»
 Source: Windows Central
In the command, make sure to change the ACCOUNT-NAME for the actual name of the account that you want to change.
Quick note: Users with administrator accounts are part of both, the «Administrators» and «Users» groups. As a result, to make a user standard, you only need to remove the user from the «Administrators» group.
After you complete the steps, the account type will switch to the Administrator or Standard group depending on your configuration.
How to change user account type using Command Prompt
To switch account types with Command Prompt, use these steps:
- Open Start.
- Search for Command Prompt, right-click the top result, and select the Run as administrator option.
Type the following command to change the account type to Standard User and press Enter:
net localgroup Administrators «ACCOUNT-NAME» /delete
Source: Windows Central
In the command, make sure to change the ACCOUNT-NAME for the actual name of the account that you want to change. If you’re trying to change an account using a Microsoft account, then the account name would be the first five letters of the email address.
Type the following command to change the account type to Administrator and press Enter:
net localgroup Administrators «ACCOUNT-NAME» /add
Source: Windows Central
In the command, make sure to change the ACCOUNT-NAME for the actual name of the account that you want to change.
Type the following command view the account type and press Enter:
net user ACCOUNT-NAME
Source: Windows Central
Once you complete the steps, the next time the user signs in to the device, the account will load with the privileges allowed by the group that you specified in the command.
More Windows 10 resources
For more helpful articles, coverage, and answers to common questions about Windows 10, visit the following resources:
![]()
Halo: MCC’s live service elements make it better, not worse
Halo: The Master Chief Collection is more popular than ever, but some fans don’t agree with the live service approach 343 Industries has taken with it. Here’s why those elements are, at the end of the day, great for the game and for Halo overall.
![]()
Microsoft’s Surface Duo is not ‘failing up’
Microsoft announced this week that it was expanding Surface Duo availability to nine new commercial markets. While Surface Duo is undoubtedly a work in progress, this is not a sign of a disaster. It’s also doesn’t mean that Surface Duo is selling a ton either. Instead, the reason for the expansion is a lot more straightforward.
![]()
Here’s what you can do if Windows 10 update KB5001330 is causing issues
In this guide, we’ll show you the steps to get rid of the update KB5001330 to fix profile, gaming, and BSoD problems with the Windows 10 October 2020 Update and May 2020 Update.
![]()
These are the best PC sticks when you’re on the move
Instant computer — just add a screen. That’s the general idea behind the ultra-portable PC, but it can be hard to know which one you want. Relax, we have you covered!
Create a local user or administrator account in Windows 10
You can create a local user account (an offline account) for anyone who will frequently use your PC. The best option in most cases, though, is for everyone who uses your PC to have a Microsoft account.
If needed, the local user account can have administrator permissions; however, it’s better to just create a local user account whenever possible.
Caution: A user with an administrator account can access anything on the system, and any malware they encounter can use the administrator permissions to potentially infect or damage any files on the system. Only grant that level of access when absolutely necessary and to people you trust.
As you create an account, remember that choosing a password and keeping it safe are essential steps. Because we don’t know your password, if you forget it or lose it, we can’t recover it for you.
If you’re using Windows 10, version 1803 and later, you can add security questions as you’ll see in step 4 under Create a local user account. With answers to your security questions, you can reset your Windows 10 local account password. Not sure which version you have? You can check your version.
Create a local user account
Select Start > Settings > Accounts and then select Family & other users. (In some versions of Windows you’ll see Other users.)
Select Add someone else to this PC.
Select I don’t have this person’s sign-in information, and on the next page, select Add a user without a Microsoft account.
Enter a user name, password, or password hint—or choose security questions—and then select Next.
Change a local user account to an administrator account
Select Start > Settings > Accounts .
Under Family & other users, select the account owner name (you should see «Local Account» below the name), then select Change account type.
Note: If you choose an account that shows an email address or doesn’t say «Local account», then you’re giving administrator permissions to a Microsoft account, not a local account.
Under Account type, select Administrator, and then select OK.
Sign in with the new administrator account.
how to change username on pc located in c:/users in windows 10 pro?
I have a problem that my name is «Srijan» but in users folder located in local disk c: is showing first five words .
Help me! I want my full name on that folder.
Replies (1)
![]()
I would like to ask if you are using Microsoft account or Local account.
I suggest you to follow the methods below and check if it helps.
Method 1: Please follow the steps to rename the user account.
- In the search box, type user accounts and click on User Accounts.
- Click on “Change your account name”
- If it’s prompting for password please enter and click on Yes. If you do not have password click on Yes.
- Enter the new user name.
- Click on change name.
Method 2:
Note: Before you start, please back up all you data and create a system restore point first.
- Press Windows Key + R combination and then type netplwiz in the Run dialog box. Click OK. If prompted for UAC, click Yes.
- Now in the User Accounts window, check Users must enter a user name and password to enter this computer, if it is unchecked.
- In the User Name section, select the user name to which you want to change the name and click Properties.
- In the Properties window, in the User name field, provide the desired user name. Then click Apply followed by OK.
- Reboot to see the change.
Change User Folder name: Even after you change the username using this method, your personal folder will continue to display the old username. To rename the user folder, do the following.
- Create a system restore point first. Then open Registry Editor and navigate to the following key:
HKEY_LOCAL_MACHINE\SOFTWARE\Microsoft\Windows NT\CurrentVersion\ProfileList
2. You will find several folders here like S-1-5-. Search through them till you find a ProfileImagePath pointing to your old username. Double-click on it and replace your old username with your new username.
3. Restart your computer to see the change.
Disclaimer:
Important: The System Restore restores the computer back to an earlier point in time, called a restore point. System Restore doesn’t change your personal files, but it might remove recently installed apps and drivers and also reset the recently changed settings on the computer.
Registry disclaimer: Important this section, method, or task contains steps that tell you how to modify the registry. However, serious problems might occur if you modify the registry incorrectly. Therefore, make sure that you follow these steps carefully. For added protection, back up the registry before you modify it. Then, you can restore the registry if a problem occurs. For more information about how to back up and restore the registry, click the following article number to view the article in the Microsoft Knowledge Base: 322756 ( http://support.microsoft.com/kb/322756/ )
How to back up and restore the registry in Windows
Write us back with status of the issue in regards with your account. Your reply is important to assist you further.


