- How to Change a Network Location from Public to Private on Windows 10/Windows Server 2016?
- What is a Network Location (Profile) in Windows?
- How to Set a Network Profile in Windows 10?
- How to Change Windows 10 Network Location from Public to Private?
- Change Network Types Using PowerShell in Windows 10
- Setting Network Type Using Windows Registry
- Change network type from Public to Private in Windows 10
- Step 1: Find the current network type of your connection
- Step 2. Change network location to Public / Private
- How to change the Windows 10 network location to private (or public)
- How to change the Windows 10 network location to private, when connected to WiFi
- How to change the Windows 10 network location to private, when connected through a network cable
- How to change the Windows 10 network location using the Settings app
- How to change the Windows 10 network location using the Command Prompt or PowerShell
- Why does setting the correct Windows 10 network profile matter?
- Did you successfully change the network profile in Windows 10?
How to Change a Network Location from Public to Private on Windows 10/Windows Server 2016?
In this article, we will consider the concept of a network profile in Windows, consider what types of network profiles are, what they are used for and how to change the assigned network profile from Public to Private or vice versa in Windows 10 and Windows Server 2019/2016. This is necessary if the network location is mistakenly detected as Public Network, when it should be Private.
Windows network profiles are a part of the Windows Defender Firewall with Advanced Security and allow you to apply different firewall rules depending on the type of network the computer is connected to. Depending on the profile used for your network connection, other computers may or may not see your computer on the network (network discovery settings), use shared network folders and printers.
What is a Network Location (Profile) in Windows?
Network profiles firstly appeared in Vista/Windows Server 2008. In Windows 10 (Windows Server 2016), you can assign one of the following network security profiles (locations) for your NIC (network interface card), whether Ethernet or Wi-Fi:
- Private or Home network – a profile for a trusted network (home or office networks). In such a network, the computer will be available for discovery by other devices; you can share your files and printers.
- Public network – a profile for an untrusted network (public Wi-Fi network in the subway, cafe, airport). You don’t trust other devices on such a network, your computer will be hidden to other network devices, no one will be able to access shared network folders and printers on your computer;
- Domain network – a profile for computers that are members of an Active Directory domain. Applies automatically after joining Windows to the AD domain. You can apply domain firewall policies for this profile.
The Network Location Awareness (NLA) service is used by Windows to determine if a network connection is on a Public, Private, or Domain network.
As mentioned earlier, different Windows Firewall rules apply to your network connection based on the network profile of your NIC.
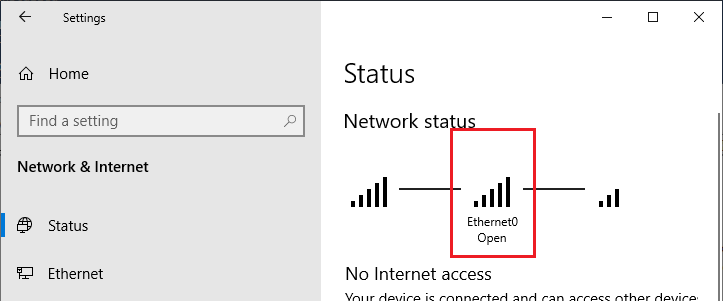
In Windows 10, you can check the current network profile (location) assigned to the network connection in the Settings -> Network & Internet. In my screenshot, you can see that the Open (Public) profile is assigned to the Ethernet0 NIC.
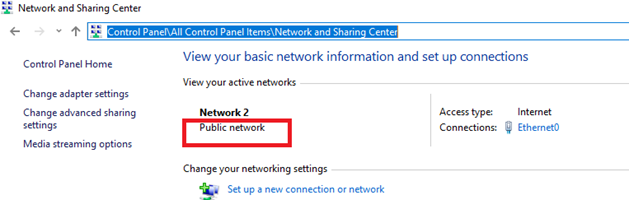
In the classic Control Panel, the network type for active network connections is displayed here: Control Panel -> All Control Panel Items -> Network and Sharing Center. But you cannot change the assigned network location from the classic Control Panel. For example, in Windows Server 2012 R2 / Windows 8.1, you can only change the network profile through the PowerShell, registry, or local security policy (described below).
How to Set a Network Profile in Windows 10?
The network profile in Windows 10 is selected by the user when the device connected to the new network for the first time. A prompt appears:
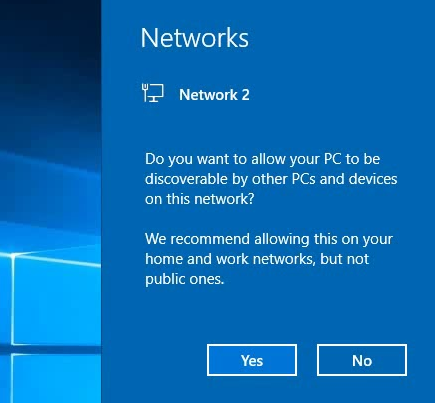
If you select “Yes”, the Private profile will be assigned to the network, or the Public profile if you select “No”. The next time you connect to the same LAN or WiFi network, the previously selected profile is automatically assigned.
You can hide “Network Location Wizard” when connecting to a new network through the registry. Just create an empty registry key HKEY_LOCAL_MACHINE\System\CurrentControlSet\Control\Network\NewNetworkWindowOff. After that, all networks are considered Public.
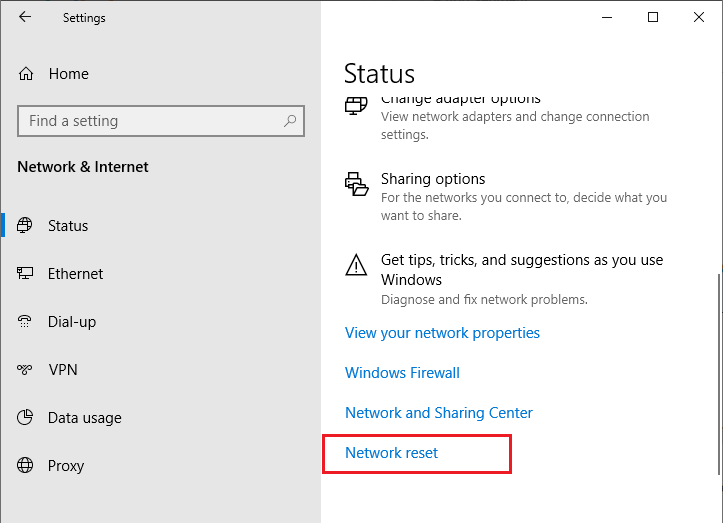
You can reset all settings and profiles for saved networks in Windows 10 by selecting Settings -> Network & Internet -> Status -> Network Reset and reboot the computer.
Now when you connected to the network, a network discovery request appears again.
How to Change Windows 10 Network Location from Public to Private?
You can change the network profile from the Windows 10 GUI. If you are using the new Settings panel, go to “Network & Internet” -> “Status” -> “Change connection properties”.
Here you can switch the network location profile from Public to Private and vice versa.

You cannot change the network profile from the classic Control Panel in Windows 10.
Also, you cannot change the network profile on the domain-joined computer. The Domain profile will always be used for a domain network connection.
Change Network Types Using PowerShell in Windows 10
On Windows 10/Windows Server 2016/2019, you can manage network connection location from the PowerShell. Run the elevated PowerShell console.
Now use the Get-NetConnectionProfile cmdlet to get a list of network adapters on your computer and their associated network profiles.
In my example, there is only one physical network adapter on a computer with a Public network location type (in the NetworkCategory value, you can see the following types of network profiles: Public, Private or DomainAuthenticated).
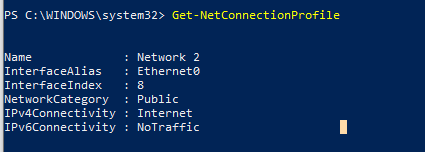
Let’s try to change the assigned network profile for the NIC. We need to get the index assigned to this network card. In this example, InterfaceIndex is 8.
After you get the network adapter index, you can change the network type to Private:
Set-NetConnectionProfile -InterfaceIndex 8 -NetworkCategory Private
Check that the network profile has changed:
Get-NetConnectionProfile -InterfaceIndex 19

The new firewall rules will be applied to the interface according to the assigned network profile without rebooting.
You can also change the network profile for all network adapters of the computer at once:
Get-NetConnectionProfile | Set-NetConnectionProfile -NetworkCategory Private
Setting Network Type Using Windows Registry
The network type can also be changed from the Registry Editor. To do this, run regedit.exe and go to the following key: HKEY_LOCAL_MACHINE\SOFTWARE\Microsoft\Windows NT\CurrentVersion\NetworkList\Profiles. This registry key contains profiles of all network connections.
You can find the necessary network profile by its name listed (from the Network and Sharing Center) in the ProfileName registry parameter.

The network type is specified in the Category parameter. The following values are available:
- 0 — Public Network
- 1 — Private Network
- 2 — Domain Network

Change the key value to the one you need and restart your computer.
Change network type from Public to Private in Windows 10
When you connect to a network for the first time in Windows 10, the network location is automatically set to Public. This is the safest option as it will keep your computer invisible on the network. You should keep this default option whenever you connect your PC to a public network such as the Wi-Fi in Hotels, airport, trains, shopping malls etc., On the other hand, if you are connecting to a private network such as your home network you might want to share music, pictures, videos etc., or even printers with other devices on that network. In such situations, you can change the network location to Private to make your computer discoverable to other computers.
The following the steps demonstrates how to change a network location from Public to Private or Private to Public.
Step 1: Find the current network type of your connection
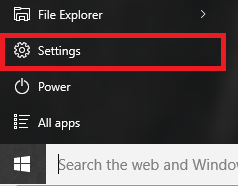
Click Windows Key and select Settings from start menu
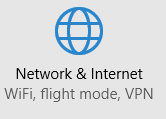
From the settings window click Network & Internet
The network status screen shows the connection type.

Step 2. Change network location to Public / Private
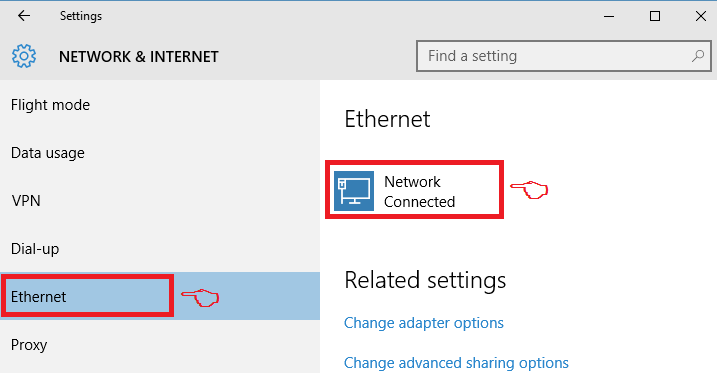
From the left pane, click Ethernet if your connection is a wired connection or WiFi in case of a Wireless connection and then Click on your network connection icon.
The network location will then change to Public 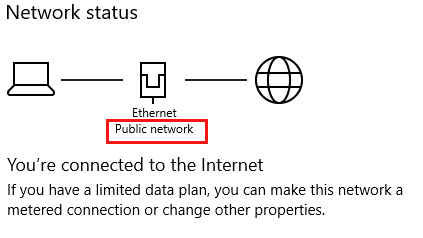
Private network type will have Network discovery on by default which allows other devices on the network to see your PC. You could customize this option from Advanced Sharing Setting menu in Network and Sharing Center. To share files and devices on a Private network you need to first create a homegroup and choose what to share.
If you don’t intend to share anything on the network, then the best option is to keep the network type as Public
How to change the Windows 10 network location to private (or public)
When you connect to a new and unknown network in Windows 10, the operating system sets it as Public. This means that Windows 10 offers the maximum protection possible from other devices on the same network because it treats that network as untrusted. Therefore, your Windows 10 PC is not discoverable on the network, and you cannot share folders and printers with that network. However, you may want to set the network as Private. Here are the quickest methods of changing the network profile in Windows 10:
IMPORTANT: For the procedure to work, you have to be logged in with a user account that has administrator privileges. If you need a refresher on the purpose of network locations in Windows, read this guide: What are network locations in Windows?. The procedure for changing the network location in Windows 10 is slightly different based on how you are connected to the network: wirelessly or through an Ethernet cable. In this guide, we cover both situations, each in a separate section.
How to change the Windows 10 network location to private, when connected to WiFi
If you use a laptop, tablet or Surface Pro device with Windows 10, and you are connected to a wireless network, first click or tap on the WiFi icon, in the notification area of the taskbar (usually found on the bottom-right corner of the screen). Then, click or tap the Properties link beneath the name of the WiFi network you are connected to.
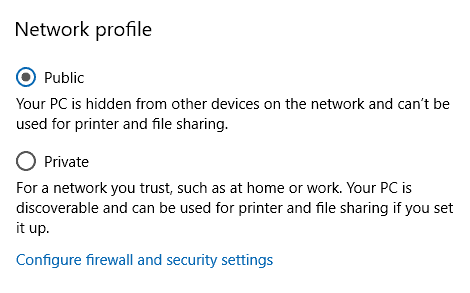
A Settings window opens, with settings for the wireless network that you are connected to. In the “Network profile” section, click or tap Private, and the network location is changed.
Alternatively, if you want to change the network location from Private to Public, make the opposite choice. Now you can close the Settings window. The change is immediately applied and used by Windows 10.
How to change the Windows 10 network location to private, when connected through a network cable
If you are on a desktop PC with Windows 10 that is connected to the network using an Ethernet cable, the procedure is different. First, click the network icon in the notification area of the taskbar (usually found on the bottom-right corner of the screen). Then, click on the name of the network that you are connected to.
The Settings window is shown, with the settings for your Ethernet network connection. Click again on the name of the network.
A list of settings is shown, for your active network connection. In the “Network profile” section, click or tap Private, and the network location is changed. Alternatively, if you want to change the network location from Private to Public, make the opposite choice.
Close the Settings window and you are done. The change is immediately applied and used by Windows 10.
How to change the Windows 10 network location using the Settings app
The methods above are the fastest. However, there is also another way to make the same change, using the Settings app. In Windows 10, open Settings and go to “Network & Internet.” Then, if you use a Wi-Fi network, go to Wi-Fi, click or tap the name of the network you are connected to, and then change the network profile to Private or Public, depending on what you need.
If you use an Ethernet connection, go to Ethernet and click the name of the network you are connected to. Then, change the network profile.
How to change the Windows 10 network location using the Command Prompt or PowerShell
If you love the command-line, you can run the Command Prompt or start PowerShell as administrator. Then type the command Get-NetConnectionProfile and press Enter. Information is then shown about the active network connection. Look at the Name field and remember its value. It is the name Windows has given to your network connection. Also, in the NetworkCategory field, you see the current network location set for your network connection. Next, type the command: Set-NetConnectionProfile -Name “NetworkName” -NetworkCategory Private. Replace NetworkName with the value of the Name field shared by the previous command.
If you want to set the network location to Public, type Set-NetConnectionProfile -Name “NetworkName” -NetworkCategory Public, and replace NetworkName with the value of the Name field shared by the previous command.
To double check that the network location was changed, run the Get-NetConnectionProfile again and see the results. The NetworkCategory field should have a different value.
NOTE: For more information about working with the Get-NetConnectionProfile command, check the documentation created by Microsoft, here.
Why does setting the correct Windows 10 network profile matter?
Windows 10 treats your network connection based on the location that is set for it. Public networks are considered untrusted. You should set network connections as Public when connected to networks that you do not know, like those found in public places, airports, hotels, restaurants, libraries, or those of companies you do not work for. You should set networks as Private only if you know them, and you trust them, like those in your home or workplace. When you set a network as Private, Windows 10 allows your computer or device to be discoverable on the network, to share data, and devices, including printers. For example, you cannot install a wireless printer, or a network printer, unless the network connection is set as Private.
Did you successfully change the network profile in Windows 10?
If you follow the steps described above you can to quickly change the Windows 10 network location from Private to Public or the other way around. Before closing this tutorial, tell us if everything worked fine for you. If you had troubles changing the network profile, tell us what happened, in a comment below.


