- How to Change the Icon Size in Windows 10
- How to Change the Size of Desktop Icons in Windows 10
- How to Change the Size of the Taskbar Icons
- How to Change the Size of Icons in File Explorer
- How to create an icon in Windows 10 [Full Guide]
- How to make a custom icon in Windows 10?
- 1. Create an icon with Paint 3D
- Design the icon
- Customize your icon with stickers
- Customize your icon with 3D objects
- 2. How do I convert a JPEG to an icon in Windows 10?
- 3. How to add new icons to the desktop
- How to change File and Folder Icons in Windows 10
- Why customize Windows 10 icons?
- Where can you find new or custom icons for Windows 10?
- How to change Icons in Windows 10
- 1] Customize your Desktop Icons
- 2] Customize Shortcut Icons
- 3] Customize your Taskbar Icons
- 4] Customize Folder Icons
- 5] Customize Specific File Types Icons
- 7] Change Drive icons
- Related Posts
- How to Turn On or Off Use Speech Recognition in Windows Mixed Reality in Windows 10
- How to change Desktop and Windows Mixed Reality Input Switching in Windows 10
- How to disable Windows Mobility Centre in Windows 10
- [email protected]
How to Change the Icon Size in Windows 10
By Melanie Pinola 29 April 2019
Wish the desktop icons in Windows 10 were bigger so you could stop squinting at them or they’d be easier to tap on a touch screen laptop? Or do you wish they were smaller so the shortcuts didn’t take up as much space on your laptop’s screen? Not to worry, we have a list of short steps on how to change the icon size in Windows 10.
How to Change the Size of Desktop Icons in Windows 10
1. Right-click on an empty space on the desktop.
2. Select View from the contextual menu.

3. Select either Large icons, Medium icons, or Small icons. The default is medium icons.
On my laptop with a native 1600 by 900 pixels display, the large option looks huge, the small size is too small, and the medium size looks just right (as Goldilocks would say). Your mileage might vary depending on your screen’s display resolution. Changing the size of the icons on the desktop doesn’t affect the size of the icons elsewhere in Windows 10, but there are ways you can change those too.
How to Change the Size of the Taskbar Icons
If you want to change the size of the icons in your taskbar, there’s a different setting for that, which will also change the size of text, apps, and other items across Windows 10.
1. Right-click on an empty space on the desktop.
2. Select Display settings from the contextual menu.
3. Move the slider under «Change the size of text, apps, and other items» to 100%, 125%, 150%, or 175%.
4. Hit Apply at the bottom of the settings window. Windows might ask you to log out and log back in for a more consistent experience.
This will not only make the icons in the taskbar a bit larger, but it will also make text bigger in apps like Microsoft Edge and Calendar, as well as in Windows 10 notification windows.
How to Change the Size of Icons in File Explorer
If you’d like larger or smaller icons or thumbnails in particular folders, you can change those on the fly in File Explorer.
Just head to your folder location and use your mouse’s scroll wheel to zoom in or out, effectively switching the view between Windows 10’s large icons, medium icons, small icons, list, details, tiles, and content views.
Although File Explorer will remember your last setting when you open this folder again, this is a folder-specific setting, so you’ll have to adjust each folder you’d want different icon and text sizes for.
How to create an icon in Windows 10 [Full Guide]

- Adding your own unique icon designs to the desktop is a great way to customize Windows 10 .
- This article provides guidelines for designing your own desktop icons with Paint 3D.
- Our Graphics & Design section includes a plethora of graphics design software guides.
- Look no further than our How-To Hub for many more Windows 10 software guides.
Windows 10 displays shortcuts on its desktop with icons, which are a big aspect of the platform’s themes.
If you fancy giving Windows a bit of a makeover, customizing desktop icons is a good way to do it. You can create your own custom icons for desktop shortcuts.
All you’ll need to set up your own icons is one art (or graphic) design application.
Windows 10 includes the Paint and Paint 3D design apps. You can set up new icons with either software. However, Paint 3D is the better-equipped package as it enables users to add 3D shapes and stickers to their icons.
How to make a custom icon in Windows 10?
1. Create an icon with Paint 3D
Set up the canvas
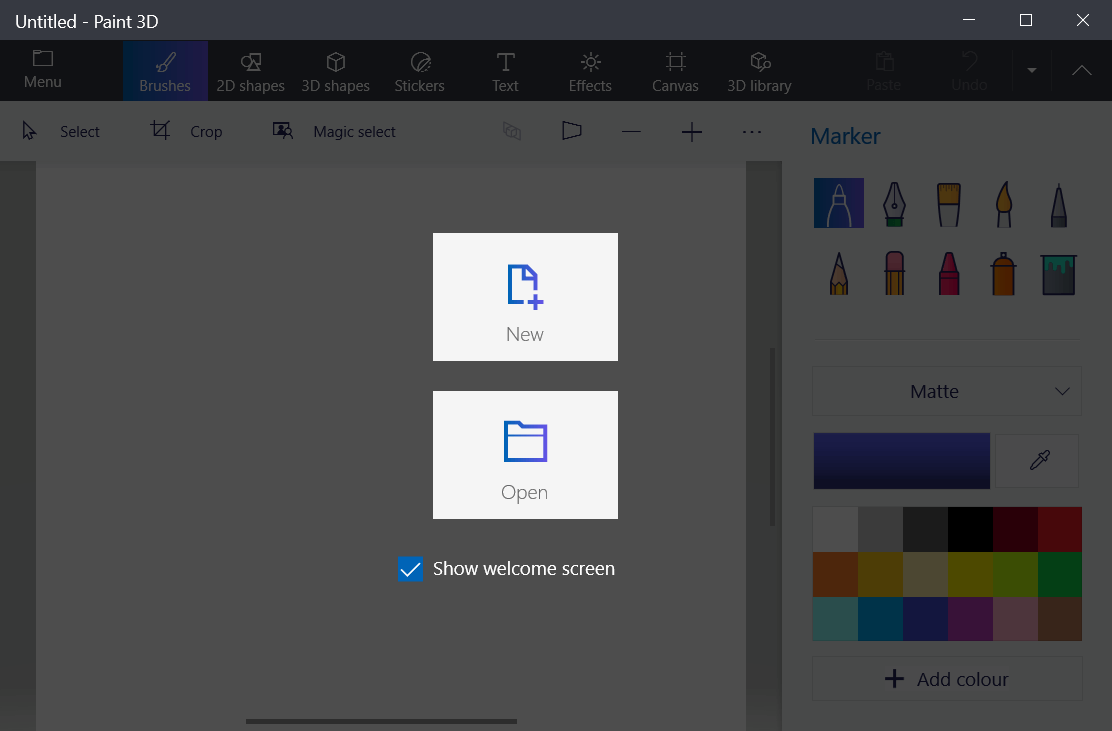
- First, click the Start button.
- Click Paint 3D on the Start menu’s software index.
- Click New in Paint 3D.

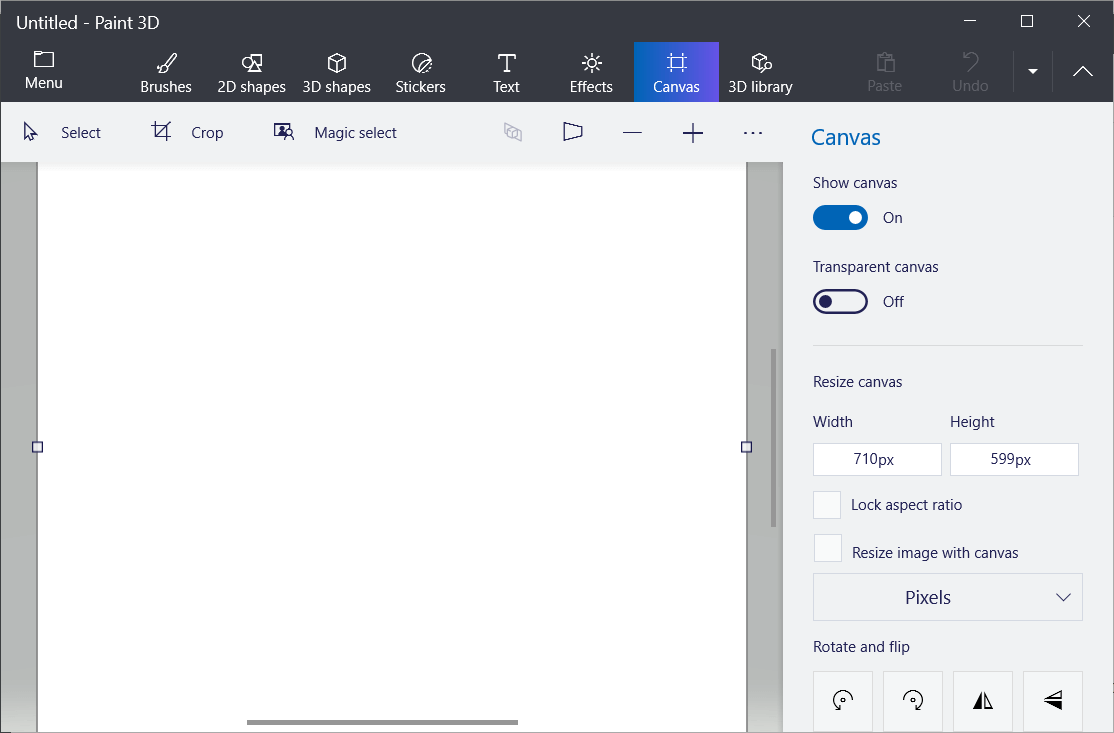
- Select Canvas to open the options shown directly below.
- Enter 32 in both the Width the Height boxes to resize the canvas to 32 x 32.
- Roll your mouse wheel to zoom in on, and expand the canvas.
- Toggle the Transparent canvas option on.
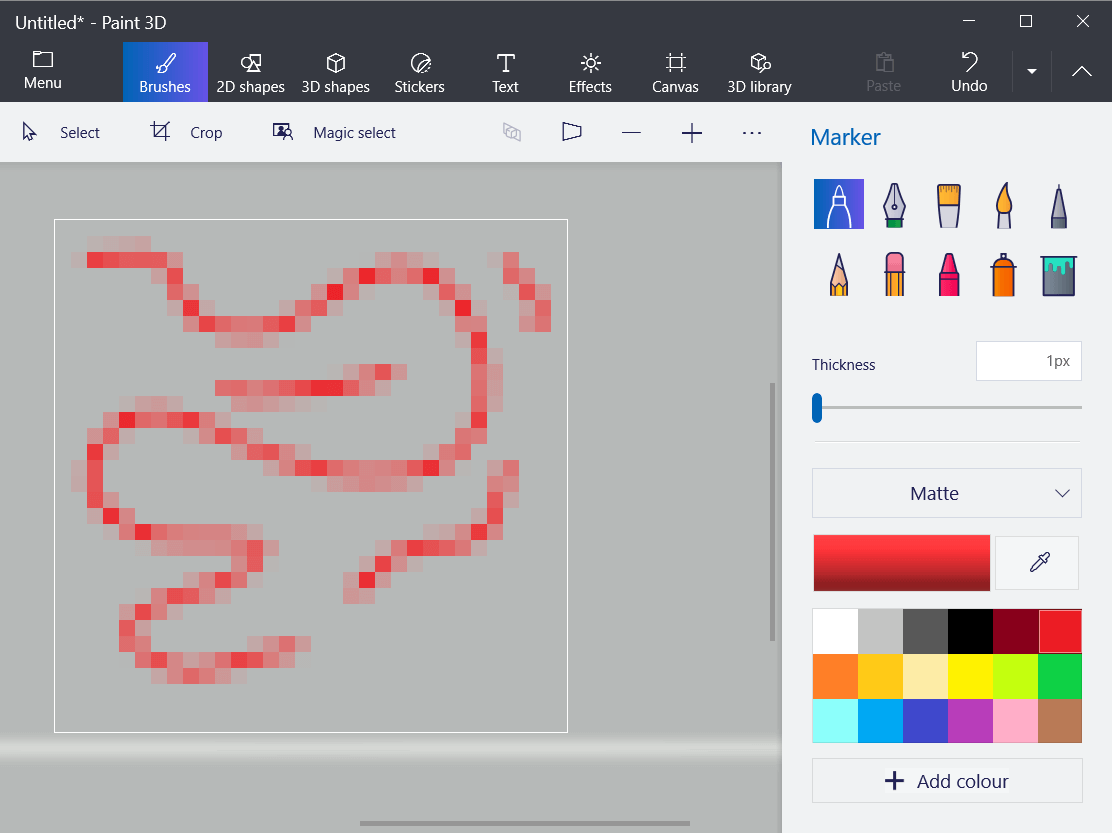
Design the icon
- You can draw a picture on your icon’s canvas by selecting Brushes. You’ll need to select Marker or Pixel Pen at a 1 px weighting.
- To add lines and two-dimensional shapes, select the 2D shapes tab. Then select a line, curve, or shape option there.
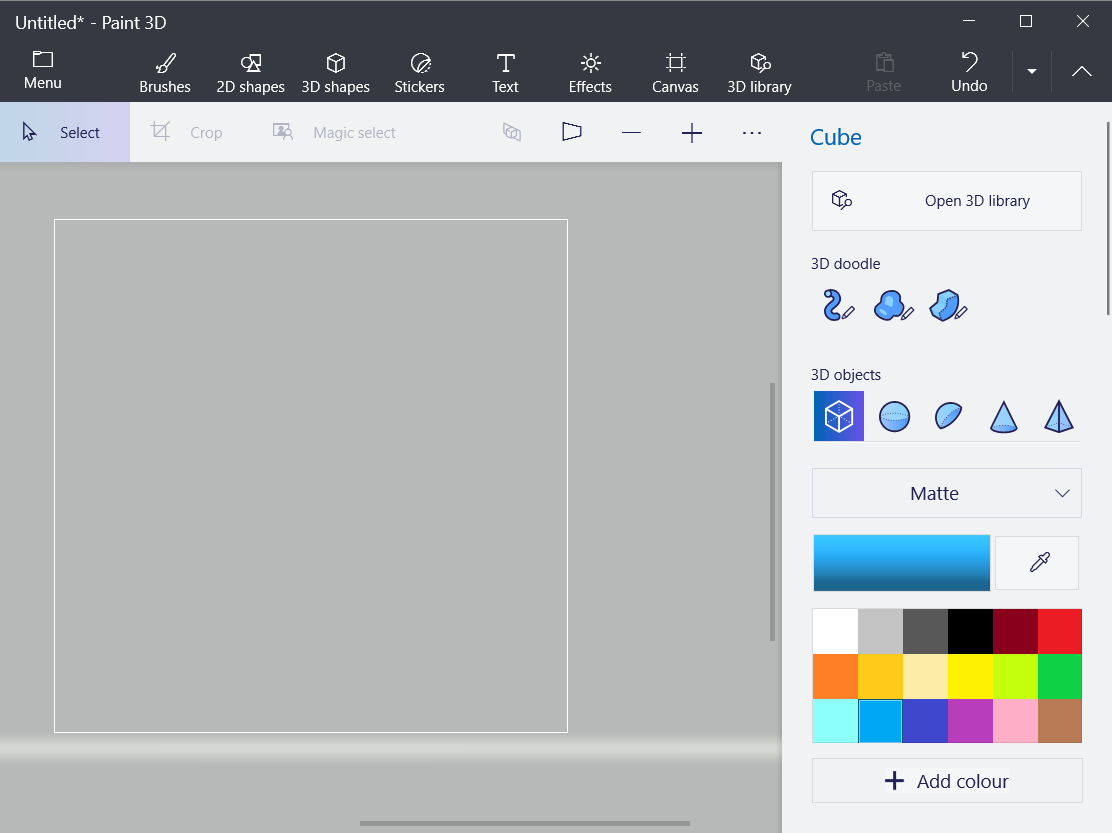
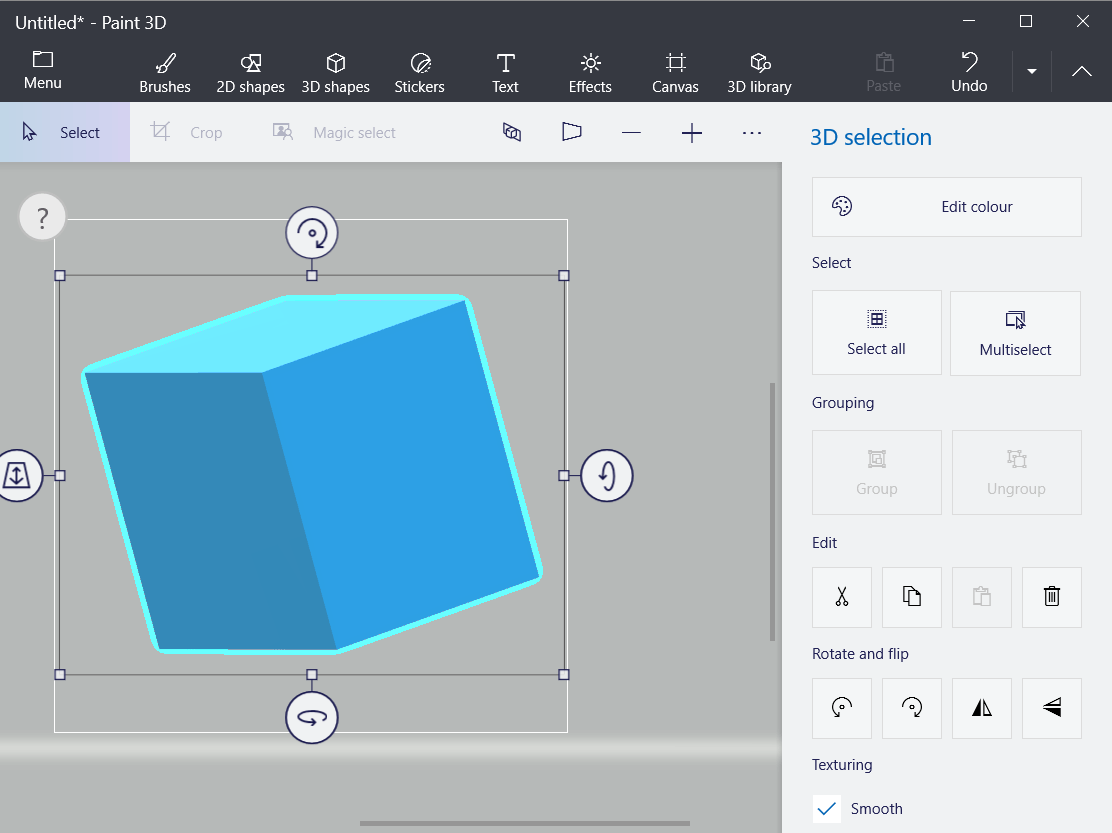
- Paint 3D’s 3D shapes tab includes a variety of options for adding three-dimensional shapes and models to your icon. Click 3D shapes to open that tab.
- Select a 3D object or model option on the sidebar. Then hold the left mouse button and drag the cursor right to expand the selected shape so it fits within your icon’s canvas.
- Click the shape on the canvas to open its rotation options as in the shot directly below.
Customize your icon with stickers
- Paint 3D also includes a relatively small collection of stickers you can utilize for icons. Click the Stickers tab.
- Select a sticker for the icon.
- Click outside the icon‘s canvas area on the left of the window to add the selected sticker.
- Left-click the top right corner of the sticker, and drag the mouse left to shrink the picture to fit within the canvas.
- Select the image and hold the mouse button to drag it into the canvas.
- Press the Make 3D button to apply a 3D effect. You can rotate the sticker much the same as 3D shapes.
- You can click Custom stickers >Add stickers to select downloaded clip art for your icons.

Customize your icon with 3D objects
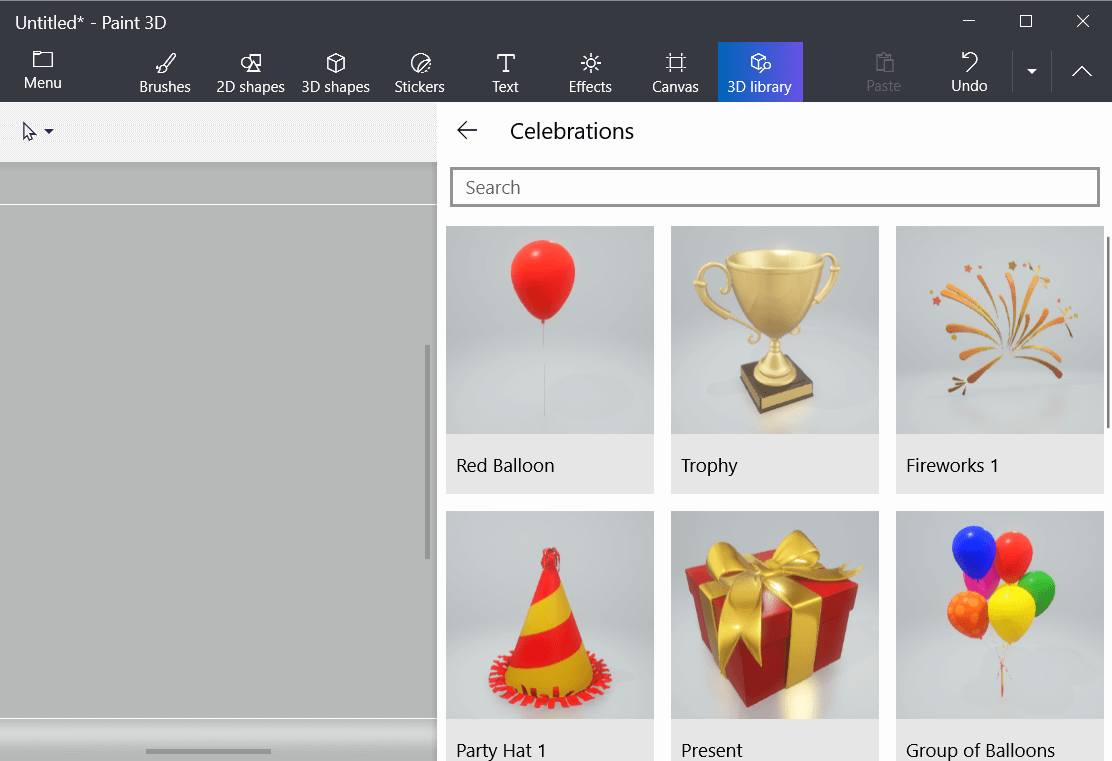
- Paint 3D also has a collection of 3D images you can add to your icons. Click 3D library to browse through the various image categories.
- Click an image to add it to your canvas.
- You’ll probably need to greatly scale down the selected image to fit it within your icon’s canvas. To scale down an image, click its top right corner, hold the left mouse button, and drag the cursor left.
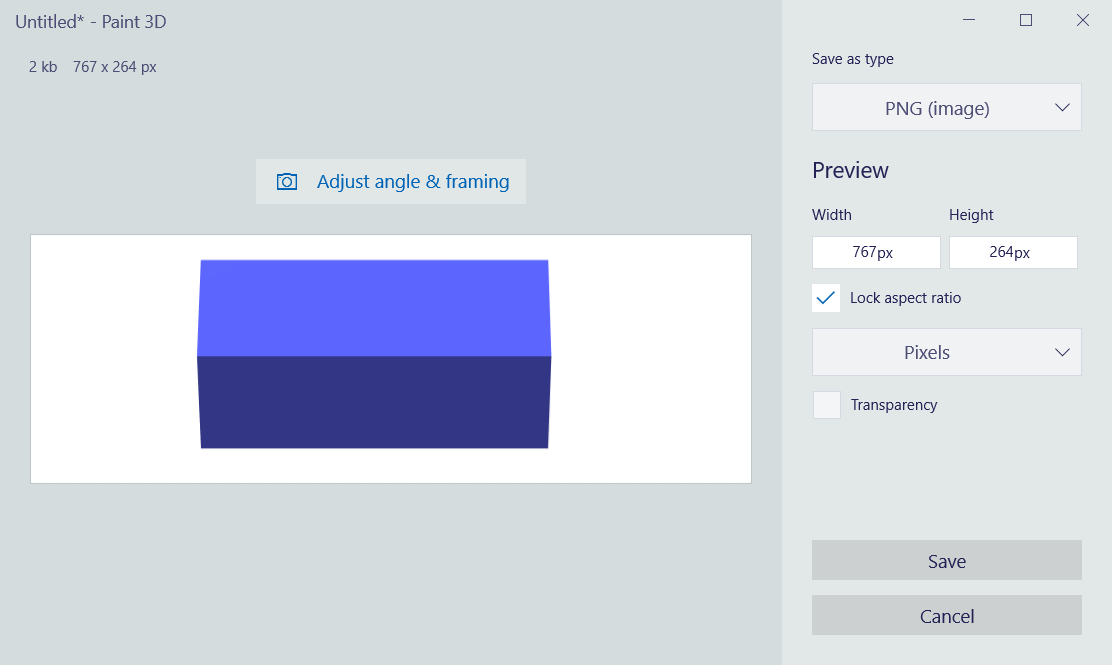
Save the icon design as an image
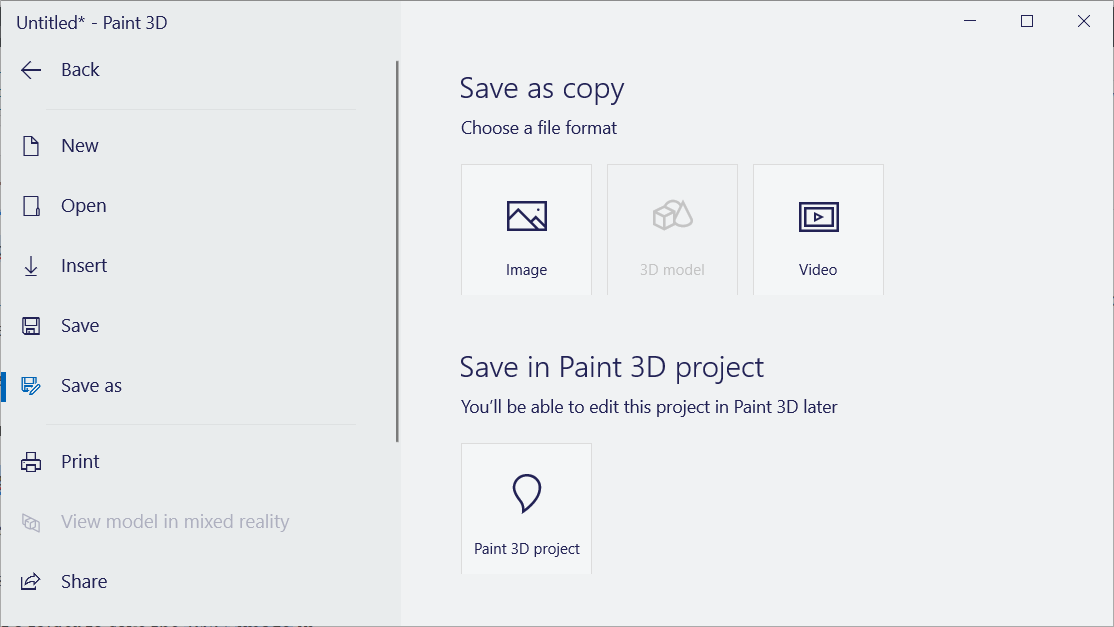
- When you’ve finished your icon design, click Menu >Save As >Image.
- If you added a 3D model to your icon, an image preview will open as in the snapshot directly below. Select PNG on the Save as type menu.
- Press the Save button.
- Select a folder to save the PNG image in.
- Select 2D – PNG as the file format.
- Enter a title for the image, and click the Save option.
2. How do I convert a JPEG to an icon in Windows 10?
- You can convert PNG, JPEG, and JPG files to icons at the Online-Convert website. So, open that website’s Online image convert page in a browser.
- Click Choose files to select the icon PNG you set up in Paint 3D.
- Press the Start conversion button.
- Then click the Download button.

3. How to add new icons to the desktop
- Now you can add your new icon to the Windows 10 desktop. To do so, right-click a shortcut icon already on the desktop and select Properties.
- Select the Customize tab on the window that opens.
- Press the Change Icon button.
- Click the Browse button on the Change Icon window.
- Then select your ICO file in the folder it downloaded to.
- Click the Open button.
- Click OK on the Change Icon window.
- Finally, select the Apply option.
- Click OK to exit the window.
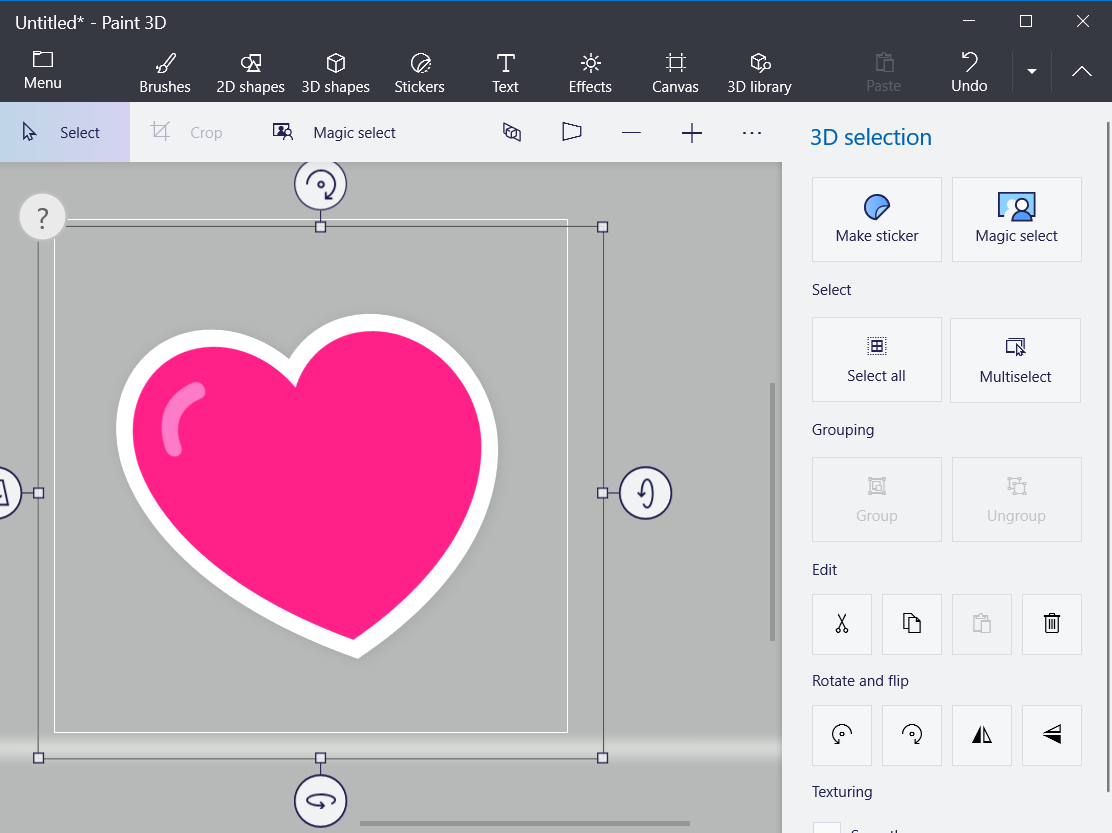
- Now your custom icon will have replaced the original one on the desktop. The heart icon in the snapshot below was one set up with Paint 3D.
So, that’s how you can set up your own custom icons with Paint 3D.
You can also design your own icon sets with numerous icon maker software.
Our icon maker guide provides details for Windows 10’s best icon maker software.
How to change File and Folder Icons in Windows 10
What do you think about the default icons on Windows 10? Well, they look great, but with time appear boring, isn’t it? You would have tried to cut the boredom by customizing your device by changing the themes and fonts. But you can take this customization to a whole new level by changing the default Windows icons and make your PC look unique and better sorted. In this Windows guide, we take you through the different ways to change any icons on Windows 10.
Why customize Windows 10 icons?
Killing ennui is just one reason, customization can be done for many different purposes. Few of them include:
- Give your PC a personal spin
- Make your environment look catchy and trendy
- Make your system more user-friendly
- Highlight the importance of a particular icon by making it look unique
- To locate an important icon immediately from a huge crowd of icons
Along with the array of benefits listed above, there are many different types of icons that can be modified on Windows 10. These include desktop icons, taskbar icons, folder icons, and shortcut icons. To know how to customize these, let’s move on the method.
Where can you find new or custom icons for Windows 10?
Before we can start changing icons on Windows 10, we will need some icons to replace the existing ones. The Operating System has a collection of built-in icons, but they might not be that great. The good news is that there are many online resources offering millions of high-quality impressive icons. You can grab them in a pack at once, or download single icons based on your likings. Few popular icon repositories are FlatIcon, Findicons, IconArchive, DeviantArt, or GraphicBurger – all of these have loads of free icons.
In case you just can’t find the icon of your choice, you can even try making high-resolution icons out of any image.
How to change Icons in Windows 10
Now let’s look at the methods of changing different types of icons one after one-
- Desktop icons
- Shortcut icons
- Taskbar icons
- Folder icons
- File icons
- Drive icons.
1] Customize your Desktop Icons
What are ‘Desktop Icons’? The icons like This PC, Network, Recycle Bin, and your User folder all fall in this category. Even though modern versions of Windows do not show them all on the desktop, users can always restore these missing icons and have them appear on your system’s desktop or even change these icons even if they appear elsewhere on your system.
For customizing desktop icons follow the below-mentioned steps:
1] Go to ‘Settings’
2] Hit ‘Personalization’
3] Now click on ‘Themes’, and go to ‘Desktop Icon Settings’.
4] Once you click on ‘Desktop Icon Settings’ a separate ‘Desktop Icon Settings’ window will appear.
5] In the ‘Desktop Icons’ section, check the checkbox corresponding to the specific item whose icon you wish to customize.
6] Now hit the ‘Change Icon’ button.
7] Once you click the ‘Change Icon’ button, a list of different in-built icons will appear on the screen. To choose from these in-built Windows icons select one and hit the ‘OK’ button.
This will change the icon.
To select a custom icon hit the ‘Browse’ button to go to the folder having the icon of your choice and hit ‘Open’ to upload the icon on the Windows icon list; then select the uploaded icon. Also, if you browse for your own icons, you can select any EXE, DLL, or ICO file.
8] Finally, click the ‘Apply’ button and then hit on the ‘OK’ button to save your settings.
Now, your ‘Computer’ icon will look like the below image.
To reverse the change, go back to the ‘Desktop Icon Settings’ window, hit ‘Restore Default’ button and hit ‘Apply’ and then click ‘Ok’ to save settings.
2] Customize Shortcut Icons
Adding a shortcut for folders and applications makes things very easy and simple on any operating system. Users can alter the icon for a shortcut in Windows and this works for all sorts of shortcuts including a shortcut to an app, folder, or even Command Prompt command. Here are the steps to customize any shortcut icon:
1] Go to your ‘Desktop’ and select the shortcut you wish to change the icon for
2] Right-click the shortcut and select ‘Properties’.
3] On the ‘Shortcut’ tab, select the ‘Change Icon’ button.
4] This opens the standard ‘Change Icon’ window you saw above.
5] Now follow the same steps as listed in the above ‘Desktop Icon’ option to select the icon and apply settings.
3] Customize your Taskbar Icons
The icons pinned to your taskbar are also shortcuts; you can customize these in nearly the same way that you customize any shortcut icon. But there are a few things you would need to keep in mind here:
- You can customize only those icons that are pinned to the taskbar and not the ones which are currently running and appearing there.
- For an app that is pinned, but is currently running, you will need to close the app to begin customizing the shortcut icon.
Start by holding the ‘Shift’ key and right-click the app icon and choose ‘Properties’.
Now, follow the same steps as listed in the ‘Desktop Icon’ option above to set a new icon.
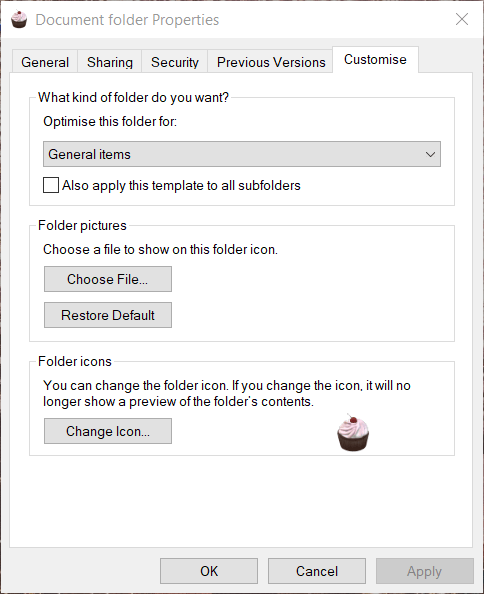
4] Customize Folder Icons
To customize the Folder icons in Windows 10, perform the following steps:
1] Right-click the folder and select ‘Properties’ in the context menu.
2] Select ‘Customize’ and hit ‘Change Icon’ in the Properties window.
3] You can replace the folder icon with a basic/personalized icon.
4] Now click ‘OK’ to save the changes.
5] Finally, hit ‘OK’ to finish changing the folder icon.
Done, this will change your specific folder icons.
You might want to also take a look at these Free software to change the Folder icon color.
5] Customize Specific File Types Icons
Personalizing the icon of a specific type of file demands third-party tools like File Types Manager. Follow these steps:
1] Get freeware FileTypesMan on your system
2] In the ‘Find Box’ locate the file type that you want to change its icon for.
3] Now close the Find box.
4] Right-click the file and choose ‘Edit Selected File Type’.
5] In Default Icon option, click the 3-dots button in the pop-out window.
6] Select one of the existing icons or input your own icon by clicking Browse > click OK.
7] Finally, hit ‘Ok’ to execute the changes.
7] Change Drive icons
You can change the Icons of your Windows Drives easily using freeware Drive Icon Changer or My Drive Icon.
In this way, you can customize different types of icons in Windows 10. So, keep customizing and add new and interesting icons to your applications or folders. And yes, if you wish to revert the changes, you will only need to hit the ‘Restore Defaults’ button in the corresponding Properties window and click on it.
Date: January 2, 2020 Tags: Features, Icons
Related Posts
How to Turn On or Off Use Speech Recognition in Windows Mixed Reality in Windows 10
How to change Desktop and Windows Mixed Reality Input Switching in Windows 10
How to disable Windows Mobility Centre in Windows 10
[email protected]
Ankit Gupta is a writer by profession and has more than 7 years of global writing experience on technology and other areas. He follows technological developments and likes to write about Windows & IT security. He has a deep liking for wild life and has written a book on Top Tiger Parks of India.


