- Обзор средства управления дисками Overview of Disk Management
- О дополнительных разделах восстановления About those extra recovery partitions
- DiskConfiguration
- Child Elements
- Valid Configuration Passes
- Parent Hierarchy
- Applies To
- XML Examples
- Manual Configuration
- Создание установочного носителя для Windows
- Windows Setup: Installing using the MBR or GPT partition style
- Why should I convert my drive?
- Reformatting the drive using a different partition style
- Make sure Windows Setup boots to the correct firmware mode
- Boot Disk – Guide for Windows XP, Vista, 7, 8, 8.1, 10
- What is a boot disk
- Download boot disk
- Create boot disk for Windows XP
- Create boot disk for Windows Vista
- Prerequisites
- Creating a boot disk
- Create boot disk for Windows 7
- Create boot disk for Windows 8/8.1/10
- Create the disk as a CD/DVD
- Create a boot disk as a USB drive
- More Information
- Support Links
- Applicable Systems
Обзор средства управления дисками Overview of Disk Management
Относится к: Windows 10, Windows 8.1, Windows 7, Windows Server (Semi-Annual Channel), Windows Server 2019, Windows Server 2016, Windows Server 2012 R2, Windows Server 2012 Applies To: Windows 10, Windows 8.1, Windows 7, Windows Server (Semi-Annual Channel), Windows Server 2019, Windows Server 2016, Windows Server 2012 R2, Windows Server 2012
Управление дисками — это системная служебная программа Windows, дающая возможность выполнять дополнительные задачи хранилища. Disk Management is a system utility in Windows that enables you to perform advanced storage tasks. Ниже приведены некоторые задачи, которые хорошо подходят для управления дисками. Here are some of the things Disk Management is good for:
- Чтобы настроить новый диск, см. раздел Инициализация нового диска. To setup a new drive, see Initializing a new drive.
- Чтобы расширить том в пространство, которое пока не является частью тома на том же диске, см. раздел Расширение базового тома. To extend a volume into space that’s not already part of a volume on the same drive, see Extend a basic volume.
- Чтобы сжать раздел (обычно для того, чтобы расширить соседний), см. раздел Сжатие базового тома. To shrink a partition, usually so that you can extend a neighboring partition, see Shrink a basic volume.
- Чтобы изменить или назначить букву диска, см. раздел Изменение буквы диска. To change a drive letter or assign a new drive letter, see Change a drive letter.
Если отобразится сообщение об ошибке или что-то не сработает при выполнении этих процедур, рекомендуем заглянуть в раздел Устранение неполадок при управлении дисками. If you get an error or something doesn’t work when following these procedures, take a peek at the Troubleshooting Disk Management topic. Если и это не поможет, сохраняйте спокойствие! If that doesn’t help — don’t panic! Есть множество сведений на сайте сообщества Майкрософт: попробуйте поиск в разделе Файлы, папки и хранилища; если вам по-прежнему нужна помощь, опубликуйте там вопрос и Майкрософт или другие члены сообщества попытаются вам помочь. There’s a ton of info on the Microsoft community site — try searching the Files, folders, and storage section, and if you still need help, post a question there and Microsoft or other members of the community will try to help. Если у вас есть отзыв о том, как улучшить эти разделы, мы будем рады узнать ваше мнение! If you have feedback on how to improve these topics, we’d love to hear from you! Просто ответьте на запрос Помогла ли вам эта страница? , оставив свои комментарии на открывшейся странице или в открытой цепочке комментариев в нижней части этого раздела. Just answer the Is this page helpful? prompt, and leave any comments there or in the public comments thread at the bottom of this topic.
Ниже приведены некоторые распространенные задачи, которые можно выполнить с помощью других средств в Windows. Here are some common tasks you might want to do but that use other tools in Windows:
- Чтобы освободить место на диске, см. раздел Освобождение места на диске в Windows 10. To free up disk space, see Free up drive space in Windows 10.
- Чтобы провести дефрагментацию дисков, см. раздел Дефрагментация компьютера с Windows 10. To defragment your drives, see Defragment your Windows 10 PC.
- Чтобы объединить несколько жестких дисков аналогично RAID, см. раздел Дисковые пространства. To take multiple hard drives and pool them together, similar to a RAID, see Storage Spaces.
О дополнительных разделах восстановления About those extra recovery partitions
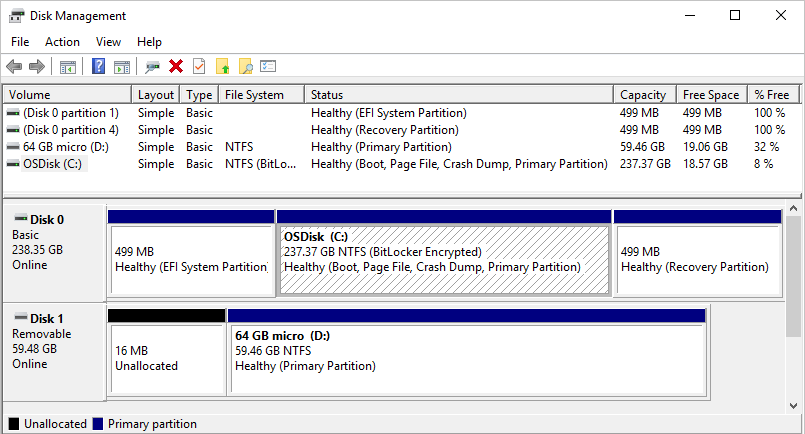
Если вам интересно (мы прочитали ваши комментарии!), Windows обычно включает три раздела на основном диске (обычно это диск C): In case you’re curious (we’ve read your comments!), Windows typically includes three partitions on your main drive (usually the C:\ drive):

- Системный раздел EFI — на современных ПК используется для запуска (загрузки) компьютера и операционной системы. EFI system partition — This is used by modern PCs to start (boot) your PC and your operating system.
- Диск операционной системы Windows (C:) — здесь установлена система Windows и обычно размещены остальные приложения и файлы. Windows operating system drive (C:) — This is where Windows is installed, and usually where you put the rest of your apps and files.
- Раздел восстановления — служит для хранения специальных средств восстановления Windows, если возникают проблемы с запуском или чем-то еще. Recovery partition — This is where special tools are stored to help you recover Windows in case it has trouble starting or runs into other serious issues.
Несмотря на то что управление дисками может показывать системный раздел EFI и раздел восстановления как свободные на 100 %, это не точно. Although Disk Management might show the EFI system partition and the recovery partition as 100% free, it’s lying. Эти разделы обычно заполнены действительно важными файлами, которые нужны для правильной работы компьютера. These partitions are generally pretty full with really important files your PC needs to operate properly. Лучше всего оставить их в покое, чтобы вы могли запускать ПК и восстановить его в случае проблем. It’s best to just leave them alone to do their jobs starting your PC and helping you recover from problems.
DiskConfiguration
DiskConfiguration contains the settings that Windows uses to partition and to configure one or more physical hard disks.
Valid disk partition configurations vary depending on whether you are using a BIOS-based computer or a Unified Extensible Firmware Interface (UEFI)-based computer. For more information, see the Manage Hard Disks and Partitions topic in the WindowsВ Assessment and Deployment Kit (WindowsВ ADK) Technical Reference.
You can configure disk partitions manually in the disk configuration user interface (UI) in Windows Setup, or automatically by using settings in the Disk element. If you do not specify a Disk element and the WillShowUI setting is set to Never, Windows logs an error, and the installation terminates.
Child Elements
| Setting | Description |
|---|---|
| DisableEncryptedDiskProvisioning | Specifies whether Windows activates encryption on blank drives that are capable of hardware-based encryption. |
| Disk | Specifies the disk configurations to apply to a disk on the destination computer. |
| WillShowUI | Specifies whether to show the disk configuration UI in Windows Setup. |
Valid Configuration Passes
Parent Hierarchy
Applies To
For a list of the Windows editions and architectures that this component supports, see Microsoft-Windows-Setup.
XML Examples
Manual Configuration
The following XML output for the DiskConfiguration setting shows how to specify that you will configure disk partitions manually through the disk configuration UI in Windows Setup:
Создание установочного носителя для Windows
Вы можете использовать установочный носитель (USB-устройство флэш-памяти или DVD-диск) для установки новой копии Windows, выполнения чистой установки или переустановки Windows 10.
Чтобы создать установочный носитель, перейдите на веб-сайт скачивания ПО, где вы найдете пошаговые инструкции. На этом веб-сайте вы можете выбрать версию Windows и создать собственный установочный носитель с помощью USB-устройства флэш-памяти или DVD-диска. Чтобы перейти непосредственно к одной из версий, выберите одну из следующих ссылок:
Windows 10 (Затем выберите Скачать средство сейчас.)
Важно: Создайте резервную копию файлов перед установкой и переустановкой Windows на компьютере. Узнайте, как это сделать для Windows 10 или для Windows 7 и Windows 8.1.
Чтобы создать установочный носитель, необходимо следующее:
Компьютер с надежным подключением к Интернету. Время скачивания зависит от скорости подключения к Интернету.
USB-устройство флэш-памяти или DVD-диск. Необходимо пустое USB-устройство флэш-памяти с 8 ГБ свободного места или пустой DVD-диск (и устройство записи DVD). Рекомендуем использовать чистый носитель, поскольку все его содержимое будет удалено. Если при записи DVD-диска из ISO-файла отображается сообщение о том, что файл образа диска слишком большой, необходимо использовать DVD-носитель с двумя слоями (DL).
Ключ продукта. 25-значный ключ продукта (не требуется для цифровых лицензий). Если вам требуется помощь, см. раздел Как найти ключ продукта Windows.
После создания установочного носителя вы можете сбросить или переустановить Windows. Дополнительные сведения см. в разделе Параметры восстановления в Windows 10.
Windows Setup: Installing using the MBR or GPT partition style
When installing Windows on UEFI-based PCs using Windows Setup, your hard drive partition style must be set up to support either UEFI mode or legacy BIOS-compatibility mode.
For example, if you receive the error message: “Windows cannot be installed to this disk. The selected disk is not of the GPT partition style”, it’s because your PC is booted in UEFI mode, but your hard drive is not configured for UEFI mode. You’ve got a few options:
Reboot the PC in legacy BIOS-compatibility mode. This option lets you keep the existing partition style. For more info, see Boot to UEFI Mode or Legacy BIOS mode.
Configure your drive for UEFI by using the GPT partition style. This option lets you use the PC’s UEFI firmware features.
You can preserve your data and convert the drive using the MBR2GPT tool. You can also choose to reformat the drive using the instructions below. Reformatting will erase all the data on the drive.
Why should I convert my drive?
Many PCs now include the ability to use the UEFI version of BIOS, which can speed up boot and shutdown times and can provide additional security advantages. To boot your PC in UEFI mode, you’ll need to use a drive formatted using the GPT drive format.
Many PCs are ready to use UEFI, but include a compatibility support module (CSM) that is set up to use the legacy version of BIOS. This version of BIOS was developed in the 1970s and provides compatibility to a variety of older equipment and network configurations, and requires a drive that uses the MBR drive format.
However, the basic MBR drive format does not support drives over 4TB. It’s also difficult to set up more than four partitions. The GPT drive format lets you set up drives that are larger than 4 terabytes (TB), and lets you easily set up as many partitions as you need.
Reformatting the drive using a different partition style
To wipe and convert the drive by using Windows Setup
Turn off the PC, and put in the Windows installation DVD or USB key.
Boot the PC to the DVD or USB key in UEFI mode. For more info, see Boot to UEFI Mode or Legacy BIOS mode.
When choosing an installation type, select Custom.
On the Where do you want to install Windows? screen, select each of the partitions on the drive, and select Delete. The drive will show a single area of unallocated space.
Select the unallocated space and click Next. Windows detects that the PC was booted into UEFI mode, and reformats the drive using the GPT drive format, and begins the installation.
To manually wipe a drive and convert it to GPT:
Turn off the PC, and put in the Windows installation DVD or USB key.
Boot the PC to the DVD or USB key in UEFI mode. For more info, see Boot to UEFI Mode or Legacy BIOS mode.
From inside Windows Setup, press Shift+F10 to open a command prompt window.
Open the diskpart tool:
Identify the drive to reformat:
Select the drive, and reformat it:
Close the command prompt window.
Continue the Windows Setup installation.
When choosing an installation type, select Custom. The drive will appear as a single area of unallocated space.
Select the unallocated space and click Next. Windows begins the installation.
Make sure Windows Setup boots to the correct firmware mode
To automate this process, you’ll need to run Windows Setup through Windows PE, and use a script to detect which mode you’re in before installing Windows. For more info, see WinPE: Boot in UEFI or legacy BIOS mode.
Boot Disk – Guide for Windows XP, Vista, 7, 8, 8.1, 10
This guide is about boot (or startup) disks for the following Windows versions: Windows XP, Vista, 7, 8, 8.1 or 10.
What is a boot disk
A boot disk (or a startup disk) is a recovery media (CD, DVD or floppy disk for older Windows versions) that you can use to start Windows, if it became damaged or corrupted somehow.
The term “boot disk” was mostly used in connection with Windows XP (and older versions) and, in some cases, with Windows Vista. For Windows 7, Windows 8 and Windows 10 the “boot disk” term is mostly replaced with the term “recovery disk” (sometimes also named as a “repair disk” or “restore disk”).
NeoSmart Technologies has extensive guides on how to create recovery media for all major PC manufacturers that have their own software for recovery procedures and a recovery disk for all Windows versions (XP, Vista, 7, 8, 10).
If you have a computer from any of the following manufacturers, read that guide too. Most PC manufacturers with computers that have Windows installed also have a recovery partition that you can make use of to restore or repair your computer. Some older models had only a recovery disk (as a CD, DVD etc.) or only the recovery partition.
Our list of recovery media guides for specific PC manufacturers: Dell (including the guide on the recovery partition), Acer, Asus, Gateway, Toshiba, HP, Lenovo.
A boot or startup disk is not an installation disk! You can not use a boot disk to install Windows. To install Windows, use your original Windows installation disk.
You can use the following formats to create a disk:
- CD or diskette (floppy disk) for Windows XP
- CD or DVD for Windows Vista
- CD or DVD for Windows 7
- CD or DVD or USB for Windows 8
- USB for Windows 8.1 or Windows 10
Download boot disk
If you aren’t able to boot into Windows or don’t access to the recovery partition to create a system recovery disk, you can use our recovery and repair disk Easy Recovery Essentials to repair and restore your computer.
Easy Recovery Essentials is compatible with the following Windows versions: Windows 10, Windows 8 or 8.1, Windows 7, Windows Vista, Windows XP or Windows Server 2003, 2008 and 2012.
Features of Easy Recovery Essentials include:
- Automatically find and fix boot errors
- Works even when you can’t get into Windows
- Recover from virus infections
- Restore your PC to a working state
- Access and backup your important data
- Advanced tools for IT experts
Easy Recovery Essentials is an ISO download image ready to be burned directly to a CD, DVD or a USB flash drive.
With Easy Recovery Essentials you can:
- Find and fix errors automatically with Automated Repair
- Recover your PC from infections with the built-in antivirus
- Restore your PC to a working state
- Access and backup your most important data (like documents, pictures, music, videos and so on)

Screenshot of Easy Recovery Essentials
Note: Easy Recovery Essentials can not be used to install or reinstall Windows.
Windows XP users
Easy Recovery Essentials can be used as a boot disk (or recovery disk) for computers with Windows XP installed to repair the computer, including the full list of Windows XP editions with Service Packs installed:
- Microsoft Windows XP SP1 (Service Pack 1)
- Microsoft Windows XP SP2 (Service Pack 2)
- Microsoft Windows XP SP3 (Service Pack 3)
It’s compatible with both the Home and Professional editions of Windows XP:
- Microsoft Windows XP Home
- Microsoft Windows XP Professional
Windows Vista users
Easy Recovery Essentials works with Windows Vista computers and the version for the x86 and x64 platforms. It works with all Windows Vista editions, including the 32-bit and 64-bit editions:
- Microsoft Windows Vista Ultimate (32-bit and 64-bit editions)
- Microsoft Windows Vista Enterprise (32-bit and 64-bit editions)
- Microsoft Windows Vista Business (32-bit and 64-bit editions)
- Microsoft Windows Vista Home Premium (32-bit and 64-bit editions)
- Microsoft Windows Vista Home Basic (32-bit and 64-bit editions)
- Microsoft Windows Vista Starter (32-bit edition)Note: Windows Vista Starter doesn’t have a 64-bit edition.
It’s compatible with the available Service Packs of Windows Vista:
- Microsoft Windows Vista Service Pack 1 (SP1)
- Microsoft Windows Vista Service Pack 2 (SP2)
Windows 7 users
Easy Recovery Essentials is compatible with Windows 7 and supports both x86 and x64 platforms and is compatible with the full list of Windows 7 editions, including the 32-bit and the 64-bit:
- Microsoft Windows 7 Ultimate (32-bit and 64-bit editions)
- Microsoft Windows 7 Enterprise (32-bit and 64-bit editions)
- Microsoft Windows 7 Professional (32-bit and 64-bit editions)
- Microsoft Windows 7 Home Premium (32-bit and 64-bit editions)
- Microsoft Windows 7 Home Basic (32-bit and 64-bit editions)
- Microsoft Windows 7 Starter (32-bit edition)Note: Windows 7 Starter is only available in the 32-bit edition.
It’s compatible with the Service Pack 1 for Windows 7:
- Microsoft Windows 7 Service Pack 1 (SP1)
Windows 8 or 8.1 users
You can use Easy Recovery Essentials as a boot or startup disk (now known as a recovery media) for computers with Windows 8/8.1 installed to repair or restore your computer.
It supports the x86 and x64 platforms and all the Microsoft Windows 8 editions (8 and 8.1), including the 32-bit and the 64-bit editions:
- Microsoft Windows 8 (32-bit and 64-bit editions)
- Microsoft Windows 8.1 (32-bit and 64-bit editions)
Windows 10 users
You can use Easy Recovery Essentials as a boot or startup disk (now known as a recovery media) for computers with Windows 10 installed to repair or restore your computer.
Create boot disk for Windows XP
The original Windows XP installation CD itself acts as a boot or startup disk that you can use and run Recovery Console (Command Prompt) to repair your computer with.
If you already have the installation CD, follow these steps to boot into Recovery Console and the Command Prompt of Windows XP:
- Insert the CD in the disk drive and restart your computer
- Press any key, when prompted to boot from the CD
- Press R to open Recovery Console, at the “Welcome to Setup” screen
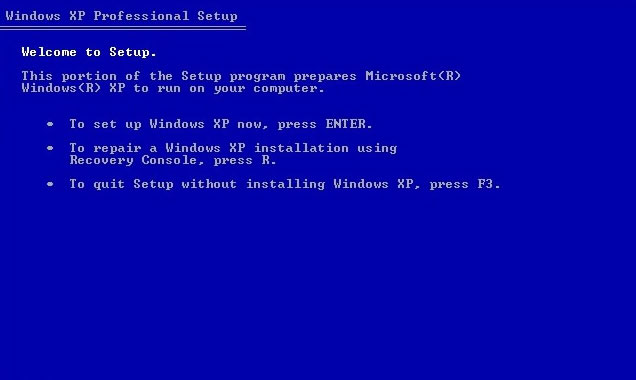
Windows XP Press R for Recovery Console
If you don’t have the CD, you can create a bootable diskette if your computer has a floppy disk drive to boot into MS-DOS. You need to be able to boot into Windows XP to create this diskette.
To create the boot diskette for Windows XP, follow these steps:
- Insert a diskette in your computer’s floppy disk drive
- Go to My Computer
- Right click on A:\ , this is usually the drive letter that holds the diskette
- Click Format
- Check the “Create an MS-DOS startup disk” option
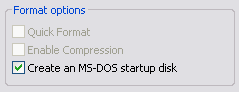
Create MS-DOS startup disk option
Once you have the diskette created, follow these instructions to use it when you need it:
- Make sure the disk is in write-protect mode
- Insert the disk in the floppy disk
- Restart your computer
- Follow the instructions on the screen as you boot the system from the diskette
You can also create a set of setup/boot disks that will allow you to bypass the need for a bootable CD-ROM (and then continue a reinstallation of Windows XP) by following these instructions:
- Download the setup program file for the Windows XP you have installed:
- Windows XP Home Edition with Service Pack 2
- Windows XP Professional with Service Pack 2
- Extract the files
- Type the drive where your floppy disks is – example: A: – and hit Enter when you receive this message:
- Insert the first blank disk in the floppy drive when you receive this message:
- Continue with the process until all 6 disks are created
- Boot from the first created diskette. Make sure you have the installation CD at hand to be used during a reinstallation process.
Create boot disk for Windows Vista
If you already have the Windows Vista installation disk, you can use it to recover or restore your computer.
If not, go to the Create the disk section instructions to learn how you can create the disk (read Prerequisites before).
If you don’t have the installation disk and can’t boot into Windows, go to Download boot disk and use Easy Recovery Essentials’ Automated Repair function to fix boot errors automatically.
To repair your computer, if you have the Windows Vista installation disk, follow these steps:
- Insert the disk
- Restart your computer
- Press any key to start Windows from the disk. If the “Press any key” message doesn’t appear, please check your BIOS settings as you need to boot from the DVD first.

If you don’t have the installation disk, but your computer has the recovery options preinstalled, you can follow these steps:
- Restart your computer. Remove all CDs, DVDs or USB flash drives from your computer first.
- Press and hold the F8 key as your computer boots up. You need to press this key before the Windows Vista logo appears on your screen.
- At the Advanced Boot Options screen, select Repair your computer.
If the “Repair your computer” option isn’t available, your computer doesn’t have any recovery options preinstalled. If so, go to Download boot disk.
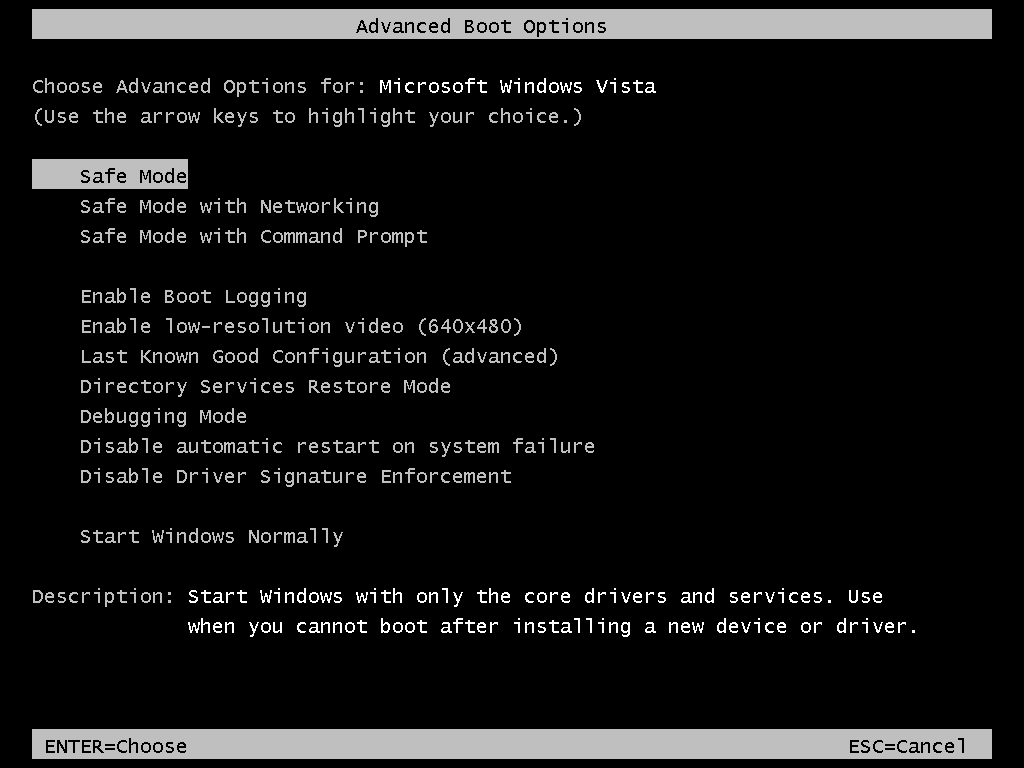
The Advanced Boot Options screen in Windows Vista
If you want to create a boot disk, follow the instructions from Prerequisites and then the Create the disk instructions.
Prerequisites
You must verify what version of Windows Vista you have before you create the boot or startup disk. If you have any Service Packs installed, you need the recdisc.exe file from the System32 folder to be from a Windows Vista system without any Service Packs (SP) installed.
To verify this, follow these steps:
- Go to Control Panel
- Click on System
- Go to the System type section
- Check if you run a “32-bit” Windows Vista or a “64-bit” Windows Vista
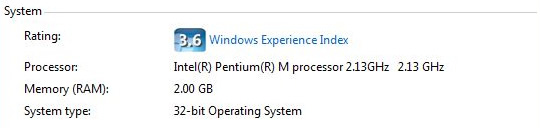
Windows Vista System Type
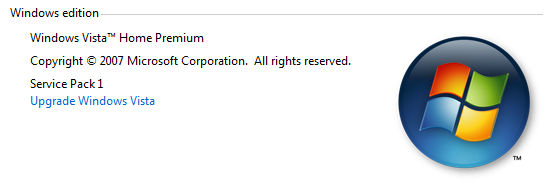
The Windows Vista – Windows Edition section
If you have the Windows Vista with Service Pack 1 (SP1) or Service Pack 2 (SP2) installed, you need to replace the recdisc.exe file.
Your Windows Vista has SP1 or SP2 installed only if it’s mentioned in the Windows edition section, above the “System type” section.
If you have a Service Pack installed, follow these steps to replace the recdisc.exe file before you continue with the Create the disk section steps:
- Copy an original recdisc.exe file from a Windows Vista without SP. This file will be replaced with your current recdisc.exe.
- Copy this file to your Desktop
- Right-click on the file > Properties
- Go to the General tab
- Click Unblock. If this option – Unblock – doesn’t exist in the General tab, skip this step.
- Click OK
- Go to C:\Windows\System32\ (from My Computer > C:\ > Windows > System32)
- Find the recdisc.exe file from this folder
- Make sure you have permissions to make modifications to this file. Right-click on this file > Properties
- To have a backup of your original recdisc.exe file, rename it to recdisc.exe.backup or similar
- Go to the copied recdisc.exe file and copy it (Right-click > Copy)
- Paste it in the System32 folder, to overwrite your current recdisc.exe file
- If you didn’t renamed the original file, confirm that you want to replace it (click Copy and Replace, when prompted)
Once these steps have been completed, move to Create the disk below to create the boot/startup disk for Windows Vista.
Creating a boot disk
Please read Prerequisites above before continuing with these instructions.
These steps allow you to create the boot or startup disk (a recovery media) for Windows Vista that you can use in emergency cases.
- At Start, type recdisc.exe in the search field
- When the search results appears, click on the top result item
- Insert a blank DVD in the disk tray. You can use CDs or DVDs for this
- Select the disk drive from the “Drive:” list
- Click Create disc. If after clicking Create disc, the system shows a message about the installation disk – Insert Windows installation disc – you need the original installation disk as your version of Windows Vista is missing the necessary files to continue with the process.
- Wait for the recdisc.exe utility software to finish the procedure
- Click Close, at the “Using the system repair disc” screen
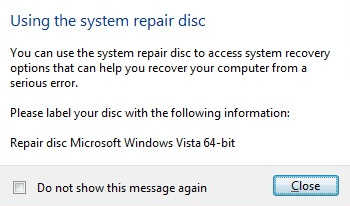
Windows Vista – Using the system repair disc
Create boot disk for Windows 7
If you already have the original installation DVD of Windows 7, you can use that DVD as the boot disk to repair your computer.
If you want to repair your computer and have the installation disk at hand, follow these steps to boot into the System Recovery Options of your computer:
- Insert the installation disk (DVD or USB flash drive)
- Restart your computer
- Press any key to boot from the disk, when prompted
- Choose your language preferences
- Click Next
- Click Repair your computer
If you don’t have the installation disk, but your system has the system recovery options pre-installed, follow these steps:
- Remove all CDs, DVDs and USB flash drives from your computer
- Restart the computer
- Press and hold the F8 key as your computer boots. You must press and hold the F8 key before the Windows 7 logo appears.
- Select Repair your computer, at the Advanced Boot Options screen
If the “Repair your computer” option isn’t listed, it means that your Windows 7 version doesn’t have the necessary files for this procedure. If so, go to Download boot disk.

Advanced Boot Options on Windows 7
You can create the boot disk for Windows 7 by following these steps:
- Boot into Windows 7 and login as an administrator or any user who has administrative rights to the system
- Insert a blank DVD in the disk tray
- At Start, type recdisc.exe in the Search field
- Click on the first result, the recdisc.exe item. It should usually be the first result item available.
- If the “Create a system repair disc” screen doesn’t show up, follow these steps instead:
- Go to Control Panel
- Go to Backup and Restore
- Click on Create a system repair disc

Windows 7 – Create a system repair disc item
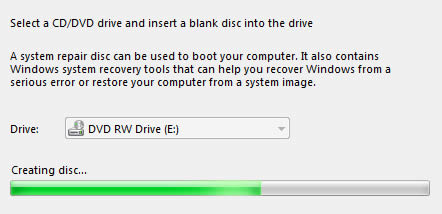
Windows 7 – Create disc progress bar
Create boot disk for Windows 8/8.1/10
In Windows 8 or 8.1, you can refresh, reset or restore your computer. These three actions have different outcomes:
- Refresh will not affect your files. Windows 8/8.1 will reinstall any applications you installed and create a copy of these applications on your desktop. Even so, backup your data before you do a refresh.
- Reset will remove all your personal files and delete any settings or configuration you did on your computer.
- Restore will restore your computer to an earlier point in time, if System Restore is available and enabled.By default, Windows 8/8.1 creates restore points whenever you install new applications or do Windows updates. If you haven’t disabled System Restore, restoring your computer via this utility should work.
If you want to create the boot disk, find the instructions below:
- If you have Windows 8, not 8.1, follow Create the disk as a CD/DVD
- If you have Windows 8.1, not 8.0, follow Create the disk as a USB drive. For Windows 8.1 you can only use USB drivers to create the disk.
Refresh
How to refresh the Windows 8 or 8.1 on your computer:
- Boot your computer
- Go to Settings
- Go to Change PC Settings
- Click Update and recovery
- Click Recovery
- Find the Refresh your PC without affecting your files section
The Refresh your PC option in Windows 8
Reset
How to reset Windows 8 or Windows 8.1:
- Boot your computer
- Go to Settings
- Go to Change PC Settings
- Click on Update and recovery
- Click on Recovery
- At the Remove everything and reinstall Windows section, click on the Get started button
The Remove everything option in Windows 8
Restore
For information on how to restore a Windows 8 or Windows 8.1 system, follow our instructions from the guide we did on Windows System Restore here.
Create the disk as a CD/DVD
If you have Windows 8, and not 8.1, you can use CDs or DVDs to create the boot disk (now commonly known as a recovery media):
- Boot into Windows 8 and log in with an administrator account
- Unplug any USB flash drives
- Insert a blank CD or DVD. It’s recommended that you use DVDs, and not CDs, as you will need lots of CDs in the process, if you choose the CD option
- Press the Windows and R key to open the Charm Bar. Or go to the Run utility.
- Type recdisc
- If the “Create a system repair” screen doesn’t appear, follow these steps instead:
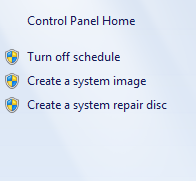
- Open Control Panel
- Go to Recovery
- Click on Create a recovery drive
- Click Next
- Click Create a system repair disc with a CD or DVD instead to create the disc as a CD or DVD and not as a USB flash drive, at the “Connect a USB flash drive” screen
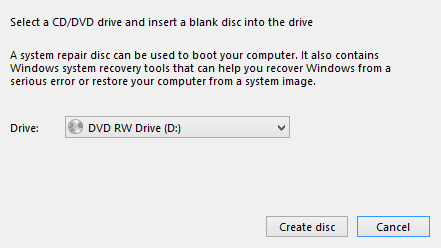
- Select the CD/DVD drive from the list
Windows 8 – Select CD for System Repair
Create a boot disk as a USB drive
These steps are for Windows 8.1 users which can only use USB flash drives to create the boot/startup disk. You need a USB drive with at least 256 MB in size, blank.
To create the disk, follow these steps:
- Boot into Windows 8.1
- Press the Windows + R key to open the Charm Bar
- Type RecoveryDrive.exe
- Select Create a recovery drive
- If the Recovery Drive utility doesn’t appear, follow these steps instead:
- Go to Control Panel
- Go to Recovery
- Click Create a recovery drive
- Click Next
- Click Next, at the Create a recovery drive screen
- Select the USB drive from the list
- Click Next
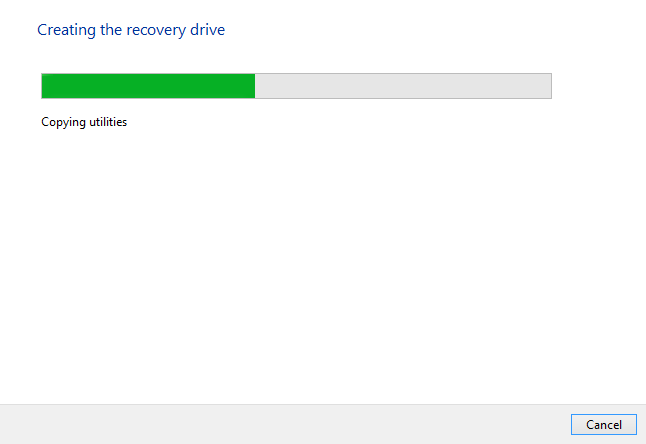
- Click Create
- Wait for the software to finish
Windows 8 – Create disc progress bar
More Information
Support Links
It’s an easy-to-use and automated diagnostics disk. It’s available for Windows 8, Windows 7 and Windows Vista. It’s also available for Windows XP and Windows Server.
Read more at Windows Recovery Disks.
- The NeoSmart Support Forums, member-to-member technical support and troubleshooting.
- Get a discounted price on replacement setup and installation discs: Windows XP, Windows Vista, Windows 7, Windows 8, Windows 10.
- Windows XP (all editions)
- Windows Vista (all editions)
- Windows 7 (all editions)
- Windows 8 (all editions)
- Windows 8.1 (all editions)
- Windows 10 (all editions)
Applicable Systems
This Windows-related knowledgebase article applies to the following operating systems: