SFML и Qt — пишем первое приложение
Приветствую всех начинающих разработчиков игр!
Сегодня мы продолжаем изучать все тонкости создания игр с использованием библиотеки SFML и Qt.
Чем мы займемся на сегодняшнем занятии?
Вы может подумаете что будем опять что-то собирать или компилировать, но нет сегодня мы будем писать наше первое приложение.
- Нам для этого потребуется подключить библиотеку SFML с Qt.
- Написать связывающий класс SFML и Qt.
- Написать тестовое приложение.
Перейдем от слов к делу. В прошлых уроках мы уже настроили Qt и собрали SFML из исходников специально для нашего компилятора MinGW.
Первое, что нам нужно сделать, это создать новый проект в Qt.
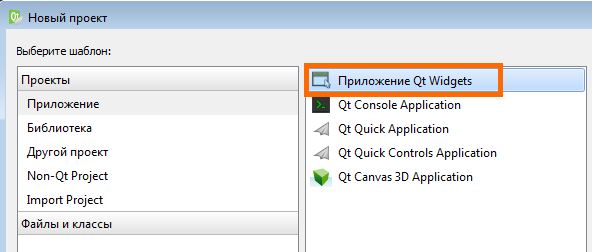
Создадим его выбрав в Qt Creator «Новый проект»

В открывшемся окне выбираем «Приложение Qt Widgets».
Назовем наше приложение»SFML-test».

Выбираем комплект с компилятором MinGW.

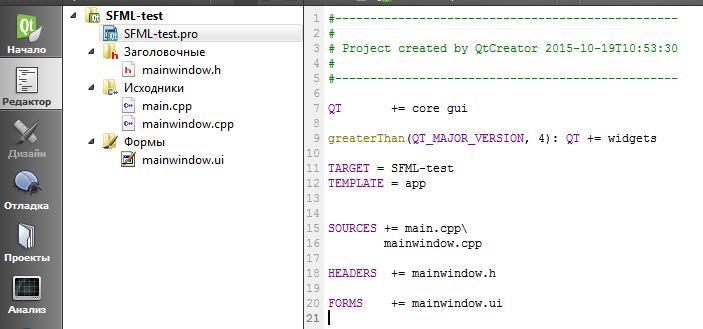
После завершения работы мастера открывается окно с проектом.
Проект SFML-test состоит из следующих каталогов:

- SFML-test (каталог проекта)
- Заголовочные (каталог заголовочных файлов)
- Исходники (каталог исходных файлов)
- Формы (каталог форм проекта)
Теперь нам нужно подключить библиотеку SFML к Qt.
Для этого открываем файл SFML-test.pro и вносим в него изменения.
Здесь нам нужно подключить библиотеку SFML. Для этого необходимо указать путь к файлам библиотеки Qt и SFML. Напишем следующий код:
LIBS+=-L»D:Program Files (x86)SFML232lib»
Теперь нужно указать используемые модули библиотеки SFML для «release» и «debug» конфигурации. Напишем следующий код:
CONFIG(release, debug|release): LIBS += -lsfml-audio -lsfml-graphics -lsfml-main -lsfml-network -lsfml-window -lsfml-system
CONFIG(debug, debug|release): LIBS += -lsfml-audio-d -lsfml-graphics-d -lsfml-main-d -lsfml-network-d -lsfml-window-d -lsfml-system-d
Следующее что нам нужно сделать это указать путь к каталогу с заголовочными файлами SFML библиотеки и зависимости необходимые при компиляции.
INCLUDEPATH+=D:Program Files (x86)SFML-2.3.2lib
DEPENDPATH+=D:Program Files (x86)SFML-2.3.2lib
Так должен выглядеть заполненный файл SFML-test.pro

Все библиотеки подключены! Перейдем к написанию нашего первого приложения.
Добавим два заголовочных и исходных файла с именами «qtsfmlcanvas.h, qtsfmlcanvas.cpp» и «mycanvas.h, mycanvas.h».
Напишем код для файла «qtsfmlcanvas.h». Код выглядит следующим образом.
#ifndef QTSFMLCANVAS
#define QTSFMLCANVAS
#include
#include
#include
class QTSFMLCanvas : public QWidget, public sf::RenderWindow
<
//Q_OBJECT
public:
explicit QTSFMLCanvas(QWidget *parent, const QPoint& Position, const QSize& Size, unsigned int FrameTime = 0);
virtual void showEvent(QShowEvent*);
virtual QPaintEngine* paintEngine() const;
virtual void paintEvent(QPaintEvent*);
virtual
QTSFMLCanvas();
virtual void OnInit();
virtual void OnUpdate();
private:
QTimer myTimer;
bool myInitialized;
>;
#endif // QTSFMLCANVAS
Напишем код для файла «qtsfmlcanvas.cpp». Код выглядит следующим образом.
#include «qtsfmlcanvas.h»
#ifdef Q_WS_X11
#include
#include
#endif
#include
QTSFMLCanvas::QTSFMLCanvas(QWidget* Parent, const QPoint& Position, const QSize& Size, unsigned int FrameTime) : QWidget(Parent), myInitialized (false)
<
// Setup some states to allow direct rendering into the widget
setAttribute(Qt::WA_PaintOnScreen);
setAttribute(Qt::WA_OpaquePaintEvent);
setAttribute(Qt::WA_NoSystemBackground);
// Set strong focus to enable keyboard events to be received
setFocusPolicy(Qt::StrongFocus);
// Setup the widget geometry
move(Position);
resize(Size);
// Setup the timer
myTimer.setInterval(FrameTime);
>
QTSFMLCanvas::
QTSFMLCanvas() <>
void QTSFMLCanvas::showEvent(QShowEvent*)
<
if (!myInitialized)
<
// Under X11, we need to flush the commands sent to the server to ensure that
// SFML will get an updated view of the windows
#ifdef Q_WS_X11
//XFlush(QX11Info::display());
#endif
// Create the SFML window with the widget handle
RenderWindow::create(reinterpret_cast ((void *) winId()));
// Let the derived class do its specific stuff
OnInit();
// Setup the timer to trigger a refresh at specified framerate
connect(&myTimer, SIGNAL(timeout()), this, SLOT(repaint()));
myTimer.start();
myInitialized = true;
>
>
QPaintEngine* QTSFMLCanvas::paintEngine() const
<
return 0;
>
void QTSFMLCanvas::paintEvent(QPaintEvent*)
<
// Let the derived class do its specific stuff
OnUpdate();
// Display on screen
RenderWindow::display();
>
void QTSFMLCanvas::OnInit() <>
void QTSFMLCanvas::OnUpdate() <>
Перейдем к написанию следующего связующего класса «mycanvas.cpp mycanvas.h».
Напишем код для файла «mycanvas.h».
#ifndef MYCANVAS
#define MYCANVAS
#include «qtsfmlcanvas.h»
#include
class MyCanvas : public QTSFMLCanvas
<
public :
MyCanvas(QWidget* Parent, const QPoint& Position, const QSize& Size);
void OnInit();
void OnUpdate();
private :
sf::Clock myClock;
sf::Texture myImage;
sf::Sprite mySprite;
>;
#endif // MYCANVAS
Напишем код для файла «mycanvas.cpp». Код выглядит следующим образом.
#include «mycanvas.h»
#include
#include
#include
MyCanvas::MyCanvas(QWidget* Parent, const QPoint& Position, const QSize& Size) : QTSFMLCanvas(Parent, Position, Size)
<
>
void MyCanvas::OnInit()
<
// Load the image
std::cout
Связующие классы и процедуры мы написали.
Теперь напишем код который будет рисовать SFML окно. Для этого перейдем в файл main.cpp и добавим немного кода. Курсивным шрифтом выделен добавленный фрагмент кода.
#include «mainwindow.h»
#include
#include
#include
int main(int argc, char *argv[])
< QApplication a(argc, argv);
MainWindow w;
QFrame* MainFrame = new QFrame;
MainFrame->setWindowTitle(«Qt SFML»);
MainFrame->resize(400, 400);
MainFrame->show();
MyCanvas* SFMLView = new MyCanvas(MainFrame, QPoint(20, 20), QSize(560, 460));
SFMLView->show();
w.show();
return a.exec();
>
Теперь собираем проект и запускаем его. Нам остается добавить в папку с релизом все библиотеки используемые при разработке, а также файл «sfml2.jpg»
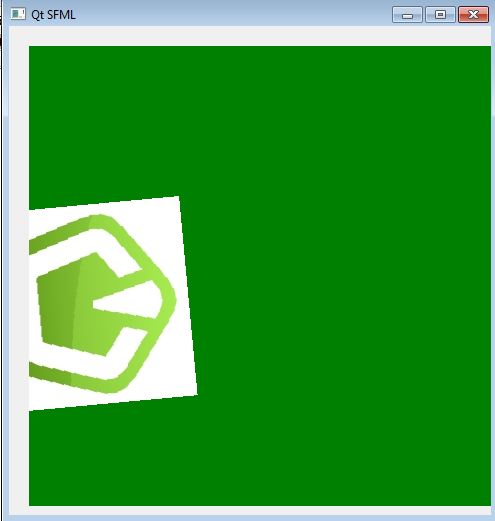
Наслаждаемся вращением картинки.
Надеюсь данная статья была полезной и интересной, если есть пожелания, предложения и просто хотите сказать спасибо, пишите в комментариях или на почту gearsofgame@mail.ru.
Видео версия урока будет готова к концу этой недели.
Урок 0. Вступление и создание простого приложения
Итак, всем привет, поискав в Интернете уроки по библиотеке SFML и не наткнувшись на что-то существенное решил написать собственный тутор. Заранее скажу, что я буду использовать, чтобы потом не создавать лишних вопросов:
• Операционную систему Windows 7.
• Кроссплатформенную IDE Qt Creator с установленным компилятором MinGW.
• Язык С++.
• Библиотеки SFML 2.1 для соответствующего компилятора.
Начну немного с теории. Что же представляет собой SFML? А оное – Simple and Fast Multimedia Library – свободная кроссплатформенная библиотека, которая является объектно-ориентированной заменой SDL. Написана она Лаурентом Гомилой (вероятно, француз, если смотреть на сайте).
Исходный код SFML распространяется свободно, и загрузить его можно все там же, на официальном сайте. Впрочем, это понадобится лишь тем, кто захочет собирать библиотеки конкретно под какую-то версию компилятора.
Я же представлю вариант работу с Qt Creator. Что же, начнем.
1. Сперва нужно загрузить библиотеки SFML. Пройдем на официальный сайт в раздел Download. Нажимаем на большую кнопку «SFML 2.1» и видим перед собой огромное количество кнопок загрузки. Нам понадобится версия GCC 4.7 MinGW (DW2) — 32 bits.

2. После загрузки разархивируем в любое свободное место. Важно: если вы будете делать это на рабочий стол, то ваше имя пользователя не должно содержать кириллицу.
3. Далее заходим в Qt, создаем пустой проект на С++. После создания у вас должна появиться вот такая структура файлов. В моем случае проект называется untitled.

4. Два раза кликаем по PRO-файлу. Видим настройки проекта. Именно сюда я буду все зависимости и библиотеки SFML.
Теперь прописываем вот эти строки:

Теперь, пожалуй, поясню. Первая строка LIBS отвечает за подключение тех самых библиотек SFML. После –L вы должны прописать свой путь к папке lib, которая находится в свою очередь в папке SFML.
Первая строка CONFIG описывает, какие библиотеки следует подключить в параметре выпуска приложения. Вторая, соответственно, описывает параметр отладки.
Ну и последние две команды направляют Qt к заголовкам SFML. Опять же, следует прописать ваш путь к папке include.
5. Все, наш проект настроен на работу с SFML. Можете собрать его.
6. Далее для корректной работы приложения нужно скинуть все DLL-библиотеки в папку с EXE-файлом.
7. Давайте добавим тестовый код и скомпилируем проект. Должно появиться черное окно с заголовком «Hello, SFML. ».

Вот и все. Каркас для создания следующих ваших приложений на SFML готов. Надеюсь, что для вас это осталось предельно простым. Удачи!
Данная статья не подлежит комментированию, поскольку её автор ещё не является полноправным участником сообщества. Вы сможете связаться с автором только после того, как он получит приглашение от кого-либо из участников сообщества. До этого момента его username будет скрыт псевдонимом.
Integrating to a Qt interface
Introduction
In this tutorial, we’ll see how we can integrate a SFML view into a Qt interface. The typical way of adding a new feature to a Qt interface is to write a custom widget ; that’s what we’ll do here.
Creating the SFML custom widget
To create a custom Qt widget, we need to inherit from the QWidget base class. And as we want our widget to be an SFML rendering window too, we’ll inherit from sf::RenderWindow .
Then, what will this class need to work ? First, it will need a standard constructor for defining the usual widget parameters : parent widget, position, size. We add a last parameter which is the duration of one frame (the inverse of the framerate) ; as Qt doesn’t provide an idle event (which would be called each time the event queue is empty), we’ll have to refresh the widget manually. The best way to do this is to launch a timer, and connect it to a function that refreshes the widget at the specified rate. The default value of 0 will make the timer trigger a refresh whenever there is no other event to process, which is exactly what an idle event would do.
Then, we need to override the show event : this is a good place to initialize our SFML window. We can’t do it in the constructor, because at this time the widget doesn’t have its final position and size yet.
We also override the paint event, to refresh the SFML view.
We’ll define two functions for the derived classes : OnInit() , which will be called as soon as the SFML view has been created, and OnUpdate() , which will be called before each refresh to let the derived class draw things into the widget.
Let’s now have a look at the implementation.
First, the constructor sets some attributes to allow direct rendering into the widget. WA_PaintOnScreen tells Qt that we will not use its painting functions, and paint directly into the widget. WA_NoSystemBackground and WA_OpaquePaintEvent prevent from drawing the widget’s background, which could cause some flickering.
We also set the Qt::StrongFocus policy, to enable keyboard events to be received by the widget.
Then, we set the widget’s position and size, and set the timer interval to the requested frame time.
In the showEvent function, which is called when the widget is shown, we create the SFML window. This is done simply by calling the Create function with the internal identifier of the window, which is given by the winId function. Under X11 (Unix), we first need to put a system call to flush the message queue, to make sure SFML will see the window.
Once the SFML window has been initialized, we can tell the derived class by calling the OnInit virtual function.
Finally, we connect the timer with the repaint function, which will refresh the widget and trigger a paint event. And of course, we start it.
We make the paintEvent function return a null paint engine. This functions works together with the WA_PaintOnScreen flag to tell Qt that we’re not using any of its built-in paint engines.
The paintEvent function is quite straight-forward : we notify the derived class that a refresh is about to be performed, and we call Display to update the widget with our rendered frame.
Using our Qt-SFML widget
The QSFMLCanvas we just wrote is not usable directly, it is meant to be derived. So, let’s create a derived widget that will do some nice drawing :
Nothing very complicated here : we override OnInit to load and initialize our resources, and OnUpdate to draw them.
We can now create a regular Qt window, and put an instance of our custom widget into it :
Conclusion
Integration of SFML into a Qt interface is easy with the custom widget we just wrote, feel free to use and improve it.
If you want to see how SFML integrates into a wxWidgets interface, you can go to the next tutorial.


