- ОС Mac OS X: подключение общих папок с помощью URL-адреса afp:// или команды mount_afp
- Дополнительная информация
- Информация для ОС Mac OS X версий 10.6–10.6.6
- Share Mac files with Windows users
- Set up file sharing on the Mac
- Provide the information Windows users need
- Share files with others who use your Mac
- Make a file available to all users of your Mac
- Use a drop box to share a file with another user of your Mac
- Use iCloud File Sharing to share folders and documents with other iCloud users
- Share folders or documents
- Accept an invitation and revise a document
- Change the sharing options of a folder or document
- Stop sharing a folder or document
- Share folders mac os
ОС Mac OS X: подключение общих папок с помощью URL-адреса afp:// или команды mount_afp
Подключить общий том на сервере AFP можно с помощью URL-адреса типа afp://myserver.mydomain.com/Sharepoint/Folder или команды mount_afp в программе «Терминал».
Если в программе Mail.app или браузере Safari выбрать URL-адрес типа afp://myserver.mydomain.com/Sharepoint/Folder, программа Finder подключит том с именем Sharepoint на сервере AFP myserver.mydomain.com, после чего откроется окно с содержимым каталога Folder. Если перетянуть текст URL-адреса на рабочий стол, создается AFP-ссылка. Чтобы открыть эту папку, дважды щелкните ссылку.
Чтобы подключить общую папку на сервере AFP, используйте команду mount_afp в окне программы «Терминал» или shell-скрипте. Для получения дополнительной информации введите следующую команду в окне программы «Терминал»:
Дополнительная информация
Информация для ОС Mac OS X версий 10.6–10.6.6
Путь для подключения общей папки в ОС Mac OS X версий 10.6–10.6.6 отличается от используемого в других версиях Mac OS X.
URL-адрес, ведущий к файлу на сервере, (например, afp://myserver.mydomain.com/Sharepoint/Folder/File.txt) не сработает. Эта проблема решена в ОС Mac OS X 10.6.7 и более поздних версий.
Если URL-адрес или команда mount_afp в ОС Mac OS X версий 10.6–10.6.6 указывает на папку в точке подключения, такая папка подключается. В ОС Mac OS X версий 10.0–10.5 и Mac OS X 10.6.7 или более поздних (, в том числе ОС OS X Lion), устанавливается соединение с точкой подключения.
Пример: afp://myserver.mydomain.com/Sharepoint/Folder.
При открытии этой ссылки в ОС Mac OS X версий 10.0–10.5, 10.6.7 и более поздних программа Finder подключает том Sharepoint. Локальный путь к общей папке будет /Volumes/Sharepoint/Folder/.
При открытии этой ссылки в ОС Mac OS X версий 10.6–10.6.6 программа Finder подключает подкаталог Folder. Локальный путь к общей папке будет /Volumes/Folder/.
В ОС Mac OS X 10.5, 10.6.7 или более поздних версий с помощью этой команды подключается том Sharepoint в /Volumes/mntpnt. Локальный путь к общей папке будет /Volumes/mntpnt/Folder/.
В ОС Mac OS X версий 10.6–10.6.6 с помощью этой команды подключается подкаталог Folder в /Volumes/mntpnt. Локальный путь к общей папке будет /Volumes/mntpnt/.
Источник
Share Mac files with Windows users
To let users connect to your Mac from a Windows computer, turn on file sharing and enable SMB sharing.
Set up file sharing on the Mac
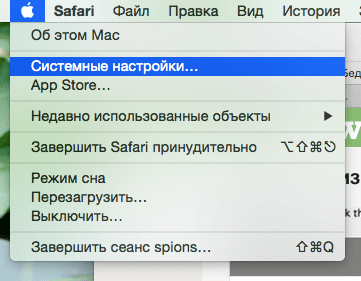
On your Mac, choose Apple menu

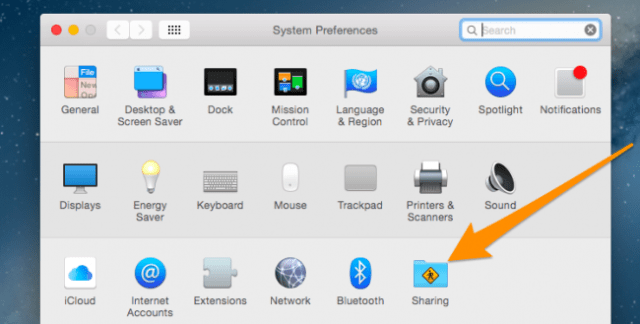
> System Preferences, then click Sharing.
Select the File Sharing tickbox, then click Options.
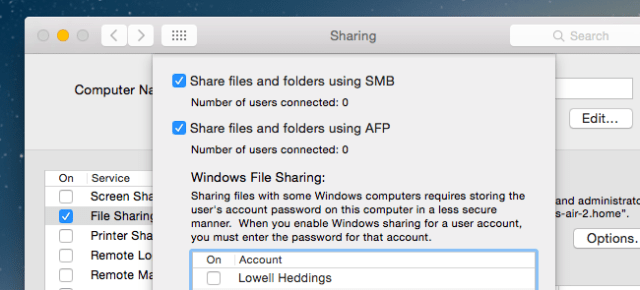
Select “Share files and folders using SMB”.
In the Windows File Sharing list, select the tickbox next to the user account that will be used to share files with Windows users, enter the password for that user, then click OK.
Choose View > Network, select your active connection, then click Advanced.
Click the WINS tab, then enter the workgroup name used by the Windows computer.
If you don’t know the workgroup name, on the Windows computer open Control Panel > System and Security > System. (Windows computers normally use either WORKGROUP or MSHOME.)
Click OK, then click Apply.
Provide the information Windows users need
To connect to your Mac, Windows users need the network address for your Mac, and a username and password to use to log in to your Mac.
To find your Mac computer’s network address, choose Apple menu
> System Preferences, click Sharing, then select File Sharing. The address appears below the “File Sharing: On” indicator, and looks similar to this example: smb://17.212.167.33/.
Create an account on your Mac for each Windows user. To create accounts, choose Apple menu > System Preferences, then click Users & Groups.
If you want to use an account that existed before you installed the latest version of macOS, you may need to reset the password for the account in Users & Groups preferences.
Because the passwords of user accounts used for Windows sharing may be stored in a less secure manner, turn off the account when it’s not being used. Before you turn off Windows sharing, turn off all the accounts you enabled. Otherwise, the passwords are still stored less securely.
Источник
Share files with others who use your Mac
People who use the same Mac with different user accounts can share files with one another using the computer’s Shared folder or using their individual Public and Drop Box folders.
The computer’s Shared folder is located in Macintosh HD/Users. Your Public folder is located inside your home folder, and your Drop Box folder is located inside your Public folder.
Make a file available to all users of your Mac
You can use either the computer’s Shared folder or your Public folder to make an item available to other users.
On your Mac, do any of the following:
Put a file in your Public folder: Click the desktop to make sure you’re in the Finder, choose Go > Home, then drag the file (or a copy of it) into your Public folder.
Put a file in the computer’s Shared folder: Click the desktop to make sure you’re in the Finder, choose Go > Go to Folder, type in /Users/Shared, click Go, then drag the file (or a copy of it) into the Shared folder.
Files in a user’s Public folder or in the Shared folder can be read by all users of the Mac, but edited or deleted by only the owner of the file. If you want to allow other users to edit those files, you need to change the file permissions. See Change permissions for files, folders or disks on Mac.
Use a drop box to share a file with another user of your Mac
You can use drop boxes to share files with individual users.
In the Finder  on your Mac, choose Go > Go to Folder.
Enter /Users/[username]/Public, then click Go.
Drag the item (or a copy of it) into the Drop Box folder.
Even though you can put items in another user’s Drop Box, you can’t open any Drop Box except your own.
Источник
Use iCloud File Sharing to share folders and documents with other iCloud users
With iCloud File Sharing, you can share folders and documents in iCloud Drive with other iCloud users. You and the people you invite can view and even work on your documents. The people who receive your invitation can click a link to download the shared folder or file from iCloud to any of their devices. Everyone views the same shared items. If you allow others to make edits, they can change the files and you see the updates the next time you open the files on your Mac.
Note: To use iCloud Drive folder sharing, your computer or device must have macOS version 10.15.4 or later, iOS version 13.4 or later, or iCloud for Windows version 11.1 or later.
For information about iCloud Drive and setting it up on your Mac, see Use iCloud Drive to store documents.
Share folders or documents
To share a folder or document, do one of the following on your Mac:
In the Finder , select iCloud Drive, select a folder or document, click the Share button  , then choose Share Folder or Share File.
Tip: If the item is on the desktop, Control-click it, choose Share from the shortcut menu, then choose Share Folder or Share File.
In an app that supports iCloud File Sharing, open a document, click the Share button , then choose Share File.
Select the app you want to use to send the invitation.
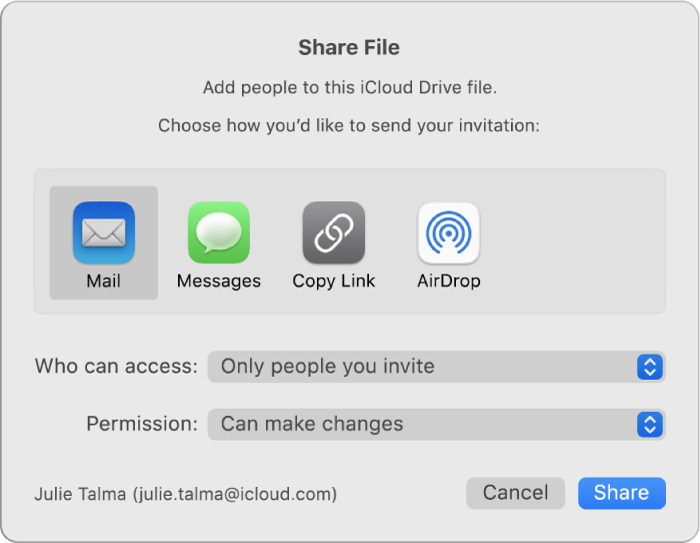
You can use Mail, Messages, Copy Link and AirDrop to send an invitation.
Click the “Who can access” pop-up menu, then do one of the following:
Choose “Only people you invite” to allow only invitees to access the folder or document.
Choose “Anyone with the link” to allow anyone who receives the link to access the folder or document. For example, your invitees can share the link and give access to others not included in the original invitation.
Click the Permission pop-up menu, then do one of the following:
Choose “Can make changes” to allow others to revise the items in the folder.
Choose “View only” to allow read-only access.
Click Share, then add the email addresses of the people you want to share with.
When the invitees receive your invitation, they can download the shared folder or file from iCloud to any of their devices. If you allow it, they can make changes to a document and you see the updates the next time you open the file on your Mac.
When you share a folder with only invited people, only they can access the files in the shared folder. To add more participants, you must change the settings of the shared folder; you can’t change the settings of an individual file within the folder.
Accept an invitation and revise a document
When you download a folder or document that you’ve been invited to share, the shared folder or file is available in the following locations:
In iCloud Drive on your Mac
The Files app (iOS 11, iPadOS or later) or iCloud Drive (iOS 10 or earlier) on your device
On a PC with iCloud for Windows
If you have permission to revise a document, you can open it with any compatible app, then make changes.
In the invitation, click the link to the shared folder or document.
If necessary, sign in with your Apple ID and password.
Open the document in an app on your Mac, make your changes, then save it.
You can also open the document later with any compatible app and make changes. Anyone sharing the document sees the latest changes to the file the next time they open it.
Change the sharing options of a folder or document
You can change the sharing settings for a folder or document you share at any time.
Note: You can’t change the sharing settings for an individual document in a shared folder. You must change the settings of the folder.
On your Mac, select the folder or document in iCloud Drive or open it in an app that supports iCloud File Sharing.
Click the Share button , then choose Manage Shared File or Manage Shared Folder.
Do any of the following:
Share a document with more people: Click the Add People button, then add an email address for each new invitee.
Copy a link to the shared file to send to another person: Click Copy Link. You can now paste the link into an email or other app.
Change who can access the file to download: Choose “Only people you invite” from the “Who can access” pop-up menu to only allow invitees to access the document, or choose “Anyone with the link” to allow anyone who receives the link to access the document.
Change whether the shared document can be changed or only viewed: Choose “Can make changes” from the Permissions pop-up menu to allow others to revise the document, or choose “View only” to allow read-only access.
Change the sharing settings for a specific person: Position the pointer over a person’s name, click  , then choose the settings you want.
Stop sharing a file with a specific person: Position the pointer over the person’s name, click , then choose Remove Access.
Stop sharing a folder or document
You can stop sharing folders or files with people you invited.
On your Mac, select the folder or document in iCloud Drive or open a document in an app that supports iCloud File Sharing.
Click the Share button , then choose Manage Shared Folder or Manage Shared File.
Do any of the following:
Stop sharing with everyone: Click Stop Sharing.
Stop sharing with a specific person: Hold the pointer over the person’s name, click , then choose Remove Access.
You can also simply move or delete the folder or document from iCloud Drive to stop others from having access to it.
If you stop sharing or delete a shared folder, the files in the folder are no longer accessible to the participants.
To stop sharing a file in a shared folder without changing the folder settings, you can move the file out of the shared folder.
Источник
Share folders mac os
В Mac OS, как и в Windows, есть возможность создания сетевой папки (диска), а также способ расшарить папку Mac для Windows. Ниже будут рассмотрим подробнее, как создать сетевую папку в мак OS? .
Если не удалось обнаружить необходимый диск в общедоступных ресурсах, действуем так.
Запускаем Finder.
Нажимаем хоткеи Command+K.
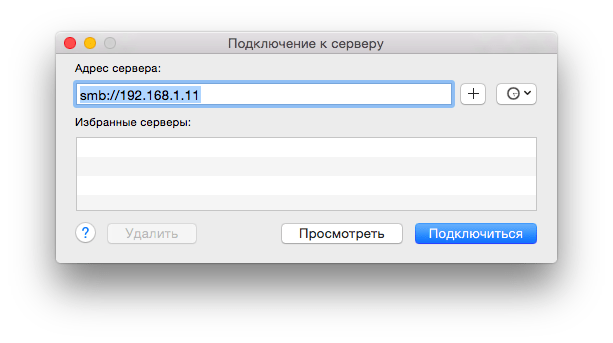
Должно будет появится окошко «Подключение к серверу«, если да, то необходимо набрать полный путь к сетевому диску, куда собираетесь подключиться. Если вы понимаете, о чем вообще в данной статье идет речь, то должны уже знать этот путь (иначе проконсультируйтесь с владельцем сервера). Формат должен быть таким: протокол//имя компьютера (или ip).
Жмем Подключиться. Иногда еще требуется ввести пароль.
Минутку, но это не все. Дальше нам надо, чтобы такой диск был сразу доступен при каждой загрузке, это делается в Объектах входа, а там в настройках системы.
Далее переходим в Пользователи/группы, объекты входа, выбираем нужный диск и добавляем.
Вот теперь с этим закончили. Далее рассмотрим вопрос расшаривания сетевой папки OS X для оси Windows.
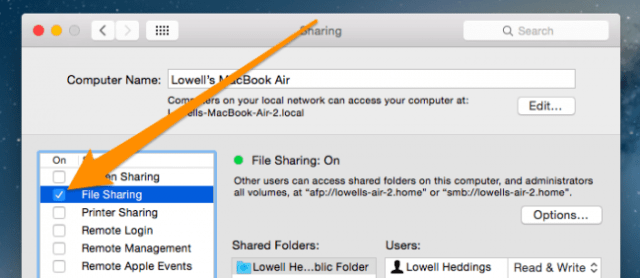
Переходим в те же настройки системы и выбираем, как ни странно, Sharing.
Там ставим галочку на шаринге файлов.
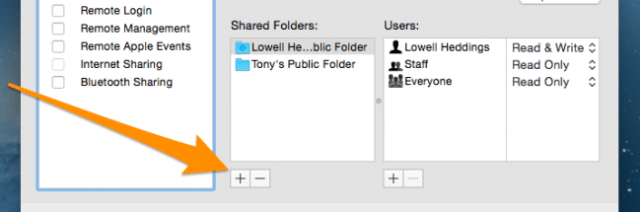
Нажимаем плюсик под колоночкой Shared Folders.
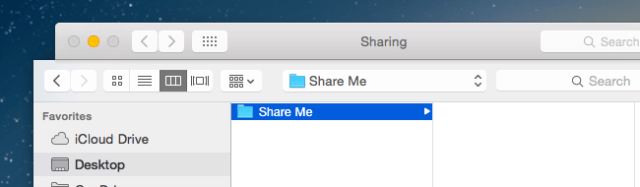
Выбираем папку, которую желаем сделать общей — в нашей ситуации Share Me.
И, наконец, чтобы эту папку могли видеть пользователи Windows, ставится галочка на опции «Share files and folder using SMB«.
Любая другая папка обрабатывается так же. Успехов!
Источник


