- Use Shell Launcher to create a Windows 10 kiosk
- Differences between Shell Launcher v1 and Shell Launcher v2
- Requirements
- Enable Shell Launcher feature
- Configure a custom shell in MDM
- XML for Shell Launcher configuration
- Custom OMA-URI setting
- Configure a custom shell using PowerShell
- default action, custom action, exit code
- Windows Shell — список команд. Classic Shell для Windows 10
- Графический интерфейс оболочки и Classic Shell
- Как работать с утилитой?
- Текстовый интерфейс и командная строка
- Начало работы и список важных команд CMD
- Assoc
- Cipher
- Shutdown
- System File Checker
- DriverQuery
- Shell Launcher
- Requirements
- Terminology
- Turn on Shell Launcher
- Enable Shell Launcher using Control Panel
- Enable Shell Launcher by calling WESL_UserSetting
- Enable Shell Launcher using DISM
- Enable Shell Launcher using Windows Configuration Designer
- Configure Shell Launcher
- Launch different shells for different user accounts
- Perform an action when the shell exits
- Default return code action
- Map the exit code to a Shell Launcher action
- Set your custom shell
- Shell Launcher user rights
Use Shell Launcher to create a Windows 10 kiosk
Applies to
Using Shell Launcher, you can configure a device that runs an application as the user interface, replacing the default shell (explorer.exe). In Shell Launcher v1, available in Windows 10, you can only specify a Windows desktop application as the replacement shell. In Shell Launcher v2, available in Windows 10, version 1809 and above, you can also specify a UWP app as the replacement shell. To use Shell Launcher v2 in version 1809, you need to install the KB4551853 update.
Shell Launcher controls which application the user sees as the shell after sign-in. It does not prevent the user from accessing other desktop applications and system components.
Methods of controlling access to other desktop applications and system components can be used in addition to using the Shell Launcher. These methods include, but are not limited to:
- Group Policy — example: Prevent access to registry editing tools
- AppLocker — Application control policies
- Mobile Device Management — Enterprise management of device security policies
You can apply a custom shell through Shell Launcher by using PowerShell. In Windows 10, version 1803 and later, you can also use mobile device management (MDM) to apply a custom shell through Shell Launcher.
Differences between Shell Launcher v1 and Shell Launcher v2
Shell Launcher v1 replaces explorer.exe , the default shell, with eshell.exe which can launch a Windows desktop application.
Shell Launcher v2 replaces explorer.exe with customshellhost.exe . This new executable file can launch a Windows desktop application or a UWP app.
In addition to allowing you to use a UWP app for your replacement shell, Shell Launcher v2 offers additional enhancements:
- You can use a custom Windows desktop application that can then launch UWP apps, such as Settings and Touch Keyboard.
- From a custom UWP shell, you can launch secondary views and run on multiple monitors.
- The custom shell app runs in full screen, and can run other apps in full screen on user’s demand.
For sample XML configurations for the different app combinations, see Samples for Shell Launcher v2.
Requirements
Windows 10 doesn’t support setting a custom shell prior to OOBE. If you do, you won’t be able to deploy the resulting image.
Shell Launcher doesn’t support a custom shell with an application that launches a different process and exits. For example, you cannot specify write.exe in Shell Launcher. Shell Launcher launches a custom shell and monitors the process to identify when the custom shell exits. Write.exe creates a 32-bit wordpad.exe process and exits. Because Shell Launcher is not aware of the newly created wordpad.exe process, Shell Launcher will take action based on the exit code of Write.exe, such as restarting the custom shell.
A domain, Azure Active Directory, or local user account.
A Windows application that is installed for that account. The app can be your own company application or a common app like Internet Explorer.
Enable Shell Launcher feature
To set a custom shell, you first turn on the Shell Launcher feature, and then you can set your custom shell as the default using PowerShell or MDM.
To turn on Shell Launcher in Windows features
Go to Control Panel > Programs and features > Turn Windows features on or off.
Expand Device Lockdown.
Select Shell Launcher and OK.
Alternatively, you can turn on Shell Launcher using Windows Configuration Designer in a provisioning package, using SMISettings > ShellLauncher , or you can use the Deployment Image Servicing and Management (DISM.exe) tool.
To turn on Shell Launcher using DISM
Open a command prompt as an administrator.
Enter the following command.
Configure a custom shell in MDM
You can use XML and a custom OMA-URI setting to configure Shell Launcher in MDM.
XML for Shell Launcher configuration
The following XML sample works for Shell Launcher v1:
For Shell Launcher v2, you can use UWP app type for Shell by specifying the v2 namespace, and use v2:AppType to specify the type, as shown in the following example. If v2:AppType is not specified, it implies the shell is Win32 app.
In the XML for Shell Launcher v2, note the AllAppsFullScreen attribute. When set to True, Shell Launcher will run every app in full screen, or maximized for desktop apps. When this attribute is set to False or not set, only the custom shell app runs in full screen; other apps launched by the user will run in windowed mode.
Custom OMA-URI setting
In your MDM service, you can create a custom OMA-URI setting to configure Shell Launcher v1 or v2. (The XML that you use for your setting will determine whether you apply Shell Launcher v1 or v2.)
The OMA-URI path is ./Device/Vendor/MSFT/AssignedAccess/ShellLauncher .
For the value, you can select data type String and paste the desired configuration file content into the value box. If you wish to upload the xml instead of pasting the content, choose data type String (XML file) .

After you configure the profile containing the custom Shell Launcher setting, select All Devices or selected groups of devices to apply the profile to. Don’t assign the profile to users or user groups.
Configure a custom shell using PowerShell
For Shell Launcher v1, modify the following PowerShell script as appropriate. The comments in the sample script explain the purpose of each section and tell you where you will want to change the script for your purposes. Save your script with the extension .ps1, open Windows PowerShell as administrator, and run the script on the kiosk device.
default action, custom action, exit code
Shell launcher defines 4 actions to handle app exits, you can customize shell launcher and use these actions based on different exit code.
| Value | Description |
|---|---|
| 0 | Restart the shell |
| 1 | Restart the device |
| 2 | Shut down the device |
| 3 | Do nothing |
These action can be used as default action, or can be mapped to a specific exit code. Refer to Shell Launcher to see how these codes with Shell Launcher WMI.
Windows Shell — список команд. Classic Shell для Windows 10
Windows Shell – это внешний слой ядра операционной системы. С ее помощью пользователь получает доступ к службам, файлам и вычислительным возможностям компьютера. Через оболочку Windows запускаются и останавливаются приложения, проводится мониторинг и пакетная обработка. Как управлять Shell, где и какие для этого вводить команды, читайте дальше.

Графический интерфейс оболочки и Classic Shell
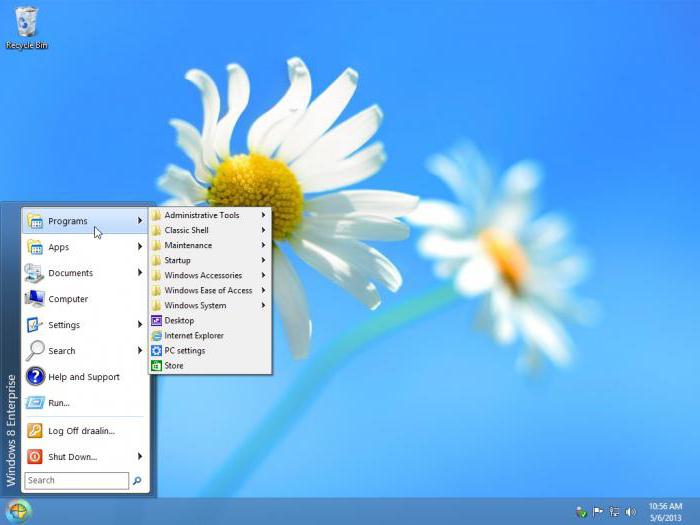
Оболочка операционной системы состоит из набора программ, обеспечивающих пользовательский интерфейс. К элементам операционной оболочки Shell относится меню «Пуск», панель задач, рабочий стол, различные функции для управления файлами и Flip 3D.
Оболочка является своеобразным мостом между операционной системой и пользователем. Windows Shell интерпретирует все команды в графический (GUI) или текстовый (TUI) вид. Основа GUI – это Проводник Windows. После загрузки приложение реализует пиктограммы, окна, панель инструментов и другие видимые элементы, обеспечивающие доступ к файлам ОС.
Начиная с Windows 8.0, компания «Майкрософт» начала менять графический интерфейс оболочки и далеко не в лучшую сторону. Гнев пользователей, а, возможно, и здравый смысл, заставил разработчиков создать Classic Shell для Windows 10.
Это программа настройки внешнего вида панели инструментов, меню «Пуск» и добавления новых функций «Проводнику». С ее помощью оболочка ОС настраивается до привычного, классического интерфейса Windows 7.
Как работать с утилитой?
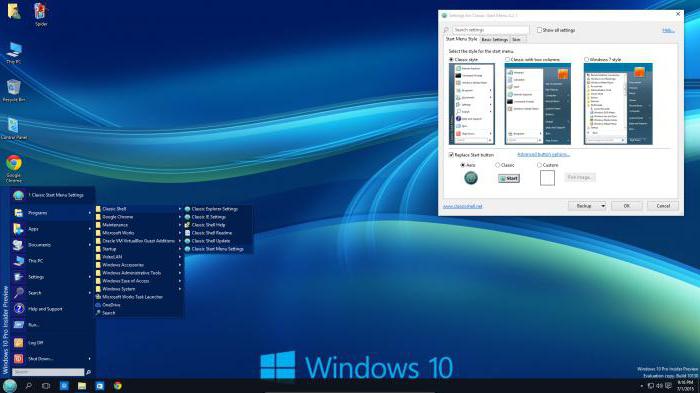
Перед началом работы программу нужно скачать. Дистрибутив находится в открытом доступе на официальном сайте разработчика. Совместим Classic Shell с Windows 10, 8, 7 и включает три компонента:
- Проводник Classic Explorer. Добавляет панель инструментов и строку состояния в File Explorer.
- Classic Start Menu. Добавляет кнопку «Пуск» и традиционное меню.
- Classic IE9. Добавляет панель заголовка и строку состояния для Internet Explorer.
После завершения установки Classic Shell, откроется окно с предложением настроить оформление, стили меню «Пуск» и добавить горячие клавиши. Можно выбрать, какие именно элементы будут отображаться в меню, включить новые функции и даже изменить внешний вид самой кнопки на любимое изображение в формате .bmp и .png.
Текстовый интерфейс и командная строка
Текстовый пользовательский интерфейс кардинально отличается от графического. Работать с ним гораздо сложнее. Вся информация представлена в виде специальных символов, букв и цифр, а не простых и понятных окон. Но TUI гораздо менее требователен к ресурсам компьютера, а программы с текстовым интерфейсом запускаются быстрее и работают на маломощном оборудовании.
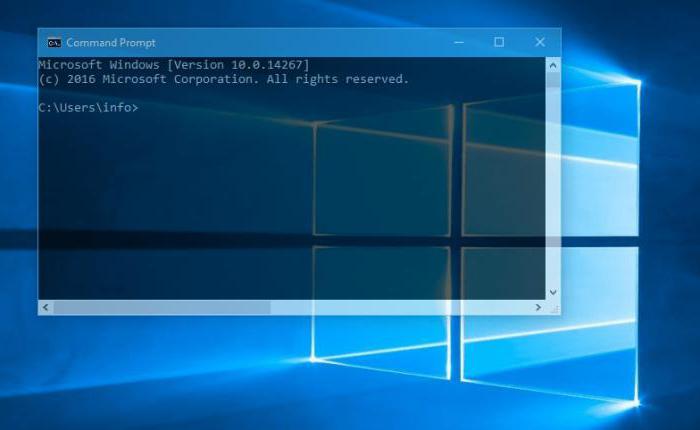
Часть операционной оболочки Windows Shell, обеспечивающая управление компьютером через интерактивный ввод команд, называется командным интерпретатором. Для операционной системы Windows существует два вида интерпретаторов. Первый – это cmd.exe, или командная строка, второй – PowerShell.
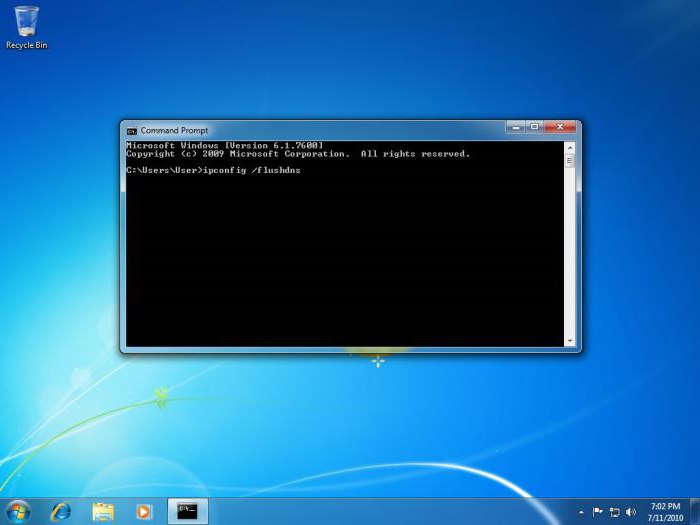
По внешнему виду командная строка во многом повторяет MS-DOS. Управление полностью осуществляется посредством набора и ввода буквенно-цифровых инструкций. Именно по этой причине командная строка считается прерогативой исключительно программистов и системных администраторов. Новички считают ее чем-то загадочным и непостижимым.
Но командная строка обеспечивает быстрое выполнение компьютерных задач, моментальный поиск и запуск программ. Когда происходит заражение системы вирусом, графический интерфейс полностью блокируется или «зависает». В такой ситуации доступ к файлам возможен только через командный интерпретатор.
Начало работы и список важных команд CMD
Попасть в командную строку можно несколькими способами. Все зависит от версии установленной операционной системы. Чтобы начать работу с Command Shell в Windows XP, необходимо в меню «Пуск» найти «Выполнить» и ввести cmd.exe. В более поздних версиях достаточно нажать Win + R.
Общее количество команд для cmd около 280, в зависимости от версии число меняется. Чтобы увидеть весь список, нужно зайти в консоль, ввести help и нажать «Ввод». Запоминать их обычному пользователю нет никакого смысла. Предлагаем познакомиться с самыми необходимыми командами, которые пригодятся в повсеместной работе.
Assoc
Для каждого типа файла есть отдельная открывающая программа. Например, для PDF-формата предназначена Foxit, пакет «Майкрософт Офис» для .doc. Чтобы выбрать нужный софт, необходимо знать расширение. Но их настолько много, что есть риск забыть или перепутать .txt с .css или .docs. Команда Assoc помогает справиться с этой задачей и выводит список сопоставлений типов файлов.
Cipher
Команда предназначена для работы с зашифрованными папками и файлами на дисках NTFS. Обычно с ними работают в графическом интерфейсе Windows Shell, но в таком режиме полное удаление файлов невозможно. Остается резервная копия, занимающая лишнее место.
Окончательно стереть все данные и очистить пространство на неиспользуемых частях NTFS-томов можно через Cipher. Для этого в командной строке Windows Shell нужно ввести cipher /W:путь. Параметр /W удаляет по указанному пути все файлы без возможности их восстановления.
Shutdown
В ОС Windows 8 и выше есть функция перезапуска с особыми вариантами загрузки. В Shell Windows 7 эта опция отсутствует. Вместо нее используется команда Shutdown:
- shutdown –s завершает работу;
- shutdown –r выполняет перезагрузку;
- shutdown –t 30 выключит компьютер через заданное цифрой в конце время, в данном случае через полчаса;
- shutdown –f означает принудительное завершение сеанса работы с выключением всех запущенных приложений.
Действия команды зависит от указанного в конце параметра. S означает stop, r расшифровывается как reload, t – это time.
System File Checker
Команда SFC предназначена для проверки файловой системы ОС. Она находит поврежденные «битые» файлы и производит их замену без непосредственного участия пользователя. Это незаменимый инструмент для восстановления системы и лучшее противоядие от BSOD – «экрана смерти».
- sfc /scannow – незамедлительно выполняет проверку с автоматической заменой файлов;
- /scanonce – проверка будет запущена при следующем перезапуске;
- /scanboot – автоматическая проверка при каждом перезапуске, для ее отмены в командной строке Windows Shell вводится sfc Revert;
- /verifyonly – проверка без исправлений;
Запускать программу можно только на правах администратора. Для этого перед началом работы нужно зайти в «учетные записи пользователей» и убрать галочку с «отключить права администратора».
DriverQuery
Последняя утилита, с которой должен уметь работать каждый сознательный пользователь, – это DriverQuery. Она генерирует список драйверов. Если в конце добавить параметр v, программа покажет всю дополнительную информацию. С помощью DriverQuery можно находить отсутствующие или требующие переустановки драйвера. Есть возможность мониторинга удаленных драйверов через ввод соответствующего IP-адреса.
Shell Launcher
You can use Shell Launcher to replace the default Windows 10 shell with a custom shell. You can use almost any application or executable as your custom shell, such as a command window or a custom dedicated application.
You can also configure Shell Launcher to launch different shell applications for different users or user groups.
There are a few exceptions to the applications and executables you can use as a custom shell:
- You cannot use the following executable as a custom shell: C:\\Windows\\System32\\Eshell.exe . Using Eshell.exe as the default shell will result in a blank screen after user signs in.
- You cannot use a Universal Windows app as a custom shell.
- You cannot use a custom shell to launch Universal Windows apps, for example, the Settings app.
- You cannot use an application that launches a different process and exits as a custom shell. For example, you cannot specify write.exe in Shell Launcher. Shell Launcher launches a custom shell and monitors the process to identify when the custom shell exits. Write.exe creates a 32-bit wordpad.exe process and exits. Because Shell Launcher is not aware of the newly created wordpad.exe process, Shell Launcher will take action based on the exit code of Write.exe, and restart the custom shell.
- You cannot prevent the system from shutting down. For Shell Launcher V1 and V2, you cannot block the session ending by returning FALSE upon receiving the WM_QUERYENDSESSION message in a graphical application or returning FALSE in the handler routine that is added through the SetConsoleCtrlHandler function in a console application.
You cannot configure both Shell Launcher and assigned access on the same system.
Use Shell Launcher V2, you can specify a Universal Windows app as a custom shell. Check Use Shell Launcher to create a Windows 10 kiosk for the differences between Shell Launcher v1 and Shell Launcher V2.
Shell Launcher processes the Run and RunOnce registry keys before starting the custom shell, so your custom shell doesn’t need to handle the automatic startup of other applications and services.
Shell Launcher also handles the behavior of the system when your custom shell exits. You can configure the shell exit behavior if the default behavior does not meet your needs.
Requirements
Windows 10 Enterprise or Windows 10 Education.
Terminology
- Turn on, enable: To make the setting available to the device and optionally apply the settings to the device.
- Configure: To customize the setting or sub-settings.
- Embedded Shell Launcher: This feature is called Embedded Shell Launcher in Windows 10, version 1511.
- Custom Shell Launcher: This feature is called Shell Launcher in Windows 10, version 1607 and later.
Turn on Shell Launcher
Shell Launcher is an optional component and is not turned on by default in Windows 10. It must be turned on prior to configuring. You can turn on and configure Shell Launcher in a customized Windows 10 image (.wim) if Microsoft Windows has not been installed. If Windows has already been installed and you are applying a provisioning package to configure Shell Launcher, you must first turn on Shell Launcher in order for a provisioning package to successfully apply.
Enable Shell Launcher using Control Panel
- In the Search the web and Windows field, type Programs and Features and either press Enter or tap or click Programs and Features to open it.
- In the Programs and Features window, click Turn Windows features on or off.
- In the Windows Features window, expand the Device Lockdown node, select or clear the checkbox for Shell Launcher, and then click OK.
- The Windows Features window indicates that Windows is searching for required files and displays a progress bar. Once found, the window indicates that Windows is applying the changes. When completed, the window indicates the requested changes are completed.
- Click Close to close the Windows Features window.
Turning on Shell Launcher does not require a device restart.
Enable Shell Launcher by calling WESL_UserSetting
- Enable or disable Shell Launcher by calling the WESL_UserSetting.SetEnabled function in the Windows Management Instrumentation (WMI) class WESL_UserSetting.
- If you enable or disable Shell Launcher using WESL_UserSetting, the changes do not affect any sessions that are currently signed in; you must sign out and sign back in.
This example uses a Windows image called install.wim, but you can use the same procedure to apply a provisioning package (for more information on DISM, see What Is Deployment Image Servicing and Management.
Enable Shell Launcher using DISM
Open a command prompt with administrator privileges.
Copy install.wim to a temporary folder on hard drive (in the following steps, we’ll assume it’s called C:\wim).
Create a new directory.
Mount the image.
Enable the feature.
Commit the change.
Enable Shell Launcher using Windows Configuration Designer
The Shell Launcher settings are also available as Windows provisioning settings so you can configure these settings to be applied during the image runtime. You can set one or all Shell Launcher settings by creating a provisioning package using Windows Configuration Designer and then applying the provisioning package during image deployment time or runtime. If Windows has not been installed and you are using Windows Configuration Designer to create installation media with settings for Shell Launcher included in the image or you are applying a provisioning package during setup, you must enable Shell Launcher on the installation media with DISM in order for a provisioning package to successfully apply.
Use the following steps to create a provisioning package that contains the ShellLauncher settings.
- Build a provisioning package in Windows Configuration Designer by following the instructions in Create a provisioning package for Windows 10.
- In the Available customizations page, select Runtime settings >SMISettings >ShellLauncher.
- Set the value of Enable to ENABLE. Additional options to configure Shell Launcher will appear, and you can set the values as desired.
- Once you have finished configuring the settings and creating the provisioning package, you can apply the package to the image deployment time or runtime. See the Apply a provisioning package for more information. Note that the process for applying the package to a Windows 10 Enterprise image is the same.
Configure Shell Launcher
There are two ways you can configure Shell Launcher:
- In Windows 10, version 1803, you can configure Shell Launcher using the ShellLauncher node of the Assigned Access Configuration Service Provider (CSP). See AssignedAccess CSP for details. Configuring Shell Launcher using this method also automatically enables Shell Launcher on the device, if the device supports it.
- Use the Shell Launcher WMI providers directly in a PowerShell script or application.
You can configure the following options for Shell Launcher:
- Enable or disable Shell Launcher.
- Specify a shell configuration for a specific user or group.
- Remove a shell configuration for a specific user or group.
- Change the default shell configuration.
- Get information on a shell configuration for a specific user or group.
Any changes do not take effect until a user signs in.
Launch different shells for different user accounts
By default, Shell Launcher runs the default shell, which is specified when you create the OS image at design time. The default shell is set to Cmd.exe, but you can specify any executable file to be the default shell.
You can configure Shell Launcher to launch a different shell for specific users or groups if you do not want to run the default shell. For example, you might configure a device to run a custom application shell for guest accounts, but run the standard Windows Explorer shell for administrator accounts in order to service the device.
If you use the WMI providers to configure Shell Launcher for a user or group at run time, you must use the security identifier (SID) for that user or group; you cannot use the user name or group name.
For more information about common security identifiers, see Well-known SIDs.
When the current signed in account belongs to two or more groups that have different configurations defined for each group, Shell Launcher uses the first configuration it finds. The search order is not defined, so we recommend that you avoid assigning a user to multiple groups with different Shell Launcher configurations.
Perform an action when the shell exits
When a custom shell exits, Shell Launcher can perform one of four actions:
| Action | Description |
|---|---|
| 0 | Restart the shell. |
| 1 | Restart the device. |
| 2 | Shut down the device. |
| 3 | Do nothing. |
Make sure that your shell application does not automatically exit and is not automatically closed by any features such as Dialog Filter, as this can lead to an infinite cycle of exiting and restarting, unless the return code action is set to do nothing.
Default return code action
You can define a default return code action for Shell Launcher with the DefaultReturnCodeAction setting. If you do not change the initial value, the default return code action is set to 0 (zero), which indicates that Shell Launcher restarts the shell when the shell exits.
Map the exit code to a Shell Launcher action
Shell Launcher can take a specific action based on the exit code returned by the shell. For any given exit code returned by the shell, you can configure the action that Shell Launcher takes by mapping that exit code to one of the shell exit actions.
If the exit code does not match a defined value, Shell Launcher performs the default return code action.
For example, your shell might return exit code values of -1, 0, 1, or 255 depending on how the shell exits. You can configure Shell Launcher to:
- restart the device (1) when the shell returns an exit code of value -1
- restart the shell (0) when the shell returns an exit code of value 0
- do nothing (3) when the shell returns an exit code of value 1
- shut down the device (2) when the shell returns an exit code of value 255
Your custom return code action mapping would look like this:
| Exit code | Action |
|---|---|
| -1 | 1 (restart the device) |
| 0 | 0 (restart the shell) |
| 1 | 3 (do nothing) |
| 255 | 2 (shut down the device) |
Set your custom shell
Modify the following PowerShell script as appropriate and run the script on the device.
The script above includes examples of multiple configuration options, including removing a custom shell and disabling Shell Launcher. It is not intended to be run as-is.
Shell Launcher user rights
A custom shell is launched with the same level of user rights as the account that is signed in. This means that a user with administrator rights can perform any system action that requires administrator rights, including launching other applications with administrator rights, while a user without administrator rights cannot.
If your shell application requires administrator rights and needs to be elevated, and User Account Control (UAC) is present on your device, you must disable UAC in order for Shell Launcher to launch the shell application.


