- Use two Mac apps side by side in Split View
- Enter Split View
- If you can’t enter Split View
- Work in Split View
- How to Run Windows, Mac, and Linux Side by Side and Pain-Free with VirtualBox
- Why Virtualize?
- What You’ll Need
- Installing New Virtual Machines in VirtualBox
- Take a Snapshot of What You’ve Done so Far
- Optimize Your VirtualBox Installation
- Hack Attack: Side-by-side Windows and Mac OS with Parallels
- A quick taste of Parallels
- Install XP as a virtual machine
- Install Parallels Tools
- Install VirtueDesktops
- Using VirtueDesktops with Parallels
- Friendly transitions
- DISCUSSION
Use two Mac apps side by side in Split View
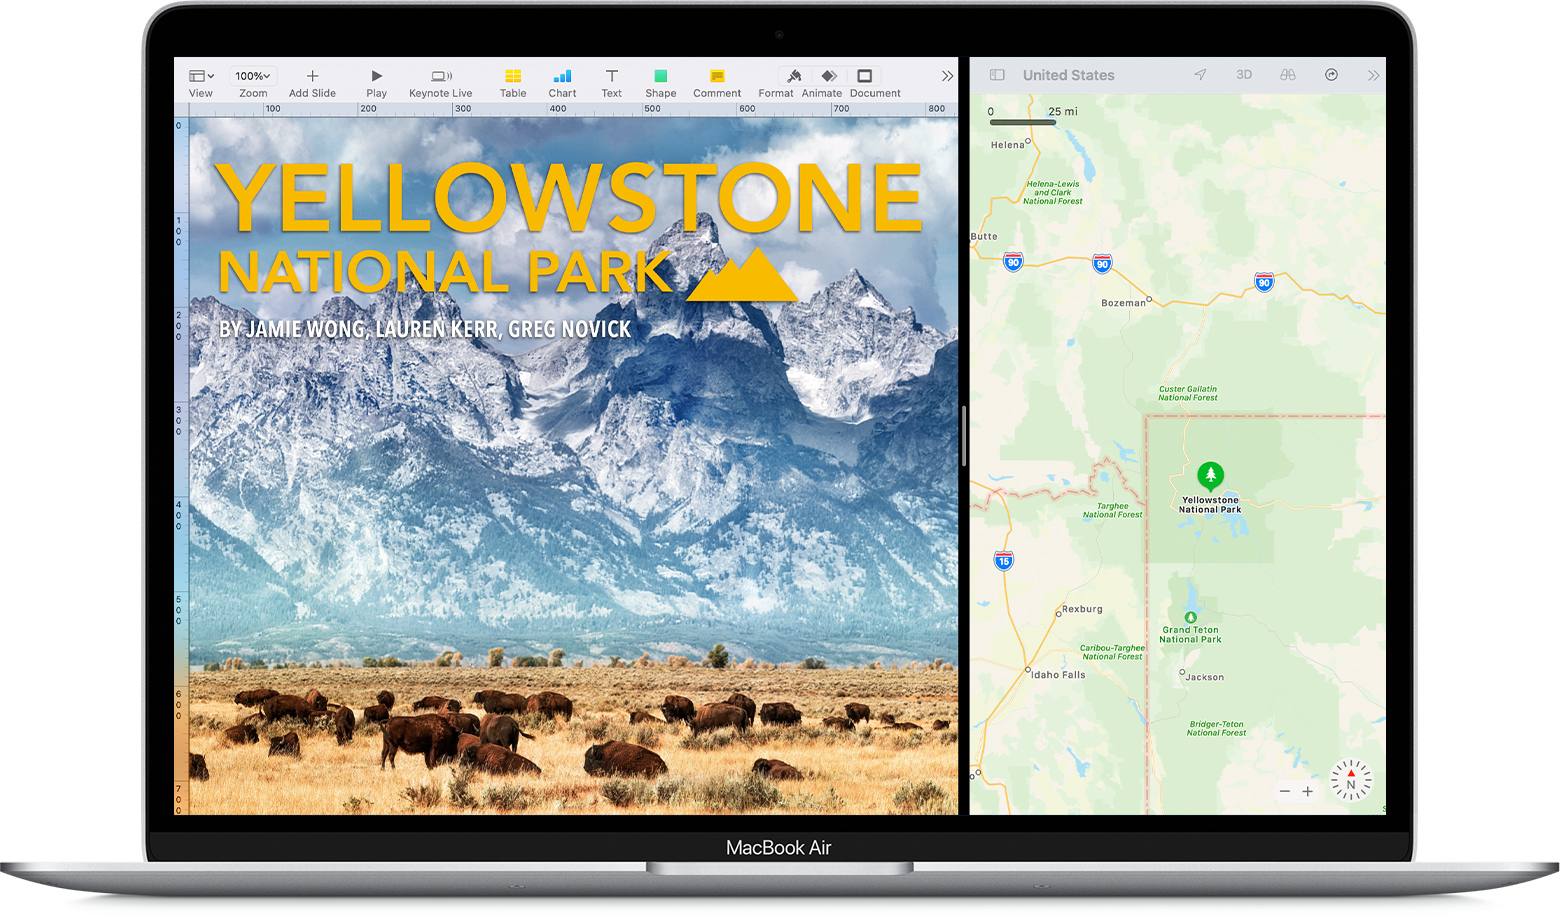
With Split View, you can fill your Mac screen with two apps, without having to manually move and resize windows.
Enter Split View
If you’re using macOS Catalina or later:
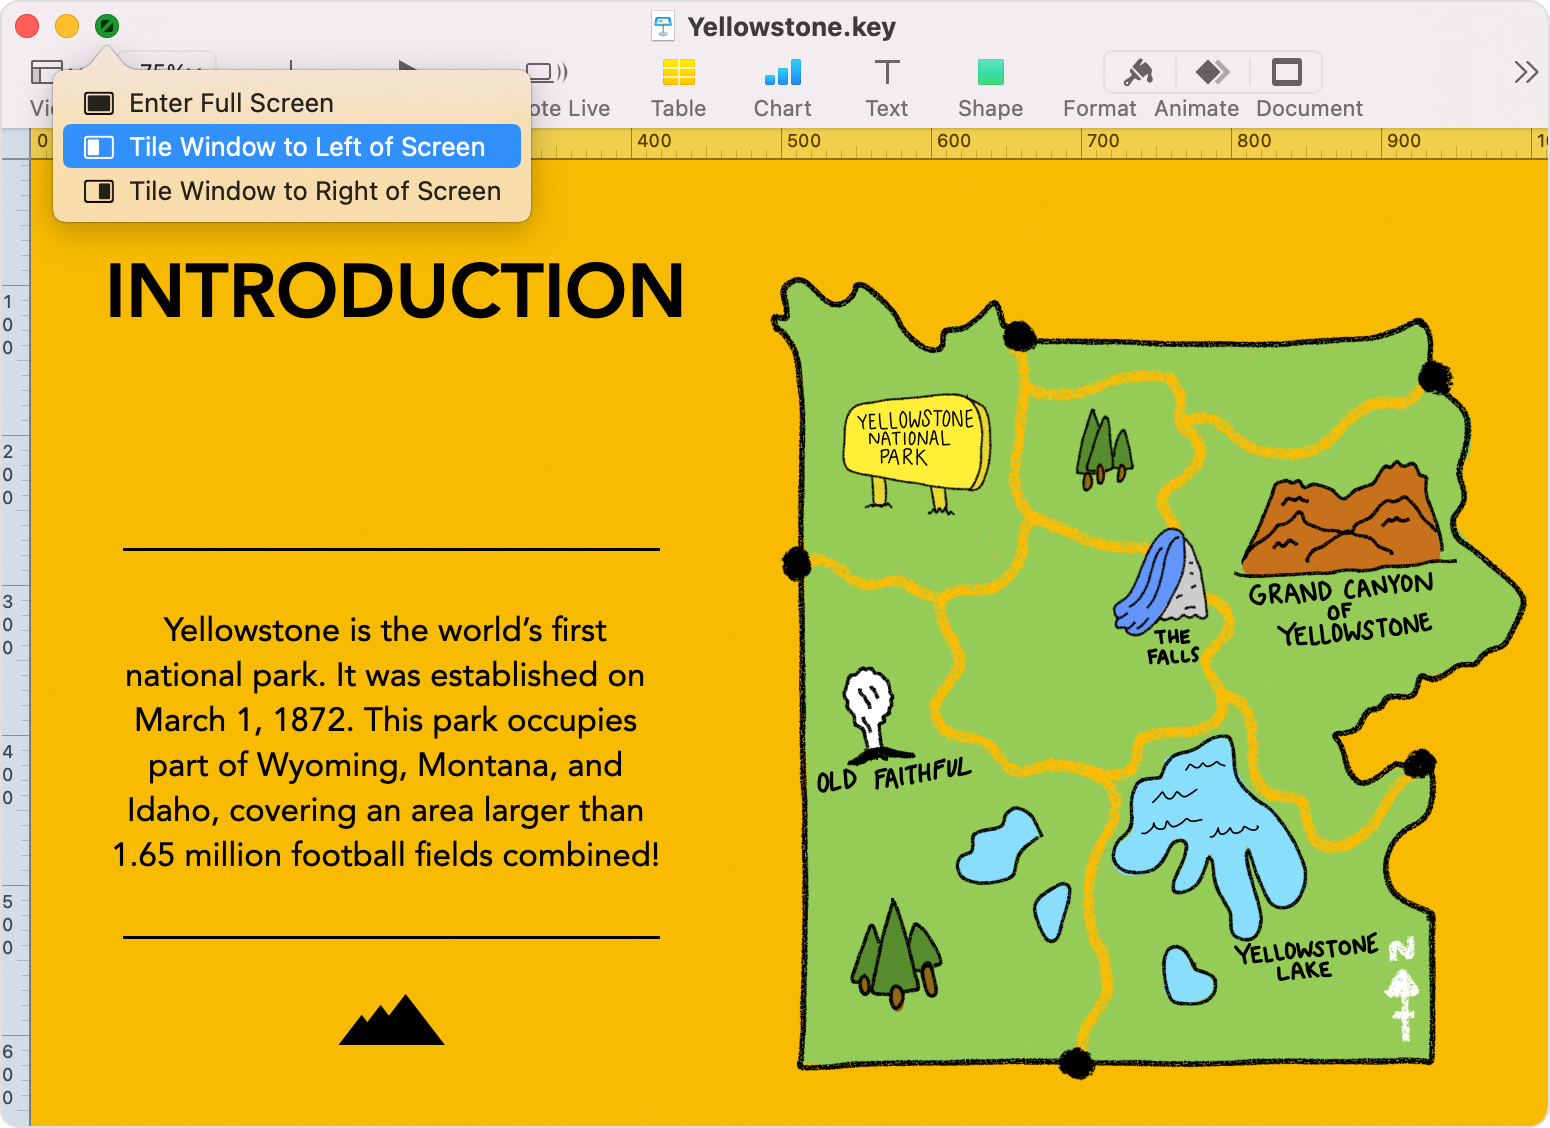
- Hover your pointer over the full-screen button in the upper-left corner of a window. Or click and hold the button.
- Choose ”Tile Window to Left of Screen” or ”Tile Window to Right of Screen” from the menu. The window then fills that side of the screen.

- Then click a window on the other side of the screen to begin using both windows side by side.
If you’re using macOS Mojave, High Sierra, Sierra, or El Capitan:
- Click and hold the full-screen button in the upper-left corner of a window.
- As you hold the button, the window shrinks and you can drag it to the left or right side of the screen.
- Release the button, then click a window on the other side of the screen to begin using both windows side by side.
If you can’t enter Split View
If Split View doesn’t work, choose Apple menu > System Preferences, click Mission Control, and make sure that “Displays have separate Spaces” is selected.
Work in Split View
In Split View, you can use both apps side by side, without the distraction of other apps.
- Choose a window to work in by clicking anywhere in that window.
- Show the menu bar by moving the pointer to the top of the screen.
- Swap window positions by dragging a window to the other side.
- Adjust window width by dragging the vertical line between the windows.
- Switch to other apps or your desktop with Mission Control, or use a Multi-Touch gesture such as swiping left or right with four fingers on your trackpad.
Источник
How to Run Windows, Mac, and Linux Side by Side and Pain-Free with VirtualBox
Running multiple operating systems side-by-side gives you the chance to test applications, run platform-specific software, and tons more without ever rebooting. It’s also extremely cool. Here’s how to run Windows, Mac, and Linux simultaneously and pain-free as possible.
To get a quick idea of where we’re headed, check out the video above, which demonstrates my Windows 7 system running OS X and Ubuntu through VirtualBox. Below, we’ll build on the basics you learned in our beginner’s guide to creating virtual machines with VirtualBox . We’ll show you how to easily install new operating systems (including Mac OS X and Linux) and optimize your installation with shared folders and software to help your virtual machines communicate with your main OS. We’ll also do a little extra work to get the newest release of Snow Leopard to play nice, even though it’s not fully supported yet. Although we’re using Windows 7 64-bit as our base OS, VirtualBox runs on nearly any OS, and these tips and tricks are applicable to any serious VirtualBox setup.
The Beginner’s Guide to Creating Virtual Machines with VirtualBox
Virtual machines can seem juuuuust a bit too geeky for most otherwise computer-friendly people.…
Why Virtualize?
Using virtualized operating systems presents all sorts of opportunities. You don’t have to leave your primary and favored operating system to use tools found only in another operating system; you can run a copy of your current operating system to try out new tweaks, tricks, and software to ensure everything works well; you can test new software or browse in an entirely sandboxed OS. One of the great perks of running multiple operating systems in virtualization comes with multiple monitors, you can spread out almost as though you had separate computers hooked up to the same keyboard and mouse.
What You’ll Need
You’re most likely using a machine right now that would easily support at least one other operating system in virtualization, but likely more. Our test machine for this virtualization project is a modest rig we put together for around $400 nearly two years ago. It has an AMD quadcore processor, 8GB of RAM, and a basic graphics card with 256MB of RAM. The parts weren’t cutting edge when we bought them—all of them were selected because they were on sale—and they’re certainly not cutting edge now. With those specs, the machine easily runs Ubuntu, OS X Snow Leopard, and Windows 7 32-bit simultaneously—powered by a core OS of Windows 7-64 bit—without any problems. If you’ve got a reasonably new system with a good amount of RAM, you should be just fine.
Installing New Virtual Machines in VirtualBox
Again, if you’re unfamiliar with virtual machines or VirtualBox, check out our beginner’s guide . We won’t be running through the basics of installation, but we will be highlighting some tricks to make your virtual machines run smoother. First, let’s run through where you can get started installing various virtual machines (like Linux or OS X).
Grab a pre-configured VirtualBox image and don’t sweat through installation of open-source operating systems. VirtualBoxImages.com catalogs pre-configured VirtualBox hard drive images (VDIs). While in most instances it isn’t too much of a hassle to create your own fresh install, why bother with it if you don’t need to? VirtualBoxImages is a great place to grab operating systems you want to try just for fun like ultra compact versions of Linux or even Android OS. When it comes to installing Windows and other commercial operating systems, you’ll have to do it the manual way.
Step-by-step Mac OS X installation. If you’re installing Snow Leopard make sure to check out a previous guide to installing Mac OS X in Windows to get OS X up and running. When you’re done, come back; below we’ll detail how to set up file sharing between your host OS and OS X.
How to Run Mac OS X in VirtualBox on Windows
If you’re on Windows, need to use OS X, but don’t want to buy or build a new computer, reader Bobby
Don’t bother burning a disc if you already have the .ISO file on your computer. VirtualBox excels at installing operating systems off an .ISO. Just for fun we installed Windows XP off a CD and Windows 7 off an .ISO file simultaneously and it handled the dual install without a hiccup. Remember to add your .ISO files to the Virtual Media Manager or else they won’t be available to your virtual operating systems.
Take a Snapshot of What You’ve Done so Far
Copying, snapshotting, and cloning your virtual disks preserves your hard work. VirtualBox has several mechanisms in place for helping you to preserve all the setup and customization you’ve done. One of the first things you should do after successfully installing and customizing a virtual OS is to back it up.
Although installing operating systems with VirtualBox is a breeze most of the time, the few times it isn’t you’ll likely spend a lot of time searching for a solution and tinkering. Save yourself the headache of doing it again by backing up your new virtual disk. You’ll also likely want to do the same after you get the machine set up with the tweaks detailed in the optimize section below, and any time you’ve taken some time to set something up that you don’t want to hassle with again.
Shut down your virtual machine and exit VirtualBox before attempting to back up any of your disks. Once VirtualBox is shut down you can browse to the directory your VDI files are in. Copy the VDI file of each virtual operating system you wish to backup and put it on another disk or network drive. If any part of your customization involved tweaking the XML file associated with the virtual OS it would be wise of you to copy that along with the VDI file.
Significantly faster and easier than a total backup is a Snapshot. You can create one by pressing CTRL+S at anytime when your virtual OS is running.
Think of snapshots like the System Restore function in Windows. You can create a snapshot at anytime within your virtual machine to mark a restore point you may want to return to. It takes so little time to create them it’s criminal to not do so before making a major change to your virtual OS or installing a big software suite.
Cloning is the most advanced technique for dealing with your virtual disks. Let’s say you installed an OS that was a bit more hassle than you anticipated and you’d really like to make a perfect copy of it so you’ll have a pure installation to study and a disposable one that you can really thrash around in. You can’t just copy the VDI file because the unique identifier will conflict with the original VDI. You’ll need to use the clone command from the command prompt. Refer to this portion of the official manual for explicit details. Your clone command should look something like «C:\Program Files\Sun\xVM VirtualBox\VBoxManage.exe» clonevdi «Ubuntu 10.vdi» «Ubuntu 10 clone.vdi» . This will assure your new virtual OS won’t conflict with its twin.
Optimize Your VirtualBox Installation
Always install Guest Additions. Guest Additions are special software for Windows, Linux, and Solaris operating systems that make your life as a virtual OS user much easier. Rather than muck around in configuration files and settings trying to resize your virtual OS resolution, for example, the Guest Addition enables dynamic resizing. It’s always been easy to install in Windows but now it’s just as easy to install in Linux, just mount the VboxGuestAdditions.iso from the Devices -> CD/DVD Devices menu and then run the installation package inside.
Set up a universal share. Hopping between virtual operating systems might be faster than hopping between two physical computers but it still suffers from one of the same hazards. It’s easy to lose track of your files. If you’re running Windows or Linux the Guest Additions installation takes care of the networking for you. If you’re running Mac OS X you miss out on that, for lack of a Mac Guest Additions package. Don’t worry though, setting up sharing from Windows (or any other Samba share) is simple.
Thanks to these handy instructions from VirtualBox forum member PaulsCode , you’ll have no trouble setting up your cross-platform share.
- Share a folder from the actual host machine (from the OS, not through the vbox shared folders).
- Use NAT for your guest’s network settings.
- From Mac OS X, Open «Finder» (looks like a square face, usually on the bottom-left).
- From the top menu, navigate to Go->Connect to Server.
- For «Server Address» enter smb://10.0.2.2
- Click «Connect».
- Enter your username and password (for the host machine).
Now you’ll be able to access the same pool of files from all of your virtual machines which makes it even easier to switch OS-dependent tools while working on the same project.
At this point you’ve got your virtual operating systems installed, customized, linked to a shared folder, duplicated for your stress testing and mad scientist experiments, and backed up in case it all goes terribly wrong. With a good battery backup attached to your computer and virtual operating systems to do the heavy lifting and get abused by all your software installations you’re in a perfect position to forget about rebooting your base OS and get busy playing with your virtual machines.
Jason Fitzpatrick is the Senior Writer at Lifehacker, an absurd fan of obscenely long uptimes, hates rearranging his workspace after a reboot, and knows that if you just give virtualization a try you’ll be addicted too.
Источник
Hack Attack: Side-by-side Windows and Mac OS with Parallels
When I bought my first Mac last month — a 15″ MacBook Pro — I wasn’t thrilled about the $2000+ price tag (even though I did save a few hundred upgrading the RAM myself ). But I wasn’t just buying one computer, I was getting two. Not only was I: 1) getting a Mac, a platform I’d long wanted to dive into, but 2) I was also purchasing a computer that could run a familiar old friend — Windows.
Hack Attack: How to install RAM in your Mac (and save big $$$)
Using the previously — mentioned virtual machine software, Parallels Desktop for Mac ($79.99), you can run Mac OS X and Windows (XP, Vista, you name it) side-by-side. Here’s how I’ve set up my Parallels installation to make working in multiple OSes easy and fun.
Run Mac OS X and Windows simultaneously
Mac only: The New York Times’ David Pogue reviews Parallels Workstation for Mac OS X , software…
A quick taste of Parallels
Since I’m nuts about my Parallels setup, and since half the fun is seeing Windows and Mac running side-by-side in action, check out this short video demonstration of my Parallels setup. (Music courtesy of Bubblegum Best )
Interested? Below I’ve detailed how I’ve set up XP in Parallels, along with a few tweaks for getting that oh-so-cool fullscreen OS-switching across the cube.
Install XP as a virtual machine
This is the easiest part of the process. The people who make Parallels are very good at what they do so installing a virtual machine in Parallels is a breeze.
To create a new virtual machine in which to run XP, open Parallels and go to File -> New VM. The wizard will walk you through setting up the virtual machine, starting with the option for creating a typical VM, which you will most likely want to do.
Next, tell Parallels the OS-type you want to install as a virtual machine (in my case, it was Windows XP). Finish the wizard, and now you can open the virtual machine and tweak any settings you like by going to File -> Open and selecting the VM you just created.
Click Edit at the bottom of the new window and change any of the default settings, like hard disk size, RAM allocation and so on. (I’ve allocated 256MB for XP, and amazingly enough, it’s still very fast for everything I use it for.) Don’t worry too much about these settings, since you can change the RAM allocation at any time. Although you do set limits, Parallels will only take up the hard drive space you need, dynamically resizing whenever it needs more space. (That means if you allocate 8GB but you only have 2GB of data on your Windows VM, it will only take 2GB of your Mac’s hard drive.)
When you’re ready to install XP, insert your XP installation CD and click the green play button on the side of the Parallels window. If you’ve ever installed XP, everything from here on out should be old hat to you. If it’s not, you could follow Gina’s guide to installing Windows from step 4 on.
Geek to Live: How to format your hard drive and install Windows XP from scratch
Hey, Windows XP users: The blue screen of death got you down? Missing dll errors making you…
Install Parallels Tools
Once you’ve completed your installation, the first thing you should do is install a program called Parallels Tools by selecting VM -> Install Parallels Tools while Windows is running. I was an idiot and missed the section in the quick start guide on Parallels Tools for the first week I was playing with the program, so don’t make the same mistake. Parallels Tools is what makes working in Parallels so great. It improves mouse movement, video, and pretty much everything else necessary to a modern OS.
Now that you’ve got Windows installed, there are still those always-important tweaks you want to make on a new Windows install. Gina’s top Windows tweaks is a good place to start.
Geek to Live: Top Windows tweaks
by Gina Trapani
Install VirtueDesktops
To give XP it’s own little side-of-the-cube like you saw in the video, you’ll need to install previously-mentioned VirtueDesktops , a life-saving desktop management software.
Download of the Day: VirtueDesktops (Mac)
Mac OS X only: Open source program VirtueDesktops is a brilliant virtual desktop application for…
I like to arrange the virtual desktops in a straight row that flips across a cube (like in the screencast). To do this, open the VirtueDesktops preferences and select Cube from the Transitions options. Then select the Layouts and Pagers pane, and make your columns and rows into a nx1 configuration (I do 3×1, but you can do whatever fits your needs).
Using VirtueDesktops with Parallels
I had a bit of trouble at first getting Parallels to work with VirtueDesktops in that snazzy way you saw in the screencast, so here are a few tips so that you don’t have the same problems.
Alt-Enter will put Parallels into fullscreen, but fullscreen mode might not work with desktop switching in VirtueDesktops as-is. If it doesn’t, go to the Parallels preferences and select User Interface -> Advanced and make sure that «Exit fullscreen on focus lost» is unchecked. That may work for you, but it didn’t for me, and every time I tried switching desktops, Parallels would still drop out of fullscreen mode, which was a major pain.
Lucky for me, with the help of the Parallels crew and the VirtueDesktop developer (thanks, guys!), I learned that something about the Universal Access pane of my Mac’s System Preferences was to blame, so in order to use Parallels in fullscreen with the handy desktop switching of VirtueDesktops, you need to uncheck the checkbox labeled «Enable access for assistive devices.»
This led to sort of a bummer for me because Universal Access is required in order to use TextExpander . I wrote an Applescript that I use to launch Parallels while automatically turning off Textpander and Universal Access, and another that turns them back on. This makes the process a bit easier for me, though I do hope some day I can keep TextExpander enabled while running Parallels in fullscreen.
Download of the Day: Typng usg abrvns with Textpander
Textpander, a great new Mac OS X utility, allows you to type your most commonly used phrases by…
I’ve made my Applescripts available below, but be forewarned: I’m an Applescript novice, so I’m sure these could be improved. Right now you have to enter your administrator password each time you run it.
Friendly transitions
Once you’ve got the fullscreen business working, it’s just a matter of using the VirtueDesktop desktop switching hotkey (which I’ve left at the default Ctrl-Shift-Left/Right) to switch back and forth between your desktops.
Finally, you may find (as I did) that when you’re working on a Mac, switching back and forth between Windows and OS X, it can get a little sticky keeping your keyboard shortcuts straight. I’ve found it helpful to remap some of my Windows keys to match more closely with my Mac shortcuts using previously-mentioned freeware program KeyTweak .
Download of the Day: KeyTweak
Windows only: Freeware application KeyTweak lets you remap any key on your computer’s keyboard.
If you’ve used Parallels in your workflow, I’d love to hear your tips and tricks for getting more from Parallels. If you’ve got any questions about the whole Parallels experience, I’d be happy to answer them, so let’s hear ’em in the comments.
Adam Pash is an associate editor for Lifehacker who’s too greedy to stick to just one operating system. His special feature Hack Attack appears every Tuesday on Lifehacker. Subscribe to the Hack Attack RSS feed to get new installments in your newsreader.
DISCUSSION
@ChrisNesbit—Yeah, I read that Parallels and a couple other competitors are working on ways to run Windows 3D without loss in the OSX environment.
For a while I was really scared about switching, but the more the year goes on, the less scary it is. Suddenly I can run just about anything on Mac hardware and soon I may be able to do so without even using the dual-boot option. I still have to wait a few months, but that doesn’t bother me. By first quarter next year, Leopard should be out as well as other updates.
Now I just have to figure out what to get. I’ve been thinking about getting an iMac, but clearly, I could get a MacBook and run a second monitor with it—allowing me to take it with me on the go. ah choices, choices. but I’ll definately get it by first quarter next year while I can still qualify for educational discounts.
Источник


