- Спящий режим Windows 10
- Отключение режима сна в параметрах Windows 10
- Настройки спящего режима в панели управлении
- Возможные проблемы с работой спящего режима
- Sleep option missing in Windows 10 [Power Options]
- What can I do if the sleep option is missing in Windows 10?
- 1. Check Power options settings
- 2. Update drivers
- DriverFix
- 3. Check the available sleep states
- 4. Reset and restore the power plans to default
- 5. Make Group Policy changes
- 6. Switch the account to a local account and then back to a Microsoft account
- 7. Rollback the driver
- 8. Uninstall and reinstall the driver
- 9. Perform a Clean Boot
- 10. Perform a System Restore
Спящий режим Windows 10
 В этой инструкции подробно о том, как настроить или отключить спящий режим в Windows 10 как в новом интерфейсе настроек, так и в привычной панели управления. Также, в конце статьи рассмотрены основные проблемы, имеющие отношение к работе спящего режима в Windows 10 и способы их решения. Схожая тема: Гибернация Windows 10.
Для чего может пригодиться отключение спящего режима: например, для кого-то удобнее, чтобы при нажатии кнопки питания ноутбук или компьютер выключался, а не уходил в сон, а некоторые пользователи после обновления до новой ОС столкнулись с тем, что ноутбук не выходит из сна. Так или иначе, сделать это не сложно.
Отключение режима сна в параметрах Windows 10
Первый способ, он же самый простой — использовать новый интерфейс настроек Windows 10, попасть в который можно через «Пуск» — «Параметры» или нажав клавиши Win+I на клавиатуре.
В параметрах выберите пункт «Система», а затем — «Питание и спящий режим». Как раз здесь, в разделе «Сон» вы можете настроить работу спящего режима или отключить его отдельно при питании от сети или аккумулятора.
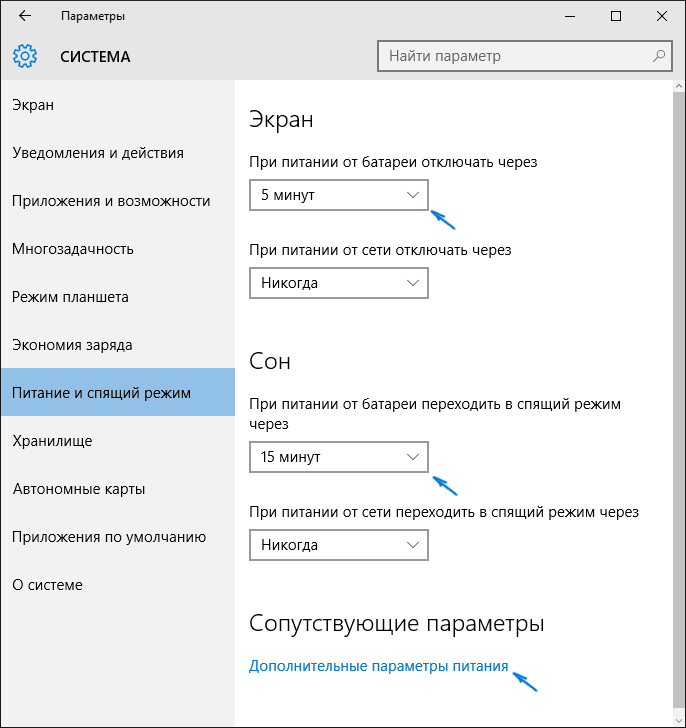
Здесь же можно настроить и параметры отключения экрана при желании. Внизу страницы настроек питания и спящего режима есть пункт «Дополнительные параметры питания», в которых также можно отключить спящий режим, а заодно изменить поведение компьютера или ноутбука при нажатии кнопки выключения или закрытии крышки (т.е. можно отключить сон и для этих действий). Об этом — следующий раздел.
Настройки спящего режима в панели управлении
Если вы зайдете в настройки электропитания способом, описанным выше или через Панель управления (Способы открыть панель управления Windows 10) — Электропитание, то там вы также можете отключить спящий режим или настроить его работу, при этом сделать это более точно, чем в предыдущем варианте.
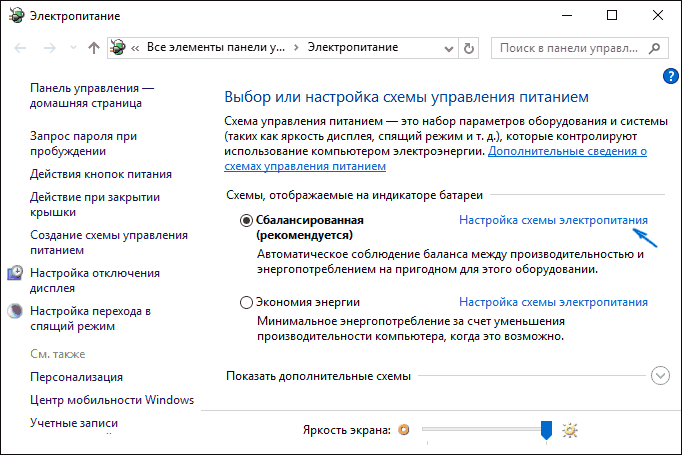
Напротив активной схемы электропитания нажмите «Настройка схемы электропитания». На следующем экране вы сможете настроить, когда переводить компьютер в спящий режим, а выбрав пункт «Никогда», отключить сон Windows 10.
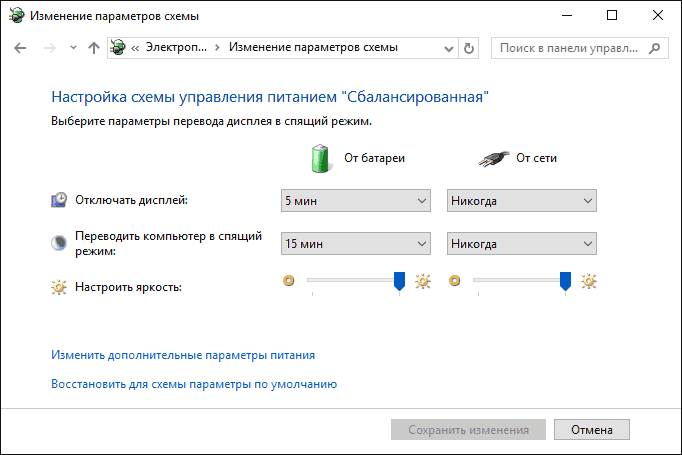
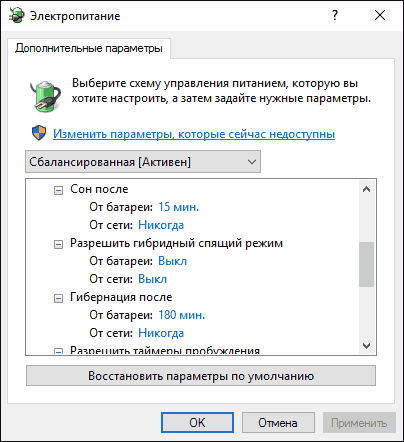
Если ниже нажать по пункту «Изменить дополнительные параметры электропитания», вы попадете в окно подробных настроек текущей схемы. Здесь вы отдельно можете задать поведение системы, связанное со спящим режимом в разделе «Сон»:
- Задать время перехода в спящий режим (значение 0 означает отключить его).

- Разрешить или запретить гибридный спящий режим (представляет собой вариант спящего режима с сохранением данных памяти на жесткий диск на случай потери питания).
- Разрешить таймеры пробуждения — здесь обычно ничего менять не нужно, кроме случаев, когда у вас возникла проблема с самопроизвольным включением компьютера сразу после выключения (тогда отключаем таймеры).
Еще один раздел настроек схемы электропитания, который имеет отношение к режиму сна — «Кнопки питания и крышка», здесь вы отдельно можете задать действия для закрытия крышки ноутбука, нажатия кнопки питания (по умолчанию для ноутбуков — сон) и действие для кнопки спящего режима (я даже не знаю, как такая выглядит, не видел).
При необходимости вы можете также задать параметры отключения жестких дисков при простое (в разделе «Жесткий диск») и параметры отключения или снижения яркости экрана (в разделе «Экран»).
Возможные проблемы с работой спящего режима
А теперь типичные проблемы с тем, как работает спящий режим Windows 10 и не только он.
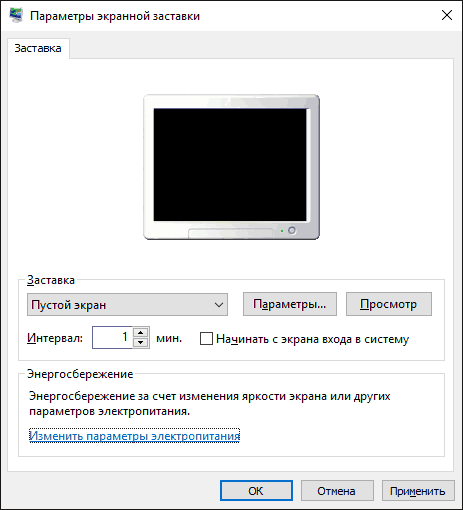
- Спящий режим отключен, выключение экрана тоже, но экран все равно выключается через короткое время. Пишу это первым пунктом, потому как чаще всего обращались именно с такой проблемой. В поиске в панели задач начните вводить «Заставка», затем перейдите к параметрам заставки (скринсейвера) и отключите ее. Ещё одно решение описано далее, после 5-го пункта.
- Компьютер не выходит из режима сна — либо показывает черный экран, либо просто не реагирует на кнопки, хотя индикатор, что он в спящем режиме (если есть такой) горит. Чаще всего (как ни странно) эта проблема вызвана драйверами видеокарты, установленными самой Windows 10. Решение — удалить все драйверы видео с помощью Display Driver Uninstaller, затем установить их с официального сайта. Пример для NVidia, которые подойдет полностью для видеокарт Intel и AMD описан в статье Установка драйверов NVidia в Windows 10. Внимание: для некоторых ноутбуков с графикой Intel (часто на Dell) приходится брать последний драйвер с сайта производителя самого ноутбука, иногда для 8 или 7 и устанавливать в режиме совместимости.
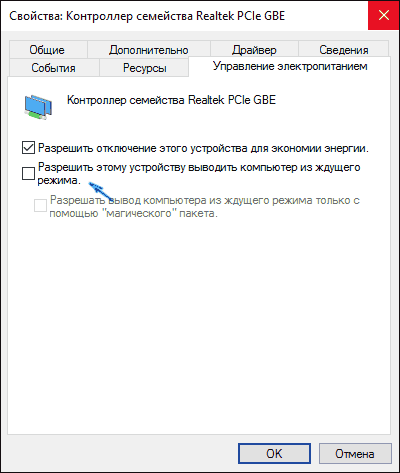
- Компьютер или ноутбук сразу включается после выключения или перехода в спящий режим. Замечено на Lenovo (но может встретиться и на других марках). Решение — в дополнительных параметрах электропитания, как это было описано во втором разделе инструкции, отключить таймеры пробуждения. Кроме этого следует запретить пробуждение от сетевой карты. На эту же тему, но подробнее: Windows 10 не выключается.
- Также многие проблемы с работой схем питания, включая сон, на Intel-ноутбуках после установки Windows 10 бывают связаны с устанавливаемым автоматически драйвером Intel Management Engine Interface. Попробуйте удалить его через диспетчер устройств и установить «старый» драйвер с сайта производителя вашего устройства.
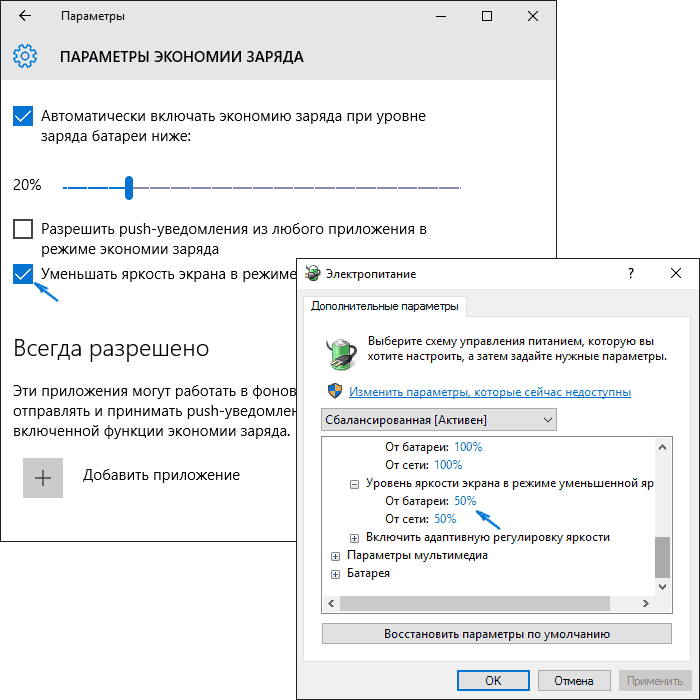
- На некоторых ноутбуках было замечено, что автоматическое снижение яркости экрана до 30-50% при простое полностью выключало экран. Если вы боретесь с таким симптомом, попробуйте в дополнительных параметрах электропитания в разделе «Экран» изменить «Уровень яркости экрана в режиме уменьшенной яркости».
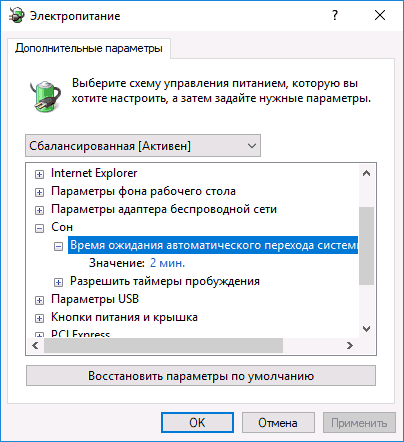
В Windows 10 также присутствует скрытый пункт «Время ожидания автоматического перехода системы в режим сна», который, по идее, должен срабатывать только после автоматического пробуждения. Однако, у некоторых пользователей он срабатывает и без этого и система засыпает через 2 минуты вне зависимости от всех настроек. Как это исправить:
- Запустите редактор реестра (Win+R — regedit)
- Перейдите к разделу HKEY_LOCAL_MACHINE\SYSTEM\CurrentControlSet\Control\Power\PowerSettings\238C9FA8-0AAD-41ED-83F4-97BE242C8F20\7bc4a2f9-d8fc-4469-b07b-33eb785aaca0
- Дважды кликните по значению Attributes и задайте значение 2 для него.
- Сохраните настройки, закройте редактор реестра.
- Откройте дополнительные параметры схемы электропитания, раздел «Сон».
- Задайте нужное время в появившемся пункте «Время ожидания автоматического перехода системы в режим сна».
На этом все. Кажется, рассказал по столь простой теме даже больше, чем нужно. Но если все еще остались какие-то вопросы по спящему режиму Windows 10, спрашивайте, будем разбираться.
Sleep option missing in Windows 10 [Power Options]

- Sleep function is important for our electronics, as it gives time to rest and save on power.
- If the sleep options is missing in Windows 10, make sure to check out our recommendations.
- Don’t forget to bookmark our Sleep Mode Guides to read the latest news and updates.
- Explore our Windows 10 Troubleshooting Hub and take your tech skills to the next level.

Sleep is important for any system, whether it is your own body or your computer. So when you’re missing sleep option on your computer, it can be equally frustrating. Some of the reasons why may not be able to put your computer to sleep include:
- The sleep option is missing
- The video card on your computer doesn’t support sleep
- Your system administrator manages some settings
- Sleep and other power-saving states are not enabled on your computer’s BIOS
What can I do if the sleep option is missing in Windows 10?
1. Check Power options settings
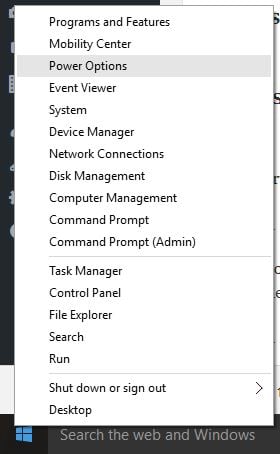
- Right-click Start
- Select Power Options
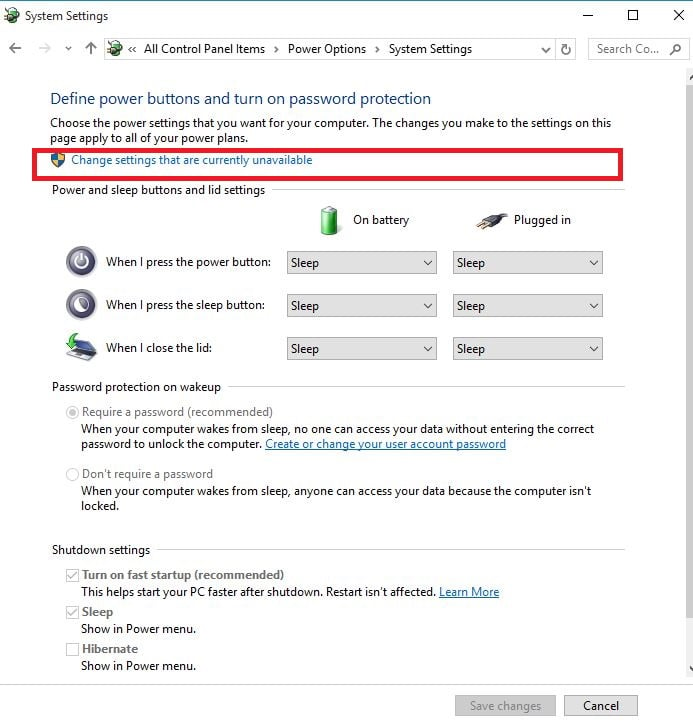
- Select Choose what the Power buttons do
- Click Change settings that are currently unavailable
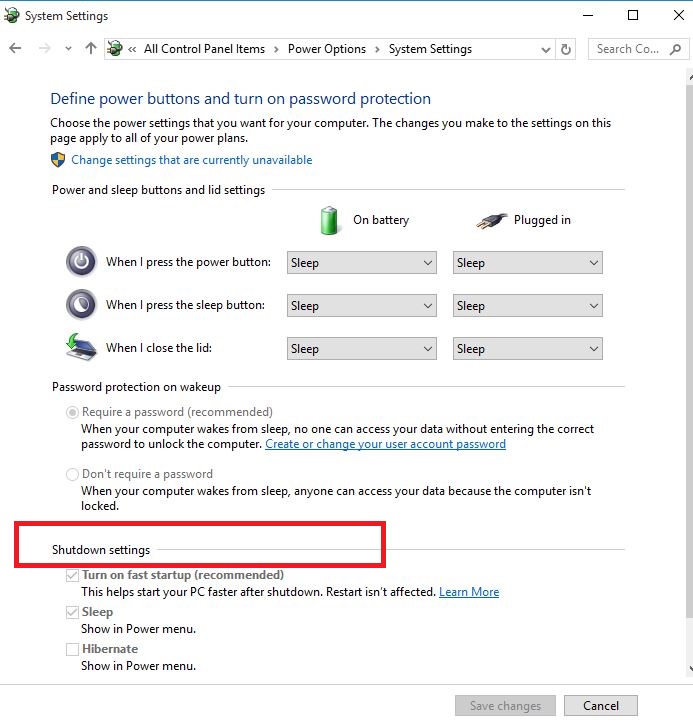
- Go to Shutdown settings
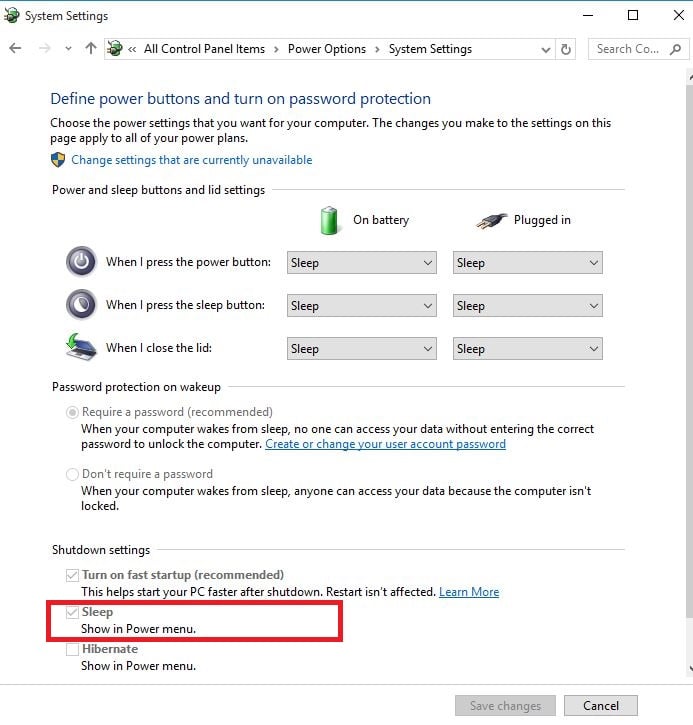
- Find Sleep and tick the box to Show in Power menu
- Click Save changes
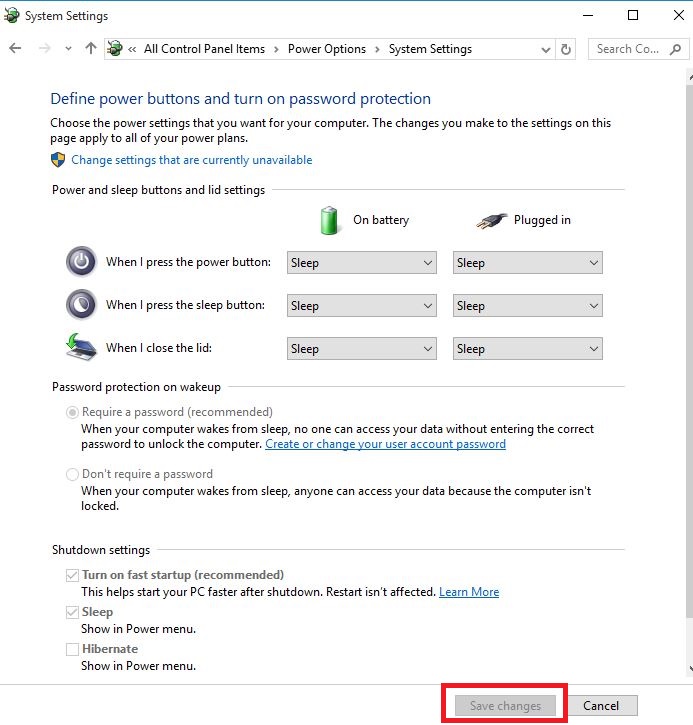
- Restart your computer and check if sleep option is restored
2. Update drivers
2.1. Use a dedicated third-party driver updater

In case you install the wrong driver version, your PC might become damaged good. So it’s recommended that you install a dedicated driver updater, such as DriverFix to prevent this from happening.
DriverFix helps detect and update outdated drivers efficiently. The scanning speed is excellent and you will see your drivers’ status in no time.
And if you want to get the latest updates in real-time, then this tool also has an auto driver update that you can easily activate.
Let’s take a look at some of the key features:
- Updates and detects any outdated drivers.
- Scans your device fast.
- Huge database with the latest manufactrer drivers

DriverFix
2.2. Update drivers from Device Manager
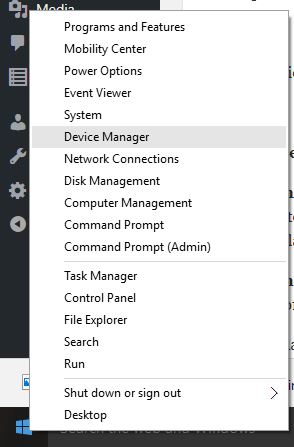
- Right-click Start
- Select Device Manager
- Select Display Adapters and click to expand the list then check for the adapter name
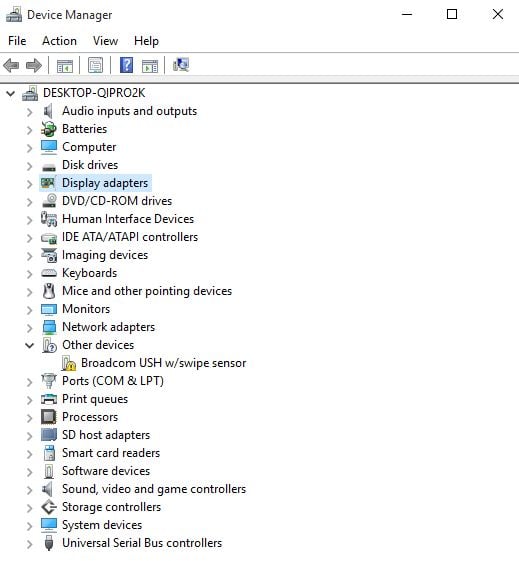
- Right-click on the name of your adapter and select Update Driver Software
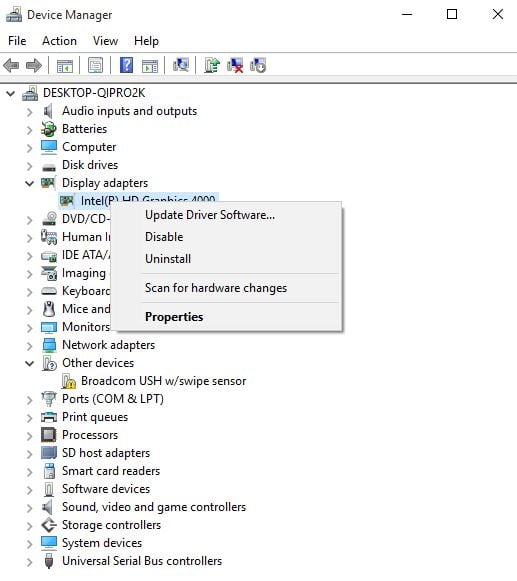
- Select Search automatically for updated driver software
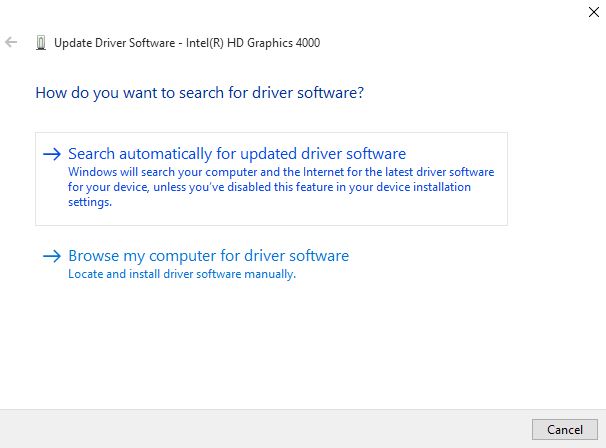
- Restart your computer see if it fixes the USB WiFi adapter is not connecting to the internet issue
If you don’t have any driver updates available, right-click on the graphics card driver and click Uninstall, then restart your computer.
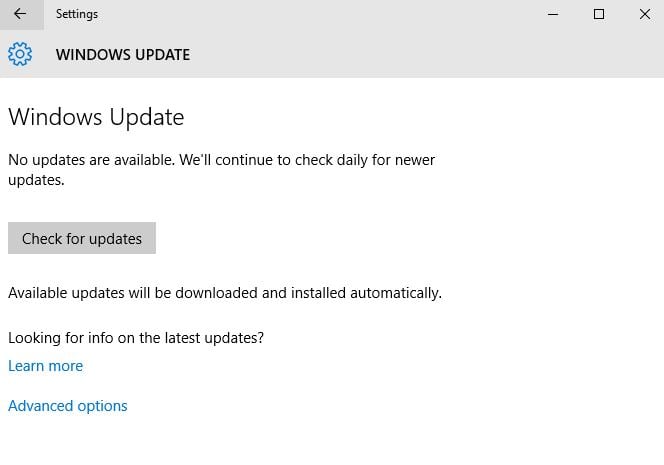
2.3 Update drivers from Windows Update:
- Click Start
- Select Settings
- Select Update & Security
- Select Windows Update

- Click Check for updates
2.4 Update drivers from manufacturer’s website
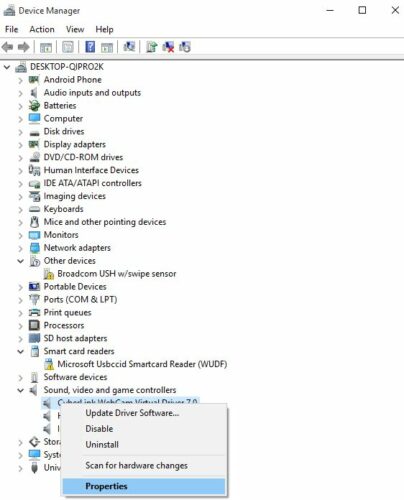
- Right-click Start
- Select Device Manager
- Expand the Sound, Video and game controllers option
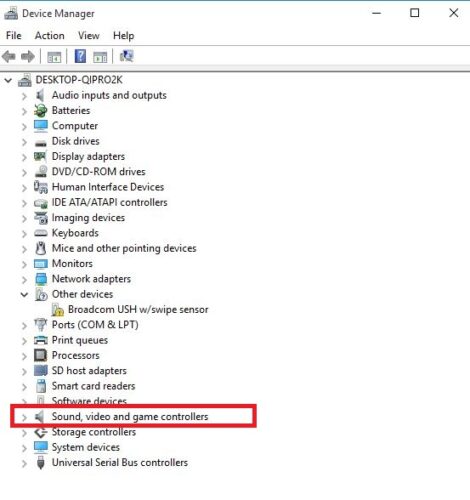
- Right-click on the graphics/video card
- Click Update driver software
- Restart your computer
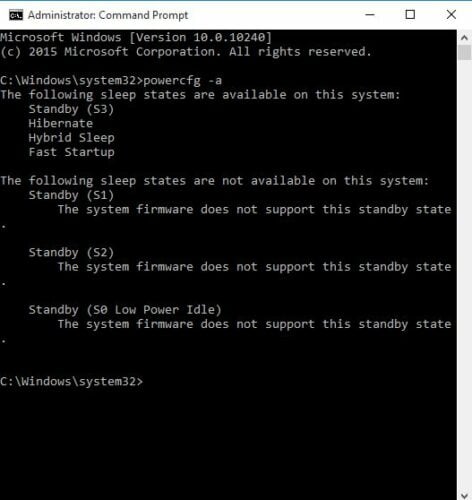
3. Check the available sleep states
- Click Start
- Type cmd in the search box
- Right-click Command Prompt and select Run as administrator
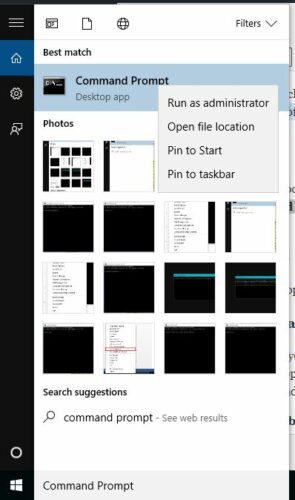
- Click Yes to confirm
- At the prompt, type powercfg –a
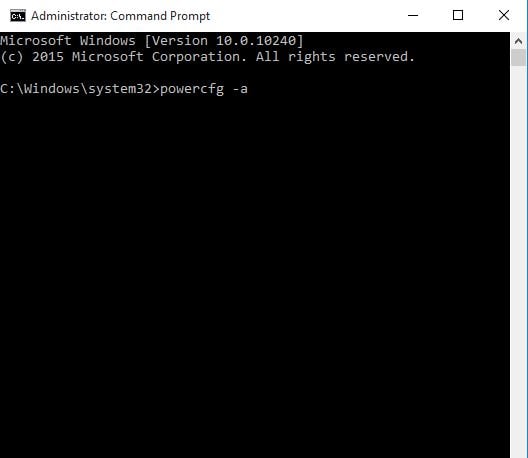
- Press Enter. The available sleep states available will be displayed.
Most users don’t know what to do when the Windows search box goes missing. You can easily get it back by following this guide.
4. Reset and restore the power plans to default
- Click Start
- Type cmd in the search box
- Right-click Command Prompt and select Run as administrator
- Click Yes to confirm
- At the prompt, type powercfg –restoredefaultschemes and press Enter
This will reset the power plan settings to default. Any customized power plans will be removed, so check if you’re getting the sleep option after resetting the power settings.
Does the power plan keep changing by itself? Don’t worry, we’ve got a dedicated fix guide about that.
5. Make Group Policy changes
- Right-click Start
- Select Run
- Type gpedit.msc
- Click OK
- Type User ConfigurationAdministrative TemplatesStart Menu and Taskbar
- Double click Remove and Prevent access to the Shut Down command
- Select Disabled
- Double click Change Start Menu power button
- Select Enabled
- Choose Shutdown
Most Windows 10 users have no idea how to edit the Group Policy. Learn how you can do it by reading this simple article.
6. Switch the account to a local account and then back to a Microsoft account
- Click Start
- Select Settings
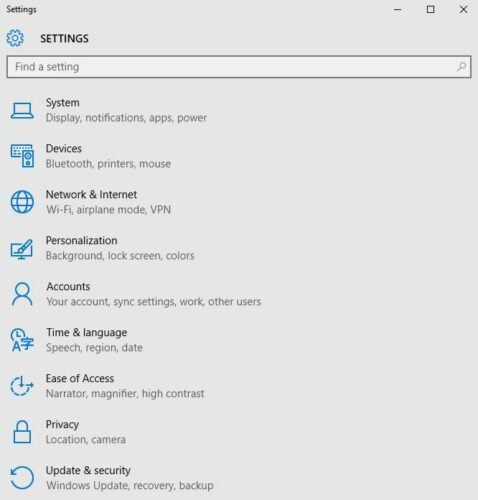
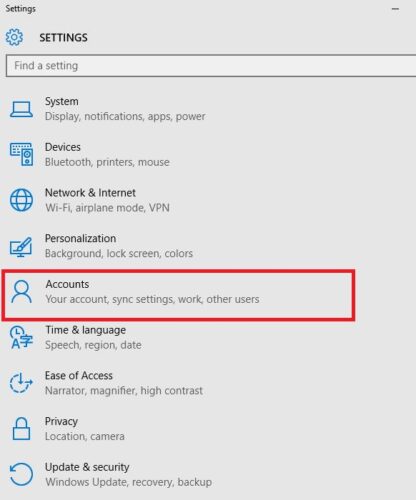
- Go to Your account
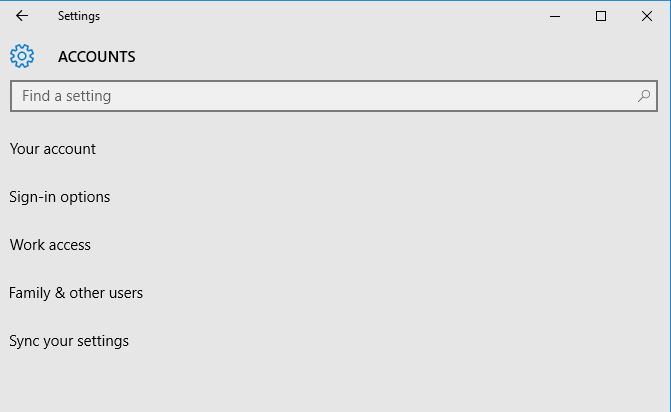
- Click Sign inwith a local account instead and follow the instructions to create the local account
- Once you’re signed in through a local account, go to Settings>Accounts>Your email and accounts and sign in with a Microsoft account instead
- Enter your Microsoft account credentials during the setup
If you’re having trouble opening the Setting app, take a look at this article to solve the issue.
7. Rollback the driver
- Right-click Start
- Select Device Manager
- Select Sound Video and Game controllers and click to expand the list then choose the graphics/video card.
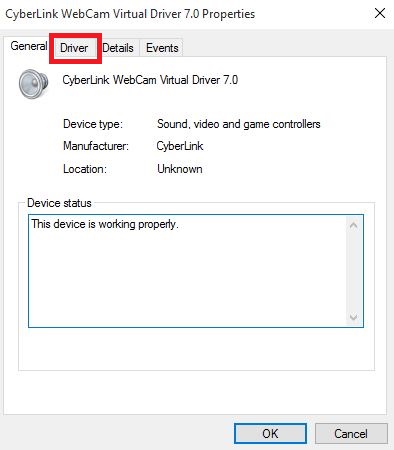
- Right-click the graphics/video card, and then select Properties.
- In Properties, select the Driver tab
- Select Roll Back Driver, then follow the prompts
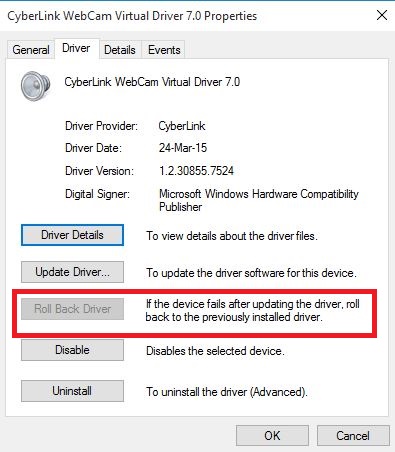
If the button is unavailable, that means there’s no driver to roll back to.
After the rollback works, you’ll have to prevent Windows from automatically updating the driver in the future. To do that, just follow this step-by-step guide.
8. Uninstall and reinstall the driver
- Right-click Start
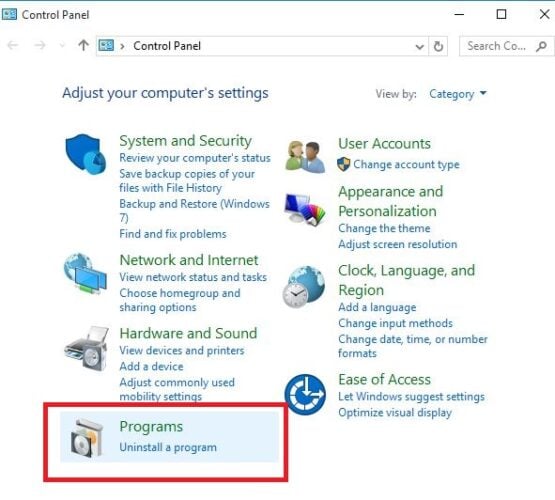
- Select Control Panel
- Click Programs icon
- Select the name of your Display Drivers
- Click Change/Remove or Add/Remove button
- Confirm that you wish to continue with the uninstall
- Once driver files have uninstalled, restart your computer to complete the uninstallation
- Turn on your computer and reinstall the graphics/video card driver
Driver files should be uninstalled before you update to newer drivers, or when removing an older graphics/video card and replacing it with a new one.
You can’t open Control Panel? Take a look at this step-by-step guide to find a solution.
9. Perform a Clean Boot
- Log on as an administrator
- Go to the search box
- Type msconfig
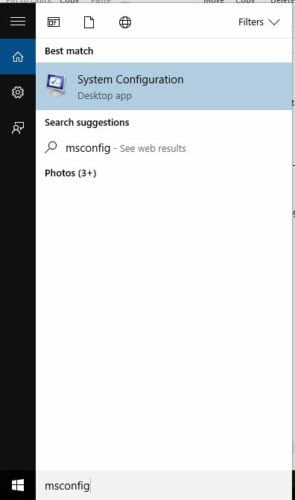
- Select System Configuration
- Find the Services tab
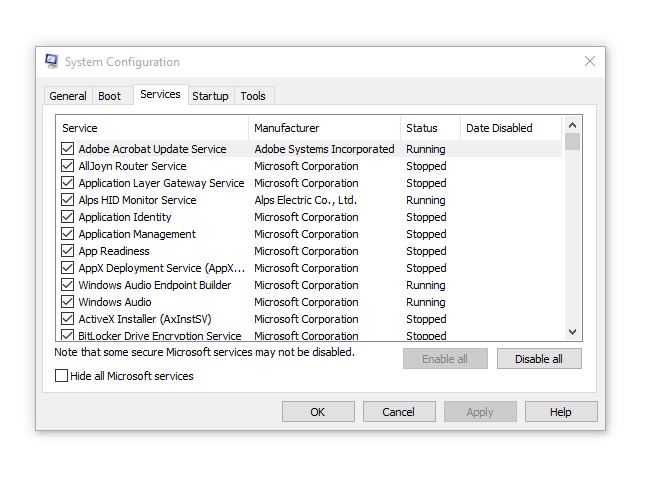
- Select Hide all Microsoft services box
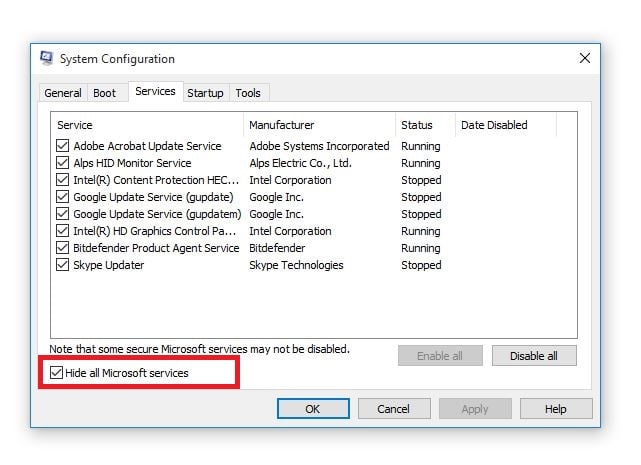
- Click Disable all
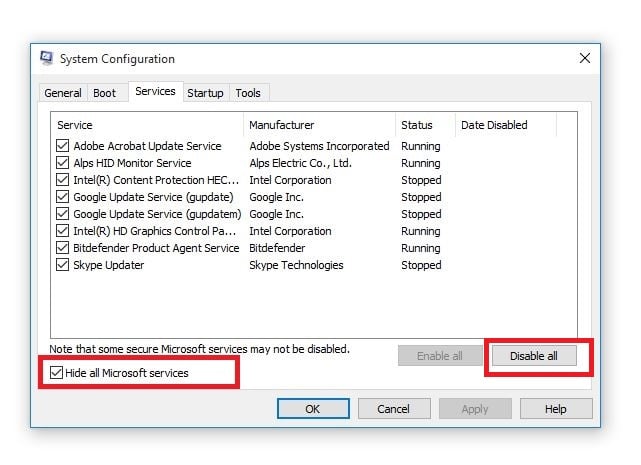
- Go to Startup tab
- Click Open Task Manager
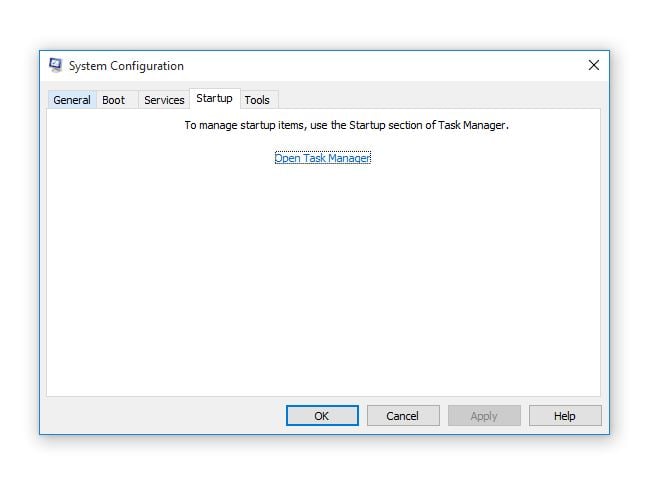
- Close Task manager then click Ok
- Reboot your computer
Performing a clean boot for your computer reduces conflicts related to software that can bring up the root causes of sleep options missing in Windows 10.
These conflicts can be caused by applications and services that start up and run in the background whenever you start Windows normally.
You will have a clean boot environment after all these steps are carefully followed, after which you can try and check if the sleep option is restored.
If you want to know how to add or remove startup apps on Windows 10, check out this simple guide .
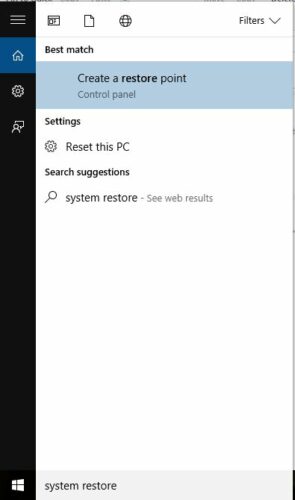
10. Perform a System Restore
- Click Start
- Go to the search field box and type System Restore
- Click Create a restore point in the list of search results
- Enter your administrator account password or grant permissions if prompted to
- In the System Restore dialog box, click Choose a different restore point
- Click Next
- Click a restore point created before you experienced the problem
- Click Next
- Click Finish
Restoring doesn’t affect your personal files. It however removes apps, drivers, and updates installed after the restore point was created.
If you’re interested in more info on how to create a restore point and how would that help you, take a look at this simple article to find out everything you need to know.
Did any of these solutions work? Drop your comment in the section below and let us know your experience.


