- SNMP MIBs и как их готовить
- Предыстория
- Установка MIBs
- Программное обеспечение
- Итого
- Установка и настройка SNMP в CentOS
- Установка агента SNMP и утилит диагностики в CentOS Linux
- Настройка SNMP агента в CentOS
- Опрос SNMP агента с помощью утилиты snmpwalk
- Настройка протокола SNMP v3 в CentOS
- danman’s blog
- 8 thoughts on “Installing SNMP MIBs in Ubuntu”
- Leave a Reply Cancel reply
- What is SNMP? Install & Configure SNMP in Linux
- SNMP Basics concepts
- SNMP versions
- 1) Installation of snmp on Linux
- 2) Configuration of SNMP
- 3) Testing SNMP service
- Conclusions
SNMP MIBs и как их готовить
Доброго времени суток, читатель.
Предыстория
Установка MIBs
Стандартные
MIBs обычно распространяются в виде архива с пачкой файлов. Многие из них, составленные в iana и ietf, повторяются в каждом архиве, но передаются для совместимости.
Для работы в системе по умолчанию (конкретно для Debian) они должны лежать примерно в /usr/share/mibs
Для начала установим стандартные mibs в систему.
В файле конфигурации /etc/snmp/snmp.conf включить нужные. Пример:
mibs :ALL включает все, что не совсем хорошо. Рекомендую для каждого оборудования иметь папку с mib’ами, т.к. они могут отличаться из одной прошивки к другой.
Частный случай
После распаковки структура следующая:
Программное обеспечение
D-View
Net-SNMP
Возвращаюсь к тому, с чего начинал пост:
Мы скачали архив с MIBs и будем использовать утилиту snmptranslate из пакета Net-SNMP. Для удобства складываем все mibs в одну директорию, но это все равно не хватает:
Чтобы долго не мучатся скопируем недостающие файлы из mibs коммутатора des-3200 с опцией не перезаписывать существующие. И здесь мы уже получаем положительный результат:
UPD: Можно не копировать файлы, а указывать директории локальную и стандартные из системы -M ./:/usr/share/mibs/ietf:/usr/share/mibs/iana (для удобства можно делать alias в шелле)
О флагах:
- -M Указывает на директорию, где искать mibs (можно перечислять, разделяя символом «:»)
Таким образом можно было не складывать все MIBS в одну директорию, но тогда нужно с флагом -M указать все каталоги из первоначального архива. - -m Указывает какой модуль активируем (можно перечислять, разделяя символом «:»)
Без указания модуля будут использоваться те, которые прописаны в /etc/snmp/snmp.conf
% snmptranslate -m ./ -Ln 1.3.6.1.4.1.171.11.117.1.3.2.100.1.2.0.1
RFC1155-SMI::enterprises.171.11.117.1.3.2.100.1.2.0.1 - -Ln Избавляет нас от бесконечной портянки ошибок в иерархии mibs. Точнее -Ln отключает errors в stdout
Теперь, когда трансляция работает, можно вкусить всю прелесть иерархии OIDs. Для этого есть флаги:
Примеры использования
Можно просканировать все mibs и увидеть, что swL2macNotifyInfo есть и на других коммутаторах
Подводные камни D-Link
Еще есть особенность в mibs для 3200, что в них присутствует Object Name loop_detect. Символ «_» в net-snmp не поддерживается, так что для профилактики делаем: % sed -i ‘s/_/-/’ * в директории с mibs. Ошибку об этом символе можно увидеть, если вернуть вывод ошибок (убрать ключ -Ln):
Здесь мы видим, что иерархия не сложилась до конца.
После исправления становится так:
UPD: Можно использовать флаг -P u (-P MIBOPTS Toggle various defaults controlling mib parsing: u: allow the use of underlines in MIB symbols)
Нужно заметить, что я указал конкретный MIB, в котором искать (остальные «подтянутся» из директории ./). В этом случае не возникает ошибок, ну и скорость работы выше.
Если не указать конкретный MIB, то получим ошибки в других mibs
Еще пример
Здесь мы видим тот mib, который ранее использовали в ключе -m DES3200-10-L2MGMT-MIB
SNMPv2-MIB::sysORID.49 = OID: DES3200-10-L2MGMT-MIB::swL2MgmtMIB
Еще бонус в виде команды snmptable
Итого
В данный момент, я перевожу OID SNMP Traps с коммутаторов в понятный для оператора формат. Это послужит основой для системы регистрации событий на оборудовании. Использовать MIBs в приложении мы не собираемся по причине непереносимости и не универсальности. Думаю подавляющее большинство библиотек используют для трансляции OID системные базы MIBs и конфиг /etc/snmp/snmp.conf (их использует Net-SNMP, а библиотека обращется к последнему), а глобально включать эти модули MIBs мы не хотим. Эти данные можно использовать для экспериментов и добиться более универсального варианта по использованию MIBs, но для меня этого достаточно.
UPD:
Полезные ключи:
-TB ищет в MIBs Object Name по regexp
-On выводит Object ID
Примеры:
Источник
Установка и настройка SNMP в CentOS
Протокол SNMP (Simple Network Management Protocol) используется для получения информации о текущем состоянии серверов, сетевых устройств, принтеров и другого IP оборудования (можно собирать различные метрики: загрузка CPU, количество процессов, состояние служб и многое другое). Основные преимущества SNMP – он поддерживается практически на любых устройствах и не требует установки отдельного агента системы мониторинга. В этой статье мы рассмотрим, как установить и настроить SNMP агент (и SNMP v3) на сервере под управлением Linux CentOS 8.
Установка агента SNMP и утилит диагностики в CentOS Linux
Перед установкой пакетов SNMP, сначала установите на сервере последние обновления с помощью пакетного менеджера dnf (yum):
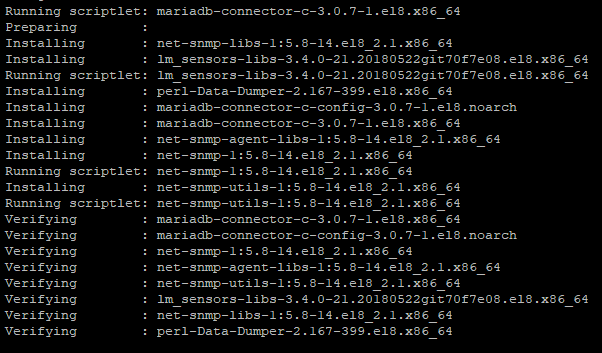
Затем установите агент SNMP и дополнительные утилиты из стандартного репозитория:
# dnf install net-snmp net-snmp-utils -y
Настройка SNMP агента в CentOS
Перед началом настройки параметров SNMP сервиса, создайте копию оригинального конфигурационного файла:
# mv /etc/snmp/snmpd.conf /etc/snmp/snmpd.conf.orig
Теперь отредактируйте настройки SNMP агента:
Добавьте следующие строки:
Сохраните файл (локацию и почтовый ящик желательно указать корректные). Теперь нужно добавить в автозагрузку сервис snmpd и запустить его:
# systemctl enable snmpd.service
# systemctl start snmpd
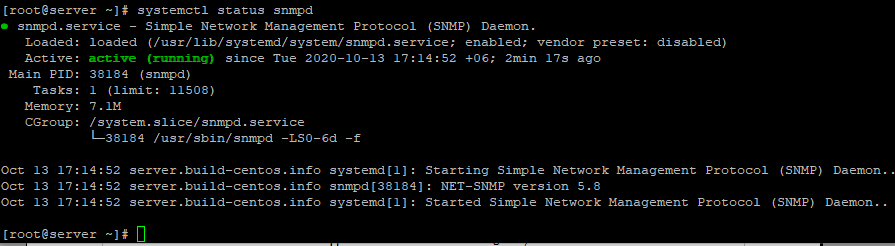
Проверьте, что сервис запущен:
# systemctl status snmpd
Если на сервере используется файерволл, нужно разрешить подключение к портам 161 и 162 TCP/UDP. Для firewalld в CentOS можно выполнить такие команды:
# firewall-cmd —zone=public —add-port=161/udp —permanent
# firewall-cmd —zone=public —add-port=161/tcp –permanent
# firewall-cmd —zone=public —add-port=162/udp —permanent
# firewall-cmd —zone=public —add-port=162/tcp —permanent
# firewall-cmd —reload
Опрос SNMP агента с помощью утилиты snmpwalk
С помощью утилиты snmpwalk вы можете опросить SNMP агент. Для локальной проверки службы по протоколу SMMPv2 используется команда:
# snmpwalk -v 2c -c public -O e 127.0.0.1
Если SNMP настроен корректно, вы получите от агента набор SNMP данных.
Решилось она очисткой всего конфигурационного файла и добавлением только тех строчек, которые я указал в статье. Если вам нужны будут какие-то специфичные настройки, внимательно проверяйте все, так как сам сервис запускается без проблем, но фактически он не работает.
Также вы можете опросить сервер локально командой:
# snmpwalk -v2c -c public localhost system
Затем проверьте, что ваш SNMP агент доступен удаленно. Выполните следующую команду с другого сервера (нужно предварительно установить утилиты snmp):
# snmpwalk -v2c -c public 10.10.22.225 system
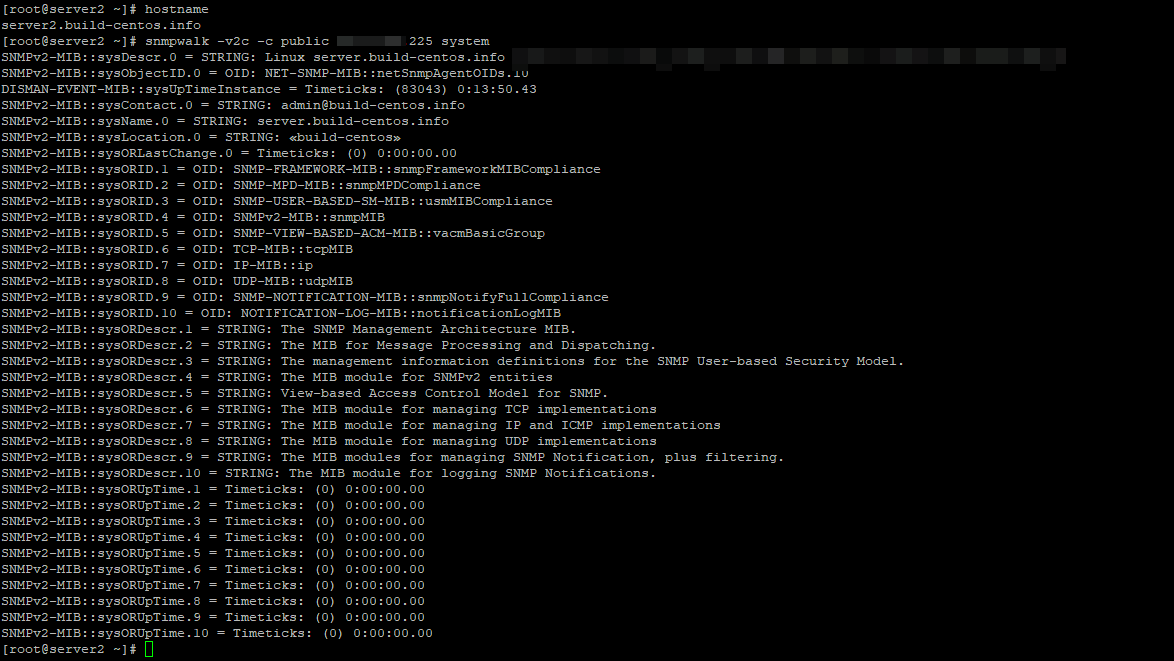
Как видите, удаленный сервер получил с сервера информацию по протоколу SNMP. Теперь вы можете добавить сервер в любую из систем мониторинга, работающую по SNMP (например, Zabbix или Cacti).
Настройка протокола SNMP v3 в CentOS
В первой части статьи мы рассматривали, как настроить SNMP агент, который работает по версиям протокола 1 и 2. SNMPv3 – это более современная и безопасная версия протокола. Оно из преимуществ которого — возможность аутентификации и шифрования. Для настройки SNMPv3 вам нужно создать отдельного пользователя с паролем, задать пароль шифрования, права доступа и алгоритм шифрования (MD5 или SHA).
Чтобы создать пользователя для SNMP v3, нужно остановить сервис snmpd:
# systemctl stop snmpd
Теперь можно создать пользователя:
# net-snmp-create-v3-user -ro -A 123456789 -a SHA -X 1234567890 -x AES snmpuser
net-snmp-create-v3-user [-ro] [-A authpass] [-a MD5|SHA] [-X privpass][-x DES|AES] [username]
- -ro — read-only, то есть пользователь только для чтения
- Authpass — пароль аутентификации
- Privpass — приватный ключ
- Username — пользователь
После запуска команды, у вас будет создан пользователь с заданными паролем и ключом:

# systemctl start snmpd
Попробуйте опросить SNMP агент с помощью утилиты snmpwalk (обратите внимание, для опроса по SNMPv3 нужно указывать имя пользователя, пароль и ключ).
# snmpwalk -v3 -a SHA -A 123456789 -x AES -X 1234567890 -l authPriv -u snmpuser localhost | head
Теперь вы смело можете добавлять свой сервер в любую систему мониторинга, работающую по SNMP.
Источник
danman’s blog
If you get this error in zabbix autodiscovery function:
snmp_parse_oid(): cannot parse OID “IF-MIB::ifDescr”
Or if you just want to install MIBs for some other reason, do following:
1. install snmp-mibs-downloader – this will also automatcally download mibs:
2. Comment following line in /etc/snmp/snmp.conf – to use default paths for mibs in snmp utils:
3. In order to reload MIBs in zabbix, restart it:
And you are done!
8 thoughts on “Installing SNMP MIBs in Ubuntu”
Thank you very much!
Last part of Zabbix SNMP puzzle was solved by your article! 🙂
I found a website where you can parse any mib for free. You can parse any SNMP MIB into a spreadsheet.
Why does everyone say “install snmp-mibs-downloader and run download-mibs and it will install all of the MIBS, then you are done!”. This is so wrong!! It only downloads and installs a small subset of mibs, and totally misses the system specific mibs such as CISCO mibs.
For example, in your list of MIBS, you are missing ALL of the CISCO* MIBS. Things such as:
CISCO-FIREWALL-MIB
CISCO-PROCESS-MIB
CISCO-MEMORY-POOL-MIB
CISCO-REMOTE-ACCESS-MONITOR-MIB
I have a folder of about 50 MIBS I need to add. There used to be a way to do this, but ever since snmp-mibs-downloader, everyone seems to have forgotten that we have third party MIBS too, in fact /most/ mibs are /not/ being loaded by snmp-mibs-downloader. How do we use third party mibs with snmp-mibs-downloader?
When you have 3rd party mibs, you should ask for 3rd party support 😉
> When you have 3rd party mibs, you should ask for 3rd party support
No, you shouldn’t. The third party did they job by providing the MIB file. It’s not their job to support installation of the MIB on the local system.
If I got this reply from my vendor I would consider replacing them.
Did you try commenting the “mibs:” entry in the /etc/snmp/snmp.conf file? It did do the trick for my environment!
Leave a Reply Cancel reply
This site uses Akismet to reduce spam. Learn how your comment data is processed.
Источник
What is SNMP? Install & Configure SNMP in Linux

SNMP (Simple Network Management Protocol) is an internet standard protocol used to remotely retrieve the operational statistics (current status) of the servers and infrastructure components. Devices that typically support SNMP include routers, switches, workstations, firewalls, and more.
In this tutorial, we will go through the installation and simple configuration of SNMP on Linux (CentOS 7, Ubuntu 16.04, Ubuntu 18.04, Ubuntu 20.04).
SNMP Basics concepts
SNMP protocol is implemented on the application layer of the networking stack. It is one of the widely accepted protocols to manage and monitor network elements. The protocol was created as a way of gathering information from very different systems in a consistent manner.
In general, a network profiled by SNMP will mainly consist of devices containing SNMP agents. An agent is a program that can gather information about a piece of hardware, organize it into predefined entries, and respond to queries using the SNMP protocol.
In the core, SNMP management system read and write operational parameters in remote devices. These parameters are known as OID’s (Object Identifiers).
SNMP requires only a couple of basic components to work:
- SNMP Manager: Is an application that manages SNMP agents on the network. It can be any machine that can send query requests to agents with the correct credentials. Manager’s key functions are queries agents, get responses from agents, set variables in agents and acknowledges asynchronous events from agents. It can be part of the network management station (NMS). Cacti, MRTG, Zabbix, Icinga, PRTG are some of the free opensource monitoring tool which acts as an SNMP manager.
- Agent: When the manager application sends SNMP queries, the agent responds back with current status and statistics. Agents are responsible for gathering information about the local system and storing them in a format that can be queried and updating a database called the management information base (MIB).
MIB is a database that follows a standard that the manager and agents adhere to. Every agent maintains an information database describing the managed device parameters. The manager application uses this database to request the agent for specific information and translates the information as needed for the Network Management System (NMS). This commonly shared database between the Agent and the Manager is called MIB.
SNMP versions
Currently, there are 3 versions available.
SNMP Version 1: This is the first version of SNMP. It only supports 32-bit counters. This provides device statistics and error reporting without consuming a lot of system resources. Security is limited to community strings, if the string matches that configured in the equipment, the request will be carried out.
Access controls based on the IP address of the querying server. It has unencrypted data communication.
SNMP Version 2: This is referred to as v2c, which adds support for 64-bit counters. Has the ability to do bulk queries that more efficiently loaded response packets with data.
SNMP Version 3: This version provides greater security and remote configuration capabilities. Access isn’t limited to a single community string for read-only and read/write access, as usernames and passwords have been introduced. It supports using encryption algorithms and authentication mechanisms.
3 Options for security and privacy:
noAuthNoPriv (no authentication, no privacy)
authNoPriv (authentication but no privacy)
authPriv (authentication and privacy)
Two authentication mechanisms:
Two encryption algorithms:
1) Installation of snmp on Linux
On the SNMP agent machine, you required only SNMP daemon (snmpd) and for manager components, you can install snmp package on Ubuntu.
The following command install snmp service on Ubuntu and Debian derived systems:
2) Configuration of SNMP
The configuration file of snmpd service can be found at /etc/snmp/snmpd.conf . Before modifying the file, make a copy of the file by the following command:
Remember to add a new SNMP user you use ‘/var/lib/net-snmp/snmpd.conf’ file.
The following are the basic config parameters to configure SNMP.
- Set community string: It is like a user id or password that allows access to a device’s statistics. The client machine use this string to retrieve data (to generate monitoring graphs). It can be identified where you will see rocommunity or rwcommunity . The default value is ‘public’ which is not secured, should be disabled.
- Listening address: We can configure the agent to listen only to a particular IP address as follows agentAddress udp:ip_address:161 . The default port on which SNMP listens is 161. The default behavior of the agent is to listen on standard UDP port on all interfaces.
- System information: It concerns personal info, process/disk monitoring,
- syslocation: This is the [typically physical] location of the system.
- syscontact: This is the contact information for the administrator.
- SNMP traps: Helps to send traps (device down, interface down, etc) to monitoring tools.
Our modified information should be like below, notice that there are other default values on the file which don’t appear here
A sample agent configuration file on Ubuntu:
A sample agent config file on CentOS:
The SNMP service needs to be restarted for any configuration change ( /etc/snmp/snmpd.conf ) to take place.
The following will restart service on Linux, make sure to run with sudo access.
On systemd systems, run the following command
3) Testing SNMP service
You can test whether SNMP can read the system and interface MIB’s using the snmpwalk command.
Once you have verified SNMP is working correctly, you can configure SNMP statistics gathering software such as MRTG to create online graphs of your traffic flows.
This example shows how to use snmpwalk command to verify the user authentication.
Similar to snmpwalk, snmpget is command-line tool to get information from snmp enabled devices.
The following snmpget command, verify user authentication on snmp server.
-u : specify snmp user name
-l : Type of security and privacy method
-a : Which authentication mechanisms
-x : Type of encryption algorithms used
-A : Authentication password
-X : Encryption password
Conclusions
If you are configuring using SNMPv3, you should know about snmpusm command and used to creates and maintains SNMPv3 user’s on a network entity.
In this tutorial we learn how to install and configure SNMP on Linux to monitor network devices. I hope you enjoyed reading and please leave your suggestions in the below comment section.
Источник


