- compizomania
- Страницы
- 04 сентября 2012
- Установить Центр приложений Ubuntu в Linux Mint 13
- Delightly Linux
- How to Install the Ubuntu Software Center in Linux Mint 17
- Install Synaptic
- Install xapian
- Install software-center
- Edit /etc/lsb-release
- Running Ubuntu Software Center
- Linux Mint 17 MATE Issue
- /etc/lsb-release Resetting After Reboot
- Conclusion
- compizomania
- Страницы
- 08 апреля 2013
- Установить Deepin Software Center в Ubuntu 13.04/12.10/12.04/11.10 и Linux Mint Linux Mint 14/13/12/11/10
- Software center linux mint
compizomania
Азбука в Linux для начинающих и не только. Я знаю только то, что ничего не знаю, но другие не знают и этого. Сократ
Страницы
04 сентября 2012
Установить Центр приложений Ubuntu в Linux Mint 13

Для управления приложениями, Linux Mint 13 имеет по умолчанию свой Software Manager, а также Менеджер пакетов Synaptic, но большинство новичков предпочитают использовать Software Manager, чем Synaptic или утилиту командной строки-Терминал.
В Ubuntu, начинающие пользователи предпочитают — Центр приложений Ubuntu, который прост в использовании и имеет много интересных особенностей.
Linux Mint 13 основан на пакетной базе Ubuntu 12.04 LTS, поэтому большинство приложений Ubuntu отлично работают в Linux Mint. Центр приложений Ubuntu также доступен для Linux Mint. Так что если вы ищете более удобный менеджер управленя программным обеспечением для Linux Mint, то вы должны попробовать Центр приложений Ubuntu.

Установка Центра приложений Ubuntu (размером около 12 MB) в Linux Mint 13
Откройте терминал (Ctrl+Alt+T), скопируйте и выполните всего одну команду:
sudo apt-get install software-center
Вот и все. После его установки, вы сразу можете пользоваться Центром приложений Ubuntu в Меню ->Preferences.
Источник
Delightly Linux
How to Install the Ubuntu Software Center in Linux Mint 17
⌚ June 10, 2014 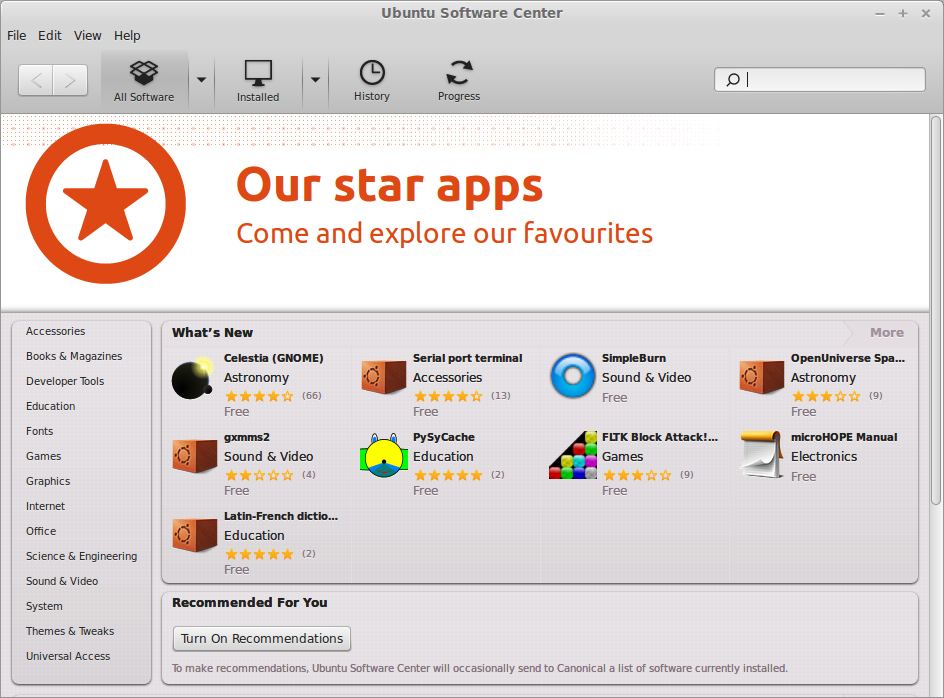 Linux Mint 17 was released a few days ago, and it is proving, yet again, to be a worthy successor in a line of fine Linux distributions.
One extremely minor item on the Linux Mint wishlist would be an improved software manager similar to what Ubuntu offers with its Software Center.
This is more of a matter of personal preference, but the Ubuntu Software Center offers more polish and professionalism than what is offered by Linux Mint’s Software Manager. Since Linux Mint is an Ubuntu derivative, can we run the Ubuntu Software Center in Linux Mint and enjoy the best of both worlds?
Well, it turns out that we can! The Ubuntu Software Center will run in Linux Mint 17 Cinnamon and MATE (and Linux Mint 17.1), and this article shows you how.
First, this will not replace the existing Linux Mint Software Manager. It only adds the Ubuntu Software Center to the system, so you may choose which to use.
We want to use this:
Linux Mint 17 Software Manager.
Ubuntu Software Center running in Linux Mint 17.
Install Synaptic
For best results, I recommend using Synaptic so most dependencies will be resolved automatically. I experienced dependency issues when installing the Ubuntu Software Center from the terminal, and installation was trickier since full package names are needed. Synaptic provides those names. To begin, install Synaptic if it is not already installed:
Yes, Synaptic installs fine from the terminal.
Install xapian
The program software-center installs some dependencies, but not all of them. Even though Ubuntu Software Center appears in the menus (if installed), it will not open yet due to errors. If opening from the GUI, nothing seems to happen, but if you run software-center from a terminal, you should see an error message similar to this:
Xapian is a search engine required by the Ubuntu Software Center, but it is not installed with Linux Mint. Hence, this error. In Synaptic, search for xapian. Mark xapian-tools for installation and apply.
Synaptic showing xapian-tools installed. Ubuntu Software Center requires xapian and its dependencies. Installing from Synaptic should install all needed packages automatically, but if not, install them manually.
If the “No such file or directory” error persists, manually create the directory:
Oddly, Linux Mint 17 Cinnamon seemed to automatically set up the xapian directory structure, but Linux Mint 17 MATE needed the manual directory creation.
Update: Linux Mint 17.3 Cinnamon also needs the manual directory creation. Even then, Software Center still did not run. The solution was to uninstall software-center and then reinstall it.
Install software-center
Open Synaptic and search for software-center, which is the name for the Ubuntu Software Center. Find software-center, mark for installation, and apply.
Synaptic Package Manager showing software-center already installed. Associated screenshot is also shown.
Edit /etc/lsb-release
We are not finished yet! We have one more issue to resolve. If you try to open the Ubuntu Software Center at this point, you will likely encounter another error at the terminal:
The line reading “No module named linuxmint” is the clue. To resolve this, we need to edit a file named lsb-release.
(Use any text editor you prefer.)
By default, there are four lines in this file:
DISTRIB_ID=LinuxMint
DISTRIB_RELEASE=17
DISTRIB_CODENAME=qiana
DISTRIB_DESCRIPTION=”Linux Mint 17 Qiana”
Change the line,
DISTRIB_ID must be set to Ubuntu, not LinuxMint. Ubuntu Software Center has no idea what to do with a line reading LinuxMint, but Ubuntu will work. In theory, DISTRIB_ID=Xubuntu should also work, but I had no success.
Running Ubuntu Software Center
Now, we are ready to see if our efforts yield results! From the menu, choose Administration > Ubuntu Software Center (or run software-center from a terminal to see any possible error messages).
The Ubuntu Software Center should appear, and you should be able to use it like you normally would in Ubuntu.
Browsing through programs using the Ubuntu Software Center running in Linux Mint 17. When connected to the Internet, ratings, user comments, and screenshots will appear.
Ubuntu Software Center running in Linux Mint 17 and installing Stellarium.
Stellarium installed successfully using the Ubuntu Software Center. The program runs well.
Strangely, the Ubuntu Software Center did not always run the first time. It took a few tries to set up, but once set up, Ubuntu Software Center would run reliably. If the program does not appear upon opening it from the menu, then run it from the terminal and read the error messages for clues. I had to twiddle with xapian in Synaptic a few times before it would run. In another system, Ubuntu Software Center worked right away. This might have been due to what was already installed.
Linux Mint 17 MATE Issue
With MATE, a new error appeared:
Unexpected errors might occur across various Linux distributions, so run software-center from the terminal to see them. I resolved this issue by completely removing software-center from the terminal. Leave all xapian installations intact.
I performed the update and upgrade just in case something was outdated, but it had no effect. The Linux Mint 17 MATE system was already updated. Nothing updated.
Then, I reinstalled software-center from the terminal.
Now, running Software Center from the terminal or from the Linux Mint 17 MATE menu opened the Ubuntu Software Center properly. It ran fine, and programs installed normally. Not sure what the issue might have been. One theory might be that xapian needs to be installed first so the software-center installation will set up properly.
Update November 29, 2014: After installing the Ubuntu Software Center in Linux Mint 17.1 Cinnamon, I encountered the same issue of a nonworking Software Center as experienced in Linux Mint MATE. I had installed the Ubuntu Software Center first and then xapian. The installation order seems to be important.
After performing the uninstallation as outlined above, I reinstalled the Ubuntu Software Center from the command line. This produced some text regarding a catalog update. Once the catalog database updated, the program worked correctly. Apparently, xapian must be installed first, and then the Ubuntu Software Center.
/etc/lsb-release Resetting After Reboot
Usually, Linux Mint will update /etc/lsb-release at each boot and change the edited DISTRIB_ID line back to LinuxMint. This means /etc/lsb-release must be edited again or else the Ubuntu Software Center will not load.
One quick method (out of many) to resolve this is to fix /etc/lsb-release so it cannot be edited by the system. Change DISTRIB_ID to Ubuntu, and then set the file’s immutable flag.
Now, DISTRIB_ID=Ubuntu persists across reboots. Ubuntu Software Center, Synaptic, and the Linux Mint Software Manager run fine, and I have not experienced any problems by doing this. To revert the file to an editable mode,
Conclusion
After a little tweaking, Ubuntu Software Center runs great in Linux Mint 17. You can browse for programs, install them, read user comments, interact with the online repository, and grab screenshots. Purchasing software was not tested, so I cannot report on how well that works, but, in theory, it might.
Источник
compizomania
Азбука в Linux для начинающих и не только. Я знаю только то, что ничего не знаю, но другие не знают и этого. Сократ
Страницы
08 апреля 2013
Установить Deepin Software Center в Ubuntu 13.04/12.10/12.04/11.10 и Linux Mint Linux Mint 14/13/12/11/10

Для тех кто не знаком с Deepin Software Center поясню, что он является Центром приложений популярного в Китае дистрибутива Linux Deepin, основанном на пакетной базе Ubuntu. Это все равно, что Центр приложений Ubuntu только с некоторыми дополнительными функциями, такими как: параллельные загрузки, возобновление прерванной загрузки, обновления и уведомления, очистка кэша и красочные темы оформления окна приложения, которые могут быть заменены по мере изменения Вашего настроения.

Deepin Software Center использует движок Aria2 для выполнения многопоточной, параллельной загрузки, чтобы произвести быструю загрузку нескольких приложений одновременно.
Deepin Software Center является альтернативой для тех, кто хочет попробовать быструю загрузку и управление приложениями в Ubuntu/Linux Mint.
Его можно установить параллельно с Центром приложений Ubuntu или Менеджером программ (Linux Mint) и они не будут конфликтовать между собой. Все действия выполненные в Deepin Software Center будут синхронизированы в Центре приложений Ubuntu/ Менеджере программ и наоборот, т.е. если вы установили какую-то программу в Deepin Software Center, она тутже отобразтся как установленная в Центре приложений Ubuntu/ Менеджере программ.
Интерфейс программы — английский, т.к. сам дистрибутив Linux Deepin выпускается только на двух языках: китайском и английском.
— Существует регулярно обновляемый список популярных приложений на домашней странице. Список рекомендаций производится на основе пользовательских оценок.
— Репозиторий дает вам удобный способ выбрать и установить необходимые приложения с помощью всего одного щелчка мыши. С мощной фоновой многопоточной загрузкой.
— Update Manager поможет вам убедиться, что ваша операционная система имеет новейшее и самое лучшее программное обеспечение. Все обновления доступны бесплатно!
— Удаление приложений, которые вам больше не нужны, что дает вам возможность иметь более чистую рабочую систему.
— Поставляется с 6 предустановленными красочными заставками, так что вы можете выбрать ту, которая более украсит ваш день!
Установка Deepin Software Center
Для установки Deepin Software Center в Ubuntu/Linux Mint откройте терминал (Ctrl+Alt+T), скопируйте и выполните следующие команды:
sudo add-apt-repository ppa:noobslab/deepin-sc
sudo apt-get update
sudo apt-get install deepin-software-center
После установки, вы найдёте Deepin Software Center в системных программах или поиском в Даш:

Удалить Deepin Software Center
Если вы решили удалить Deepin Software Center, выполните следующие команды:
sudo apt-get remove deepin-software-center
sudo apt-get update
sudo add-apt-repository —remove ppa:noobslab/deepin-sc
Источник
Software center linux mint
There are several ways of installing softwares in linux and they are described in many tutorials. this tutorial will cover most of the processes of installing softwares in a linux system.
Online installation:
#1. Through software manager(linux mint)/software center(ubuntu):
first open the terminal and run this command to get the latest version of the software:
sudo apt-get update
1. open software manager/center. it’s in the menu.
2. search your desired software in the search box
3. if it’s in the list then it will appear before you . if it’s not in the list follow the instructions in the ppa installation section of this tutorial.
4. now double click on the desired software entry and then click «install«.
5. it will be installed on your system as per your network connection speed.
#2. Through synaptic package manager:
if it is absent in your linux distribution then you will have to install it through software manager/center first.
to me it’s the best way to install softwares in linux.
1. open synaptic package manager . click reload to get the latest version of the softwares.
2. search your desired software/s in the search box.
3. right click each software you want to install and mark them for installing. it will mark additional dependencies on it’s own.
if your softwares not in the list follow the instructions in the ppa installation section of this tutorial.
4. after marking for installing, click apply
6. it will download and install the marked softwares.
if you have a list of softwares then save the file with the list, with .list extension (this file should contain the exact package name one at every line with an extra string «install» included after each package name preceding by an space/tab). then go to file->read markings and then brows to the file and open it. synaptic will mark the softwares in the list automatically.
#3. Through terminal:
if you know the exact name of the software then you can install it through terminal by simply entering the command:
sudo apt-get update (to get the latest version)
sudo apt-get install software-package-name
if it says «unable to locate package. » then follow the instructions in the ppa installation section of this tutorial.
#4. PPA installation:
if your software’s not in the software list then it may come from private package archives (PPA’s).
these are private development of softwares so use it at your own risk.
1. search google for the ppa address for your software. (like ppa for package-name)
2. then add it to the repository by entering this command in terminal:
sudo add-apt-repository ppa. whatever_it_is
3. then run this command (must)
sudo apt-get update
4. now your desired software is in the list. so you can follow one of the above processes (#1,#2,#3)
Offline installation:
say, you downloaded your desired softwares from some website. in this case if you don’t trust the origin of the software then don’t install it or install it at your own risk.
Your downloaded softwares may come as a .zip, tar.gz, tar.bz2, .deb, .rpm, .tgz, tar.xz or any other types of archives.
if you are in linux mint or in ubuntu or in a debian based OS try to download .deb packages because it’s easier to install in debian based OS.
#5. installing .deb packages:
cd path_to_the_directory_that_contains_the_.deb_file
sudo dpkg -i filename.deb
through gdebi package manager:
if gdebi is not installed then you have to install it through one of the processes #1,#2,#3 (requires internet connection)
1. then double click on the .deb file or open the file with gdebi package manager and click install.
2. it will be istalled soon.
#6. installing .rpm packages:
rpm has to be installed in the system, otherwise follow one of the processes #1,#2,#3 to install rpm (requires internet connection)
cd path_to_the_directory_that_contains_the_.rpm_file
sudo rpm -i filename.rpm
#7. installing from archives(.zip tar.gz. etc):
these archives generally conatains the source of the package. each of them generally has a different approach to install. I will be discussing a common method which will supposedly work for all of them.
2. bison or bison++
As these archives contains the source, your system needs the required programming languages to compile and build the source. so the general requirement packages stated above may not be sufficient for you. in that case you have to install the required packages through one of the processes #1,#2,#3 (requires internet connection). you can know about the dependencies about your software in a readme file included in the archives.
1. open the archives with archive manager by double clicking it, then extract it.
cd path-to-the-extracted-folder
3. inside the extracted folder look carefully.
a. if you find a file named configure then :
./configure
make
sudo make install
if the first code fails to execute then run this code before above codes:
chmod +x configure
b. if you find a file named install.sh then
chmod +x install.sh
./install.sh or sudo ./install.sh (if it needs root permission)
or you can double click it and select run in terminal or simply run
N.B : sometimes there is a file, something like your_software_name.sh is found instead of install.sh. for this case you have to replace install.sh with the correct name in the previous codes.
c. if you find a file named install then
chmod +x install
./install or sudo ./install (if it needs root permission)
or you can double click it and select run in terminal or simply run
d. if you find a file named make (if there is no configure file) then
make
sudo make install
e. If you still can’t find the required files
then it may be in a special folder (generally in a folder named ‘bin’). move to this folder with cd command with appropriate path and then look again and follow the same process.
#8. pre installed archives:
some packages are archived as pre installed packages i.e you don’t have to install them , you just need to extract them in a secure place and theres an executable file (name is generally same as the software name) in the extracted folder or in child folders like bin,build etc. you have to find it and make it executable.
Example: eclipse, adt bundle (android developing tool)
code to make executable:
chmod +x filename_with_exact_path
then you can run it with :
filename
or double clicking it and selecting run in terminal or run, whatever supports your software.
#9. installing .sh files:
some softwares come with a .sh file to install it
chmod +x filename.sh
./filename.sh or sudo ./filename.sh (if it needs root permission)
or double click it and select run in terminal or run, whatever supports your software.
#10. installing .run files:
some softwares come with a .run file to install it
chmod +x filename.run
./filename.run or sudo ./filename.run (if it needs root permission)
or double click it and select run in terminal or run, whatever supports your software.
Additional info about offline installation:
Often, softwares generally have a lot of dependencies. You need to download all of them, which sometimes can be very difficult and tiring. for this you can follow the instructions here which will save your time and effort.
for adding an entry in the menu for your newly installed software you can see my other tutorial:
W: The first three online methods are the safest way to install a software. For other methods you have to take risks of potential damage of your system or software dependencies.
Источник


