- The Personal OS for Personal Computers
- Built for people like you, by people like you
- For home or office
- For developers
- For content creators
- For gamers
- Solus
- Дистрибутив Solus
- Видео
- Среда рабочего стола Budgie
- Программы
- Редакции дистрибутива
- Пакетный менеджер
- Установка
- График выхода релизов и обновлений
- Solus
- Designed for Everyone
- Ready to go.
- Help Center
- Get answers to common questions
- Preparing to install
- Getting the ISO
- Verifying the ISO
- Linux and Mac
- Import the Public Key
- Verify SHA256SUMS file signature
- Verify ISO
- Getting the Right Tool
- Linux
- Windows
- macOS
- Writing the ISO
- Linux
- Windows
- macOS
- Boot the Image
The Personal OS for Personal Computers
A modern operating system to power your daily needs. Install today, update forever.
Built for people like you, by people like you
Solus is empowered by the shared vision of a strong community working for a common goal. All developments and improvements to Solus are by people who want to use their computers just like you do. Solus stands strong on an open platform, powered by industry-proven technologies, including GNU/Linux*.
Get Involved Team Technologies 
For home or office
Shipping with the latest version of the free LibreOffice* suite, so that you can work on your documents, spreadsheets and presentations right away. In our Software Center you’ll also find options for accounting, Personal Information Management and more.
For developers
With Solus, you can spend less time setting up tooling and more time coding. We support a wide variety of editors, programming languages, compilers, and version control systems, as well as containerization / virtualization technology such as Docker* and Vagrant*. Whether you’re writing drivers in C or writing backend web services in Go, we have software that will fit your needs.
Powerful editors and IDEs readily available, such as: Atom, Idea, GNOME Builder, Qt Creator, Visual Studio Code*.
Support for many languages, including: Go, Rust, PHP, Node.js, Ruby, and many more.
Support for Bazaar, Git, Mercurial, SVN. Graphical tools like GitKraken* and git-cola.
For content creators
Whether animating in Synfig Studio, producing music with Musescore or Mixxx, graphic design with GIMP or Inkscape, or editing video with Avidemux, Kdenlive, or Shotcut, Solus provides software to help express your creativity.
For gamers
Many fantastic open source games are available natively for Solus, along with support for many gamepads and controllers. Within minutes you can be playing all your own Steam* titles for Linux, with a modern, optimised gaming runtime and no setup hassles.
Gamepad and controller software such as antimicro and sc-controller.
Support for gaming platforms like Itch.io, Lutris, and Steam*.
Many free and open source titles including: Freeciv, OpenTTD, Red Eclipse, and Warzone 2100.
Copyright В© 2015-2021 Solus Project. The Solus logo is Copyright В© 2016-2021 Solus Project.
All rights reserved. Laptop graphic provided by Clyde Goodall. Icons provided by the Papirus Icon Theme.
* Other names and brands may be claimed as the property of others
Источник
Solus
Дистрибутив Solus
- Рабочий стол:
- Budgie
- GNOME
- KDE, Plasma
- MATE
- Основан на:
- Независимые
- Категория:
- Для настольных ПК
- Поддерживает Live-режим
- Подходит для новичков
Solus — красивый дистрибутив, который не основан на других дистрибутивах. Использует собственную среду рабочего стола Budgie. Имеет современный и удобный рабочий стол.
Видео
Наш краткий видео-обзор Solus и обзор релиза 4.1.
Среда рабочего стола Budgie
Дистрибутив использует собственную среду рабочего стола Budgie. Среда тесно интегрирована со стеком GNOME и использует многие его возможности.
Интерфейс системы выглядит современно и свежо, и вызывает приятные ощущения. Как пишут сами разработчики, Budgie разрабатывается с упором на простоту и элегантность.
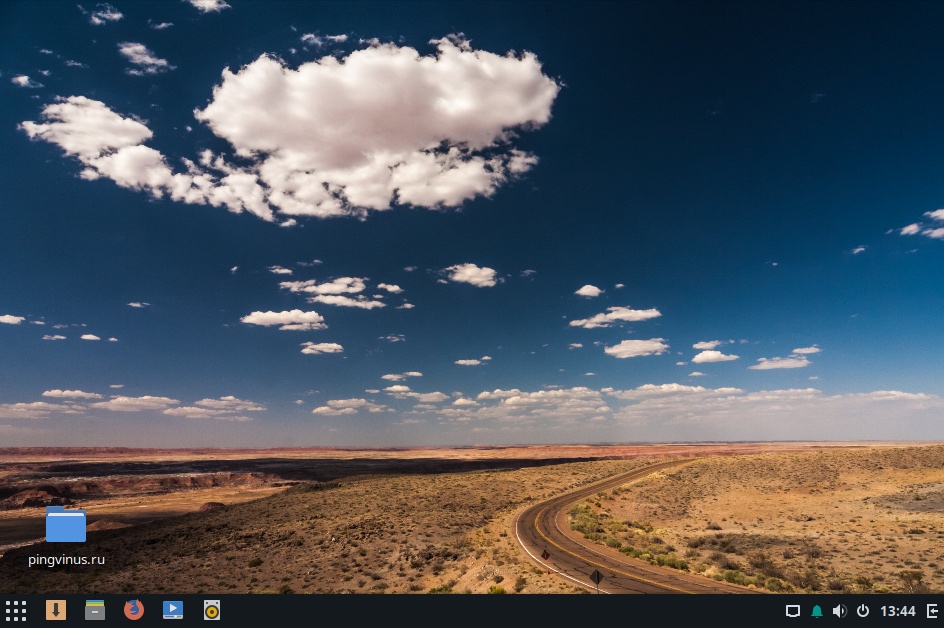
Внешний вид рабочего стола можно легко настроить, для этого существует специальная утилита. Через нее можно с легкостью изменить тему рабочего стола, тему курсора мыши, иконки, шрифты и так далее.
Доступ к установленным приложениям осуществляется через главное меню Budgie Menu. Меню простое и без изысков, программы в нем распределенные по категориям. Есть строка для поиска. Также на панели располагаются иконки быстрого запуска приложений, часы, регулятор звука, область уведомлений.
В правой части рабочего стола можно открыть панель уведомлений и апплетов Raven. На ней размещаются уведомления, календарь, апплеты приложений и некоторые настройки. Например, можно отрегулировать звук, управлять медиа-проигрывателем, выключить или перезагрузить компьютер. На панель можно добавлять дополнительные апплеты.
Программы
В Solus относительно мало предустановленных программ.
Из основных предустановленных программ представлены:
Редакции дистрибутива
Solus доступен в трех редакциях, отличающихся используемой средой рабочего стола:
Пакетный менеджер
Для управления пакета в Solus используется пакетный менеджер eopkg (Evolve OS Package).
eopkg является форком пакетного менеджера PiSi (Packages Installed Successfully as Intended), который был разработан для дистрибутива Pardus.
eopkg позволяет выполнять весь необходимый базовый набор действий для управления пакетами и репозиториями.
Поддерживается установка Snap и Flatpak пакетов.
Установка
Установка Solus выполняется из LiveCD системы. Используется графический инсталлятор.
Пошаговое руководство по установке: Установка Solus
Имеются следующие особенности:
- Инсталлятор Solus не имеет средств создания/удаления/редактирования разделов диска. Разделы нужно подготовить заранее. В LiveCD системе это можно сделать с использованием программы GParted. В установщике вы затем указываете точки монтирования.
Если вы хотите задействовать весь диск, то программа установки сама разметит его и создаст разделы автоматически. - Во время установки можно создать несколько пользователей.
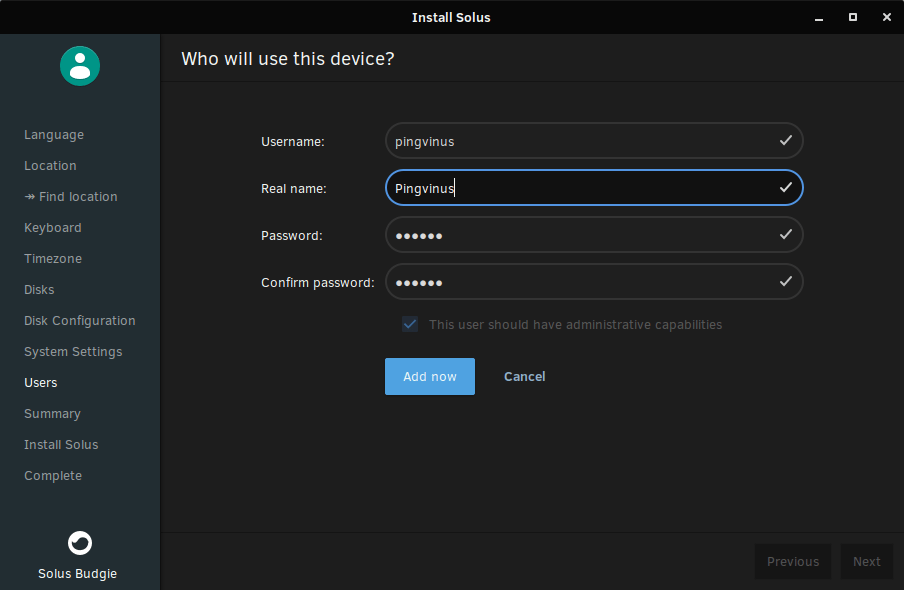 Solus 4.0 Budgie: Установка — Создание пользователя
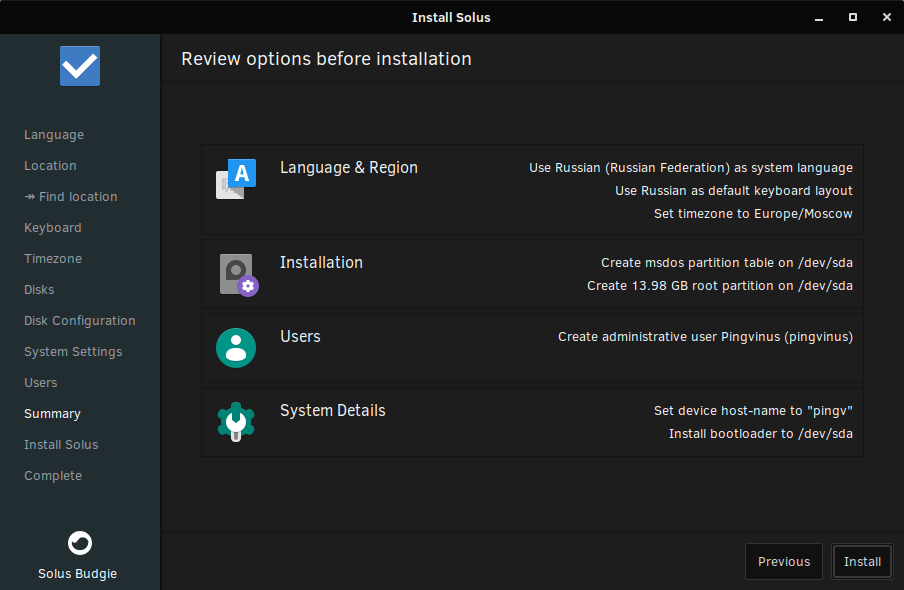 Solus 4.0 Budgie: Установка
График выхода релизов и обновлений
Solus использует модель rolling release — постоянное обновление компонентов системы. Система всегда находится в актуальном состоянии.
Релизы выпускаются, чтобы зафиксировать текущий срез (snapshot) или если требуется включить в систему компоненты, которые существенно обновились.
Какая-либо система в нумерации версий отсутствует.
Источник
Solus
Solus is an operating system that is designed for home computing. Every tweak enables us to deliver a cohesive computing experience.
Designed for Everyone
Solus provides a multitude of experiences that enable you to get the most out of your hardware.
From our flagship Budgie experience for modern devices to the more traditional MATE experience for lower-end devices, Solus aims to provide the best experience for your device.
Learn More
Ready to go.
Solus ships with a variety of software out of the box so you can get going without a lot of setup fuss. See our selection of default applications below!
Easily manage all your documents, music, photos, videos, and more with Files.
We ship with Mozilla Firefox*, a fast and secure web browser.
Pop some popcorn and sit down to your favorite digital content via GNOME MPV.
Play and manage your music and podcasts, as well as tune into online radio with Rhythmbox.
No more hunting around for apps! Install and manage them right from our Software Center.
Take the hassle out of email by using the simple yet feature-rich Mozilla Thunderbird*.
Copyright В© 2015-2021 Solus Project. The Solus logo is Copyright В© 2016-2021 Solus Project.
All rights reserved. Laptop graphic provided by Clyde Goodall. Icons provided by the Papirus Icon Theme.
* Other names and brands may be claimed as the property of others
Источник
Help Center
Get answers to common questions
Preparing to install
The first step to installing Solus is acquiring the correct media. The Solus Project provides ISO images, which contain the contents of Solus for installing.
Getting the ISO
You can download a Solus ISO by going to our Download page.
Verifying the ISO
Linux and Mac
Download the relevant Solus ISO SHA256SUMS: File, Signed File and Public Key from the Download page.
Note: It is advisable that the files are all placed in the same folder.
Import the Public Key
Verify SHA256SUMS file signature
Verify ISO
Getting the Right Tool
There is a multitude of tools which enable the writing of our ISO image to DVDs or USB thumb drives. Below, we break it apart across Linux, Windows and macOS.
Linux
We recommend using Brasero for writing the ISO to a DVD.
Graphical Tool
We recommend using Gnome Multi-Writer. Please note that unetbootin will not work.
Command-Line
For those comfortable with the command-line / terminal, we will walk you through using dd .
Windows
You can easily burn an ISO image to a DVD, on Windows 7 and newer, by using Window’s built-in file manager (Explorer), right-clicking on the ISO image file, and clicking Burn disk image.
You can easily burn an ISO image to a USB by using graphical tool Rufus.
macOS
On a Mac, burn an ISO image to a DVD by using the macOS “Finder” file manager, right-clicking on the ISO image file, and clicking “Burn Disk Image”.
Graphical Tool
One of the easiest ways to burn an ISO image to a USB thumb drive is by using a graphical tool called Etcher.
Command-Line
For those comfortable with the macOS Terminal app, we will walk you through using dd .
Writing the ISO
To write the ISO, you will need:
- Either a blank DVD or a USB drive larger than 1GB.
- If using a USB, the ability to boot from the USB.
- ISO from the “Getting the ISO” section.
Linux
- Insert blank DVD (DVD-R or DVD+RW is suitable) into your DVD writer.
- Open Brasero.
- Select the option “Burn image”.
- Click the “Click here to select a disc image” button and using the file dialog, choose the ISO.
- Ensure the correct DVD is selected in the “Select a disc to write to”.
- Click Burn and wait.
- Upon seeing “Image successfully burned to DVD”, click Close.
Graphical Tool
Upon opening Gnome MultiWriter, you will likely be shown a window similar to the one below, in the event your USB drive is already plugged in.

If your USB drive is not plugged, you will be prompted with an image indicating to plug it in.
Next, click the “Start Copying” button, and you will be prompted to select the ISO. Choose the ISO you downloaded in the “Getting the ISO” section. The USB will automatically be written to.

Upon completion, you will be prompted with the following dialog and your USB is now ready for use.

Command Line
Please follow the steps below, which guide you through installation using the utility dd :
First, insert the USB drive into your computer and open your Terminal. Proceed to type lsblk into your Terminal. It should output something along the lines of:
You will see one disk, in my case /dev/sdb , that is roughly the size of my USB Drive. Yours should be similar (difference being in size). Write this device down somewhere.
Next, locate the downloaded ISO. It will most likely be in your Downloads folder. In the event that it is, type: cd
If it is not in your Downloads folder, use cd to navigate to the correct directory.
Dangerous Below
This is where we overwrite the contents of your USB drive so please ensure you identified the current drive in the lsblk stage above. My command is below, however you may need to replace sdb with the drive we located above:
This will write the contents of the ISO to the thumb drive so you can boot it and also make sure the data is synchronised so you can eject the USB safely.
Windows
- Open Window’s built-in file manager (Explorer).
- Right click on the ISO image file and click Burn disk image.
- Select the correct Disc burner.
- Click Burn.
- Open Rufus.
- Ensure your device is correct by checking the contents of the Device dropdown.
- Click the CD icon found in the image below, and select the ISO.
- Untick all options except “Create a bootable disk using” and use the dropdown to select “DD Image”.
- Click Start.

macOS
Since OS X El Capitan (10.11), the easiest way to burn a DVD is:
- Insert your DVD and open Finder.
- Right click on the ISO image.
- Click on “Burn Disk Image вЂSolus-4.3-Budgie.iso’ to Disc…”
- Then click “Burn”.

Graphical Tool
- Open Etcher.
- Click on “Select image” and then select the ISO and click “Open”.
- Etcher will automatically select your USB drive. If it has selected the wrong one, click “Change” and select the correct one.
- Click “Flash!”.
- You may be prompted for your macOS user password.
- Once Etcher has finished it is safe to remove the USB drive.

You may see a message stating “The disk you inserted was not readable by this computer.” once Etcher finishes, this can be ignored.
Command Line
First, insert the USB drive into your computer and open Terminal (found in Applications/Utilities).
Now you’ll need to identify your USB drive by listing your storage devices with the following command:
You should see output similar to this:
From this output, we can see the USB drive is listed as — /dev/disk1 (external, physical) . In this example, the IDENTIFIER is disk1 . Please note, your USB drive may have a different identifier. You should be able to tell which is your USB drive by checking the name and size.
macOS usually auto-mounts USB drives so you’ll need to unmount it first before proceeding. Use the following command and replace IDENTIFIER with the correct identifier we found in the diskutil list step.
Now navigate to the folder that has the downloaded ISO. This could be your Mac’s Downloads folder. The following command will get you there:
This step is dangerous. Using the wrong drive identifier could result in data loss.
We will use the dd command to write the contents of the ISO to the thumb drive. Replace IDENTIFIER in the command below with your drive identifier. Note the extra r before the identifier (i.e rdisk1 ). This is for raw mode, which along with bs=1m, makes the transfer faster.
Be patient! After a few minutes you’ll receive a message saying how much data was transferred. You can now safely eject the usb drive.
Boot the Image
Now it is time to restart your computer to boot the DVD or USB. Most computers will automatically boot from DVDs and USB, however if you experience issues booting the media, you may need to select to boot from DVD or USB.
This is usually accessible by pressing F9 or F12 while your computer is booting. On some devices it may also be ESC .
Macs will boot to the “Startup Manager” by holding down the Option (Alt) key. The DVD or USB drive will most likely show up as “EFI Boot”.
Источник


