- How to Use Recovery Disk in Windows 7 to Restore Sony VAIO
- This article will show you how to create a recovery disk for Sony VAIO and use the recovery disk to restore your computer in Windows 7 operating system.
- How to Create a Sony VAIO Recovery Disk
- 1. Using the VAIO Recovery Wizard:
- 2. Using VAIO Care
- How to Use Created Recovery Disk to Restore a Sony VAIO Computer
- How to Recover Data When Recovery Disk Won’t Work and Computer Fails to Start
- The Bottom Line
- VAIO Recovery Disk – Guide for Windows XP, Vista, 7, 8
- Download VAIO recovery disk
- Create set of recovery disks for VAIO
- Using VAIO Recovery Wizard
- Using VAIO Care
- Restore a VAIO computer
- Restore Windows XP
- Restore Windows Vista
- Restore Windows 7
- Restore Windows 8
- Troubleshooting
- Error loading operating system
- Windows – No Disk
- Cannot find the partition, restart
- Can’t create a Recovery Media
- Can’t complete the recovery process
- Screen is blank, power indicator is green
- Enter Onetime password
- More Information
- Support Links
- Applicable Systems
- Applicable Models
How to Use Recovery Disk in Windows 7 to Restore Sony VAIO
This article will show you how to create a recovery disk for Sony VAIO and use the recovery disk to restore your computer in Windows 7 operating system.

David Darlington
Dec 21, 2020 • Filed to: Windows Computer Solutions • Proven solutions
Recovery disks are used by computer users to repair, restore, rescue, or boot their computers if the need arises. They are especially important in cases where the computer is inaccessible. To be able to create and use recovery disks, one needs a proper guide. So, instead of going to look for an expert to do this for you, you can keep reading the article to learn how to create a recovery disk for your Sony VAIO computer. You can go further to learn how to use it in Windows 7.
How to Create a Sony VAIO Recovery Disk
When you purchase a Sony VAIO computer, you will not see a recovery DVD or CD. However, you will see a recovery partition with which you can create a recovery media. Sony VAIO has provided software that will assist you in this. This software is VAIO Care or VAIO Recovery Wizard, depending on the model of your PC and the version of your Windows.
Follow these steps carefully in creating your Sony VAIO recovery disk:
1. Using the VAIO Recovery Wizard:
- Get a CD-R or DVD-R/DVD+R with which you will use to create the recovery disk. Close all programs and disconnect every peripheral device attached to your PC
- Start your computer and log on to Windows OS
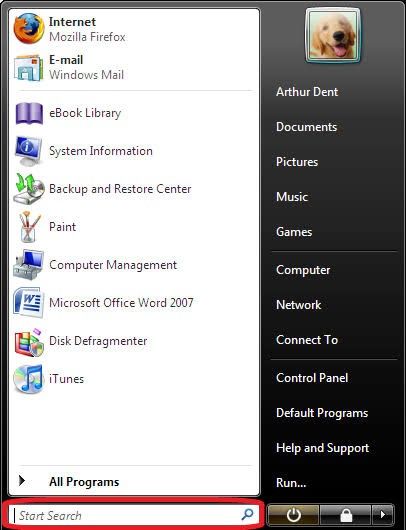
- Select «Start»
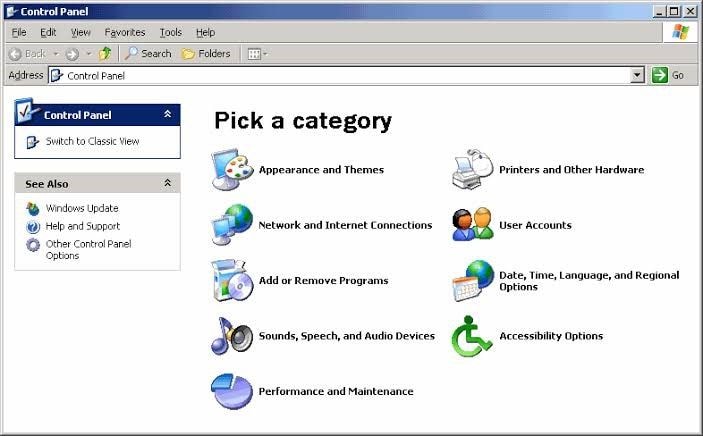
- Launch the «Control Panel» window and choose «Performance and Maintenance» if you have enabled the Category View
- Select the option «VAIO Recovery Wizard»
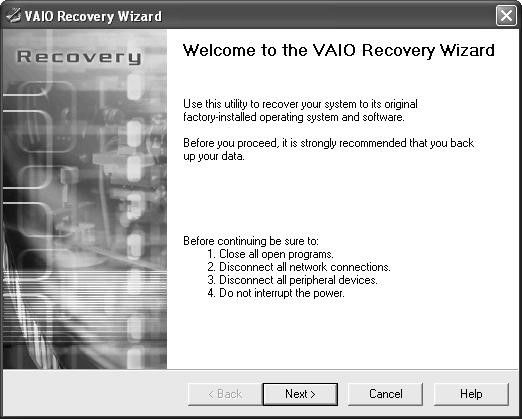
- Once the software opens, choose «Next»
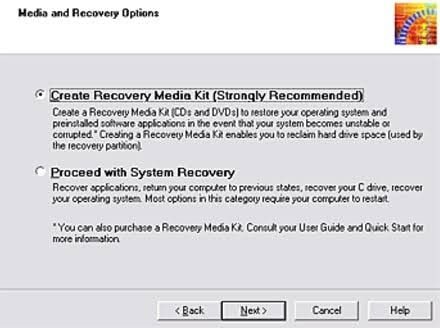
- Choose the first option in this new window, to proceed with creating the recovery media, then select «Next»
- Choose either CDs or DVDs as your desired media to use. Now click «Next»
- Insert the first blank disk you wish to use into the drive of your computer. Again, choose «Next».
- Do the same for the rest of the DVDs/CDs, depending on how many are needed based on the notification of the VAIO software. Follow the on-line instructions to complete the process
- Your PC will restart. Ensure all the disks are labeled
2. Using VAIO Care
- Boot your PC
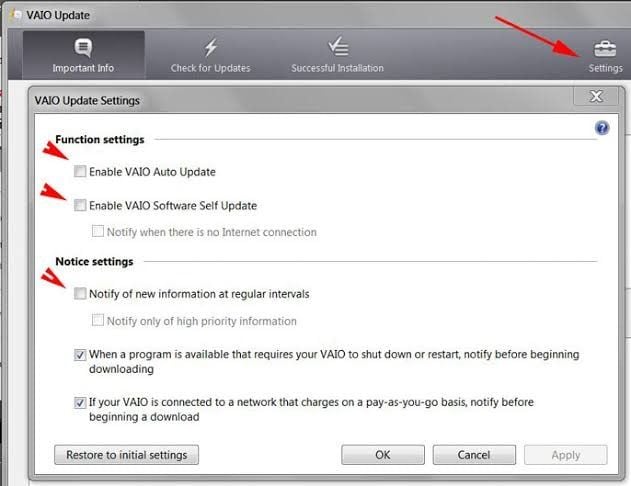
- Connect the PC to the internet to enable you to run a «VAIO Update». This will ensure you get all the latest available updates for your Windows and your PC
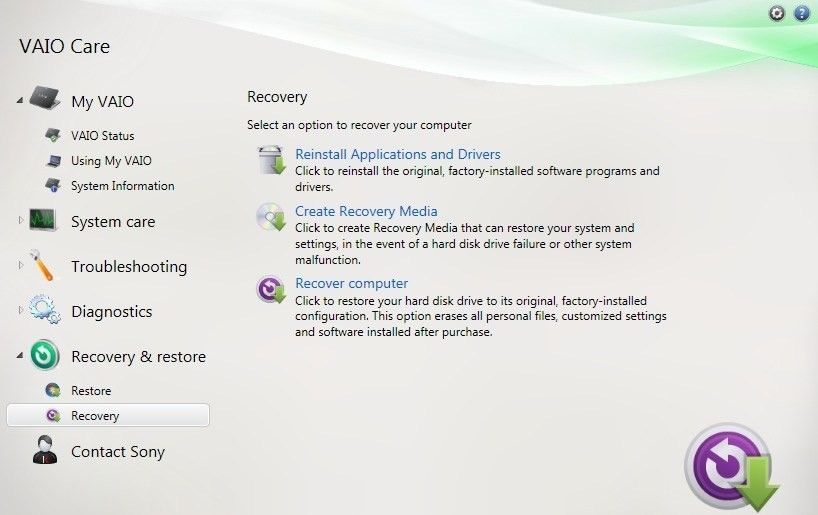
- Choose the button «VAIO Care»
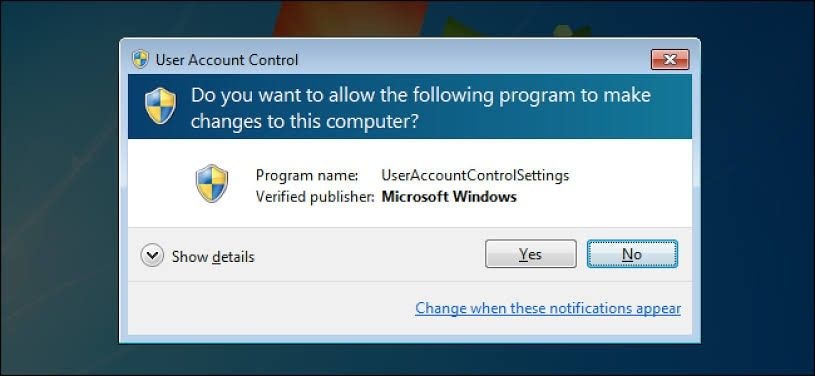
- If you get a pop-up «User Account Control» window, select «Yes»
- Move to the menu on the left and choose «Recovery & restore»
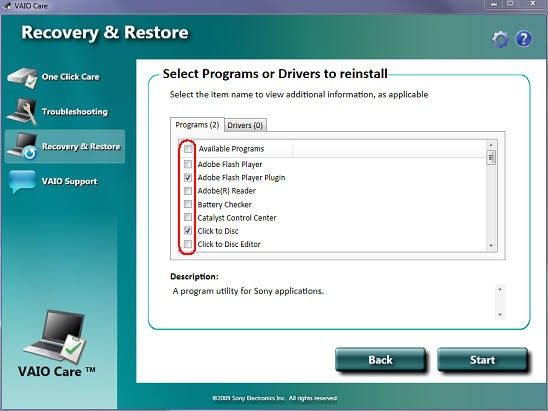
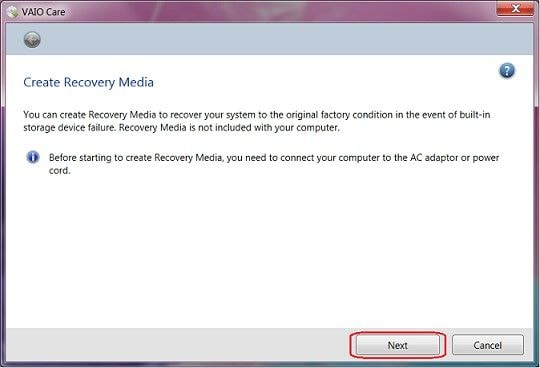
- Now select the «Create Recovery Media» tab
- Go through the instructions carefully and choose «Next» if you understand what next to do.
- Now follow the on-screen instructions to complete the process of creating your recovery disk with VAIO Care.
How to Use Created Recovery Disk to Restore a Sony VAIO Computer
Now that you have created your Sony VAIO recovery disks, you can use them to restore your computer if you own a Windows 7 version. Follow the steps below to guide you:
- Boot your computer
- First, plug in the drive or insert the CD/DVD in the computer’s drive using the VAIO User Guide to instruct you on what to do. Thus, insert the first recovery disc into the drive for DVD
- Put off your computer and put it on again
- Choose the «Next» option beneath the option to select a keyboard layout. These are found in the window labeled «System Recovery Options»

- Again click on «Next» after selecting an operating system to repair
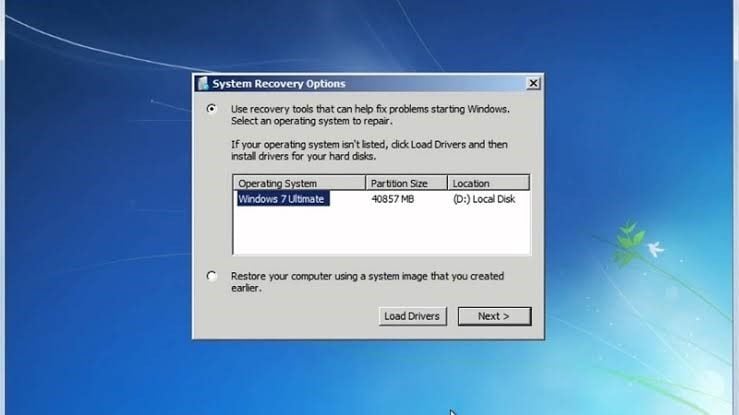
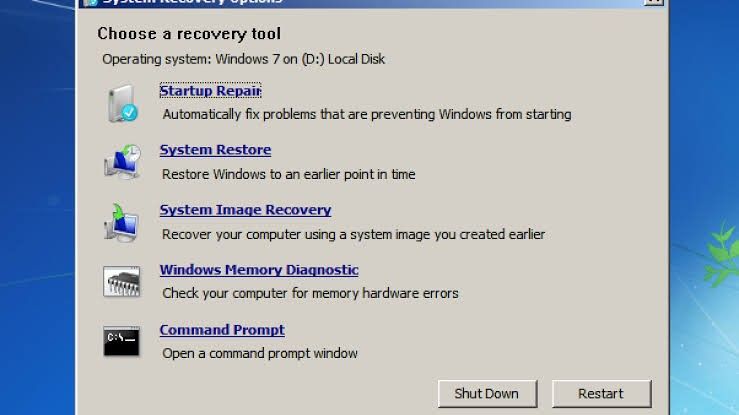
- Go to «Choose a recovery tool», you will find a list of options to pick from. Now, select one of the following:
Startup Repair: This is meant to automatically fix any issue that is preventing your computer system from booting
Windows Memory Diagnostic Tool: This will check to see if the problems your computer is facing have anything to do with its memory
System Restore: This restores your computer to the state it had been before the error began
Command Prompt: This helps you in performing troubleshooting on your operating system or hard drive.
Windows Complete PC Restore: Here, you can restore the computer’s previous files and settings through a backup that has been created with the Windows Backup and Restore Center.
VAIO Recovery Center: You can launch the VAIO Recovery Center from your Recovery Disc
How to Recover Data When Recovery Disk Won’t Work and Computer Fails to Start
Have you tried using the recovery disks to restore your Sony VAIO and it just wouldn’t work? If this is your situation, do not be discouraged and lose hope. This is because there is still one way to access your computer and get back those files. This way is simply with the use of a third-party professional recovery tool called Recoverit Data Recovery.
Recoverit supports data recovery from such data loss scenarios like formatted system drives, SD card error, Virus infestation, system crash, inaccessible computers, deleted files, etc. It also supports data recovery of over a thousand different file formats.
To use this tool, follow the steps below:
Step 1 – Create Bootable Media
First, you need a USB drive or a CD/DVD that can be used to create a bootable media on a computer that is working. This bootable media will enable you to boot your system to be able to access the files on it since your computer cannot boot on its own.
Install and launch Recoverit on the working computer after inserting the drive in it. Click on the option to make recovery from a crashed computer, then tap on the «Start» button
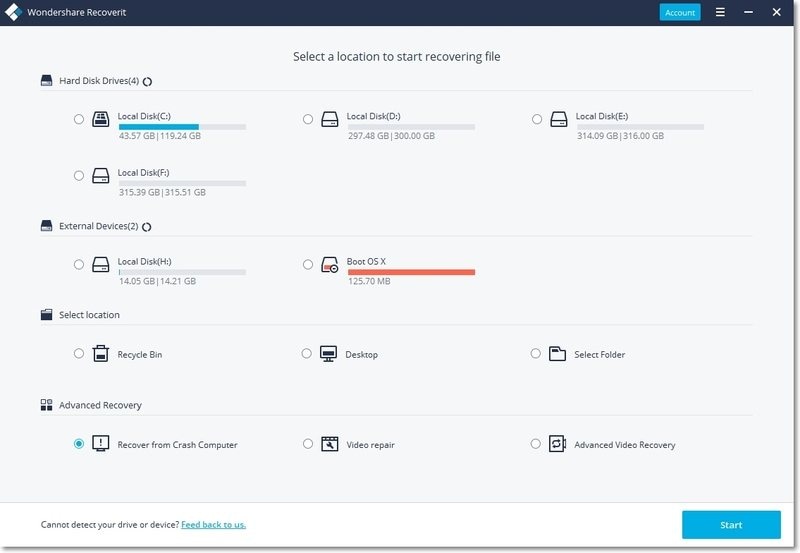
Choose which device you wish to use in creating the bootable media. If you choose USB, you will be required to format it before clicking on «Create».
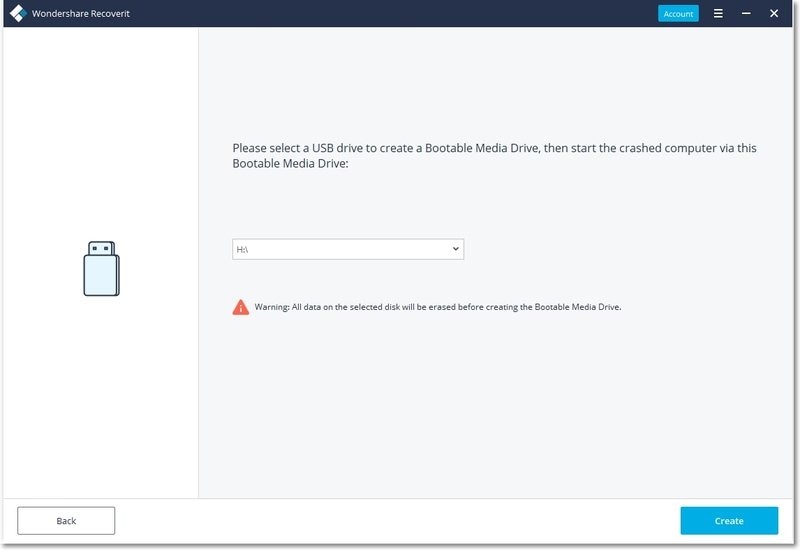
In the next window, Recoverit will download the firmware required for creating the bootable media, format the drive, and then create the media. Unplug the drive once this is complete and move to your inaccessible computer.
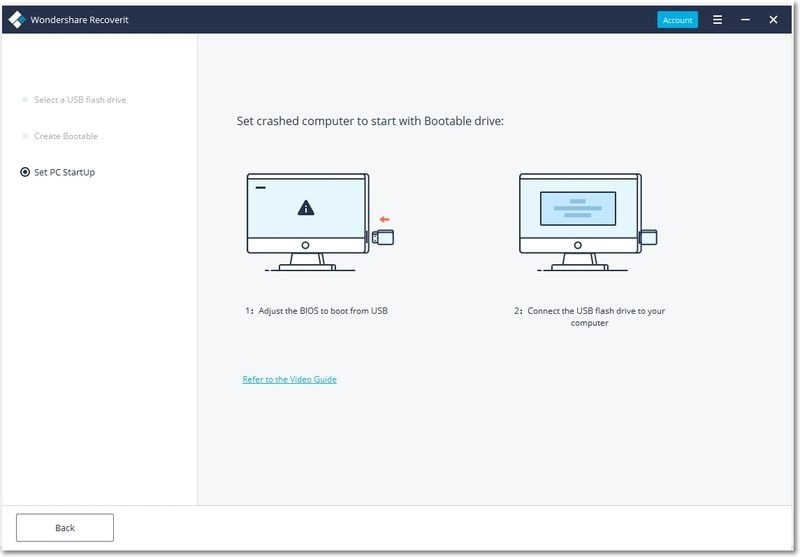
Step 2 – Boot Computer with Bootable media
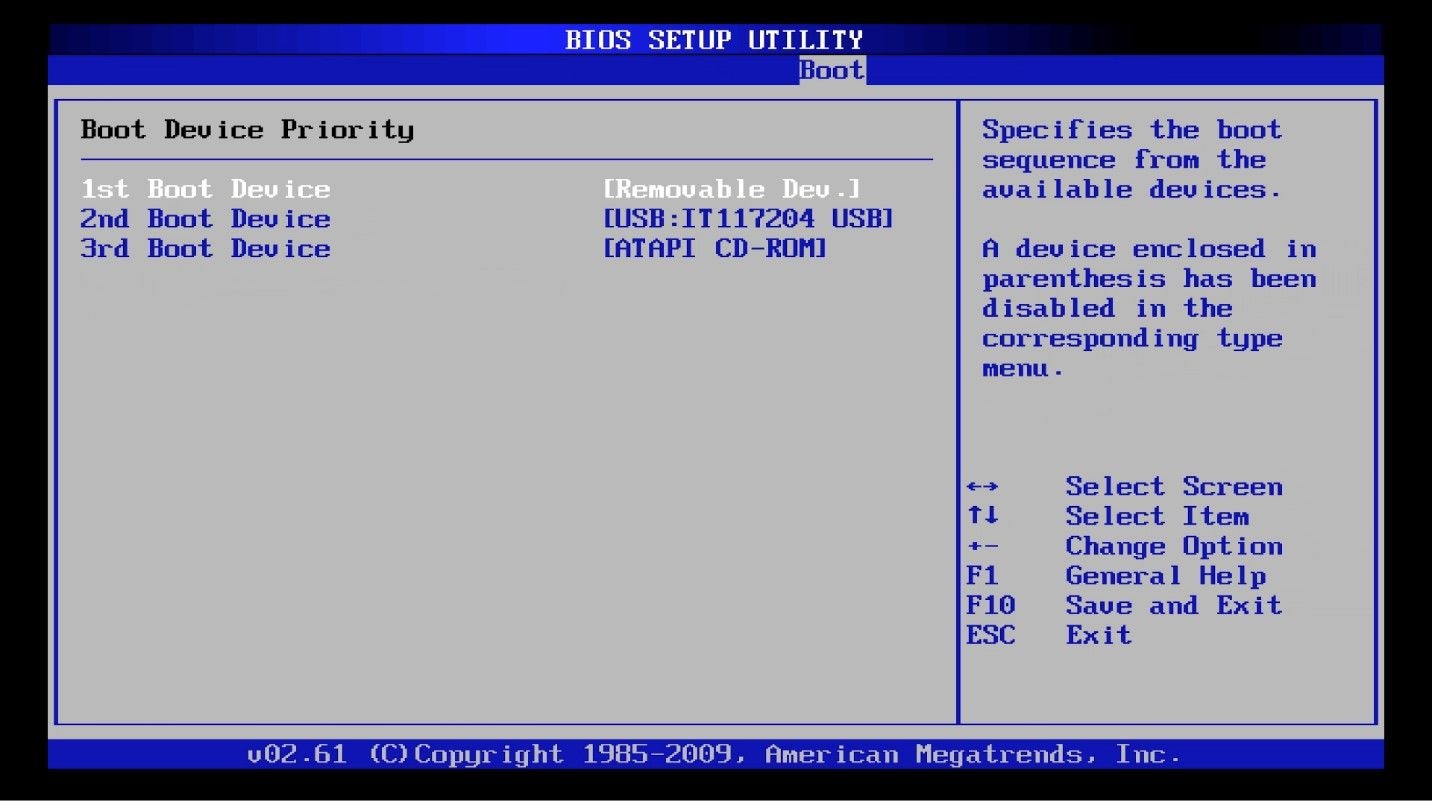
Set your boot order in BIOS settings such that your computer will boot from CD/DVD or USB, depending on what you are using. Plug the USB into the computer and restart it.
Step 3 – Select Recovery Mode
Choose the «Data Recovery» mode and click on the location where your files were originally stored before the system error. Before Recoverit can scan for your files, you need to click on the «Start» option.
Step 4 – Recover and Save
The different files in their various formats will keep increasing as the location is being scanned by Recoverit; you can preview them all. Afterward, select a location to save the files, preferably an external drive plugged in. Click «Recover» to save the files.
The Bottom Line
You have learned how to use Recovery Disk in Windows 7 to restore Sony VAIO. You can choose either of the methods to first create recovery disks, then do the system restore. Every computer needs a good restore once a while to fix its problems and this article has provided you a means to do that.
VAIO Recovery Disk – Guide for Windows XP, Vista, 7, 8
This guide is about recovery disks for VAIO computers (including Sony VAIO) for the following versions of Windows: Windows XP, Windows Vista, Windows 7 and Windows 8.
A recovery disk is also known as a restore disc, repair disc, boot disc or rescue disk.
VAIO computers were originally manufactured by the Sony Corporation, but the division was sold in February 2014.
This guide covers all computers models, that have Windows XP, Vista, 7 or 8 installed, known as Sony VAIO and the newer models from the VAIO Corporation that now builds these computers.
Download VAIO recovery disk
If your recovery partition is no longer available on your VAIO computer or you don’t have a set of recovery disks to restore your computer, download Easy Recovery Essentials, our recovery and repair disk.
Easy Recovery Essentials works with any VAIO computer model and it’s compatible with the following Windows versions:
- Microsoft Windows XP
- Microsoft Windows Vista
- Microsoft Windows 7
- Microsoft Windows 8
- Microsoft Windows Server 2003, 2008 and 2012

Burn Easy Recovery Essentials directly to a CD, DVD or a USB flash drive and use the Automated Repair function to automatically find and fix boot errors.
Note: Easy Recovery Essentials can not be used to install or reinstall Windows.
Create set of recovery disks for VAIO
Sony VAIO computers and laptops don’t come with a recovery CD or DVD included with your purchase, but the computers have a recovery partition available (similar to a Dell recovery partition) that you can use to create your VAIO Recovery Media Kit (this is the set of recovery CDs or DVDs that you will use to restore your computer) using the software application provided by Sony/VAIO.
Depending on your computer model and your Windows version, this software application can have different names:
- VAIO Recovery Wizard
- VAIO Recovery Center
- VAIO Care
Your computer’s recovery partition might not be available if you changed the partitions on your hard drive in any way and incidentally deleted this partition.
Backup your computer before you proceed. Running the recovery software utility to create a Recovery Media Kit can lead to data loss (including your music, movies, pictures and applications).
Depending on the computer model you have, you will need either a set of CDs or DVDs to create the disks.
You can use simple CDs or DVDs:
- CD-R
- DVD-R or DVD+R (only single layer)
You can’t use any of the following types of media:
You might need 10 – 12 CDs or 1 – 2 DVDs, depending on the computer model you have. The VAIO software will notify you about the required media type you need to use and how many you’ll need.
Before you begin to create the recovery disks, please make sure that you:
- Close any programs
- Disconnect from the Internet and all other network connections with might have opened
- Disconnect any peripheral devices, e.g. USB flash drives, external hard disk
- Disable any antivirus software
- Disable your screensaver
Follow these instructions for the VAIO software you have installed:
Using VAIO Recovery Wizard
Follow these instructions to create a set of recovery disks for a Sony VAIO computer using the VAIO Recovery Wizard software:
If you’re not able to create the disks, use Easy Recovery Essentials for VAIO
- Boot your computer
- Login into Windows
- Click Start
- Go to Control Panel. If you have the Category View enabled, go to Performance and Maintenance
- Click on the VAIO Recovery Wizard item
- Wait for the VAIO Recovery Wizard software to open
- Click Next

Select Create Recovery Media Kit (Strongly Recommended) and click Next

Select what type of media you want to use: CDs or DVDs.
Even if your computer has a DVD-RW or DVD±RW drive, the VAIO Recovery Wizard does not support any of the following: CD-RW, DVD+RW, DVD-RW, 1X and 2X speed DVD-R, or double layer DVD+R and DVD-R.
Using VAIO Care
Follow these instructions to create a set of recovery disks for Sony VAIO computers using the VAIO Care software:
If you’re not able to create the disks, use Easy Recovery Essentials for VAIO
- Boot your computer
- Connect to the Internet and run VAIO Update to get all the updates for your computer and Windows
- Then, click Start
- Go to All Programs
- Select and click VAIO Care

Restore a VAIO computer
Your computer can be recovered and restored using the following options:
- If you can boot into Windows to run the VAIO software
- If you have a set of disks already created to run the VAIO software
- If you have the recovery partition available on your computer to run the VAIO software
Restore Windows XP
If you have the recovery partition intact or have a set of recovery disks created (the Recovery Media Kit), you can access the VAIO Recovery Wizard software to restore Windows XP.
If you no longer have the recovery partition or the recovery disks, use Easy Recovery Essentials for VAIO
You can find instructions below, for each case:
- If you can boot into Windows XP
- If you have a set of recovery disks (you can use these if you can’t boot into Windows)
- If you have the recovery partition available. You can use this option if you can’t boot into Windows XP and don’t have a set of disks available
If you can boot into Windows XP, follow these instructions:
- Boot into Windows XP
- Click Start
- Go to Control panel. If you have the Category View enabled, select the Performance and Maintenance category
- Click VAIO Recovery Wizard
- At the Welcome window, click Next
If you have a set of disks created:
- Boot your computer by pressing the Power button
- Insert your first disk in the optical drive and close it
- Turn off your computer
- Wait 30 seconds (approximately)
- Turn on the computer
- When prompted, insert the disk asked by the VAIO Recovery Wizard software
- Click OK
- Click Next
- Select any of the available options and continue with the instructions on the screen
If you have the recovery partition available on your computer:
- Turn off your computer
- Boot your computer
- When the VAIO logo appears, press the F10 key
- Wait for the VAIO Recovery Wizard to appear
- Click Next
- Continue with the instructions on the screen after you selected any of the available options presented by the software utility
Restore Windows Vista
VAIO computers with Windows Vista have the VAIO Recovery Center software installed that you can use to do a factory reset of your computer.
If you have the disks available, follow these instructions:
- Turn on your PC and insert the first disk in the optical drive
- Restart your computer
- Wait for the recovery program to load
- Select Restore Complete System

If you have the partition available on your computer, follow these instructions:
- Boot your Windows Vista
- While it’s booting up, press the Alt and F10 key several times before the VAIO logo appears on your screen.
- At the VAIO Recovery Center software screen, select Restore Complete System from the menu on the left
If Alt and F10 didn’t work to open the software utility, try pressing only the F10 key or the ASSIST button from your keyboard (if your computer model has this button on the keyboard).
Another alternative is to press the F8 key to boot into the Advanced Boot Options of Windows Vista, then select Repair Your Computer and wait for the VAIO Recovery Center software to appear.

Restore Windows 7
You can do a factory reset on a Sony VAIO with Windows 7 installed. VAIO computers with Windows 7 have the VAIO Care software installed. Other models can have the VAIO Recovery Center software.
To restore your computer, you can also use Easy Recovery Essentials for VAIO, if you don’t have the disks created with VAIO Care
If you can boot into Windows 7, follow these steps:
- Start Windows 7
- Press the ASSIST button available on your keyboard to open the VAIO Care software. If you don’t have an ASSIST button, find the VAIO Care software by going to Start > All Programs

If you have the recovery partition available, follow these steps:
- Turn on your computer and hit F10 several times (or Alt and F10 ). You can also press the ASSIST button, if this is available for your computer model
If you have the disks follow the instructions from Windows 8, at the “If you have a set of recovery disks created” section.
Restore Windows 8
VAIO computers with Windows 8 installed have the VAIO Care software installed that you can use to recover and restore your computer.
To restore your computer, you can also use Easy Recovery Essentials for VAIO, if you don’t have the disks created with VAIO Care
If you can boot into Windows 8, follow these instructions:
- Boot into Windows 8
- Press the Windows and C key to open the Charm bar
- Select Search
- Type in “vaio care“
- Select VAIO Care (or the VAIO Care (Desktop) item) from the result items on the left
- Select Advanced Tools
- Select Restore and recovery
- Select Recover or maintain your system
- Click Yes and wait for your computer to restart
- After restart, select your keyboard layout
- At the “Choose an option” screen, select Troubleshoot


If you have a set of recovery disks created, follow these instructions:
- Turn on your computer to insert the first disk in your computer’s optical drive
- Turn off your computer
- Turn on your computer again
- At the Windows Boot Manager, select Start VAIO Care Rescue and hit Enter . If you have an external optical drive, you may need to press F11 multiple time before the VAIO logo disappears to boot into the Windows Boot Manager.
- Select Start recovery wizard
- Follow the instructions on the screen to continue with the process. If you want a custom recovery process, you can select Tools instead of Start recovery wizard and then click Start advanced recovery wizard
If you have the recovery partition on your computer, follow these steps:
If your computer has an ASSIST button:
- Turn off your computer
- Press the ASSIST button
- Wait for the VAIO Care Rescue software to launch
- Click Start recovery wizard. For more advanced options on the recovery process, select Tools and then click Start advanced recovery wizard
- Follow the instructions on the screen
If your computer does not have an ASSIST button:
- Turn on your computer
- Press the F10 key several times before the VAIO logo disappears
- If the Edit Boot Options screen appears, hit Enter
- Select Start recovery wizard. For more options, select Tools and then click Start advanced recovery wizard
- Follow the instructions on the screen
Troubleshooting
Error loading operating system
If you received this error message after running the VAIO Recovery Wizard software – Error loading operating system – run the software again.
The power to your computer might have been interrupted during the process.
Windows – No Disk
If you received this error message – Windows – No Disk – when booting the computer with the set of disks you created, the recovery disks you’ve used may have been corrupted (either due to bad quality or incompatibility).
In this case, you need to create a new set of disks.
Cannot find the partition, restart
If you’ve used the software utility before and it didn’t closed properly, you may receive this error message at its next start:
If so, restart your computer and start VAIO Recovery Wizard again.
Can’t create a Recovery Media
If you can’t create the disks, follow these tips and try again:
- Turn off your computer and run the software again. Make sure you close all your open programs, antivirus software and remove any plugged-in peripherals.
- Download the latest available updates for your computer model from the VAIO Update software
- Try a different set of CDs or DVDs with a better quality
Can’t complete the recovery process
If you can’t complete the recovery process, try these suggestions:
- Disconnect any external drives
- If you can’t complete the process from the VAIO Recovery Wizard or the VAIO Care software, try using your set of disks instead
- Check the disks you’re using for any damages. The disks need to be clean and high quality.
Screen is blank, power indicator is green
If the power indicator is green but the computer screen is blank or stuck, follow any of these tips:
- Press the Alt and F4 keys to close a software application
- Press Ctrl + Alt + Delete and then go to Shutdown and select Restart to restart your computer
- Press and hold the Power button for more than 4 seconds to shutdown your computer
- Make sure you don’t have any external devices plugged-in
Enter Onetime password
If you entered the password wrong 3 times, the following error message appears on your screen:
In this case, press and hold the Power button for more than 4 seconds to shutdown your computer. When you are sure than your computer has been turned off completely, wait 10 to 15 seconds and then restart your computer again.
More Information
Support Links
It’s an easy-to-use and automated diagnostics disk. It’s available for Windows 8, Windows 7 and Windows Vista. It’s also available for Windows XP and Windows Server.
Read more at Windows Recovery Disks.
Applicable Systems
This Windows-related knowledgebase article applies to the following operating systems:
- Windows XP (all editions)
- Windows Vista (all editions)
- Windows 7 (all editions)
- Windows 8 (all editions)
- Windows 8.1 (all editions)
- Windows Server 2003 (all editions)
- Windows Server 2008 (all editions)
- Windows Server 2012 (all editions)
Applicable Models
This VAIO-related knowledge base article applies to the following computer models:
- PCG series: PCG-505, PCG-505G, PCG-505GX, PCG-505TS, PCG-505TX, PCG-838, PCG-C1XS, PCG-F150, PCG-F160, PCG-F180, PCG-F190, PCG-F340, PCG-F350, PCG-F360, PCG-F370, PCG-F390, PCG-F420, PCG-F480, PCG-F490, PCG-F520, PCG-F540, PCG-F560, PCG-F570, PCG-F580, PCG-F590, PCG-F610, PCG-F630, PCG-F650, PCG-F6650K, PCG-F680, PCG-F680K, PCG-F690, PCG-F690K, PCG-FR100, PCG-FRV26, PCG-FRV27, PCG-FRV28, PCG-FRV30, PCG-FRV31, PCG-FRV33, PCG-FRV34, PCG-FRV35, PCG-FRV35Q, PCG-FRV37, PCG-FRV37B, PCG-FX120, PCG-FX120K, PCG-FX140, PCG-FX140K, PCG-FX150, PCG-FX150K, PCG-FX170, PCG-FX170K, PCG-FX190, PCG-FX200, PCG-FX200K, PCG-FX210, PCG-FX215, PCG-FX220, PCG-FX290K, PCG-FX300, PCG-FX30010B, PCG-FX30011B, PCG-FX30012B, PCG-FX30013B, PCG-FX30014B, PCG-FX30015B, PCG-FX30016B, PCG-FX30017B, PCG-FX30018B, PCG-FX30019B, PCG-FX3001B, PCG-FX30020B, PCG-FX30021B, PCG-FX30022B, PCG-FX30023B, PCG-FX30024B, PCG-FX30025B, PCG-FX30026B, PCG-FX30027B, PCG-FX30028B, PCG-FX30029B, PCG-FX3002B, PCG-FX30030B, PCG-FX30031B, PCG-FX30032B, PCG-FX30033B, PCG-FX30034B, PCG-FX30035B, PCG-FX30036B, PCG-FX3003B, PCG-FX3004B, PCG-FX3005B, PCG-FX3006B, PCG-FX3007B, PCG-FX3008B, PCG-FX3009B, PCG-FX300K, PCG-FX300P, PCG-FX310, PCG-FX340, PCG-FX350, PCG-FX370, PCG-FX390, PCG-FX400, PCG-FXA32, PCG-FXA33, PCG-FXA36, PCG-FXA40, PCG-FXA47, PCG-FXA47B, PCG-FXA48, PCG-FXA48DB, PCG-FXA49, PCG-GR200, PCG-GR200P, PCG-GR250, PCG-GR300, PCG-GR350, PCG-GR370, PCG-GR390, PCG-GRT100, PCG-GRT170, PCG-GRT200, PCG-GRT200K, PCG-GRT200P, PCG-GRT240G, PCG-GRT260G, PCG-GRT270G, PCG-GRV550, PCG-GRV600, PCG-GRV670, PCG-GRX500, PCG-GRX520, PCG-GRX550, PCG-GRX560, PCG-GRX590, PCG-GRZ530, PCG-GRZ600, PCG-GRZ610, PCG-GRZ630, PCG-GRZ660, PCG-NV100, PCG-R505TEK, PCG-R505TSK, PCG-SR17K, PCG-SR33, PCG-SR33K, PCG-SR5K, PCG-SR7, PCG-SR7K, PCG-SRX77, PCG-SRX77P, PCG-SRX99P, PCG-TR2A, PCG-TR2AP, PCG-TR3A, PCG-TR3AP, PCG-TR5AP, PCG-VX89, PCG-XG18, PCG-XG19, PCG-XG28, PCG-XG28K, PCG-XG29, PCG-XG29K, PCG-XG38, PCG-XG38K, PCG-XG39, PCG-XG39K, PCG-XG500, PCG-XG500K, PCG-XG700, PCG-XG700K, PCG-XG9, PCG-Z1VA, PCG-Z1VAP, PCG-Z505G, PCG-Z505GX, PCG-Z505HE, PCG-Z505HS, PCG-Z505JE, PCG-Z505JEK, PCG-Z505JS, PCG-Z505JSK, PCG-Z505LE, PCG-Z505LEK, PCG-Z505LS, PCG-Z505LSK, PCG-Z505S, PCG-Z505SX, PCG-Z50LSK, PCV-RS704
- VGN series: VGN-A250, VGN-A260, VGN-A290, VGN-AR150g, VGN-AW200, VGN-AW200J, VGN-AW220J, VGN-CR220E, VGN-FS700, VGN-FS710, VGN-FS715, VGN-FS720, VGN-FS730, VGN-FS740, VGN-FS742, VGN-FS760, VGN-FS770, VGN-FS780, VGN-FS790, VGN-FS920, VGN-FS930, VGN-FS940, VGN-FS950, VGN-FS950P, VGN-FS960P, VGN-FS980, VGN-FS990, VGN-FW130E, VGN-FW140E, VGN-FW150E, VGN-FW160E, VGN-FZ320E, VGN-FZ340E, VGN-N110G, VGN-N130G, VGN-N150G, VGN-N160G, VGN-N170G, VGN-N220E, VGN-N230E, VGN-N250E, VGN-N270E, VGN-N5240E, VGN-NR200E, VGN-NR220E, VGN-NR240E, VGN-NR260E, VGN-NS200E, VGN-S260P, VGN-S270B, VGN-S270P, VGN-S360P, VGN-S380P, VGN-SZ200, VGN-SZ200P, VGN-SZ210P, VGN-SZ220, VGN-SZ220P, VGN-SZ240P, VGN-SZ280P, VGN-SZ300P, VGN-SZ330P, VGN-SZ360P, VGN-SZ370P
- VPC series: VPC-EC3CFX
- PCV series: PCV-220, PCV-240, PCV-E201, PCV-E203, PCV-E206, PCV-E324DS, PCV-E518DS, PCV-J100, PCV-J120, PCV-J200, PCV-L400, PCV-L600, PCV-LX600, PCV-LX700, PCV-LX800, PCV-LX810, PCV-LX900, PCV-LX910, PCV-LX920, PCV-MXS10, PCV-MXS20, PCV-R532DS, PCV-R536DS, PCV-R538DS, PCV-R539DS, PCV-R545DS, PCV-R547DS, PCV-R549DS, PCV-R553DS, PCV-R556DS, PCV-R558DS, PCV-RS100, PCV-RS101, PCV-RS210, PCV-RS220, PCV-RS221, PCV-RS300, PCV-RS310, PCV-RS312, PCV-RS320, PCV-RS322, PCV-RS400, PCV-RS400C, PCV-RS400CG, PCV-RS400CGP, PCV-RS400P, PCV-RS410, PCV-RS411, PCV-RS412, PCV-RS420, PCV-RS422X, PCV-RS430G, PCV-RS431, PCV-RS440, PCV-RS460, PCV-RS500C, PCV-RS500CG, PCV-RS510, PCV-RS512, PCV-RS514V, PCV-RS519, PCV-RS520, PCV-RS521, PCV-RS530G, PCV-RS540X, PCV-RS550X, PCV-RS600, PCV-RS600c, PCV-RS600CG, PCV-RS610, PCV-RS611, PCV-RS611X, PCV-RS612, PCV-RS613G, PCV-RS620G, PCV-RS630G, PCV-RS650, pcv-rs720G, PCV-RS724G, PCV-RS726G , PCV-RS730G, PCV-RX260DS, PCV-RX270DS, PCV-RX280DS, PCV-RX370ds, PCV-RX380ds, PCV-RX400ds, PCV-RX450, PCV-RX460, PCV-RX500, PCV-RX540, PCV-RX550, PCV-RX560, PCV-RX570, PCV-RX572, PCV-RX580, PCV-RX600, PCV-RX640, PCV-RX650, PCV-RX660, PCV-RX670, PCV-RX680, PCV-RX681, PCV-RX700, PCV-RX710, PCV-RX720, PCV-RX740, PCV-RX741, PCV-RX750, PCV-RX753, PCV-RX755, PCV-RX760, PCV-RX762, PCV-RX770, PCV-RX820, PCV-RX821, PCV-RX830, PCV-RX850, PCV-RX851, PCV-RX860, PCV-RX861, PCV-RX881, PCV-RX891, PCV-RZ14G, PCV-RZ20G, PCV-RZ22G, PCV-RZ24G, PCV-RZ26G, PCV-RZ30C, PCV-RZ30CG, PCV-RZ30CGP, PCV-RZ30CP, PCV-RZ30GN2, PCV-RZ30GN4, PCV-RZ31G, PCV-RZ32G, PCV-RZ34G, PCV-RZ35M, PCV-RZ35MX, PCV-RZ36G, PCV-RZ40, PCV-RZ40C, PCV-RZ40C1B, PCV-RZ40C1F, PCV-RZ40CG, PCV-RZ40CP, PCV-RZ40G, PCV-RZ40GN2, PCV-RZ40P, PCV-RZ44CG, PCV-RZ44G, PCV-RZ456G, PCV-RZ45CG, PCV-RZ45G, PCV-RZ46G, PCV-RZ50C, PCV-RZ50G, PCV-RZ54G, PCV-RZ56G, PCV-V100G, PCV-V200G, PCV-V505DC2, PCV-V505DC2P
- VGC series: VGC-RA820G, VGC-RA822G, VGC-RA825G, VGC-RA826G, VGC-RA828G, VGC-RB30, VGC-RB32, VGC-RB33G, VGC-RB34G, VGC-RB35G, VGC-RB36G, VGC-RB38G, VGC-RB39C, VGC-RB60G, VGC-RB62G, VGC-RB64G


