- How to Enable or Disable Spell Check in Windows 10
- Enable or disable a spell check in Windows 10
- Conclusion
- Spell checker Windows 10 spelling mistakes, settings!
- Open the spell checker settings in Windows 10, just customize it to better detect spelling mistakes!
- 1.) . Open Spellchecker Settings! 2.) . spell check Windows 10 customize!
- 1.) Open Spellcheck Settings!
- 2.) spell check Windows 10 customize!
- Spell Check stopped in — Windows 10
- Replies (29)
- How to edit the custom spell check dictionary on Windows 10
- How to edit the spell checker dictionary
- More Windows 10 resources
- Halo: MCC’s live service elements make it better, not worse
- Microsoft’s Surface Duo is not ‘failing up’
- Here’s what you can do if Windows 10 update KB5001330 is causing issues
- These are the best PC sticks when you’re on the move
How to Enable or Disable Spell Check in Windows 10
Windows 10 is a new Microsoft operating system that brings an easy to use Settings application to look for and set up a different operating system’s options and features. An automatic spell checker that auto corrects and highlights misspells in applications is also a useful feature of the Windows 10 operating system. Although, this feature can be found in other different applications like Facebook, Internet Explorer, Xbox app and many more. This feature is an efficient tool for Windows 10.
Enable or disable a spell check in Windows 10
The Settings of Windows 10 provides the option to enable and disable a spell check. In this article, you will get to know how to enable and disable a spell check in Windows 10. You will need to follow the following procedure step by step if you want to enable or disable spell check in Windows 10:
Click the Search button. Type Settings in the search bar and select the Settings option as the following image is showing:

As you will select the Settings option, following screen of Settings will appear:
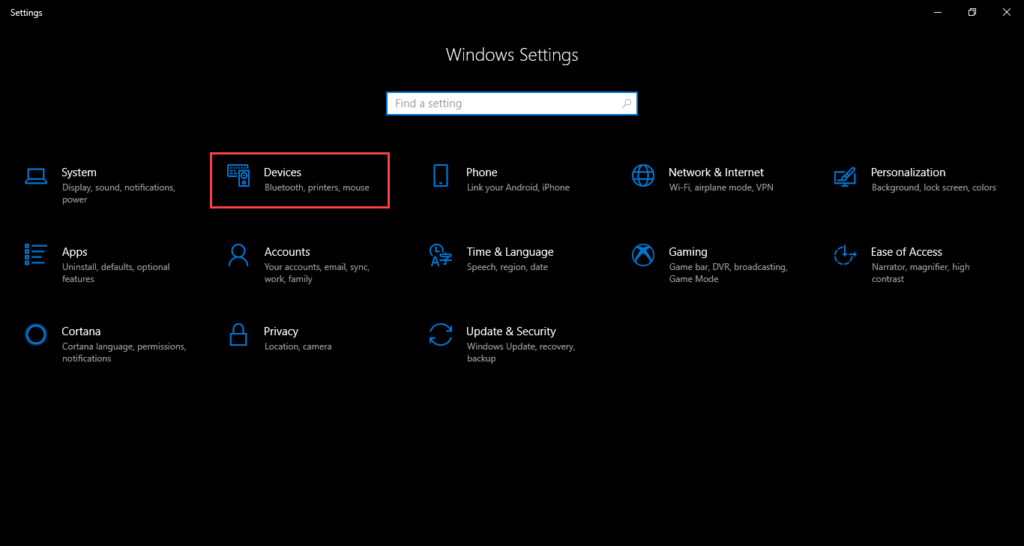
Select the Devices option if you want to be at the spell check settings. Devices option is highlighted in the above image.
As you will select the Devices option, the following screen will appear with all devices settings:
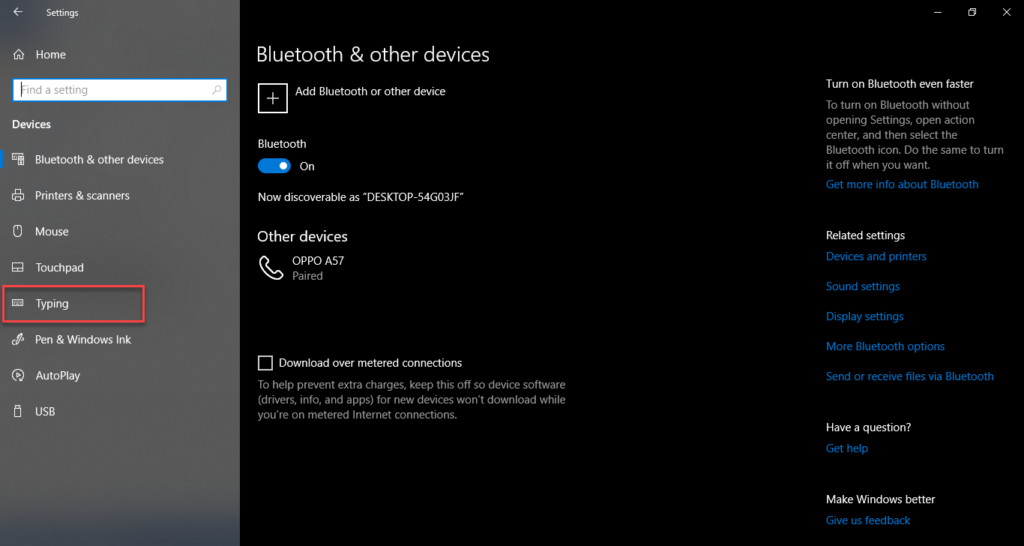
Once you are on the Device Settings screen, you need to select Typing option from the left side of the screen. The option is highlighted in the above image.
After clicking on Typing option, now you are on Spell Check settings and screen will look like this:
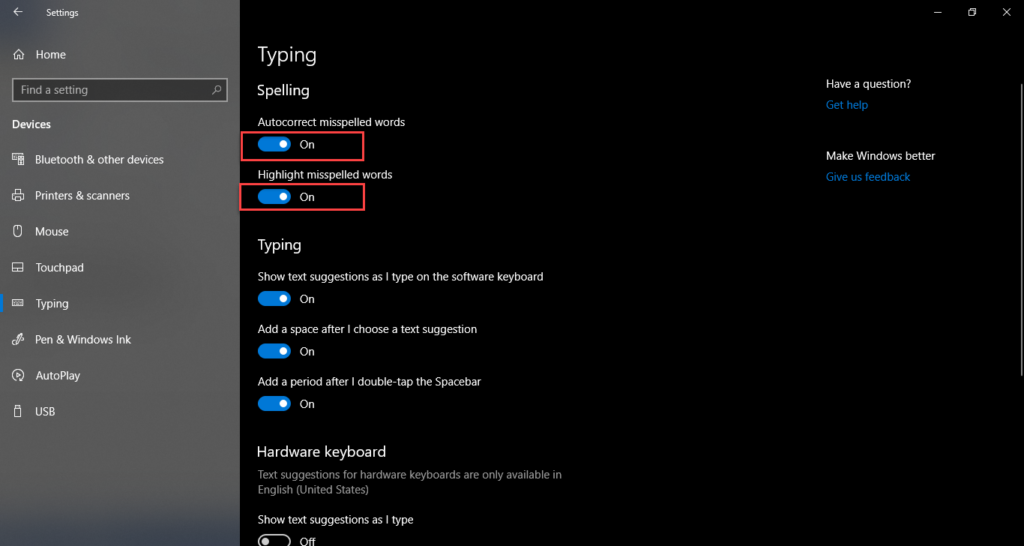
As you see that toggle buttons of both options Autocorrect misspelled words and Highlight misspelled words are On. It means that Spell check in Windows 10 is enabled, you can disable it by turning these toggle buttons off. Below the screen is showing Spell check disable in Windows 10:
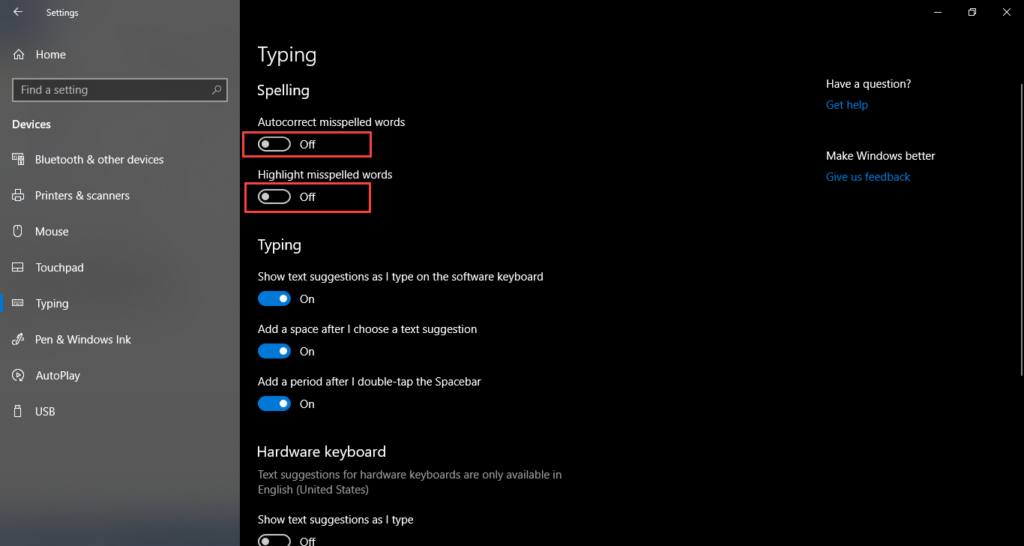
You can enable Spell check by turning both toggle buttons On.
Now you can enable or disable spell check in Windows 10.
Note:
If you are going to disable the spell check in Windows 10 and your applications are running, you need to restart the applications if you want the feature to be disabled.
Conclusion
By following this procedure you can enable or disable a spell check in Windows 10. Despite changing the settings there are some applications that need their own settings of spell checking. For example, Windows 10 Mail app and OneNote etc., Application like these need their own settings of spell checking.
Spell checker Windows 10 spelling mistakes, settings!
Open the spell checker settings in Windows 10, just customize it to better detect spelling mistakes!
Windows 10 includes a spelling checker for typing words anywhere in Windows 10. If auto-correction of misspelled words is enabled, the entered words will be automatically matched with the correct spelling of the windows word dictionary. If you want to customize spell checking in Windows 10, there is a pretty quick way.
1.) . Open Spellchecker Settings!
2.) . spell check Windows 10 customize!
1.) Open Spellcheck Settings!
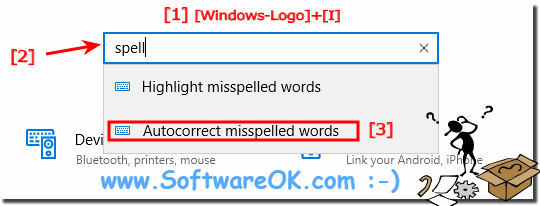
1. Simply enter the shortcut Windows logo + I
2. and enter «spell»
3. and select to «highlight misspelled words» or the «Autocorrect misspelled words»
| (Image-1) Open Spell checker in Windows 10! |
 |

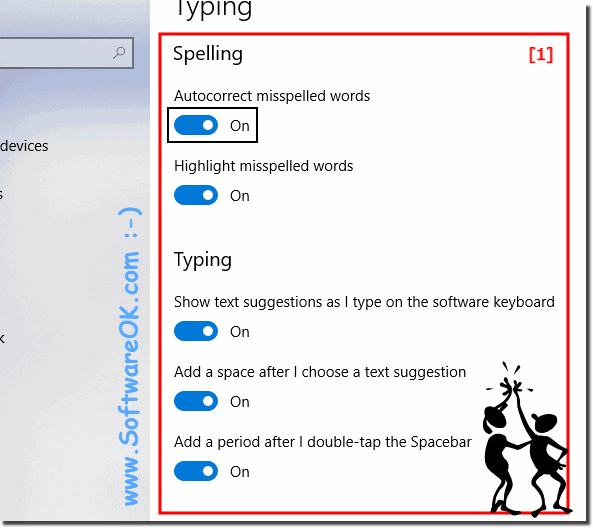
2.) spell check Windows 10 customize!
In Windows 10, you really have many options for customizing the spell checker to your individual needs, and you can hire change settings four yourself without much expertise. ( . see picture-2 )
| (Image-2) Spell checker settings on Windows 10! |
 |
Spell checker helps users enter words and phrases in text input controls. The spelling checker automatically corrects misspelled words if Auto Correction considers them necessary. For example, the word «fur» is automatically corrected to «for». If the corrections spell checker is not sure, the misspelled word is highlighted by a red line, and alternate conventions are displayed in the context menu that appears when you touch a word or right-click it.
Updated on: 14 May 2020 19:33 Windows
Spell Check stopped in — Windows 10
The spell check was working perfectly fine untill there was Windows 8.1 , But after upgrade to Windows10 the spell checker has stopped working. I tried to check in add ons, but it does not show me Spelling Checker at all in the left pane as an option. So currently for simple browsing i am using IE11 but for input or updating my websites i use Microsoft Edge where it does highlight in Red all spelling errors.
Any help on getting the same triggered in IE11, will be very much appeciated.
Replies (29)
* Please try a lower page number.
* Please enter only numbers.
* Please try a lower page number.
* Please enter only numbers.
![]()
Thank you for posting your query in Microsoft Community.
I understand your concern, and we in Community will try to help you in the best possible way we can.
I suggest that you try the steps below and check if it helps:
- On the search bar type ‘Settings’ then select the button ‘Change PC Setting’.
- Select ‘Typing’ and then set ‘Highlight Misspelled Words’ slider to the «On» position.
- If you want setting to have automatically correct any misspelled words then you need to set ‘Autocorrect Misspelled Words’ slider to the «On» position.
Your reply is very important for us to ensure a proper resolution.
For further assistance, you can post your query in Microsoft Community.
9 people found this reply helpful
Was this reply helpful?
Sorry this didn’t help.
Great! Thanks for your feedback.
How satisfied are you with this reply?
Thanks for your feedback, it helps us improve the site.
How to edit the custom spell check dictionary on Windows 10
On Windows 10, whenever you’re typing on the web using Microsoft Edge, or an app like Mail or OneNote (mobile), you can quickly right-click a misspelled word to add it to the custom dictionary when you know you have the correct spelling.
However, sometimes, you could also end up adding a wrong word to the dictionary, and Windows 10 doesn’t provide an easy way to undo the change. As a result, the spell checker won’t highlight it as a mistake the next time you type the word, which can cause you to submit an email or paper with grammar errors.
If you made a mistake adding a particular word using the Windows 10 spell checker, it’s possible to edit the custom dictionary to remove it.
In this Windows 10 guide, we’ll walk you through the steps to add or delete words from the custom dictionary.
How to edit the spell checker dictionary
If you made a mistake adding an incorrect word to the dictionary on Windows 10, or you want to add a list of new words, do the following.
- Use the Windows key + R keyboard shortcut to open the Run command.
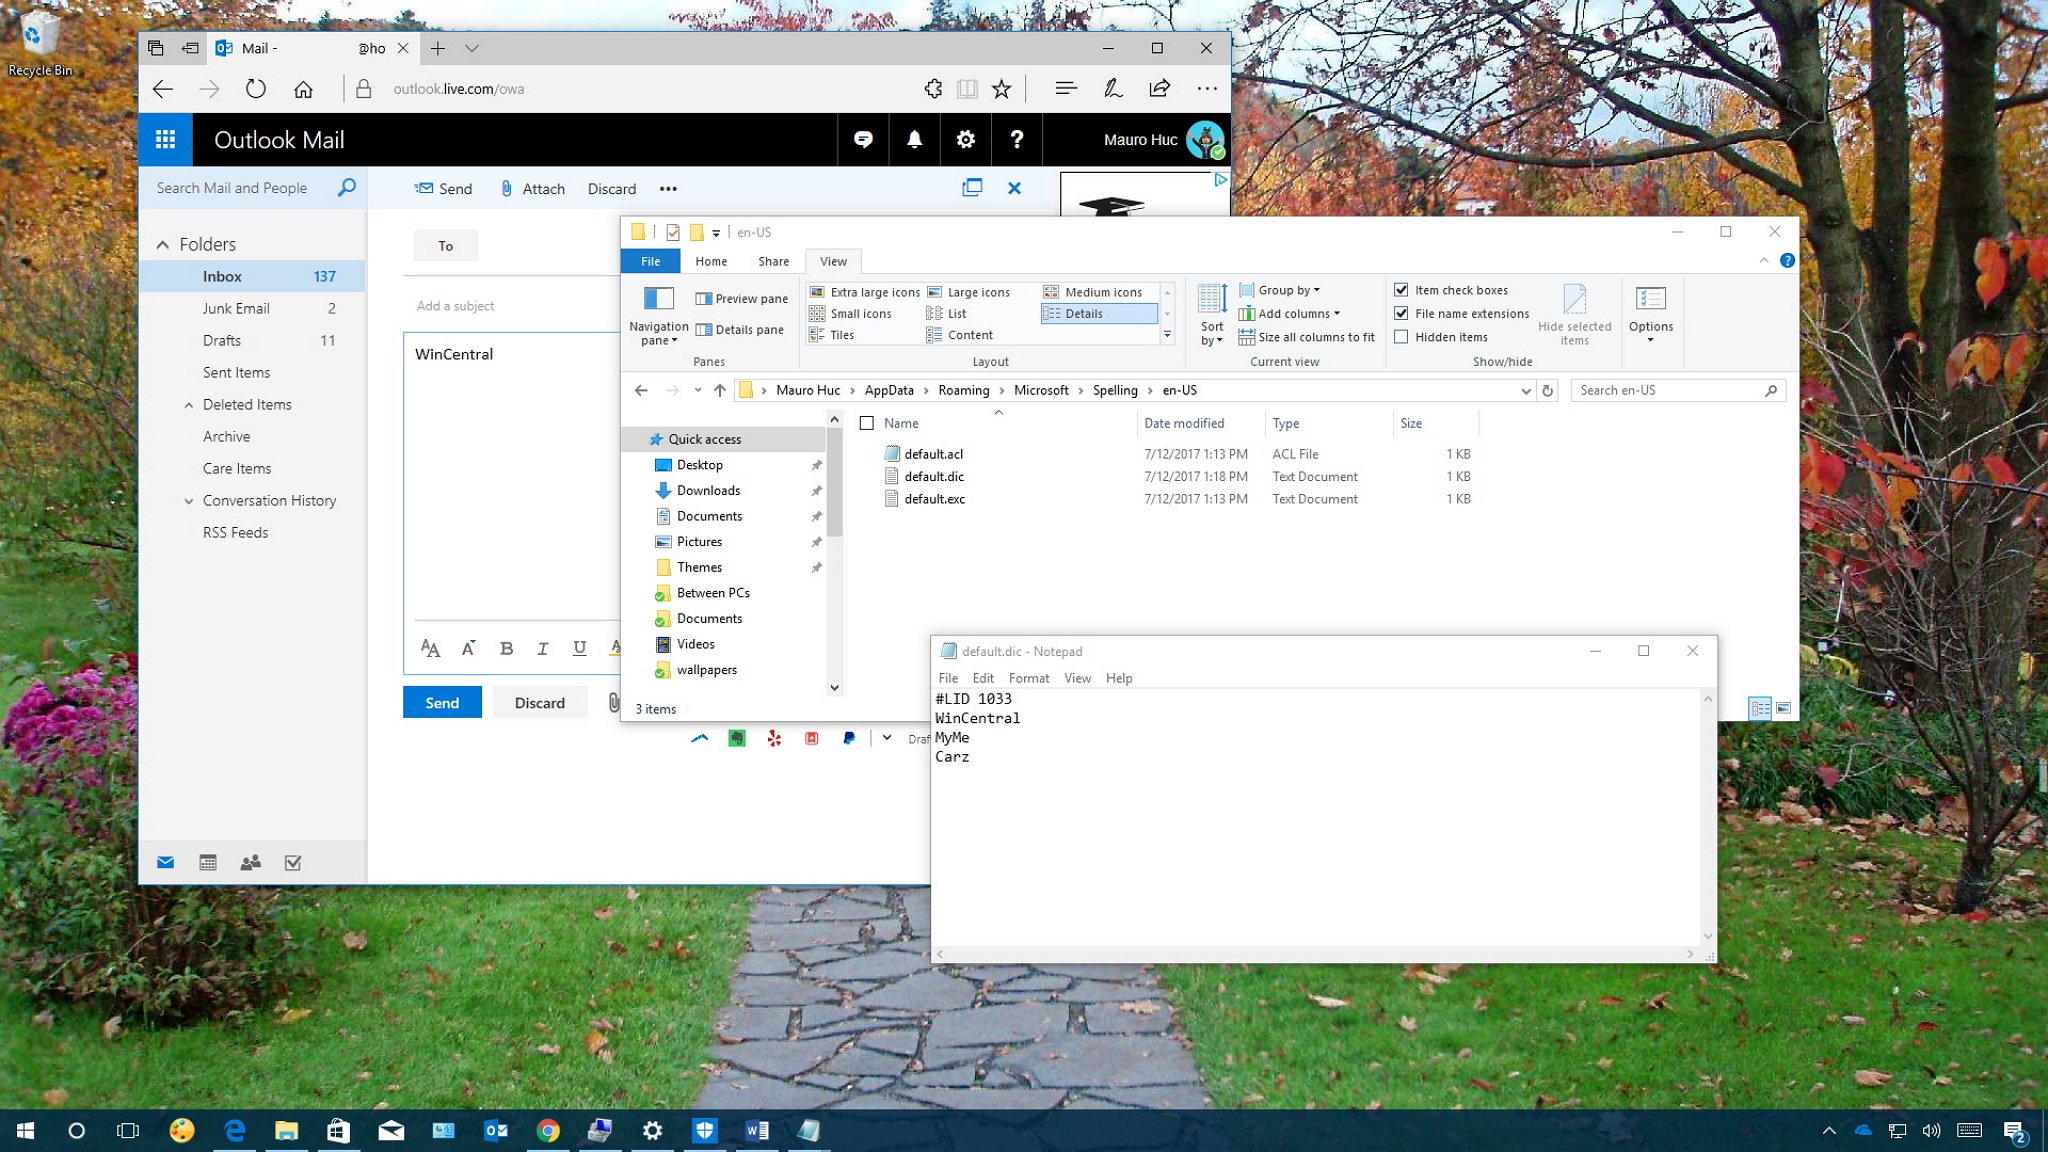
Type the following path and click OK.

Double-click the default.dic file to open with Notepad.
The default.dic file contains all the saved words that you manually added. The only thing left to do is to remove the incorrect words and save the file as you would normally do with any Notepad file.
Also, to remove words, you can also use the default.dic file to add words in bulk for items that you know the spell checker won’t recognize. Only remember to enter one word per line.
It should be noted that these instructions will only edit the custom dictionary on Windows 10. Other apps, such as those from Office and Google Chrome, use their own dictionary.
While we’re focusing this guide on Windows 10, you can also use the same steps on Windows 8.1.
More Windows 10 resources
For more helpful articles, coverage, and answers to common questions about Windows 10, visit the following resources:
![]()
Halo: MCC’s live service elements make it better, not worse
Halo: The Master Chief Collection is more popular than ever, but some fans don’t agree with the live service approach 343 Industries has taken with it. Here’s why those elements are, at the end of the day, great for the game and for Halo overall.
![]()
Microsoft’s Surface Duo is not ‘failing up’
Microsoft announced this week that it was expanding Surface Duo availability to nine new commercial markets. While Surface Duo is undoubtedly a work in progress, this is not a sign of a disaster. It’s also doesn’t mean that Surface Duo is selling a ton either. Instead, the reason for the expansion is a lot more straightforward.
![]()
Here’s what you can do if Windows 10 update KB5001330 is causing issues
In this guide, we’ll show you the steps to get rid of the update KB5001330 to fix profile, gaming, and BSoD problems with the Windows 10 October 2020 Update and May 2020 Update.
![]()
These are the best PC sticks when you’re on the move
Instant computer — just add a screen. That’s the general idea behind the ultra-portable PC, but it can be hard to know which one you want. Relax, we have you covered!


