- PuTTY SSH client for Mac OSX — download and tutorial
- Contents
- Using the built-in SSH client in Mac OS X
- Running SSH from the terminal command line
- Running SSH with a graphical user interface
- How to use PuTTY SSH keys with the built-in OpenSSH
- Ported PuTTY for Mac
- Installation using HomeBrew
- Installation using MacPorts
- Alternatives to PuTTY on the Mac
- Лучшие FTP (SSH) клиенты для Mac (macOS)
- CyberDuck
- FileZilla
- Transmit 4
- muCommander
- CrossFTP
- How to SSH on Mac with the Native SSH Client
- How to Use the SSH Client on Mac
- Как жить в Mac OS без Putty? Аналоги.
- Установка PuTTY на Mac OS
- Аналоги PuTTY на Мак
- Использование терминала для SSH соединения
PuTTY SSH client for Mac OSX — download and tutorial
PuTTY for Mac is a port of the Windows version of PuTTY . However, there are many options for SSH clients for Mac, and this page discusses several of them.
Contents
Using the built-in SSH client in Mac OS X
Mac OS X includes a command-line SSH client as part of the operating system. To use it, goto Finder, and selext Go -> Utilities from the top menu. Then look for Terminal. Terminal can be used to get a local terminal window, and also supports SSH connections to remote servers.
Running SSH from the terminal command line
Once you have the terminal window open, you have two alternatives. The first approach is to type ssh hostname or ssh user@hostname into the terminal window. This is more familiar for Linux and Unix users who are used to using a command line.
Running SSH with a graphical user interface
The second option is to select New Remote Connection. from the Shell menu of Terminal. This opens a graphical dialog asking for the host to connect to and the user name. This also allows saving connections. This is recommended for users who are not accustomed to using a command line.
How to use PuTTY SSH keys with the built-in OpenSSH
If you have a PuTTY .ppk format private key and want to use it with the built-in OpenSSH on Mac on the command line or in scripts, you can use the following commands.
First, install PuTTY for Mac using brew install putty or port install putty (see below). This will also install the command-line version of puttygen , the PuTTY key generator tool.
Then, use the following command to convert the .ppk format private key to a standard PEM format private key:
Make sure permissions on the private key file are set properly. It should only be readable by the user that owns it.
You can now use the key for logins from scripts and command line with:
Ported PuTTY for Mac
There is a port of PuTTY for Mac. It can be installed in several ways.
Installation using HomeBrew
If you already have the brew command installed, the best way to install PuTTY is to use the following command:
Installation using MacPorts
PuTTY is readily available via MacPorts. To see how to install MacPorts and PuTTY, see here .
Once you have MacPorts installed, you just need to give this command:
and to add a shortcut on the Desktop,
Alternatives to PuTTY on the Mac
A lot of people use Cyberduck on Mac. It is a solid, well-known SSH client that is quite popular.
Together with our customers, our mission is to secure their digital business on on-premises, cloud, and hybrid ecosystems cost-efficiently, at scale, and without disruptions to their operations or business continuity.
Источник
Лучшие FTP (SSH) клиенты для Mac (macOS)
Если вы не ограничиваетесь лишь скачиванием данных с FTP-серверов (это умеет практически любой браузер), вам обязательно необходимо обзавестись качественным FTP-клиентом. Наиболее популярные и функциональные решения мы собрали в этом материале.
FTP (File transfer protocol) наряду с HTML является одним из самых распространённых протоколов в интернете. Вообще, штатный проводник Finder умеет подключаться и обмениваться с FTP данными, для этого необходимо в строке меню выбрать пункт Переход → Подключение к серверу (или нажать сочетание клавиш Command (⌘) + K).
Но на этом все возможности стандартного инструментария заканчиваются. Если вы захотите подключиться по протоколу SFTP, WebDAV, Amazon S3 или SSH, то необходимо искать альтернативы, которых для Mac великое множество.
CyberDuck
Один из самых популярных FTP-клиентов для macOS (есть версия и для Windows). Несмотря на то что имеет одновкладочный интерфейс, отличающийся минималистичностью от других решений, обладает внушительным набором функций. CyberDuck работает с любыми серверами поддерживающими соединение по протоколам FTP, SFTP, S3, Backblaze B2, Azure или WebDAV. Немаловажно наличие русского интерфейса и поддержка кириллицы в названиях файлов. Любые данные перемещаются привычным способом Drag’n’Drop. А ещё можно быстро изменять трафик.
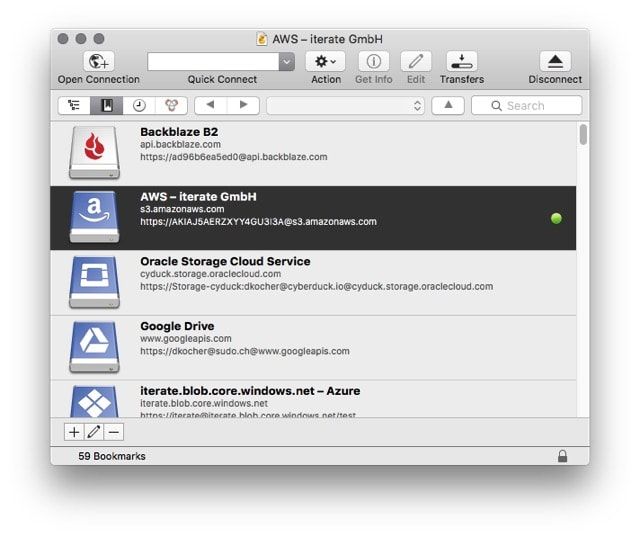
Главный недостаток программы — все файлы отправляемые на сервер отображаются не по отдельности, а одним процессом. Из-за этого не понятно какой файл уже закачался, а какой — нет. Нельзя исключить из списка отправляемых данных какой-нибудь файл. Также в CyberDuck к каждому формату уже привязано приложение по умолчанию, так что открыть тот или иной файл при помощи другого софта уже нельзя. Ну и поддержка русской локализации неполная: имеется несколько кодировок, но далеко не все.

Приложение распространяется как в платном ($24), так и бесплатном вариантах. Отличие всего одно — в бесплатной версии периодически всплывает сообщение рекомендующее приобрести программу.
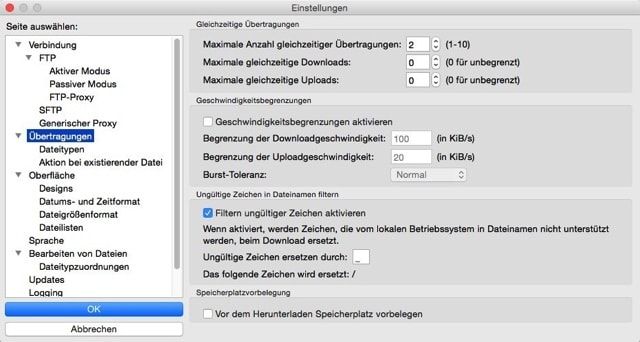
FileZilla
Абсолютно бесплатный клиент с открытым исходным кодом. Его главная фишка — кроссплатформенность. Имеются версии для macOS, Windows и Linux, а также варианты для сервера и пользователя. Интерфейс гибко настраивается под нужны юзера и имеет русскую локализацию. Понравилось наличие кнопки быстрого соединения с FTP, фильтров для облегчения поисков и возможность одновременной передачи данных с продолжением сёрфинга по серверу.
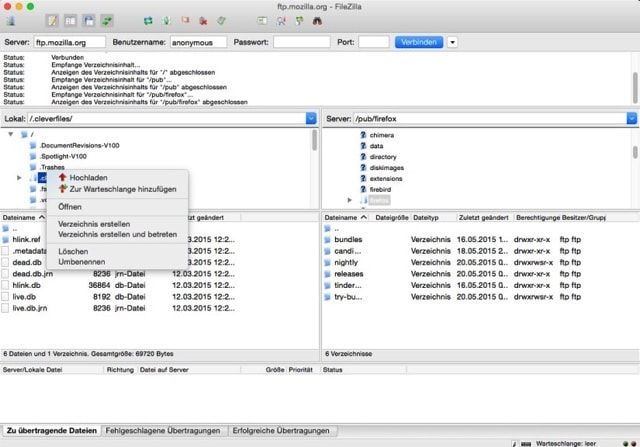
Почему-то разработчики не разрешают удалять файлы через привычную комбинацию Command (⌘) + Delete (это необходимо делать из контекстного меню). Нет автоматического восстановления соединения. Нельзя изменить ширину канала или поставить на паузу закачку отдельных файлов. Иногда возникают проблемы с русскими названиями файлов и папок. Главный недостаток FileZilla — общая низкая стабильность программы, а также отсутствие поддержки работы с облачными хранилищами.
Transmit 4
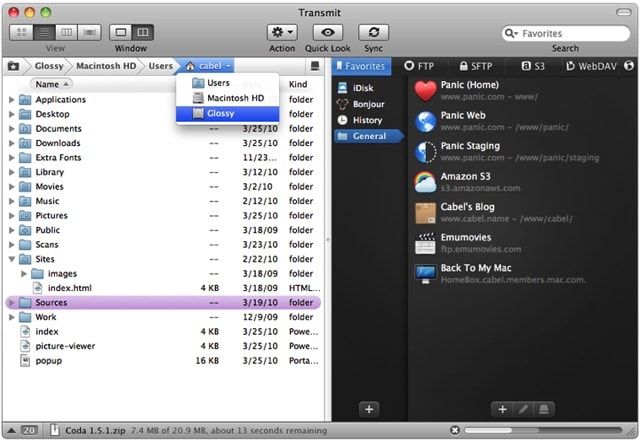
Продукт с длинной историей тянущейся еще с 1998 года. Несмотря на это, разработчики регулярно обновляют и совершенствую программу. Поддерживает работу с FTP, SFTP, WebDaw и облачным сервисом Amazon S3. Очень понравилось наличие синхронизации папок. Четвертая версия обзавелась очень свежим и привлекательным интерфейсом, но, к сожалению, без русской локализации, хотя программа работает с файлами на кириллице. Списка функций Transmit 4 хватит на полноформатный обзор. От себя хочу добавить, что это очень качественная и стабильная программа с удобным UI. Единственный весомый недостаток — софт платный ($34). Имеется бесплатная триальная версия.
muCommander

Вообще, muCommander — это кроссплатформенный файловый менеджер, но в нём присутствует встроенный FTP-клиент. Программа бесплатная и имеет двухвкладочный интерфейс как в TotalCommander под Windows. Присутствует русская локализация и полная поддержка кириллицы. Окно передачи данных информативное и удобное, но нет параллельной работы с файлами и закачками. Почему-то не работает Drag’n’Drop для скачивания с сервера.
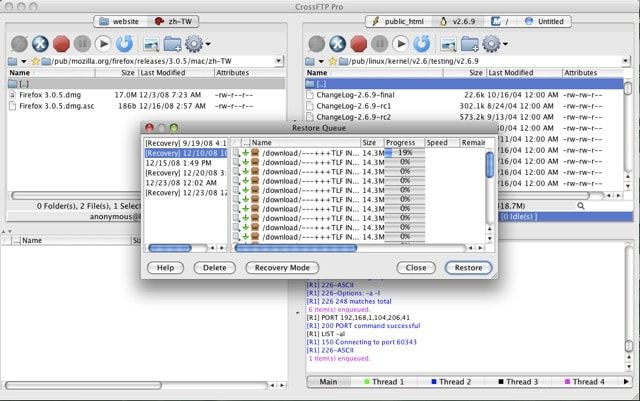
CrossFTP
Бесплатная версия CrossFTP работает с архивами, шифрованием, закладками, умеет совершать групповые операции и хорошо искать файлы. Поддерживается множество кодировок, в том числе и кириллица. А ещё программа кроссплатфоменная.
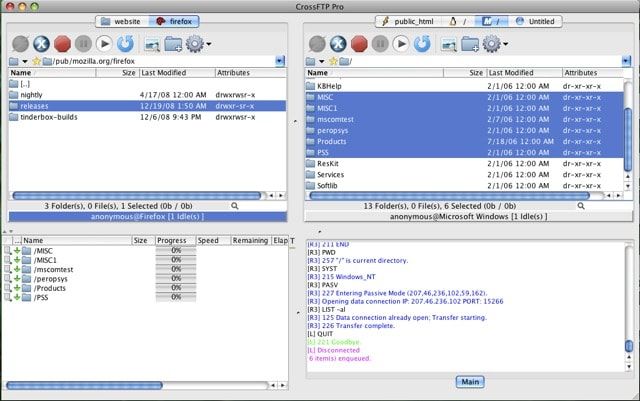
Есть и ряд недостатков, которые не позволяют мгновенно менять ширину канала, ограничивать трафик или увеличивать число потоков для закачки (только в платной версии), да и не всегда закачка ставится на паузу. Установка программы осуществляется через Java-инсталлятор.
Платная версия обладает более широкой функциональностью.
Источник
How to SSH on Mac with the Native SSH Client

Did you know the Mac has a native SSH client built directly into the command line? This ssh client allows for secured connections and remote logins into other machines. Unlike Windows, you won’t need a third party app to utilize SSH for connections into remote computers and devices, because ssh is built directly into Mac OS and Mac OS X – perfect!
Let’s walk through how to make an SSH connection into another computer using the native ssh client in Mac OS.
Some quick background for the unfamiliar; SSH stands for Secure SHell, and it permits making encrypted connections into other computers over a network or the broader internet. You can use the SSH client in Mac OS to connect to any other machine with an SSH server running, whether it’s on another Mac with Mac OS X, linux, unix, or Windows computer does not matter, as long as it has an SSH server running it and you have credentials, it can be connected to securely.
Using ssh is considered somewhat advanced and typically useful for remote systems administration, shell activity, server management, and other command line activity. If you have two computers on your own network you can setup an SSH server on a Mac via System Preferences quite easily, or if you’re savvy with Terminal you can enable SSH through the command line too, and try this out for yourself.*
How to Use the SSH Client on Mac
Assuming you have the remote server IP and the remote username handy, here’s all you need to do to connect via SSH in Mac OS and Mac OS X:
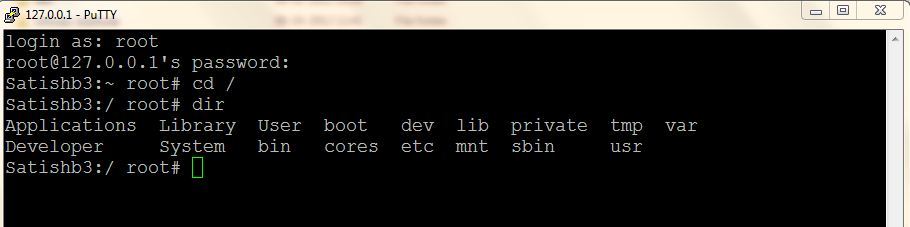
- Launch the Terminal application, Terminal is found in /Applications/Utilities/ directory but you can also launch it from Spotlight by hitting Command+Spacebar and typing “Terminal” and then return
At the command prompt, enter the following ssh syntax:
Replace “username” with the appropriate user account of the remote machine, and “ip.address” with the IP address of the remote machine. For example:
That’s it, now you’re logged in to the remote machine via SSH.
At this point you have access to any command line functionality on the remote computer, assuming you have privileges to perform the task or execute the command. What you do once you’re connected with SSH is up to you, but as state earlier it’s intended for advanced uses like systems administration, server management, network operations, and other higher level tasks that are generally less relevant to the average computer user.
When you’re finished you can type “exit” to disconnect from the remote machine, or just close the Terminal app to close the ssh client and connection.
* Side note: you can also SSH into your own Mac this way if you juts want to try this out, but there is little point to that since launching Terminal in and of itself grants you direct shell access to the computer to begin with. But, it does offer a means of experimenting with SSH connections if you have never done so before, just use your username @ localhost or 127.0.0.1 for the IP.
By the way if you want to allow someone else to remotely SSH into YOUR Mac, you’d need to setup the native SSH server on your Mac (easy as described here) and then you’d want to add a new user account to the Mac for that person, never share your own login and password with anyone else. Keep in mind if you give someone SSH access to your Mac with an admin account, you are giving them full access to your computer, all files, apps, activity, logs, and everything else, representing complete and total remote access to the computer. The command line has a huge number of commands available and is more powerful than the familiar graphical interface (GUI) we all know and love, so you probably do not want to allow for this randomly. Anything you can do at the command line can be done through ssh, assuming appropriate user privileges – this is why it’s so widely used for systems administration and by advanced users, and much less relevant to neophytes and the less technically inclined. If you want to give someone remote access for troubleshooting purposes and you’re a novice, a better approach is to use screen sharing instead.
Want to see more SSH tips (here)? Do have any fancy SSH tricks you want to share? Do you know of a better SSH client than OpenSSH that is built into Mac OS? Let us know in the comments!
Источник
Как жить в Mac OS без Putty? Аналоги.
В Windows проблема подключения по SSH полностью решалась с помощью всем известной утилиты PuTTY. Пользователи Linux тоже не остаются в обиде, и на их платформе есть это приложение. Странно, но для Мак платформы разработчики PuTTY не сделали. Пришлось искать варианты.
Установка PuTTY на Mac OS
Во первых, для поклонников этой программы, есть вариант установки самой PuTTY на Мак, с помощью систем портирования Linux программ на Mac OS (Homebrew,Xcode, XQuartz). Подробно о такой установке написано в этой статье.
Аналоги PuTTY на Мак
Кроме этого есть аналоги программы для Мака.
Правда его цена немного «кусается». Программа предлагается по цене 80$! С сайта разработчика можно скачать Trial версию на 30 дней.
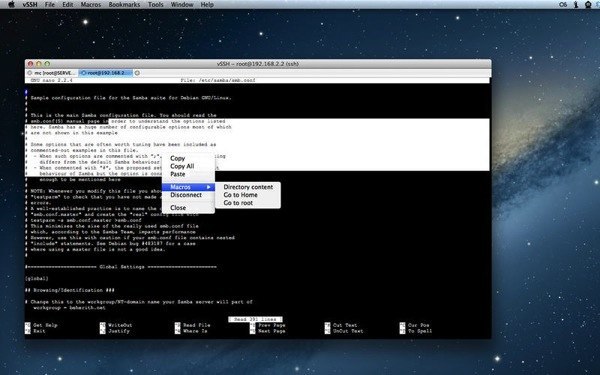
Apple Store при запросе «ssh client» показывает программу vSSH . Цена программы уже более гуманная — 169 рублей.
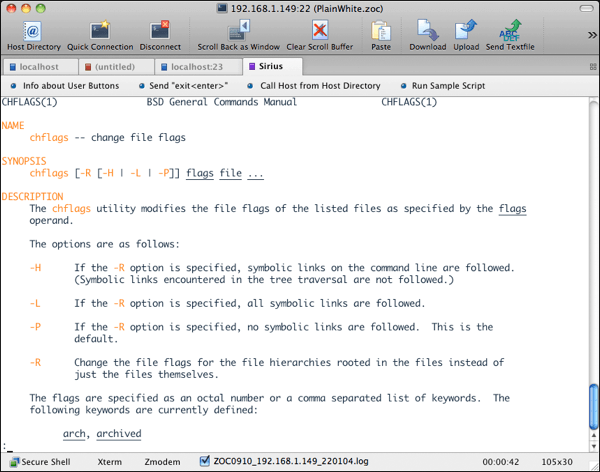
Использование терминала для SSH соединения
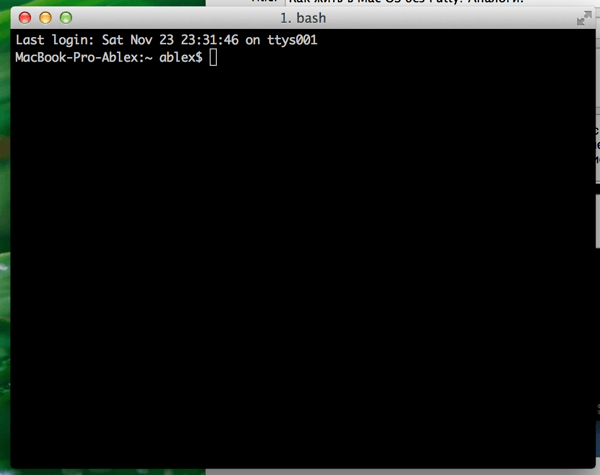
Но самым популярным в Mac OS является использование консольного терминала.
Тут рекомендуется вместо стандартного терминала платформы использовать приложение iTerm2 — пожалуй, самый популярный терминал для Мак Оси доступный бесплатно.
Для инициации SSH соединения используется команда:
ssh 192.168.1.1 -l user
В принципе, для большинства задач этого хватает.
Выбор за вами!
Поделиться «Как жить в Mac OS без Putty? Аналоги.»
Источник


