- Connecting to Your Instance
- Before You Begin
- Connecting to Your Linux Instance Using SSH
- Running Administrative Tasks on the Instance
- What’s Next
- Как подключиться по SSH
- Что такое SSH?
- Как подключиться по SSH
- 1. Подключение через SSH в Linux
- 2. Подключение через SSH в Windows
- Выводы
- SSH Command — Usage, Options, Configuration
- Contents
- SSH Command in Linux
- Other SSH Commands
- Using the Linux client
- Specifying a different user name
- Executing remote commands on the server
- SSH client configuration file
- Configuring public key authentication
- Configuring port forwarding
- SSH command line options
- A little history
Connecting to Your Instance
You connect to a running Linux instance using a Secure Shell (SSH) connection. Most Linux and UNIX-like operating systems include an SSH client by default. Windows 10 and Windows Server 2019 systems should include the OpenSSH client, which you’ll need if you created your instance using the SSH keys generated by Oracle Cloud Infrastructure . For other Windows versions, you can download a free SSH client called PuTTY from http://www.putty.org.
Before You Begin
- You know the public IPВ address of your instance. See Launching a Linux Instance.
- You know the path to the private key file.
Connecting to Your Linux Instance Using SSH
Log in to the instance using SSH.
Use the following command to set the file permissions so that only you can read the file:
is the full path and name of the file that contains the private key associated with the instance you want to access.
Use the following SSHВ command to access the instance.
Note
Copy the following example to ensure the correct characters are used. If the wrong character is used in ssh -i , a Could not resolve hostname . No such host is known. error might occur.
is the full path and name of the file that contains the private key associated with the instance you want to access.
is the default username for the instance. For Oracle Linux and CentOS images, the default username is opc . For Ubuntu images, the default username is ubuntu .
is your instance IPВ address that you retrieved from the Console .
If the instance uses a key pair that was generated by Oracle Cloud Infrastructure , use the following procedure.
If this is the first time you are using this key pair, you must set the file permissions so that only you can read the file. Do the following:
- In Windows Explorer, navigate to the private key file, right-click the file, and then click Properties.
- On the Security tab, click Advanced.
- On the Permissions tab, for Permission entries, under Principal, ensure that your user account is listed.
- Click Disable Inheritance, and then select Convert inherited permissions into explicit permissions on this object.
- For Permission entries, select each permission entry that is not your user account and click Remove.
- Ensure that the access permission for your user account is Full control.
- Save your changes.
To connect to the instance, open Windows PowerShell and run the following command:
Note
Copy the following example to ensure the correct characters are used. If the wrong character is used in ssh -i , a Could not resolve hostname . No such host is known. error might occur.
is the full path and name of the file that contains the private key associated with the instance you want to access.
is the default username for the instance. For Oracle Linux and CentOS images, the default username is opc . For Ubuntu images, the default username is ubuntu .
is your instance IPВ address that you retrieved from the Console .
SSH private key files generated by Oracle Cloud Infrastructure are not compatible with PuTTY. If you are using a private key file generated during the instance creation process you need to convert the file to a .ppk file before you can use it with PuTTY to connect to the instance.
Note
If you changed the file permissions on your key to connect from a Windows system using OpenSSH, the key will not work with a PuTTY connection. Use OpenSSH to connect instead.
Convert a generated .key private key file:
Click Load, and select the private key generated when you created the instance. The extension for the key file is .key .
Click Save private key.
Specify a name for the key. The extension for new private key is .ppk .
Connect to the Linux instance using a .ppk private key file:
If the instance uses a key pair that you created using PuTTY Key Generator, use the following procedure.
In the Category pane, select Session and enter the following:
Host Name (or IP address):
is the default username for the instance. For Oracle Linux and CentOS images, the default username is opc . For Ubuntu images, the default username is ubuntu .
is your instance public IPВ address that you retrieved from the Console
Click Browse, and then select your .ppk private key file.
Click Open to start the session.
If this is your first time connecting to the instance, you might see a message that the server’s host key is not cached in the registry. Click Yes to continue the connection.
Tip
If the connection fails, you may need to update your PuTTY proxy configuration.
Running Administrative Tasks on the Instance
When you’re logged in as the default user, opc , you can use the sudo command to run administrative tasks.
What’s Next
Now that you’ve got an instance and have successfully connected to it, consider the following next steps:
Install software on the instance.
If you’re having trouble connecting, see Troubleshooting the SSH Connection.
Источник
Как подключиться по SSH
SSH — это основной протокол для удаленного управления серверами на базе операционной системы Linux. Все действия при подключении к SSH выполняются в командной строке, но при достаточном уровне знаний и привилегий в системе там можно сделать практически все что угодно, в отличие от того же FTP где можно только передавать и редактировать файлы.
Если вы покупаете VPS сервер или продвинутый хостинг, обычно в письме вместе с другими данными авторизации есть данные доступа по SSH. В этой статье мы рассмотрим как подключиться по SSH к серверу из Linux или Windows.
Что такое SSH?
Поскольку эта статья рассчитана именно на новичков, то перед тем, как перейти дальше давайте подробнее разберемся что из себя представляет SSH. Исторически так сложилось что на большинстве серверов используется операционная система Linux, во многом этому посодействовала ее бесплатность. Графический интерфейс на серверах Linux не используется для экономии ресурсов, поэтому единственным способом администрирования сервера остается командная строка.
Но это не является недостатком, потому что в командной строке Linux можно сделать больше чем графическом интерфейсе. Протокол SSH позволяет вам выполнять команды в удаленной системе так, как будто вы это делаете в своей системе. Вам доступен буфер обмена, вы вводите команды и можете использовать их вывод. Недоступны разве что файлы из вашей файловой системы. Например, когда вы подключитесь к серверу по SSH из Ubuntu, то все будет выглядеть так, как будто вы открыли терминал в своей системе.
Как подключиться по SSH
Для подключения по SSH нам необходимо знать такие данные:
- ip адрес сервера, к которому мы собираемся подключится;
- порт, на котором ожидает подключения SSH сервер, по умолчанию используется 22, но в целях безопасности порт подключения ssh часто изменяют;
- имя и пароль пользователя на удаленном сервере.
Больше ничего не нужно, обычно эти данные присылают в письме вместе с описанием VPS. Теперь перейдем к практике.
1. Подключение через SSH в Linux
В Linux подключение по SSH выполняется с помощью утилиты ssh. Мы более подробно рассматривали работу с ней в статье как пользоваться ssh. Для подключения к удаленному компьютеру ее синтаксис будет выглядеть следующим образом:
$ ssh имя_пользователя @ айпи_адрес
Это самый простой вариант, если вам также нужно задать порт, используйте опцию -p:
$ ssh имя_пользователя @ айпи_адрес -p порт
Чтобы выполнить подключение по SSH Linux нажмите Ctrl+Alt+T для открытия терминала и наберите команду, заменив нужные значения:
Или, с нестандартным портом:
ssh sergiy@192.168.1.2 -p 2223
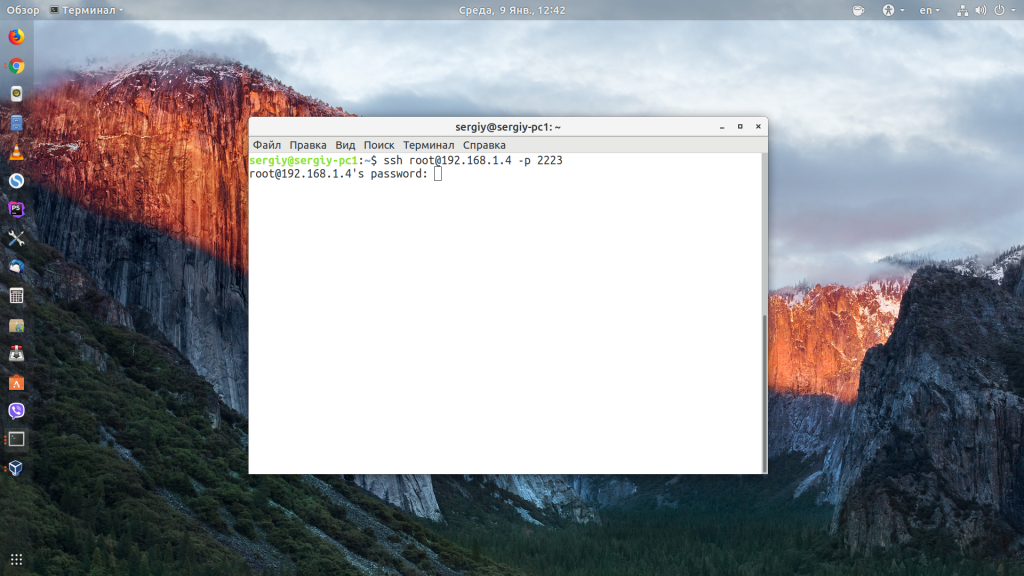
Если ip_адрес и порт правильные, то на следующем шаге программа попросит у вас ввести пароль:
Если пытаетесь подключится через SSH к этому серверу первый раз, то утилита также попросит подтвердить добавление нового устройства в свой список известных устройств, здесь нужно набрать yes и нажать Enter:

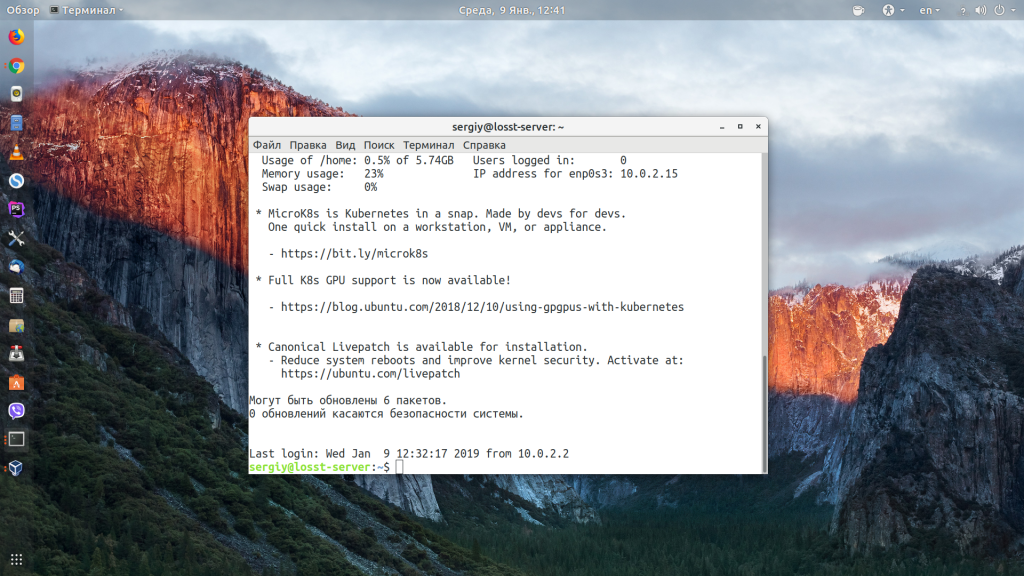
Теперь вы подключены, и все вводимые далее команды будут выполнены на удаленном сервере:
Если же произошла ошибка и IP адрес или порт введены неверно, то вы получите ошибку Connection Refused:
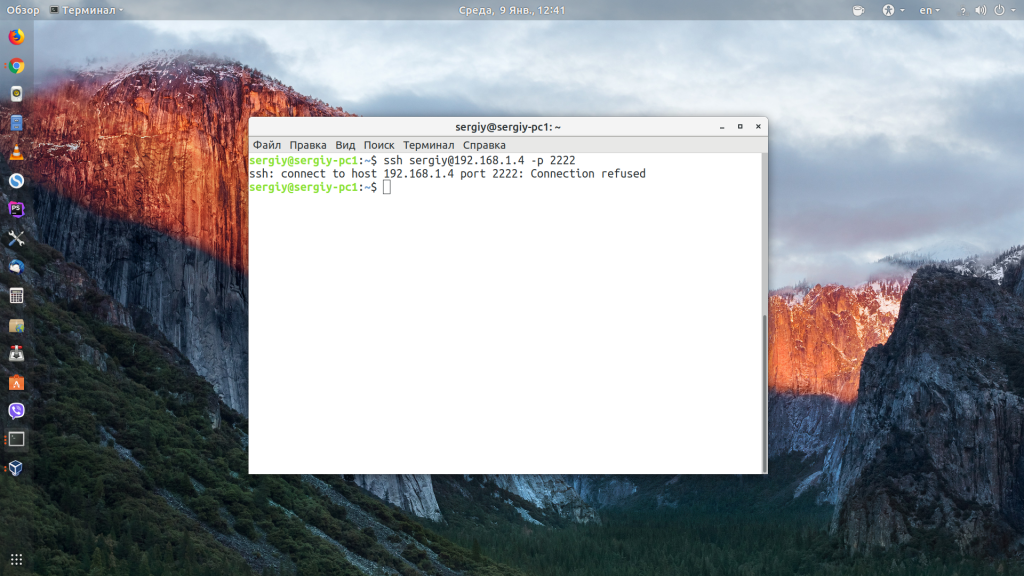
Просто убедитесь что порт введен верно. Если это ваш сервер, то, возможно на нем еще нужно разрешить подключение SSH в брандмауэре. В Ubuntu/Debian для этого на удаленном сервере выполните:
sudo ufw allow 22/tcp
А в CentOS/Fedora:
firewall-cmd —permanent —zone=public —add-port=22/tcp
Если вы используете другой порт для SSH, то замените 22 на свой порт. Для удобства подключения по SSH в дальнейшем можно настроить авторизацию по ключу ssh, чтобы не вводить каждый раз пароль.
Теперь вы знаете как подключиться по ssh linux и решить проблемы с подключением. А теперь перейдем к Windows.
2. Подключение через SSH в Windows
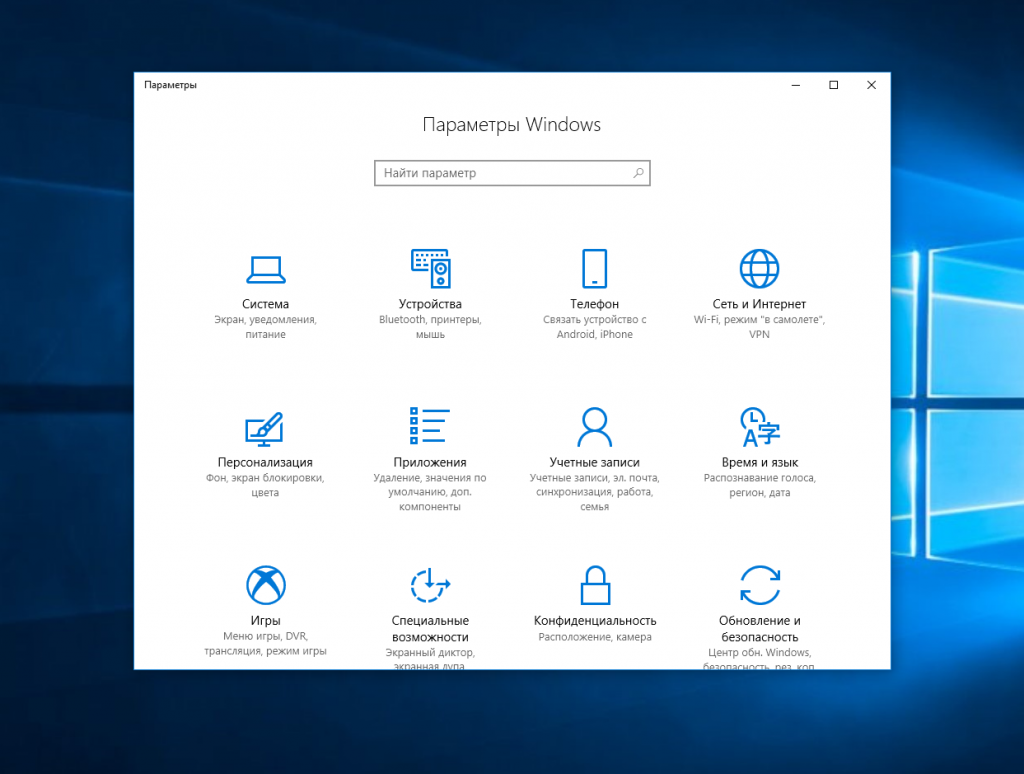
Раньше подключение по SSH из Windows выполнялось только с помощью сторонних утилит, например PuTTY. Но в Windows 10 был добавлен встроенный OpenSSH клиент и работает он точно так же, как и в Linux. По умолчанию этот компонент не активирован. Для его установки откройте Параметры -> Приложения:

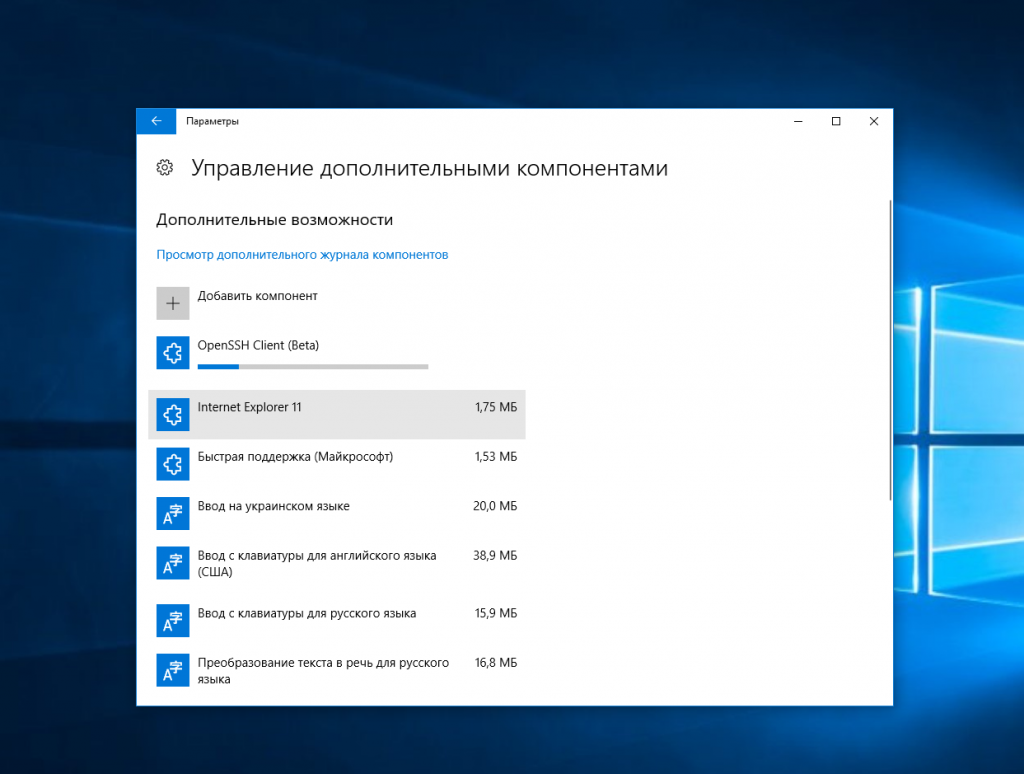
Затем выберите Управление дополнительными компонентами:
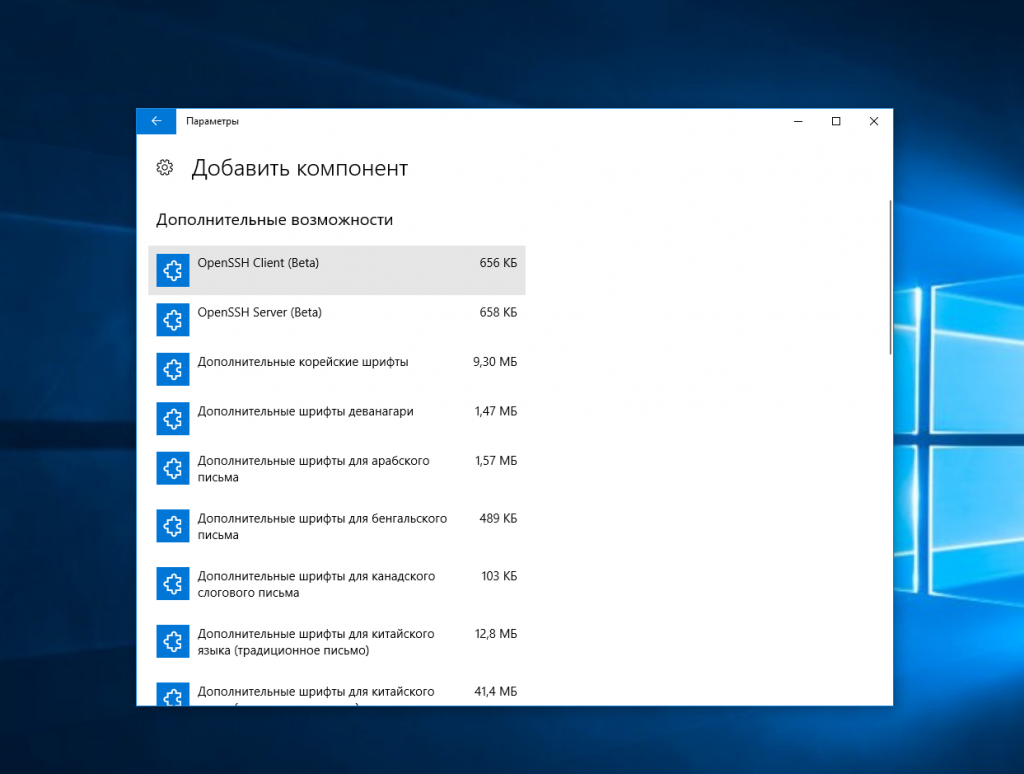
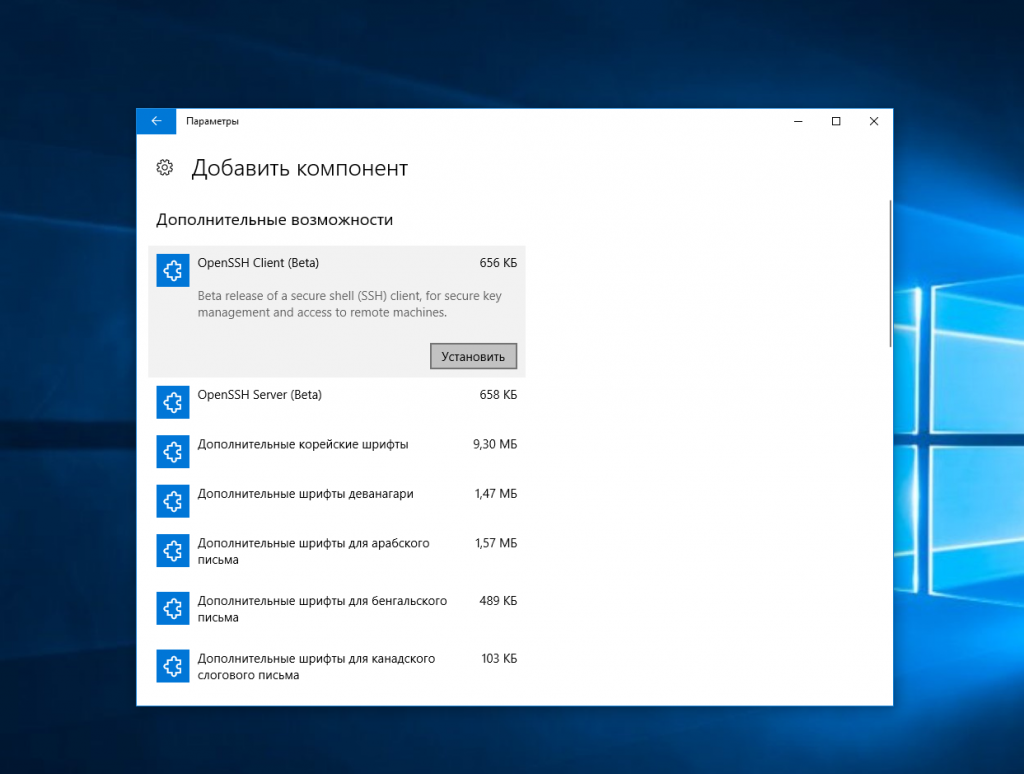
Здесь нажмите добавить новый компонент и в открывлемся меню выберите OpenSSH Client и нажмите Устанвоить:
Дальше вернитесь назад и дождитесь завершения установки. После того, как SSH клиент будет установлен нужно обязательно перезагрузить компьютер.
После перезагрузки нажмите Win+R чтобы открыть окно запуска команд и наберите в нем cmd:
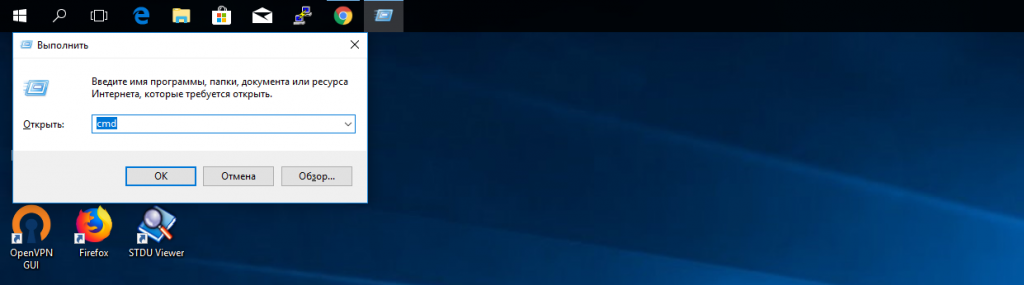
Далее нажмите Enter. Перед вами откроется командная строка Windows. Здесь можно использовать утилиту ssh. Синтаксис у нее абсолютно такой же, как и для Linux:
ssh имя_пользователя @ айпи_адрес -p порт
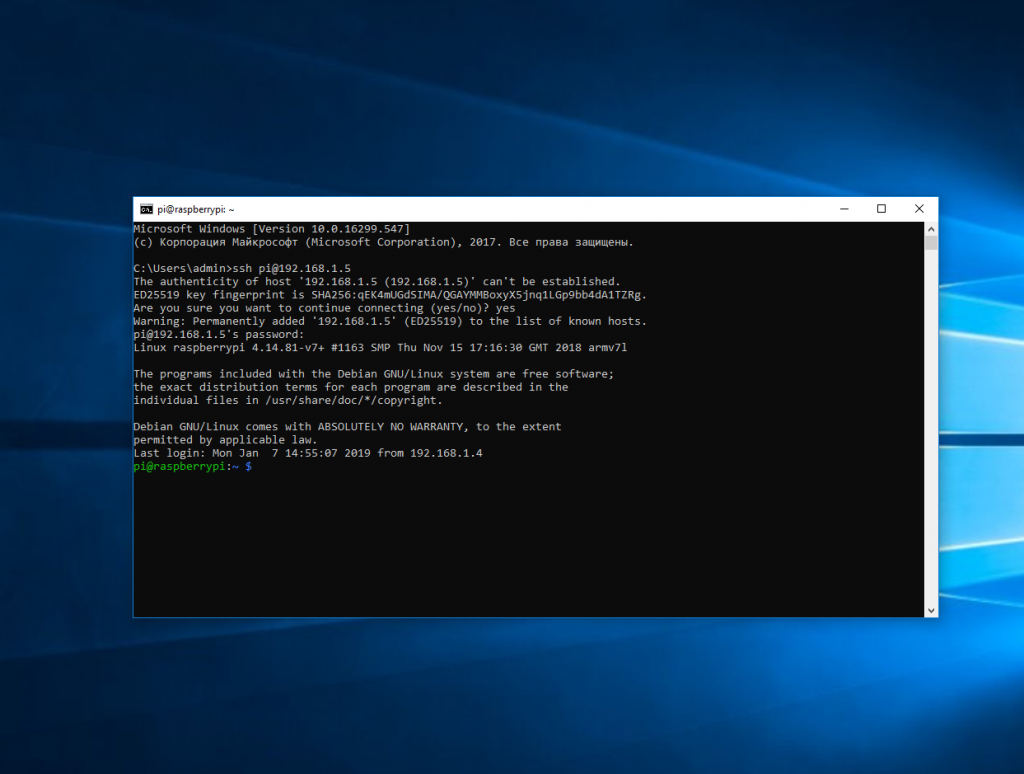
Например, такой командой можно подключится по SSH к Raspberry Pi, который находится в вашей локальной сети по адресу 192.168.1.5:
Утилита предложит добавить устройство в список известных:

Затем предложит ввести пароль:

Все следующие команды будут выполняться уже на Raspberry Pi или другой удаленной машине, к которой вы подключились.
Теперь подключиться к серверу по ssh из этой операционной системы также просто как и из Linux.
Выводы
В этой статье мы рассмотрели как выполняется подключение к серверу по SSH из Linux или Windows. Как видите, это очень просто. А дальше, для работы с удаленным сервером вам понадобятся команды терминала Linux.
Источник
SSH Command — Usage, Options, Configuration
Practically every Unix and Linux system includes the ssh command. This command is used to start the SSH client program that enables secure connection to the SSH server on a remote machine. The ssh command is used from logging into the remote machine, transferring files between the two machines, and for executing commands on the remote machine.
Contents
SSH Command in Linux
The ssh command provides a secure encrypted connection between two hosts over an insecure network. This connection can also be used for terminal access, file transfers, and for tunneling other applications. Graphical X11 applications can also be run securely over SSH from a remote location.
Other SSH Commands
There are other SSH commands besides the client ssh . Each has its own page.
ssh-keygen — creates a key pair for public key authentication
ssh-copy-id — configures a public key as authorized on a server
ssh-agent — agent to hold private key for single sign-on
ssh-add — tool to add a key to the agent
scp — file transfer client with RCP-like command interface
sftp — file transfer client with FTP-like command interface
Using the Linux client
Linux typically uses the OpenSSH client. The ssh command to log into a remote machine is very simple. To log in to a remote computer called sample.ssh.com, type the following command at a shell prompt:
If this is the first time you use ssh to connect to this remote machine, you will see a message like:
Type yes to continue. This will add the server to your list of known hosts (
/.ssh/known_hosts ) as seen in the following message:
Each server has a host key , and the above question related to verifying and saving the host key, so that next time you connect to the server, it can verify that it actually is the same server.
Once the server connection has been established, the user is authenticated. Typically, it asks for a password. For some servers, you may be required to type in a one-time password generated by a special hardware token.
Once authentication has been accepted, you will be at the shell prompt for the remote machine.
Specifying a different user name
It is also possible to use a different username at the remote machine by entering the command as:
The above can also be expressed with the syntax:
Executing remote commands on the server
The ssh command is often also used to remotely execute commands on the remote machine without logging in to a shell prompt. The syntax for this is:
For example, to execute the command:
on host sample.ssh.com, type the following command at a shell prompt:
After authenticating to the remote server, the contents of the remote directory will be displayed, and you will return to your local shell prompt. -x Disables X11 forwarding.
SSH client configuration file
The ssh command reads its configuration from the SSH client configuration file
/.ssh/config . For more information, see the page on SSH client configuration file .
Configuring public key authentication
To configure passwordless public key authentication , you may want to create an SSH key and set up an authorized_keys file. See the pages on ssh-keygen and ssh-copy-id for more information.
Configuring port forwarding
Command-line options can be used to set up port forwarding. Local fowarding means that a local port (at the client computer) is tunneled to an IP address and port from the server. Remote forwarding means that a remote port (at the server computer) is forwarded to a given IP address and port from the client machine. See the page on configuring port forwarding on how to configure them.
OpenSSH also supports forwarding Unix domain sockets and IP packets from a tunnel device to establish a VPN (Virtual Private Network).
SSH command line options
Some of the most important command-line options for the OpenSSH client are:
-1 Use protocol version 1 only.
-2 Use protocol version 2 only.
-4 Use IPv4 addresses only.
-6 Use IPv6 addresses only.
-A Enable forwarding of the authentication agent connection.
-a Disable forwarding of the authentication agent connection.
-C Use data compression
-c cipher_spec Selects the cipher specification for encrypting the session.
-D [bind_address:] port Dynamic application-level port forwarding. This allocates a socket to listen to port on the local side. When a connection is made to this port, the connection is forwarded over the secure channel, and the application protocol is then used to determine where to connect to from the remote machine.
-E log_file Append debug logs to log_file instead of standard error.
-F configfile Specifies a per-user configuration file. The default for the per-user configuration file is
-g Allows remote hosts to connect to local forwarded ports.
-i identity_file A file from which the identity key (private key) for public key authentication is read.
-J [user@] host [:port] Connect to the target host by first making a ssh connection to the pjump host[(/iam/jump-host) and then establishing a TCP forwarding to the ultimate destination from there.
-l login_name Specifies the user to log in as on the remote machine.
-p port Port to connect to on the remote host.
-V Display the version number.
-X Enables X11 forwarding.
A little history
SSH replaced several older commands and protocols in Unix and Linux the 1990s. The include telnet , rlogin , and rsh .
SSH runs at TCP/IP port 22. This is right between ftp and telnet, which are 20 years older. Read the story of how SSH got port 22 .
The following video summarizes how and why SSH was originally developed.
Together with our customers, our mission is to secure their digital business on on-premises, cloud, and hybrid ecosystems cost-efficiently, at scale, and without disruptions to their operations or business continuity.
Источник


