- PowerShell remoting over SSH
- Overview
- General setup information
- Set up on a Windows computer
- Set up on an Ubuntu 16.04 Linux computer
- Set up on a macOS computer
- Authentication
- PowerShell remoting example
- Limitations
- Windows 10 SSH vs PuTTY: что выбрать?
- Как установить SSH в Windows 10 (кратко)
- Подробная инструкция по установке
- Использование SSH в Windows PowerShell
- SSH-функции PowerShell и PuTTY
- Почему SSH, когда вы можете использовать Linux?
- Не пора ли отказаться от PuTTY в Windows 10?
- Безопасная оболочка (SSH) Secure Shell (SSH)
- Использование клиента Windows 10 OpenSSH Using the Windows 10 OpenSSH client
- Использование выводимых Using PuTTY
- Скачивание SSH-клиента Download an SSH client
- Подключение к устройству Connect to your device
- Обновление пароля учетной записи Update account password
- Настройка устройства Windows IoT базовая Configure your Windows IoT Core device
- Часто используемые служебные программы Commonly used utilities
PowerShell remoting over SSH
Overview
PowerShell remoting normally uses WinRM for connection negotiation and data transport. SSH is now available for Linux and Windows platforms and allows true multiplatform PowerShell remoting.
WinRM provides a robust hosting model for PowerShell remote sessions. SSH-based remoting doesn’t currently support remote endpoint configuration and Just Enough Administration (JEA).
SSH remoting lets you do basic PowerShell session remoting between Windows and Linux computers. SSH remoting creates a PowerShell host process on the target computer as an SSH subsystem. Eventually we’ll implement a general hosting model, similar to WinRM, to support endpoint configuration and JEA.
The New-PSSession , Enter-PSSession , and Invoke-Command cmdlets now have a new parameter set to support this new remoting connection.
To create a remote session, you specify the target computer with the HostName parameter and provide the user name with UserName. When running the cmdlets interactively, you’re prompted for a password. You can also use SSH key authentication using a private key file with the KeyFilePath parameter. Creating keys for SSH authentication varies by platform.
General setup information
PowerShell 6 or higher, and SSH must be installed on all computers. Install both the SSH client ( ssh.exe ) and server ( sshd.exe ) so that you can remote to and from the computers. OpenSSH for Windows is now available in Windows 10 build 1809 and Windows Server 2019. For more information, see Manage Windows with OpenSSH. For Linux, install SSH, including sshd server, that’s appropriate for your platform. You also need to install PowerShell from GitHub to get the SSH remoting feature. The SSH server must be configured to create an SSH subsystem to host a PowerShell process on the remote computer. And, you must enable password or key-based authentication.
Set up on a Windows computer
Install the latest version of PowerShell. For more information, see Installing PowerShell Core on Windows.
You can confirm that PowerShell has SSH remoting support by listing the New-PSSession parameter sets. You’ll notice there are parameter set names that begin with SSH. Those parameter sets include SSH parameters.
Install the latest Win32 OpenSSH. For installation instructions, see Getting started with OpenSSH.
If you want to set PowerShell as the default shell for OpenSSH, see Configuring Windows for OpenSSH.
Edit the sshd_config file located at $env:ProgramData\ssh .
Make sure password authentication is enabled:
Create the SSH subsystem that hosts a PowerShell process on the remote computer:
The default location of the PowerShell executable is c:/progra
1/powershell/7/pwsh.exe . The location can vary depending on how you installed PowerShell.
You must use the 8.3 short name for any file paths that contain spaces. There’s a bug in OpenSSH for Windows that prevents spaces from working in subsystem executable paths. For more information, see this GitHub issue.
The 8.3 short name for the Program Files folder in Windows is usually Progra
1 . However, you can use the following command to make sure:
Optionally, enable key authentication:
Restart the sshd service.
Add the path where OpenSSH is installed to your Path environment variable. For example, C:\Program Files\OpenSSH\ . This entry allows for the ssh.exe to be found.
Set up on an Ubuntu 16.04 Linux computer
Install the latest version of PowerShell, see Installing PowerShell Core on Linux.
Edit the sshd_config file at location /etc/ssh .
Make sure password authentication is enabled:
Optionally, enable key authentication:
For more information about creating SSH keys on Ubuntu, see the manpage for ssh-keygen.
Add a PowerShell subsystem entry:
The default location of the PowerShell executable is /usr/bin/pwsh . The location can vary depending on how you installed PowerShell.
Optionally, enable key authentication:
Restart the ssh service.
Set up on a macOS computer
Install the latest version of PowerShell. For more information, Installing PowerShell Core on macOS.
Make sure SSH Remoting is enabled by following these steps:
- Open System Preferences .
- Click on Sharing .
- Check Remote Login to set Remote Login: On .
- Allow access to the appropriate users.
Edit the sshd_config file at location /private/etc/ssh/sshd_config .
Use a text editor such as nano:
Make sure password authentication is enabled:
Add a PowerShell subsystem entry:
The default location of the PowerShell executable is /usr/local/bin/pwsh . The location can vary depending on how you installed PowerShell.
Optionally, enable key authentication:
Restart the sshd service.
Authentication
PowerShell remoting over SSH relies on the authentication exchange between the SSH client and SSH service and doesn’t implement any authentication schemes itself. The result is that any configured authentication schemes including multi-factor authentication are handled by SSH and independent of PowerShell. For example, you can configure the SSH service to require public key authentication and a one-time password for added security. Configuration of multi-factor authentication is outside the scope of this documentation. Refer to documentation for SSH on how to correctly configure multi-factor authentication and validate it works outside of PowerShell before attempting to use it with PowerShell remoting.
Users retain the same privileges in remote sessions. Meaning, Administrators have access to an elevated shell, and normal users will not.
PowerShell remoting example
The easiest way to test remoting is to try it on a single computer. In this example, we create a remote session back to the same Linux computer. We’re using PowerShell cmdlets interactively so we see prompts from SSH asking to verify the host computer and prompting for a password. You can do the same thing on a Windows computer to ensure remoting is working. Then, remote between computers by changing the host name.
Limitations
The sudo command doesn’t work in a remote session to a Linux computer.
PSRemoting over SSH does not support Profiles and does not have access to $PROFILE . Once in a session, you can load a profile by dot sourcing the profile with the full filepath. This is not related to SSH profiles. You can configure the SSH server to use PowerShell as the default shell and to load a profile through SSH. See the SSH documentation for more information.
Prior to PowerShell 7.1, remoting over SSH did not support second-hop remote sessions. This capability was limited to sessions using WinRM. PowerShell 7.1 allows Enter-PSSession and Enter-PSHostProcess to work from within any interactive remote session.
Windows 10 SSH vs PuTTY: что выбрать?
Одним из наиболее распространенных способов связи между компьютерами, в частности машинами Linux и веб-серверами, является SSH. Когда дело доходит до установления такого рода связи в Windows, по умолчанию выбирается установка PuTTY.
Однако благодаря Windows PowerShell вам может больше не понадобиться PuTTY. Давайте посмотрим, как настроить SSH-доступ в Windows 10 и могут ли новые инструменты вытеснить PuTTY.
Как установить SSH в Windows 10 (кратко)
Установка функциональности SSH в Windows 10 PowerShell достаточно проста, но пункты меню для нее несколько скрыты. Вот что вам нужно сделать:
- Откройте Настройки.
- Просмотр приложений.
- Перейти к управлению дополнительными функциями.
- Нажмите Добавить функцию.
- Выберите OpenSSH Client.
- Подождите, затем перезагрузите компьютер.
После этого вы можете установить SSH-соединение с другими совместимыми компьютерами. Если SSH-сервер был установлен и настроен на удаленном компьютере, можно установить соединение.
Подробная инструкция по установке
Реализация SSH в Windows 10 в PowerShell является версией проекта OpenSSH. Вы можете найти страницу проекта на GitHub.
Вы можете обнаружить, что SSH уже установлен на вашем компьютере с Windows 10 (он был включен в обновление за апрель 2018 года), но если нет, его можно легко добавить.
Чтобы проверить, откройте меню «Опытный пользователь» (щелкните правой кнопкой мыши Пуск или нажмите клавишу Windows + X ) и выберите Windows PowerShell. Здесь введите команду «ssh». Если SSH еще не установлен, вы увидите такой экран:

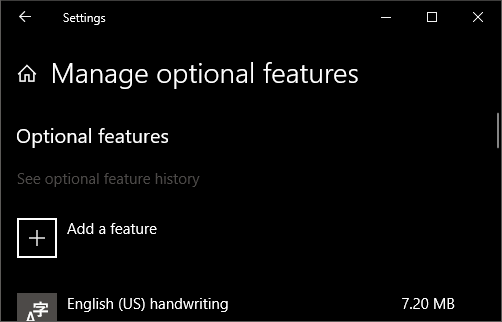
Исправить это достаточно просто. Нажмите клавишу Windows + I, чтобы открыть представление «Настройки», затем перейдите в «Приложения» и найдите «Управление дополнительными функциями . Нажмите здесь, затем найдите запись с пометкой «OpenSSH».
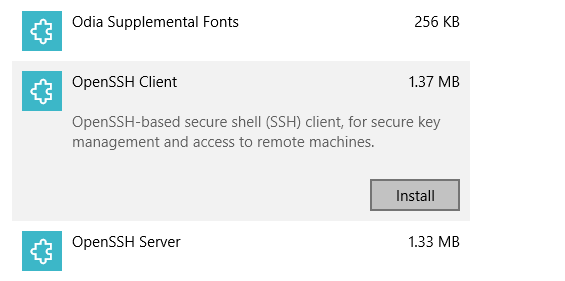
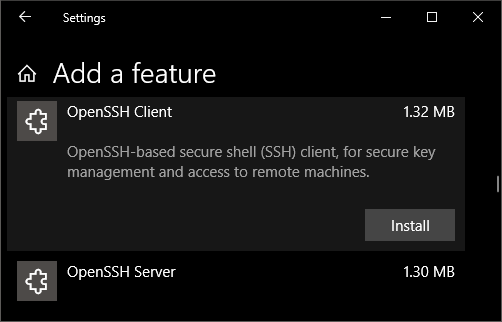
Если вы не видите его, нажмите Добавить функцию, а затем прокрутите вниз, пока не увидите OpenSSH Client. Нажмите, чтобы развернуть и просмотреть описание.
Когда вы будете готовы, нажмите Установить, чтобы добавить его на свой компьютер. Через несколько мгновений будет установлен новый SSH-клиент для Windows PowerShell. Стоит перезагрузить Windows, чтобы убедиться, что приложение установлено правильно.
Замечание о приложении SSH Server
Стоит подчеркнуть тот факт, что вы также можете установить SSH-сервер. Хотя маловероятно, что Microsoft разрешит любую форму универсального удаленного администрирования через SSH, использование его в качестве опции, тем не менее, полезно.
Чтобы установить это, повторите описанные выше шаги, выбрав OpenSSH Server .
Использование SSH в Windows PowerShell
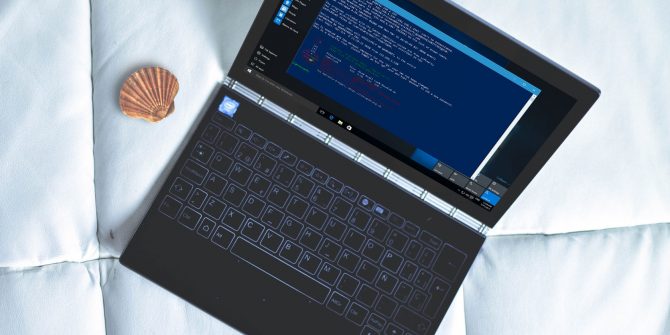
После того, как SSH установлен и работает, вы можете использовать его для связи с другим компьютером. Например, вы можете использовать его для доступа к Raspberry Pi (один из нескольких вариантов об этом маленьком компьютере).
Использование простое. В PowerShell введите команду ssh, затем имя пользователя для учетной записи на удаленном устройстве и его IP-адрес.
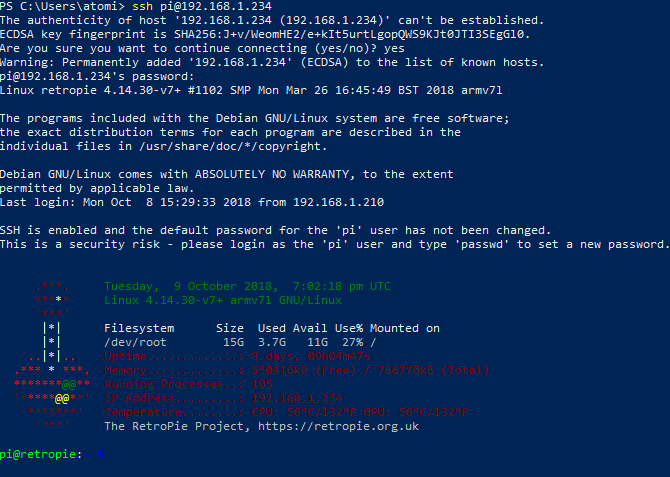
Например, чтобы подключиться к моей коробке Raspberry Pi под управлением RetroPie, я использовал:
На этом этапе удаленное устройство должно предложить вам принять безопасный ключ. Введите Да, чтобы согласиться с этим, затем введите в командной строке пароль для имени пользователя, которое вы использовали.
Через несколько минут вы будете подключены к удаленному устройству Linux, готовому выполнять любые необходимые вам задачи.
SSH-функции PowerShell и PuTTY
PuTTY долгое время был предпочтительным выбором для SSH на Windows. Будь то управление веб-серверами, доступ к Интернету вещей, устройства или удаленное администрирование ПК с Linux, это легкое и простое в использовании приложение.
Одной из причин стойкости PuTTY является широкий выбор функций. Итак, может ли SSH в Windows PowerShell конкурировать с PuTTY?
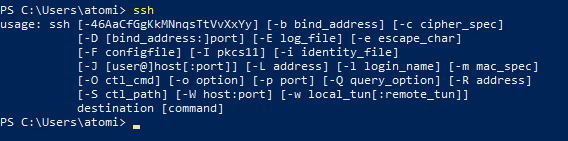
Ну, с точки зрения обеспечения функциональности SSH, да, это может. Вы можете узнать, как использовать некоторые расширенные функции SSH в Windows 10, введя команду ssh:
Результирующий список опций обрисовывает в общих чертах особенности. Например, вы можете указать порт:
Хотя вы можете связать адрес с OpenSSH в Windows, вы ограничены количеством адресов, которые можете сохранить.
Есть причина, почему PuTTY остается популярным. Приложение не только позволяет сохранять (и называть) ваши соединения, но и поддерживает соединения по Telnet, Serial и другим протоколам. Внешний вид PuTTY также настраивается, его можно быстро запустить с рабочего стола. В общем, PuTTY — это надежная утилита, которая обрабатывает практически все, что вы можете на нее бросить.
Почему SSH, когда вы можете использовать Linux?
Хотя удаленное управление Linux через SSH может быть жизненно важным, вам может даже не понадобиться SSH. В Windows 10 теперь есть подсистема Linux и командная строка в стиле Bash.
Это означает, что вы можете легко вводить команды Linux и получать реалистичные ответы. Хотя это может быть не идеально для всех сценариев, если вам нужен доступ к Linux для обучения в колледже или для обучения и у вас нет доступа по SSH (независимо от приложения) к устройству Linux, это может быть идеальным вариантом.
Конечно, это не единственный вариант. Если вам нужно практиковать команды Bash в Windows, вы всегда можете настроить виртуальную машину. Просто установите дистрибутив Linux в него и (если разрешить аппаратное обеспечение) у вас есть готовая к использованию ОС Linux.
Не пора ли отказаться от PuTTY в Windows 10?
SSH прост в использовании в Windows 10 PowerShell. Тем не менее, отсутствие функций, а также необходимость загрузки еще нескольких щелчков означает, что вы можете предпочесть использовать PuTTY. В любом случае, тот факт, что в Windows 10 есть два хороших варианта SSH, стоит отметить.
Безопасная оболочка (SSH) Secure Shell (SSH)
Secure Shell (SSH) позволяет удаленно администрировать и настраивать устройство Windows IoT базовая. Secure Shell (SSH) allows you to remotely administer and configure your Windows IoT Core device
Использование клиента Windows 10 OpenSSH Using the Windows 10 OpenSSH client
Клиент Windows OpenSSH требует, чтобы ОС узла SSH-клиента была Windows 10 версии 1803 (17134). The Windows OpenSSH client requires that your SSH client host OS is Windows 10 version 1803(17134). Кроме того, устройство Windows 10 IoT базовая должно работать под RS5 предварительной версии Windows Предварительная версия 17723 или более поздней. Also, the Windows 10 IoT Core device must be running RS5 Windows Insider Preview release 17723 or greater.
Клиент OpenSSH был добавлен в Windows 10 в 1803 (сборка 17134) как дополнительный компонент. The OpenSSH Client was added to Windows 10 in 1803 (build 17134) as an optional feature. Чтобы установить клиент, можно выполнить поиск по запросу Управление дополнительными компонентами в параметрах Windows 10. To install the client, you can search for Manage Optional Features in Windows 10 settings. Если клиент OpenSSH не указан в списке установленных компонентов, выберите Добавить компонент. If the OpenSSH Client is not listed in the list of installed features, then choose Add a feature.
Затем выберите в списке клиент OpenSSH и нажмите кнопку установить. Next select OpenSSH Client in the list and click Install.
Чтобы войти с помощью имени пользователя и пароля, используйте следующую команду: To login with a username and password use the following command:
Где Host — это IP-адрес устройства Windows IoT базовая или имя устройства. Where host is either the IP address of the Windows IoT Core device or the device name.
При первом подключении появится сообщение следующего вида: The first time you connect you see a message like the following:
Введите Да и нажмите клавишу Ввод. Type yes and press enter.
Если необходимо войти как Дефаултаккаунт, а не как администратор, потребуется создать ключ и использовать его для входа. If you need to login as DefaultAccount rather than as administrator, you will need to generate a key and use the key to login. На рабочем столе, с которого планируется подключиться к устройству IoT, откройте окно PowerShell и перейдите в папку личных данных (например, CD
). From the desktop that you intend to connect to your IoT Device from, open a PowerShell window and change to your personal data folder (e.g cd
Зарегистрируйте ключ с помощью ssh-агента (необязательно, для интерфейса единого входа). Register the key with ssh-agent (optional, for single sign-on experience). Обратите внимание, что SSH-Add необходимо выполнять из папки, которая является ACL, в качестве пользователя, выполнившего вход в систему (Builtin \ администраторы NT_AUTHORITY \system также ОК). Note that ssh-add must be performed from a folder that is ACL’d to you as the signed-in user (Builtin\Administrators and the NT_AUTHORITY\System user are also ok). По умолчанию компакт-диск
из PowerShell должен быть достаточно, как показано ниже. By default cd
from PowerShell should be sufficient as shown below.
Если вы получаете сообщение о том, что служба ssh-agent отключена, ее можно включить с помощью sc.exe config ssh-agent Start = Auto . If you receive a message that the ssh-agent service is disabled you can enable it with sc.exe config ssh-agent start=auto
Чтобы включить единый вход, добавьте открытый ключ в файл authorized_keys устройства Windows IOT базовая. To enable single sign, append the public key to the Windows IoT Core device authorized_keys file. Если у вас есть только один ключ, скопируйте файл открытого ключа в файл удаленного authorized_keys . Or if you only have one key you copy the public key file to the remote authorized_keys file.
Если ключ не зарегистрирован в ssh-agent, он должен быть указан в командной строке для входа: If the key is not registered with ssh-agent, it must be specified on the command line to login:
Если закрытый ключ зарегистрирован в ssh-agent, необходимо указать только DefaultAccount@host : If the private key is registered with ssh-agent, then you only need to specify DefaultAccount@host:
При первом подключении появится сообщение следующего вида: The first time you connect you see a message like the following:
Введите Да и нажмите клавишу Ввод. Type yes and press enter.
Теперь вы должны подключиться как дефаултаккаунт You should now be connected as DefaultAccount
Чтобы использовать единый вход с учетной записью администратора , добавьте открытый ключ в к:\дата\програмдата\сш\ administrators_authorized_keys на устройстве Windows IOT базовая. To use single sign-on with the administrator account, append your public key to c:\data\ProgramData\ssh\administrators_authorized_keys on the Windows IoT Core device.
Кроме того, необходимо задать список ACL для administrators_authorized_keys в соответствии с ACL ssh_host_dsa_key в том же каталоге. You will also need to set the ACL for administrators_authorized_keys to match the ACL of ssh_host_dsa_key in the same directory.
Настройка ACL с помощью PowerShell To set the ACL using PowerShell
Если вы видите сообщение об изменении идентификатора удаленного узла после внесения изменений в устройство Windows 10 IOT базовая, измените C:\Users . SSH \ known_hosts и удалите узел, который был изменен. If you see a REMOTE HOST IDENTIFICATION CHANGED message after making changes to the Windows 10 IoT Core device, then edit C:\Users .ssh\known_hosts and remove the host that has changed.
Использование выводимых Using PuTTY
Скачивание SSH-клиента Download an SSH client
Чтобы подключиться к устройству с помощью SSH, сначала необходимо скачать клиент SSH, например, выполнив. In order to connect to your device using SSH, you’ll first need to download an SSH client, such as PuTTY.
Подключение к устройству Connect to your device
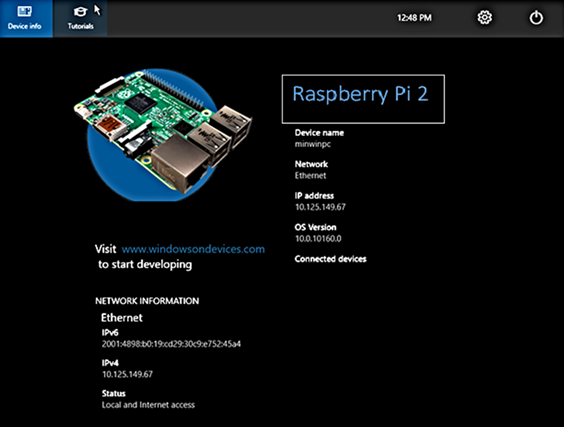
Чтобы подключиться к устройству, сначала необходимо получить IP-адрес устройства. In order to connect to your device, you need to first get the IP address of the device. После загрузки устройства Windows IoT базовая на экране, подключенном к устройству, будет отображаться IP-адрес: After booting your Windows IoT Core device, an IP address will be shown on the screen attached to the device:
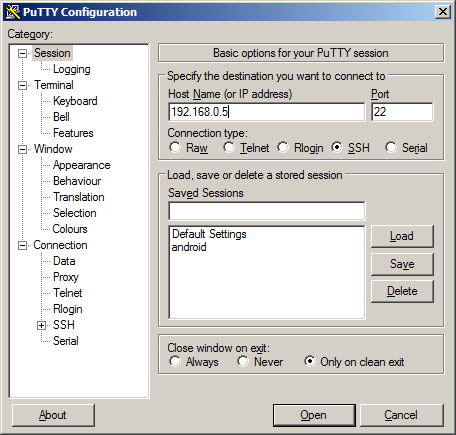
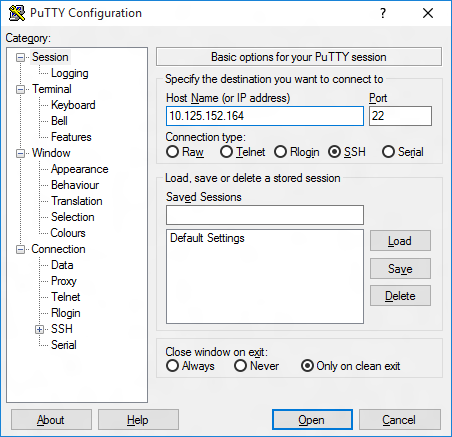
Теперь запустите выводимый текст и введите IP-адрес в Host Name текстовое поле и убедитесь, что SSH выбран переключатель. Now launch PuTTY and enter the IP address in the Host Name text box and make sure the SSH radio button is selected. Затем нажмите кнопку Open . Then click Open .
Если вы подключаетесь к устройству в первый раз с компьютера, вы можете увидеть следующее оповещение системы безопасности. If you’re connecting to your device for the first time from your computer, you may see the following security alert. Просто щелкните Yes , чтобы продолжить. Just click Yes to continue.

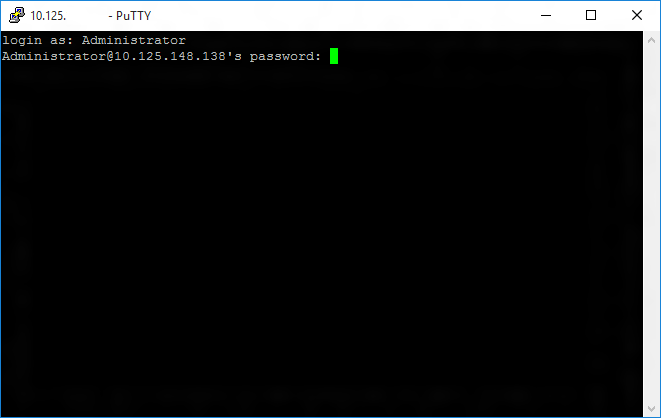
Если соединение прошло успешно, login as: на экране появится запрос на вход. If the connection was successful, you should see login as: on the screen, prompting you to login.
Введите Administrator и нажмите клавишу ВВОД. Enter Administrator and press enter. Затем введите пароль по умолчанию в p@ssw0rd качестве пароля и нажмите клавишу ВВОД. Then enter the default password p@ssw0rd as the password and press enter.
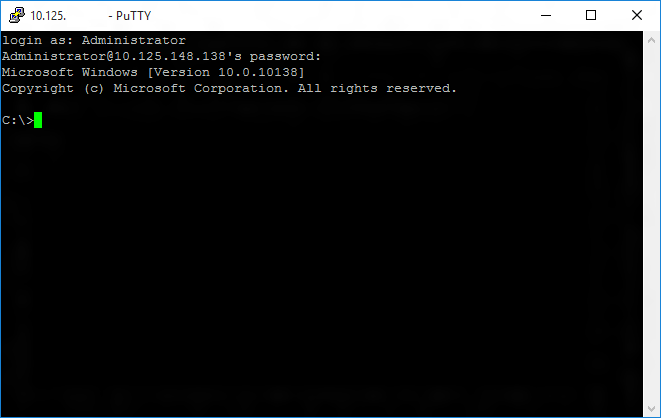
Если вы смогли успешно войти в систему, вы увидите нечто вроде: If you were able to login successfully, you should see something like this:
Обновление пароля учетной записи Update account password
Настоятельно рекомендуется обновить пароль по умолчанию для учетной записи администратора. It is highly recommended that you update the default password for the Administrator account.
Для этого введите следующую команду в консоли выводимых команд, заменив [new password] строгим паролем: To do this, enter the following command in the PuTTY console, replacing [new password] with a strong password:
Настройка устройства Windows IoT базовая Configure your Windows IoT Core device
Чтобы иметь возможность развертывать приложения из Visual Studio 2017, необходимо убедиться, что Удаленный отладчик Visual Studio работает на устройстве Windows IoT базовая. To be able to deploy applications from Visual Studio 2017, you will need to make sure the Visual Studio Remote Debugger is running on your Windows IoT Core device. Удаленный отладчик должен запускаться автоматически во время загрузки компьютера. The remote debugger should launch automatically at machine boot time. Чтобы дважды проверить, используйте команду TList, чтобы вывести список всех запущенных процессов из PowerShell. To double check, use the tlist command to list all the running processes from PowerShell. На устройстве должно быть открыто два экземпляра msvsmon.exe. There should be two instances of msvsmon.exe running on the device.
Время ожидания Удаленный отладчик Visual Studio может истекает после длительных периодов бездействия. It is possible for the Visual Studio Remote Debugger to time out after long periods of inactivity. Если Visual Studio не удается подключиться к устройству Windows IoT Core, попробуйте перезагрузить устройство. If Visual Studio cannot connect to your Windows IoT Core device, try rebooting the device.
При необходимости можно также переименовать устройство. If you want, you can also rename your device. Чтобы изменить имя компьютера, используйте setcomputername программу: To change the ‘computer name’, use the setcomputername utility:
Чтобы изменения вступили в силу, необходимо перезагрузить устройство. You will need to reboot the device for the change to take effect. Команду можно использовать shutdown следующим образом: You can use the shutdown command as follows:
Часто используемые служебные программы Commonly used utilities
Список команд и служебных программ, которые можно использовать с SSH, см. на странице служебной программы командной строки . See the Command Line Utils page for a list of commands and utilities you can use with SSH.


