- Использование встроенного SSH клиента в Windows 10
- Установка клиента OpenSSH в Windows 10
- Как использовать SSH клиенте в Windows 10?
- SCP: копирование файлов из/в Windows через SSH
- Как подключиться по SSH из Windows 10
- Подключение по SSH с помощью OpenSSH
- Подключение по SSH через PuTTY
- Scott Hanselman
- How to set up a tab profile in Windows Terminal to automatically SSH into a Linux box
- Adding a New Profile to Windows Terminal
- Using OpenSSH on Windows
- Automatically SSH’ing/logging into a Linux machine from a Windows Terminal profile
- Adding a profile Icon — the raspberry on top
- About Scott
Использование встроенного SSH клиента в Windows 10
В Windows 10 и Windows Server 2019 появился встроенный SSH клиент, который вы можете использовать для подключения к *Nix серверам, ESXi хостам и другим устройствам по защищенному протоколу, вместо Putty, MTPuTTY или других сторонних SSH клиентов. Встроенный SSH клиент Windows основан на порте OpenSSH и предустановлен в ОС, начиная с Windows 10 1809.
Установка клиента OpenSSH в Windows 10
Клиент OpenSSH входит в состав Features on Demand Windows 10 (как и RSAT). Клиент SSH установлен по умолчанию в Windows Server 2019 и Windows 10 1809 и более новых билдах.
Проверьте, что SSH клиент установлен:
Get-WindowsCapability -Online | ? Name -like ‘OpenSSH.Client*’

В нашем примере клиент OpenSSH установлен (статус: State: Installed).
Если SSH клиент отсутствует (State: Not Present), его можно установить:
- С помощью команды PowerShell: Add-WindowsCapability -Online -Name OpenSSH.Client*
- С помощью DISM: dism /Online /Add-Capability /CapabilityName:OpenSSH.Client
0.0.1.0
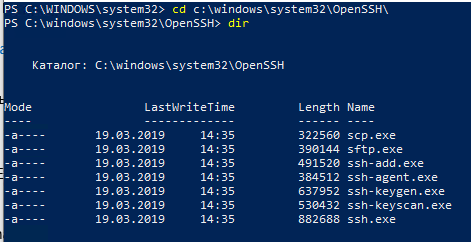
]Бинарные файлы OpenSSH находятся в каталоге c:\windows\system32\OpenSSH\.
- ssh.exe – это исполняемый файл клиента SSH;
- scp.exe – утилита для копирования файлов в SSH сессии;
- ssh-keygen.exe – утилита для генерации ключей аутентификации;
- ssh-agent.exe – используется для управления ключами;
- ssh-add.exe – добавление ключа в базу ssh-агента.
Как использовать SSH клиенте в Windows 10?
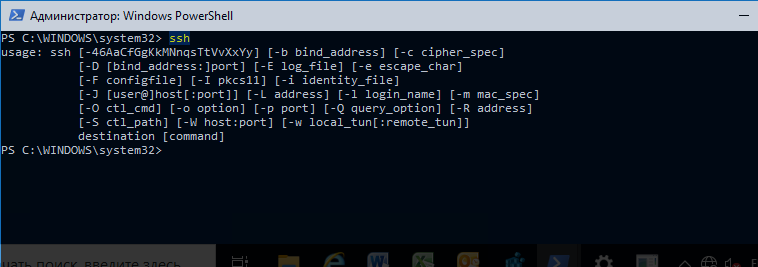
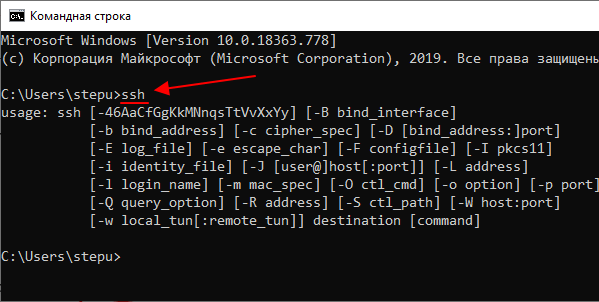
Чтобы запустить SSH клиент, запустите командную строку PowerShell или cmd.exe . Выведите доступные параметры и синтаксис утилиты ssh.exe, набрав команду:
ssh
usage: ssh [-46AaCfGgKkMNnqsTtVvXxYy] [-b bind_address] [-c cipher_spec]
[-D [bind_address:]port] [-E log_file] [-e escape_char]
[-F configfile] [-I pkcs11] [-i identity_file]
[-J [user@]host[:port]] [-L address] [-l login_name] [-m mac_spec]
[-O ctl_cmd] [-o option] [-p port] [-Q query_option] [-R address]
[-S ctl_path] [-W host:port] [-w local_tun[:remote_tun]]
destination [command]
Для подключения к удаленному серверу по SSH используется команда:
Если SSH сервер запущен на нестандартном порту, отличном от TCP/22, можно указать номер порта:
ssh username@host -p port
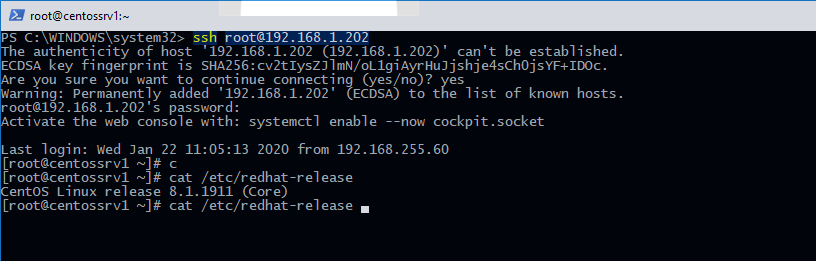
Например, чтобы подключиться к Linux хосту с IP адресом 192.168.1.202 под root, выполните:
При первом подключении появится запрос на добавление ключа хоста в доверенные, наберите yes -> Enter (при этом отпечаток ключа хоста добавляется в файл C:\Users\username\.ssh\known_hosts).
Затем появится запрос пароля указанной учетной записи, укажите пароль root, после чего должна открытся консоль удаленного Linux сервера (в моем примере на удаленном сервере установлен CentOS 8).
Если вы используете SSH аутентификацию по RSA ключам (см. пример с настройкой SSH аутентификации по ключам в Windows), вы можете указать путь к файлу с закрытым ключом в клиенте SSH так:
ssh root@192.168.1.92 -i «C:\Users\username\.ssh\id_rsa»
Также вы можете добавить ваш закрытый ключ в SSH-Agent. Сначала нужно включить службу ssh-agent и настроить ее автозапуск:
set-service ssh-agent StartupType ‘Automatic’
Start-Service ssh-agent
Добавим ваш закрытый ключ в базу ssh-agent:
Теперь вы можете подключиться к серверу по SSH без указания пути к RSA ключу, он будет использоваться автоматически. Пароль для подключения не запрашивается (если только вы не защитили ваш RSA ключ отдельным паролем):
Еще несколько полезных аргументов SSH:
- -C – сжимать трафик между клиентом и сервером (полезно на медленных и нестабильных подключениях);
- -v – вывод подробной информации обо всех действия клиента ssh;
- -R / -L – можно использовать для проброса портов через SSH туннель.
SCP: копирование файлов из/в Windows через SSH
С помощью утилиты scp.exe, которая входит в состав пакета клиента SSH, вы можете скопировать файл с вашего компьютера на SSH сервер:
scp.exe «E:\ISO\CentOS-8.1.1911-x86_64.iso» root@192.168.1.202:/home 
Можно рекурсивно скопировать все содержимое каталога:
scp -r E:\ISO\ root@192.168.1.202:/home
И наоборот, вы можете скопировать файл с удаленного сервера на ваш компьютер:
scp.exe root@192.168.1.202:/home/CentOS-8.1.1911-x86_64.iso e:\tmp
Итак, теперь вы можете прямо из Windows 10 подключаться к SSH серверам, копировать файлы с помощью scp без установки сторонних приложений и утилит.
Как подключиться по SSH из Windows 10
Для настройки и управления удаленными серверами на базе Linux обычно используется протокол SSH. С помощью SSH на удаленный компьютер можно передавать данные и команды, которые будут выполняться так как бы они выполнялись на локальной машине.
В этой инструкции мы рассмотрим процесс подключения к SSH из Windows 10. Первый способ будет актуален для Windows 10 версии 1809 и выше, а второй можно использовать как на Windows 10, так и на Windows 7.
Подключение по SSH с помощью OpenSSH
Раньше для подключения к Linux серверу по SSH из Windows компьютера требовалась установка программы PuTTy или какого-то другого SSH-клиента. Но, в операционной системе Windows 10 (начиная с версии 1809 ) доступен клиент OpenSSH, с помощью которого можно подключаться к Linux серверам по SSH. Это позволяет работать с терминалом Linux прямо из командной строки Windows 10, при этом не требуется установка никаких сторонних программ.
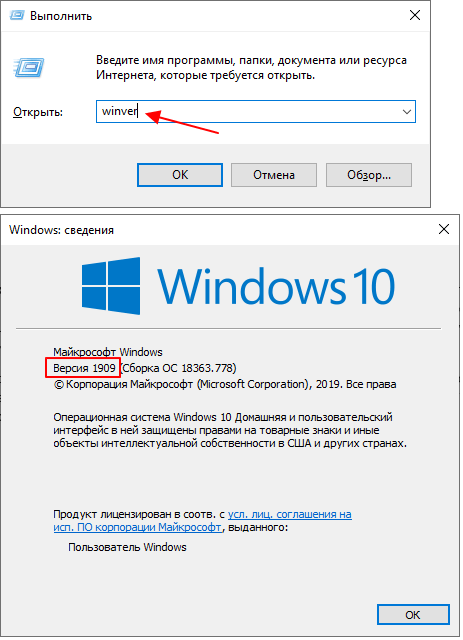
Перед тем как использовать данный способ подключения необходимо проверить версию Windows 10. Для этого нажмите комбинацию клавиш Win-R и выполните команду « winver ». Если на вашем компьютере установлена Windows 10 с версией 1809 или выше, то все нормально, в противном случае сначала нужно выполнить обновление.
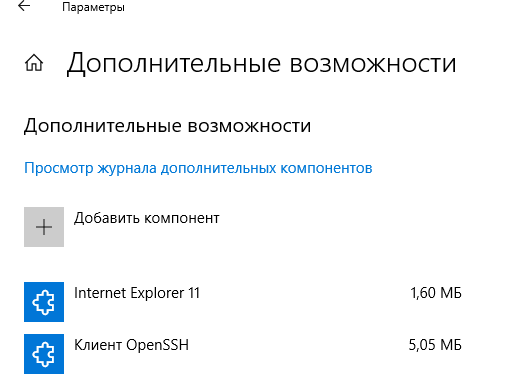
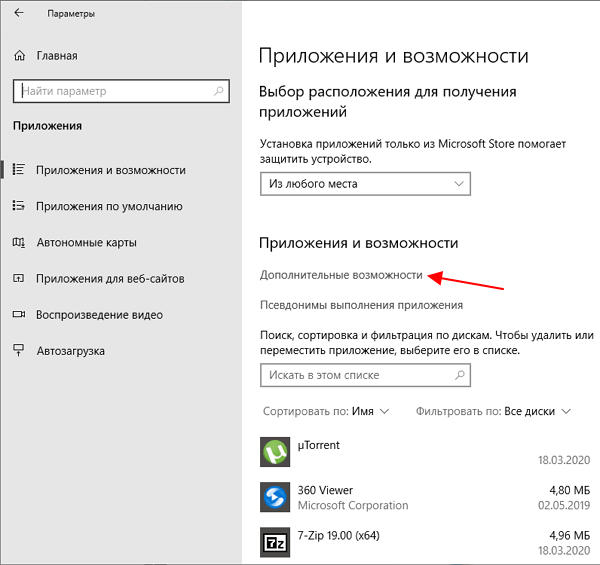
Также нужно открыть меню « Параметры » и зайти в раздел « Приложения – Дополнительные возможности ».
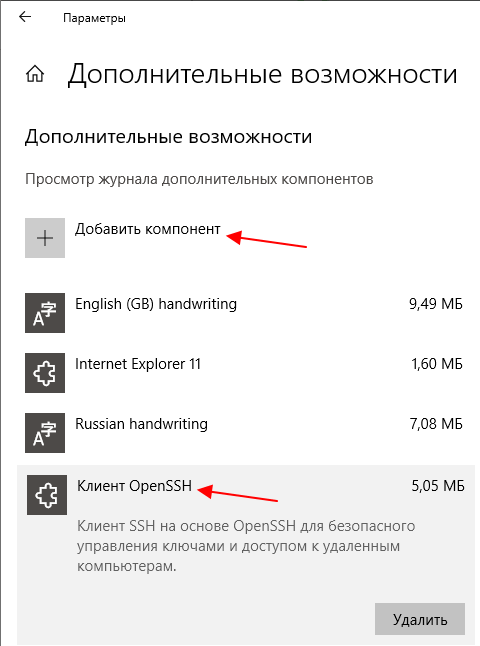
Здесь нужно пролистать список установленных дополнительных компонентов и найти в нем « Клиент OpenSSH ». Если такой компонент присутствует, значит все нормально и можно переходить к следующему шагу. Если нет, то его нужно сначала установить с помощью меню « Добавить компонент ».
Обратите внимание, не нужно путать « Клиент OpenSSH » и « Сервер OpenSSH ». Для подключения по SSH вам нужен именно клиент.
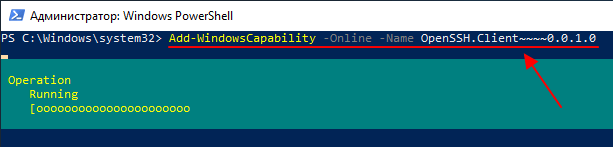
Также клиент OpenSSH можно установить с помощью PowerShell. Для этого запустите консоль PowerShell с правами администратора и выполните следующую команду:
Более подробно об установке и удалении клиента OpenSSH можно почитать в официальной документации Майкрософт.
Если версия Windows 10 подходящая и клиент OpenSSH установлен, то можно начинать подключение по SSH. Для этого запустите обычную командную строку Windows и введите команду « ssh ». В ответ вы должны получить информацию о работе с данной командой.
В общем случае синтаксис команды « ssh » выглядит следующем образом:
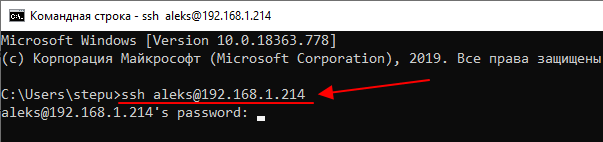
Где « user » — это имя пользователя на удаленном сервере, а « server » — это имя компьютера или его ip адрес.
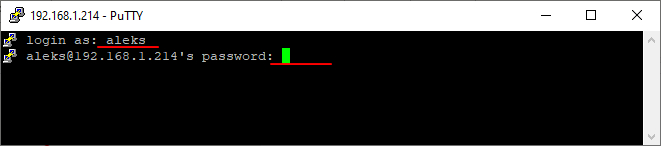
Например, если наш сервер доступен по ip адресу « 192.168.1.214 », а имя пользователя это « aleks », то команда для подключения будет выглядеть так:
После ввода данной команды появится запрос пароля и после этого мы получим доступ к удаленному серверу. Также при первом подключении с помощью ssh будет появляться запрос на добавление сервера в список известных.
По умолчанию для SSH используется порт 22. Для того чтобы это изменить нужно использовать параметр « -p ». Например, для подключения по порту 2222 нужно выполнить вот такую команду.
Если подключение предполагает использование ключей, то они должны находиться в папке « C:\Users\user\.ssh ». А при подключении путь к приватному ключу нужно указать с помощью параметра « -i ». Например, чтобы использовать ключ « C:\Users\stepu\.ssh\id_rsa » нужно выполнить:
Более подробную информацию о команде « ssh » и ее параметрам можно получить на сайте man.openbsd.org/ssh или на opennet.ru (перевод).
Подключение по SSH через PuTTY
В тех случаях, когда версия Windows 10 не поддерживает OpenSSH (или используется Windows 7) к SSH можно подключаться с помощью программы PyTTY. Скачать установщик данной программы можно на официальном сайте www.putty.org.
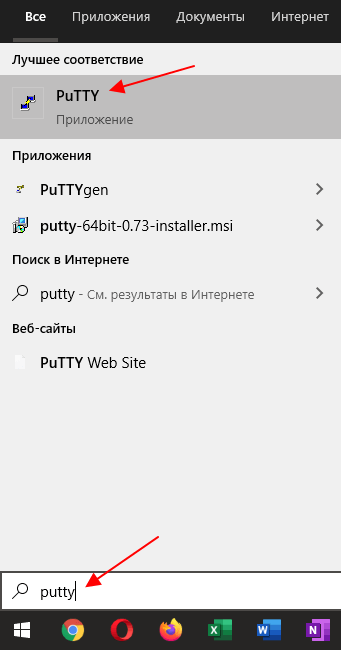
После установки программы PyTTY ее можно будет запустить с помощью поиска в меню « Пуск »
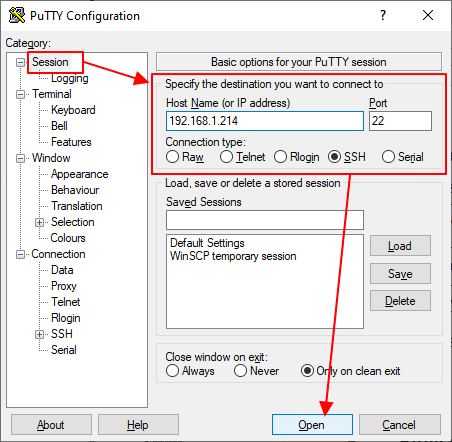
Сразу после запуска программы PuTTY появляется окно с настройками подключения. Основными параметры здесь находятся на вкладке « Session », здесь нужно ввести:
- Имя компьютера или IP адрес;
- Порт для подключения (по умолчанию, 22);
- Способ подключения (SSH);
После ввода этих данных можно запускать подключение с помощью кнопки « Open ».
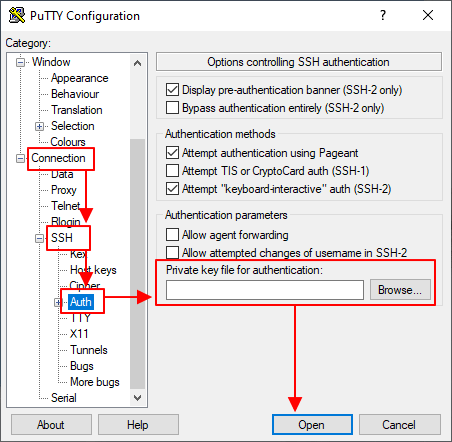
Если для подключения к SSH используются ключи, то путь к приватному ключу нужно указать в разделе « Connection – SSH – Auth ».
Обратите внимание, ключ должен быть сгенерирован программой PuTTYgen, которая устанавливается вместе с PuTTY. Если вы сгенерировали ключи с помощью OpenSSH, то их можно загрузить в PuTTYgen и сохранить в формате подходящем для PuTTy.
Если информация для подключения правильная, то вы увидите консоль с запросом на ввод имени пользователя пароля. Также при первом запуске появится запрос на добавление компьютера в список известных.
После ввода этих данных вы будете подключены к удаленному серверу по SSH.
Scott Hanselman
How to set up a tab profile in Windows Terminal to automatically SSH into a Linux box
 By now I hope you’ve installed Windows Terminal. If not, go do that, I’ll wait. It’s time.
You may also have customize your settings. If you tried terminal a few versions ago and haven’t gone back in, it’s also time to let the Windows Terminal generate you a nice fresh new profiles.json (settings file). It’s OK to zero-out/delete yours. Windows Terminal will regenerate it when it next starts.
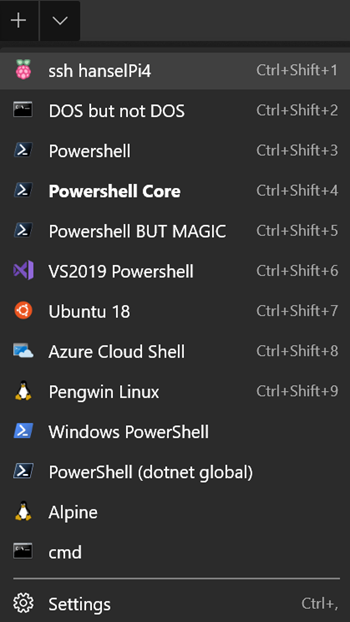
I have a number of things in my Terminal dropdown. It looks like this.
However, I’d like to be able to have a profile that ssh’s into Linux machines that I use regularly. Perhaps those remote machine can have their own cool menu item? Let’s see what that would look like and how we’d do it.
Adding a New Profile to Windows Terminal
Click the down arrow in the Windows Terminal top tab bar. Note that there are a ton of great and useful settings so explore the Settings Schema, and when you’re editing the settings make sure that Visual Studio Code is set as your default handler for .json files. That’s important because the Windows Terminal settings profile.json includes a JSON Schema and you’ll want your settings to have autocomplete/intellisense. This will make it easier to create and discover new settings.
I’ll add a profile to the «profiles» array. To start, and to learn, let’s add the simplest possible profile! I’m just adding the < >as an array item in the larger profiles [] and giving it a name.
This will make a new menu item in Windows Terminal with the same name. It will have no icon and it’ll launch cmd.exe as the default shell because I didn’t set any other command line! It I add it at the top (as the first) item in the profiles array it’ll also appear first in the menu and have the hotkey Ctrl+Shift+1.
This is lame, so let’s add more. I’ll add a tabTitle and a commandline .
This menu item will appear as «This is a name» in the menu, but the the tab will be called «This is a tab title.» It’ll launch powershell. Note that I didn’t include .exe even though I could have. I wanted to make sure you’re clear that Windows Terminal is basically just called Process.Start so you can set a profile tab to call anything in the PATH, or you can be explicit. I could also add » startingDirectory » and a bunch of other options.
Since I can call anything in the PATH, what else can I get away with?
Using OpenSSH on Windows
You may not have heard but OpenSSH has shipped in Windows for a few years now. That means that a lot of the utilities that you might have installed Putty for are already available in Windows. You can open an admin PowerShell and run one command to ensure OpenSSH’s client apps are there:
This installs the the client, but there’s an optional server as well if you’d like.
I’m going to focus only on the client. Skip to the next area if you want to do your SSH’ing from Linux, not Windows.
Here’s what’s installed in c:\windows\System32\OpenSSH
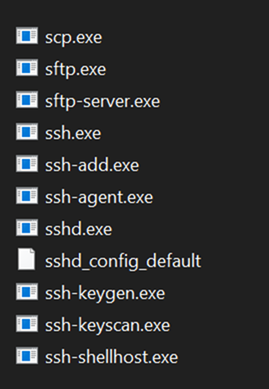
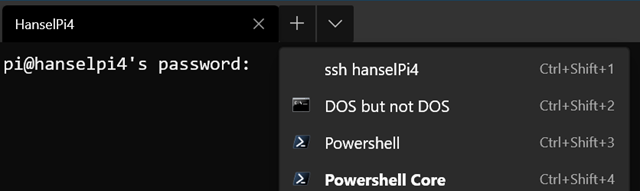
Here we’ve got sftp, scp, and most importantly, ssh.exe and ssh-agent. Since ssh is in the PATH when it’s installed with Windows I can change my Windows Terminal profile to look like this and log into my Raspberry Pi 4.
Note in this screenshot I’ve got the ssh connection listed at the top, and when I click on it it opens ssh.exe and prompts me for a password. I have no ssh keys on my system that would enable auto-login, hence the password is needed.
Automatically SSH’ing/logging into a Linux machine from a Windows Terminal profile
Now this is important, so pay attention. If you have WSL or WSL already on your machine you can certainly just use the SSH keys and utils that are included in your preferred Linux distro.
In that case, your command line in your Windows Terminal profile would be something like:
or if you want a specific distro, you can launch a distro and ssh from there.
If you know Linux, then you’re familiar with how to set up your public keys to allow this. However, most folks think you need Putty or some 3rd party tool to do this on Windows so I’ll focus on how do to that here.
I want to be able to type «ssh pi@hanselpi4» from my Windows machine and automatically be logged in. More specifically I want to click the profile and have it Just Work.
I will
- Make a key on my Window machine. The FROM machine, in this case, Windows. Then I want to ssh FROM here TO the remote Linux machine.
- Tell the Linux machine (by transferring it over) about the public piece of my key and add it to a specific user’s allowed_keys.
I’ll run ssh-keygen to make a key from my command line on Windows. I just hit enter to generate it but you can make your own filename if you want, just use the full path and make sure you keep track of where things are. Defaults are usually best.
Remember the path is c:\users\yourname because that’s the Windows equivalent of the
home folder and the keys are in c:\users\yourname\.ssh.
Now I want to transfer what’s in id_rsa.pub over to my Raspberry Pi. You can scp (secure copy) if you want, but it’s best to append the key to the authorized_keys file on the destination machine.
NOTE: I’m type’ing (cat on Linux is type on Windows) that text file out and piping it into SSH where I login that remote machine with the user pi and I then cat (on the Linux side now) and append >> that text to the .ssh/authorized_keys folder. The
folder is implied but could be added if you like.
Run this command once on Windows to output your key and pipe it over to, and append to, the right file on your remote Linux machine. You’ll be prompted for your password once.
Make sure you understand what’s happening in the line above.
Adding a profile Icon — the raspberry on top
At this point I can click the menu item in Windows Terminal and automatically be ssh’ed/logged into the remote terminal. But, scandalously, the Terminal menu item has no icon. This is clearly unacceptable M$sft sucks, right? I’ll go get a nice 32×32 Raspberry Pi Icon and put it somewhere. You might put yours in a Dropbox or OneDrive so they are available everywhere you go.
Now my profile looks like this:
How lovely is this?
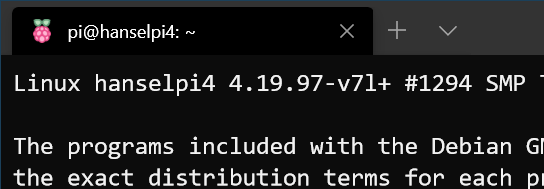
Looks good, has a nice title and icon, and I can use a hotkey to automatically SSH into my remote machine.
One final note, you’ve already got the Azure Cloud Shell in the Windows Terminal (you can get there for free at http://shell.azure.com in your browser and access a free Linux container anywhere anytime with a persistent cloud drive) but now you can follow the instructions in this post and set up one-click SSH to anywhere.
Hope this is useful!
Sponsor: This week’s sponsor is. me! This blog and my podcast has been a labor of love for over 18 years. Your sponsorship pays my hosting bills for both AND allows me to buy gadgets to review AND the occasional taco. Join me!
About Scott
Scott Hanselman is a former professor, former Chief Architect in finance, now speaker, consultant, father, diabetic, and Microsoft employee. He is a failed stand-up comic, a cornrower, and a book author.


