- Installing SFTP/SSH Server on Windows using OpenSSH
- Installing SFTP/SSH Server
- On Windows 10 version 1803 and newer
- On earlier versions of Windows
- Configuring SSH server
- Setting up SSH public key authentication
- Connecting to the server
- Finding Host Key
- Connecting
- Installing SFTP (SSH FTP) Server on Windows with OpenSSH
- What is SFTP?
- SFTP Implementation in Windows
- Installing Win32 OpenSSH on Windows 10 1803+/Windows Server 2019
- Install Win32 OpenSSH on Windows Server 2016/2012 R2
- Testing SFTP Connection Using WinSCP
- How to Uninstall Win32 OpenSSH?
- Установка и настройка SFTP сервера (SSH FTP) в Windows на базе OpenSSH
- Особенности протокола SFTP
- Реализация SFTP в системах Windows
- Установка Win32 OpenSSH в Windows 10 1803+/Windows Server 2019
- Установка Win32 OpenSSH на Windows Server 2016/2012 R2
- Тестируем SFTP подключение с помощью WinSCP
- Удаление службы Win32 OpenSSH
Installing SFTP/SSH Server on Windows using OpenSSH
Recently, Microsoft has released a port of OpenSSH for Windows. You can use the package to set up an SFTP /SSH server on Windows.
Installing SFTP/SSH Server
On Windows 10 version 1803 and newer
- In Settings app, go to Apps > Apps & features > Manage optional features.
- Locate “OpenSSH server” feature, expand it, and select Install.
Binaries are installed to %WINDIR%\System32\OpenSSH . Configuration file ( sshd_config ) and host keys are installed to %ProgramData%\ssh (only after the server is started for the first time).
You may still want to use the following manual installation, if you want to install a newer version of OpenSSH than the one built into Windows 10.
On earlier versions of Windows
- Download the latest OpenSSH for Windows binaries (package OpenSSH-Win64.zip or OpenSSH-Win32.zip )
- As the Administrator, extract the package to C:\Program Files\OpenSSH
- As the Administrator, install sshd and ssh-agent services:
Configuring SSH server
- Allow incoming connections to SSH server in Windows Firewall:
- When installed as an optional feature, the firewall rule “OpenSSH SSH Server (sshd)” should have been created automatically. If not, proceed to create and enable the rule as follows.
- Either run the following PowerShell command as the Administrator:
Replace C:\System32\OpenSSH\sshd.exe with the actual path to the sshd.exe ( C:\Program Files\OpenSSH\ssh.exe , had you followed the manual installation instructions above). - or go to Control Panel > System and Security > Windows Defender Firewall1> Advanced Settings > Inbound Rules and add a new rule for port 22.
- Start the service and/or configure automatic start:
- Go to Control Panel > System and Security > Administrative Tools and open Services. Locate OpenSSH SSH Server service.
- If you want the server to start automatically when your machine is started: Go to Action > Properties. In the Properties dialog, change Startup type to Automatic and confirm.
- Start the OpenSSH SSH Server service by clicking the Start the service.
Setting up SSH public key authentication
Follow a generic guide for Setting up SSH public key authentication in *nix OpenSSH server, with the following difference:
Connecting to the server
Finding Host Key
Before the first connection, find out fingerprint of the server’s host key by using ssh-keygen.exe for each file.
In Windows command-prompt, use:
Replace %WINDIR%\System32 with %ProgramFiles% , if appropriate.
In PowerShell, use:
Replace $env:WINDIR\System32 with $env:ProgramFiles , if appropriate.
You will get an output like this:
Connecting
Start WinSCP. Login dialog will appear. On the dialog:
- Make sure New site node is selected.
- On New site node, make sure the SFTP protocol is selected.
- Enter your machine/server IP address (or a hostname) into the Host name box.
- Enter your Windows account name to the User name box. It might have to be entered in the format user@domain , if running on a domain.
- For a public key authentication:
- Press the Advanced button to open Advanced site settings dialog and go to SSH > Authentication page.
- In Private key file box select your private key file.
- Submit Advanced site settings dialog with the OK button.
- For a password authentication:
- Enter your Windows account password to the Password box.
- If you Windows account does not have a password, you cannot authenticate with the password authentication (i.e. with an empty password), you need to use the public key authentication.
- Save your site settings using the Save button.
- Login using Login button.
- Verify the host key by comparing fingerprint with those collected before (see above).
If you cannot authenticate to the server, and you are using Windows 10 Developer mode, make sure that your OpenSSH server does not conflict with an internal SSH server used by the Developer mode. You may need to turn off the SSH Server Broker and SSH Server Proxy Windows services. Or run your OpenSSH server on a different port than 22.
Installing SFTP (SSH FTP) Server on Windows with OpenSSH
You can use the official OpenSSH package for Windows to easily organize a secure file transfer between the client and Windows server using the SFTP (Secure FTP) protocol. In this article, we will show how to use the Win32-OpenSSH to run an SFTP server on Windows 10 or Windows Server 2016/2012 R2.
What is SFTP?
SFTP (Secure File Transfer Protocol, Secure FTP or SSH FTP) is the extension of SSH protocol, being a standard in the world of UNIX/Linux systems. From the user point of view, it is similar to FTP, but in fact, it is a completely different protocol, having nothing in common with FTP. Data are transferred between a client and a server through the SSH tunnel (TCP port 22).
The main advantages of SFTP:
- Files and commands are transferred inside a secure SSH session;
- One connection is used to send both files and commands;
- Symbolic links, interrupt/resume transfer, file delete functions, etc. are supported;
- As a rule, in channels where FTP is slow or failing, SFTP connection is faster and more reliable;
- Possibility to authenticate using SSH keys.
SFTP Implementation in Windows
Historically, Windows operation systems don’t provide any built-in tools to run a secure SFTP server. For these purposes, open-source or proprietary solutions, like Core FTP, FileZilla, CYGWIN, OpenSSH, FTP Shell, IPSwitch, etc., have been used. However, several years ago Microsoft released its version of the OpenSSH port for Win32. This project is called Win32-OpenSSH.
Let’s consider the configuration of the SFTP server running Windows 10 or Windows Server 2019/2016/2012 R2 using the Win32 OpenSSH package.
Installing Win32 OpenSSH on Windows 10 1803+/Windows Server 2019
In Windows 10 build 1803 and newer and in Windows Server 2019, the OpenSSH package is already included in the operating system in the form of Feature on Demand (FoD) like RSAT.
You can install the OpenSSH server on Windows 10 and Windows Server 2019 using the following PowerShell cmdlet:
Add-WindowsCapability -Online -Name OpenSSH.Server*
Or using DISM:
dism /Online /Add-Capability /CapabilityName:OpenSSH.Server
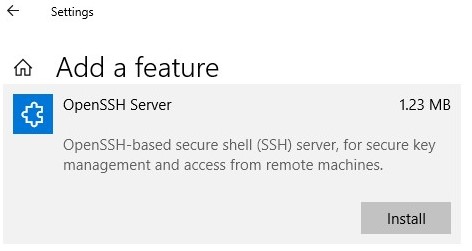
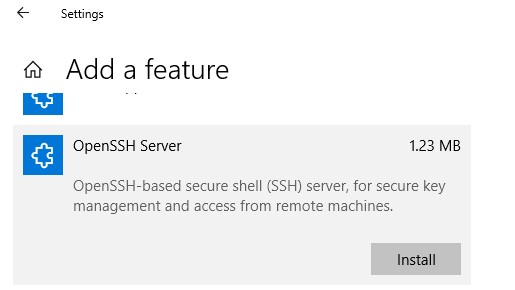
Also you can add OpenSSH server from Windows 10 GUI (Settings -> Apps -> Optional Features -> Add a feature -> Open SSH Server -> Install).
- OpenSSH executables are located in the directory: c:\windows\system32\OpenSSH\ ;
- The sshd_config configuration file is located in the directory: C:\ProgramData\ssh (this directory is created after the first start of the sshd service);
- Log file: c:\windows\system32\OpenSSH\logs\sshd.log ;
- The authorized_keys file and keys are stored in a directory: %USERPROFILE%\.ssh\ .
Now you can connect to Windows 10 via SSH like in Linux.
Install Win32 OpenSSH on Windows Server 2016/2012 R2
In the previous versions of Windows 10 and in Windows Server 2016/2012 R2, you must download and install OpenSSH from the GitHub (https://github.com/PowerShell/Win32-OpenSSH/releases). You need to download a package version for Windows x64: OpenSSH-Win64.zip (3,5 MB).
- Extract the archive to the target directory: C:\OpenSSH-Win;
- Start the elevated PowerShell cli and switch to the OpenSSH folder: Cd C:\OpenSSH-Win
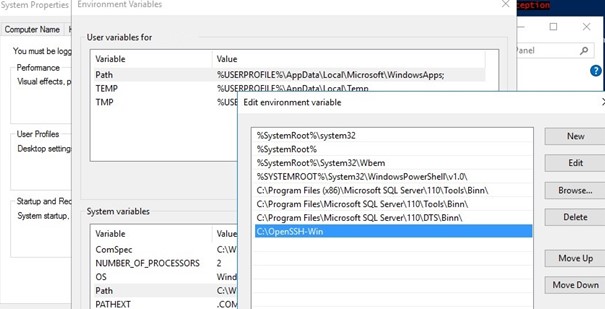
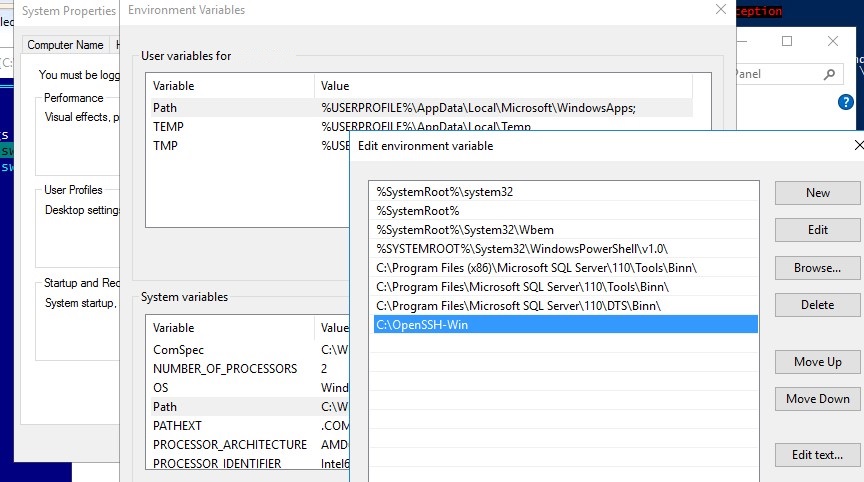
- Add the path to the OpenSSH directory to the Path environment variable (System Properties -> Advanced tab -> Environment Variables -> Select and edit the Path system variable -> Add the path to the OpenSSH folder);

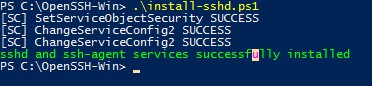
- Install the OpenSSH server: .\install-sshd.ps1 (a green message should appear “ sshd and ssh-agent services successfully installed ”);
- Generate SSH keys for the server (needed to start the sshd service):
ssh-keygen.exe –A ssh-keygen: generating new host keys: RSA DSA ECDSA ED25519 - Enable autostart for the SSHD service and start it using the following PowerShell service management commands:
Set-Service -Name sshd -StartupType ‘Automatic’
Start-Service sshd - Restart your computer:
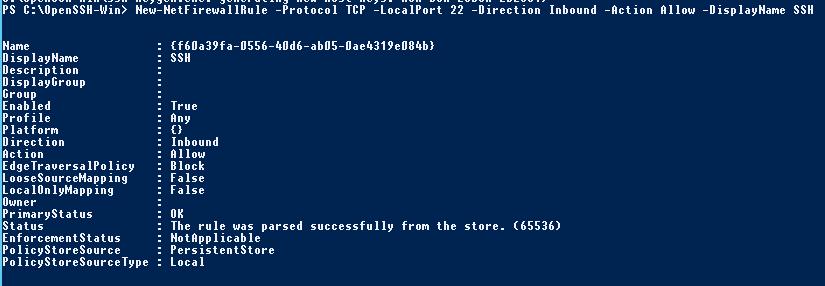
Restart-Computer - Use the PowerShell to open TCP port 22 in the Windows Firewall for incoming SSH traffic: New-NetFirewallRule -Protocol TCP -LocalPort 22 -Direction Inbound -Action Allow -DisplayName SSH


AllowGroups corp\sftp_users # allow to connect to OpenSSH only for users in this domain group
AuthenticationMethods password # enable password authentication (SSH keys cannot be used)
ForceCommand internal-sftp
ChrootDirectory C:\inetpub\wwwroot\ftpfolder # default directory for SFTP users
Testing SFTP Connection Using WinSCP
Let’s try to connect to the created SSH server using the SFTP protocol. To do it, use a free WinSCP client.
In the connection configuration window, select the SFTP as the file transfer protocol, specify the server name and the credentials of the Windows account, which is used for connection (it is also possible to configure key authentication).

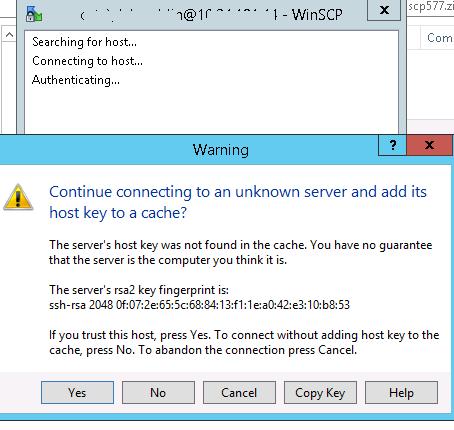
When you try to connect for the first time, the following notification of the host key not found in the local cache appears.
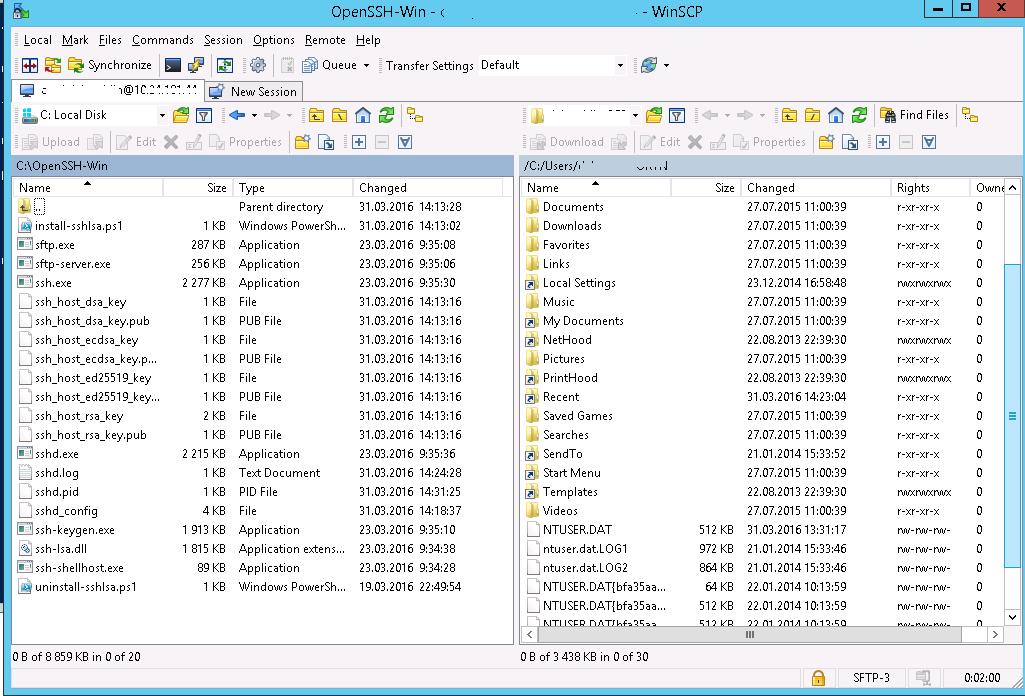
If everything is configured correctly, a client would connect to the SFTP server and display the list of files in the user home directory (by default, it is the directory with the user profile).
Using the familiar file manager interface (like Total Commander), you can copy files between the server and the client. Files are transferred using the secure SFTP.
How to Uninstall Win32 OpenSSH?
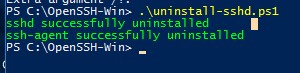
To uninstall Win32 OpenSSH from your system correctly:
Установка и настройка SFTP сервера (SSH FTP) в Windows на базе OpenSSH
С помощью официального пакета OpenSSH для Windows вы можете с легкостью организовать безопасный обмен файлами между клиентом и серверов Windows по защищенному протоколу передачи файлов SFTP (Secure FTP). В этой статье мы покажем, как с помощью Win32-OpenSSH установить SFTP сервер на Windows 10 или Windows Server 2016/2012R2.
Особенности протокола SFTP
Протокол SFTP (Secure File Transfer Protocol , Secure FTP или SSH FTP) это расширение протокола SSH, являющимся стандартом мира UNIX/Linux систем. Хотя с точки зрения пользователей он похож на FTP, но на самом деле это абсолютно другой протокол, не имеющий с FTP ничего общего. Данные между клиентом и сервером передаются по порту 22 через SSH туннель.
Основные преимущества протокола SFTP:
- Передача файлов и команд происходит внутри защищенной SSH-сессии;
- Для передачи файлов и команд используется одно соединение;
- Поддержка символических ссылок, функций прерывания, возобновления передачи, удаления файла и пр;
- Как правило, на каналах, где FTP работает медленно или с перебоем, SFTP-соединение работает более надежно и быстро;
- Возможность аутентификации с помощью SSH ключей.
Реализация SFTP в системах Windows
Исторически в операционных системах Windows отсутствуют встроенные средства для организации защищенного SFTP сервера. Для этих целей обычно использовались открытые или коммерческие решения, к примеру, Core FTP, FileZilla, CYGWIN, OpenSSH, FTP Shell, IPSwitch и пр. Однако несколько лет назад Microsoft выпустила свою версию порта OpenSSH для win32. Данный проект называется Win32-OpenSSH.
Рассмотрим процесс настройки SFTP сервера в Windows 10 и Windows Server 2016/2012 R2 с помощью пакета Win32-OpenSSH.
Установка Win32 OpenSSH в Windows 10 1803+/Windows Server 2019
В Windows 10, начиная с билда 1803, и в Windows Server 2019 пакет OpenSSH (как и RSAT) уже включен в операционную систему в виде Feature on Demand (FoD).
В Windows 10 и Windows Server 2019 вы можете установить сервер OpenSSH с помощью командлета PowerShell:
Add-WindowsCapability -Online -Name OpenSSH.Server*
Или с помощью DISM:
dism /Online /Add-Capability /CapabilityName:OpenSSH.Server
Или можно установить OpenSSH из графического интерфейса Windows 10 (Settings -> Apps -> Optional Features -> Add a feature -> Open SSH Server -> Install).
Исполняемые файлы OpenSSH находятся в каталоге:
Конфигурационный файл sshd_config находится в каталоге C:\ProgramData\ssh (каталог создается после первого запуска службы).
Файл authorized_keys и ключи хранятся в каталоге %USERPROFILE%\.ssh\.
Установка Win32 OpenSSH на Windows Server 2016/2012 R2
В предыдущих версиях Windows 10 и в Windows Server 2016/2012 R2 вы должны скачать и установить OpenSSH с GitHub (https://github.com/PowerShell/Win32-OpenSSH/releases). Нам нужна версия для 64 битной версии Windows: OpenSSH-Win64.zip (3,5 Мб).
- Распаковываем содержимое архива в целевой каталог, к примеру: C:\OpenSSH-Win
- Запускаем командную строку PowerShell с правами администратора и переходим в каталог OpenSSH: Cd C:\OpenSSH-Win
- Добавьте путь к каталогу OpenSSH в переменную окружения Path;
- Установите сервер OpenSSH: .\install-sshd.ps1 (должно появиться зеленое сообщение “sshd and ssh-agent services successfully installed”);
- Сгенерируйте SSH ключи для сервера (нужны для запуска службы sshd): ssh-keygen.exe –A

, убедитесь, что создан каталог %programdata%\ssh.
Тестируем SFTP подключение с помощью WinSCP
Попробуем подключиться к поднятому нами SSH серверу по протоколу SFTP. Для этих целей воспользуемся свободным клиентом WinSCP.
В окне настройки подключения выберите протокол передачи файлов SFTP, укажите имя сервера и данные учетной записи Windows, под которой осуществляется подключение (возможно также настроить авторизацию по ключам).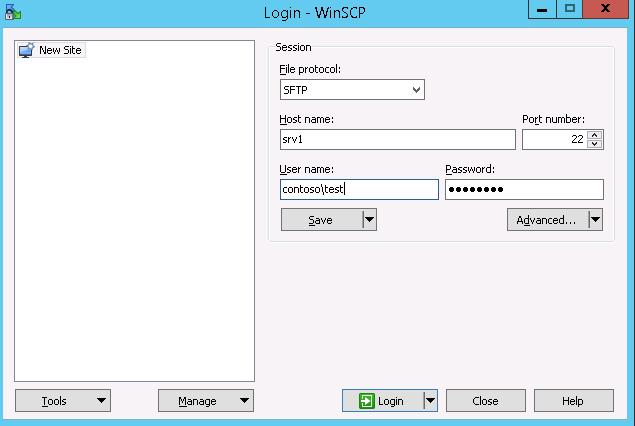 При первом подключении появится окно с предупреждением о том, что ключ хоста отсутствует в локальном кеше.
 Если все настроено правильно, клиент должен подключиться к SFTP серверу и отобразить список файлов в домашнем каталоге пользователя (по умолчанию каталог с профилем пользователя).
С помощью привычного интерфейса файлового менеджера можно безопасно копировать файлы между сервером и клиентом. Передача файлов будет осуществляться по защищённому протоколу SFTP.

Удаление службы Win32 OpenSSH
Чтобы корректно удалить службу Win32 OpenSSH из системы:
- Откроем консоль Powershell с правами администратора
- Остановим службу SSHD: Stop-Service sshd
- Удалим службу OpenSSD:Удалим ключи: .\uninstall-sshlsa.ps1