- Как сгенерировать открытый/закрытый SSH-ключ в Linux
- How To Generate 4096 bit Secure Ssh Key with Ssh Keygen
- Generate 4098 Bit Key
- Generate 4096 Bit DSA Key
- Generate 2048 Bit Key
- Generate 1024 Bit Key
- Linux / UNIX: Generate SSH Keys
- ssh-keygen command to Generate SSH Keys
- SSH Keys Are Generated, What Next?
- Optional ssh-keygen command syntax for advance users
- Conclusion
- 10 examples to generate SSH key in Linux (ssh-keygen)
- Overview on ssh-keygen
- 1. Generate ssh key without any arguments
- 2. Define Key Type
- 3. Define Bit size
- 4. Assign Passphrase
- 5. Change passphrase of the private key
- 6. Create keys with custom filename
- 7. Add custom comment to the key
- 8. Change comment of the key
- 9. Hash the content of known_hosts file
- 10. Remove keys for hostname from known_hosts file
- Conclusion
- References
- Related Posts
Как сгенерировать открытый/закрытый SSH-ключ в Linux
Если вы часто используете ssh для подключения к удаленному хосту, одним из способов обеспечения безопасности соединения является применение открытого/закрытого SSH-ключа, так как при этом по сети не передается никакой пароль и система устойчива к атакам методом «грубой силы».
Создать открытый/закрытый SSH-ключ в Linux очень просто.
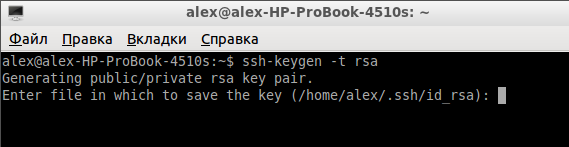
1. Откройте терминал. Введите:
Альтернативой является использование для создания ключа технологии DSA (Digital Signing Algorithm):
Примечание: Было много дебатов о том, что безопаснее, DSA или RSA. По моему мнению, если только вы не любитель копаться в технических подробностях, большой разницы между этими технологиями нет. Обе работают хорошо.
2. На нижеследующем скриншоте вы видите предложение указать место для сохранения ключа. По умолчанию это папка .ssh в вашей домашней директории. Для того, чтобы согласиться с настройками по умолчанию, просто нажмите «Enter».
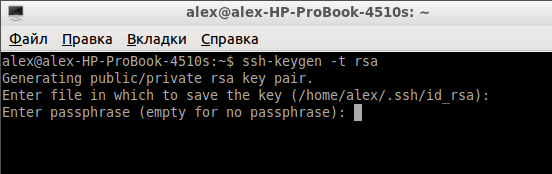
3. Далее, вас попросят ввести идентификационную фразу. Это не идентификационная фраза для соединения с удаленным хостом. Это идентификационная фраза для разблокировки закрытого ключа, поэтому она не поможет вам получить доступ к удаленному серверу, даже если на нем хранится ваш закрытый ключ. Ввод идентификационной фразы не является обязательным. Чтобы оставить ее пустой, просто нажмите «Enter».
4. Теперь ваши открытый и закрытый SSH-ключи должны быть сгенерированы. Откройте файловый менеджер и перейдите в директорию .ssh. Вы должны увидеть два файла: id_rsa и id_rsa.pub.
5. Загрузите файл id_rsa.pub в домашнюю директорию вашего удаленного хоста (предполагается, что удаленный хост работает под Linux). Подключитесь к удаленному хосту с помощью SSH и переместите открытый ключ в его целевую директорию с помощью команд:
6. Оставаясь на удаленном хосте, откройте конфигурационный файл SSH:
Убедитесь, что следующие атрибуты имеют корректные значения:
Нажмите «ctrl + o», чтобы сохранить изменения, затем «ctrl + x», чтобы закрыть файл.
7. И последнее, перезапустите сервер SSH на удаленном хосте:
На этом все. Теперь вы можете соединяться со своим удаленным хостом с помощью команды:
Источник
How To Generate 4096 bit Secure Ssh Key with Ssh Keygen
Ssh is secure protocol used to manage remote systems like Linux, BSD, UNIX, network devices event windows operating systems. The traffic between systems are encrypted. Ssh uses asymmetric keys in order to encrypt and made traffic invisible to the others those resides between systems in the network. The encryption power comes from key bit size or length. In this tutorial we will look how to create 4096 bit keys.
Generate 4098 Bit Key
In this example we will generate very secure key. This key size will be 4096 bit. 4096 bit keys are a lot more secure than 2048 or 1024 bit keys. If we are not transferring big data we can use 4096 bit keys without a performance problem. We will use -b option in order to specify bit size to the ssh-keygen .
 Generate 4098 Bit Key
Generate 4096 Bit DSA Key
RSA is very old and popular asymmetric encryption algorithm. It is used most of the systems by default. There are some alternatives to RSA like DSA . We can not generate 4096 bit DSA keys because it algorithm do not supports.
Generate 2048 Bit Key
The default key size for the ssh-keygen is 2048 bit. We can also specify explicitly the size of the key like below.
 Generate 2048 Bit Key
Generate 1024 Bit Key
The less secure key size is 1024 bit. We do not recommend usage of this size of keys but in some situations like old systems we may need this size of keys. Here how we can generate 1024 bit key with ssh-keygen .
 Generate 1024 Bit Key
Источник
Linux / UNIX: Generate SSH Keys
H ow do I generate ssh keys under Linux / UNIX / Mac OS X and *BSD operating systems for remote login?
SSH uses public-key cryptography to authenticate the remote computer and allow the remote computer to authenticate the user, if required. You can create ssh keys as follows on any Linux or UNIX-like operating systems including Mac OS X.[donotprint]
| Tutorial details | |
|---|---|
| Difficulty level | Easy |
| Root privileges | No |
| Requirements | None |
| Est. reading time | 5m |
[/donotprint]
ssh-keygen command to Generate SSH Keys
The ssh-keygen command generates, manages and converts authentication keys for ssh client and server usage. Type the following command to generate ssh keys (open terminal and type the command):
$ ssh-keygen
Generate SSH keys looks as follows:
The above command creates
/.ssh/ directory. So if your user name is vivek, than all files are stored in /home/vivek/.ssh/ or $HOME/.ssh/ directory as follows:
- $HOME/.ssh/id_rsa – Your private key. Do not share this file with anyone. Keep it private
- $HOME/.ssh/id_rsa.pub – Your public key.
Please note that the passphrase must be different from your current password and do not share keys or passphrase with anyone. Also, make sure you have correct and secure permissions on $HOME/.ssh/ directory:
- No ads and tracking
- In-depth guides for developers and sysadmins at Opensourceflare✨
- Join my Patreon to support independent content creators and start reading latest guides:
- How to set up Redis sentinel cluster on Ubuntu or Debian Linux
- How To Set Up SSH Keys With YubiKey as two-factor authentication (U2F/FIDO2)
- How to set up Mariadb Galera cluster on Ubuntu or Debian Linux
- A podman tutorial for beginners – part I (run Linux containers without Docker and in daemonless mode)
- How to protect Linux against rogue USB devices using USBGuard
Join Patreon ➔
SSH Keys Are Generated, What Next?
You need to copy $HOME/.ssh/id_rsa.pub file to remote server so that you can login using keys instead of the password. Use any one of the following command to copy key to remote server called vpn22.nixcraft.net.in for vivek user:
ssh-copy-id vivek@vpn22.nixcraft.net.in
On some *nix system such as OS X ssh-copy-id command may not be installed, use the following commands (when prompted provide the password for remote user account called vivek) to install/append the public key on remote host:
ssh vivek@vpn22.nixcraft.net.in «umask 077; mkdir .ssh»
cat $HOME/.ssh/id_rsa.pub | ssh vivek@vpn22.nixcraft.net.in «cat >> .ssh/authorized_keys»
To login simply type:
ssh vivek@vpn22.nixcraft.net.in
The following command will help to remember passphrase
exec ssh-agent $SHELL
ssh-add
ssh vivek@vpn22.nixcraft.net.in
Optional ssh-keygen command syntax for advance users
The following syntax specifies the 4096 of bits in the RSA key to creation (default 2048):
ssh-keygen -t rsa -b 4096 -f
/.ssh/aws.key -C «My AWs cloud key»
Where,
- -t rsa : Specifies the type of key to create. The possible values are “rsa1” for protocol version 1 and “dsa”, “ecdsa”, “ed25519”, or “rsa” for protocol version 2.
- -b 4096 : Specifies the number of bits in the key to create.
- -f
/.ssh/aws.key : Specifies the filename of the key file.
Now install the
/.ssh/aws.key, run:
ssh-copy-id -i
/.ssh/aws.key user@aws-server-ip
Test it with the ssh command:
ssh -i
Conclusion
You learned how to create and generate ssh keys using the ssh-keygen command.
🐧 Get the latest tutorials on Linux, Open Source & DevOps via
Источник
10 examples to generate SSH key in Linux (ssh-keygen)
Table of Contents
We use ssh-keygen tool to generate SSH keys which are used for Public Key Based Authentication with SSH. As the time of writing this article, there are 6 different types of authentication methods possible with SSH. But Public key Authentication is one of the most used authentication methods used across production environment.
To use public key based authentication you would need a public and private key pair.
- The public key content must be added to the authorized_keys file of server
- The private key will be stored on the client
So when a client tries to make a secure connection, it will use this private and public key pair combination to establish the connection
Overview on ssh-keygen
- ssh-keygen is a utility provided by openssh rpm which should be installed by default on all the Linux distributions.
- ssh-keygen generates, manages and converts authentication keys for ssh version 2.0 and higher
- This tool supports different arguments which can be used to create keys as per the requirement
- If you wish to use SSH with public key authentication then use this once to create the authentication key in
/.ssh/id_rsa
Let us explore the ssh-keygen tool to generate different types of key pairs in Linux
1. Generate ssh key without any arguments
- You can execute ssh-keygen without any arguments which will generate key pairs by default using RSA algorithm
- The tool will prompt for the location to store the RSA key pairs.
- The default location would be inside user’s home folder under .ssh i.e.
/.ssh
The tool will create
/.ssh if the directory does not exists already
Snippet from my terminal
 Generate SSH Key without any arguments
2. Define Key Type
- By default ssh-keygen will create RSA type key
- You can create key with dsa , ecdsa , ed25519 , or rsa type
- Use -t argument to define the type of the key
- In this example I am creating key pair of ED25519 type
Snippet from my terminal
 Define key type
3. Define Bit size
By default ssh-keygen generates SSH key with 2048 bit size. You can also specify the number of bits to be used for the keys by using -b
In this example i will generate keys with 4096 bit size
Snippet from my terminal
 Define bit size
4. Assign Passphrase
By default ssh-keygen will prompt for the passphrase before creating the key pairs. But we can also assign passphrase with using -P
Snippet from my terminal
 Assign passphrase
5. Change passphrase of the private key
- You can also change the existing passphrase of your private key
- Use ssh-keygen with -p which will prompt you for the location of your private key file
- Next provide the existing passphrase of your private key
- If the provided passphrase is correct, you will get the prompt to assign new passphrase to your existing private key
6. Create keys with custom filename
- By default ssh-keygen creates private key with the name id_rsa and public key as id_rsa.pub
- We can also create keys with custom filename using -f
- This will create and keep the certificates in the current location from where you execute ssh-keygen tool
- In this example my private key will be my-own-rsa-key and public key would be my-own-rsa-key.pub
Snippet from my terminal
 Generate SSH key and assign filename
7. Add custom comment to the key
You can also add custom comment to your private key for more identification. Use -C to generate keys with your custom comment
We can use -l to print the fingerprint and comment of the private key
8. Change comment of the key
You can also change the existing comment of your private key using -c argument
Check the new comment of your private key
9. Hash the content of known_hosts file
- Every time you do SSH to another server, the SSH fingerprint for the secure connection is added to the client’s
/.ssh/known_hosts file
- Any intruder can use this information to get the fingerprint details of individual hostname .
- You can use ssh-keygen to hash the hostname entries in the known_hosts file using -H argument
- This option will not modify existing hashed hostname and is therefore safe to use on files that mix hashed and non-hashed names.
- This will create a backup file with .old extension in the same location
Next check the content of known_hosts file
As you see now the hostname can not be understood as they are hashed. A backup file is also created at the same location
10. Remove keys for hostname from known_hosts file
- Every time you do SSH, the RSA key for the SSH connection for respective hostname is stored inside
/.ssh/known_hosts file
Conclusion
ssh-keygen is a very vast tool which can do much more than generating SSH keys. It also supports signing of keys to produce certificates that may be used for user or host authentication. In this article we learned about different arguments which can be used to generate SSH keys for Public key Authentication with SSH
You can also combine all the arguments from this tutorial to automate the process. Lastly I hope the steps from the article to understand about ssh-keygen tool in more detail with different examples on Linux was helpful. So, let me know your suggestions and feedback using the comment section.
References
I have used below external references for this tutorial guide
man page for ssh-keygen
Related Posts
Didn’t find what you were looking for? Perform a quick search across GoLinuxCloud
If my articles on GoLinuxCloud has helped you, kindly consider buying me a coffee as a token of appreciation.

For any other feedbacks or questions you can either use the comments section or contact me form.
Thank You for your support!!
Источник


