- GitLab S sslstrip Project information Project information Activity Labels Members Repository Repository Files Commits Branches Tags Contributors Graph Compare Locked Files Issues 0 Issues 0 List Boards Service Desk Milestones Iterations Requirements Merge requests 0 Merge requests 0 CI/CD CI/CD Pipelines Jobs Schedules Test Cases Deployments Deployments Environments Releases Monitor Monitor Incidents Packages & Registries Packages & Registries Package Registry Container Registry Infrastructure Registry Analytics Analytics CI/CD Code review Insights Issue Repository Value stream Snippets Snippets Activity Graph Create a new issue Jobs Commits Issue Boards Collapse sidebar Close sidebar sslstrip packaging for Kali Linux Archived project! Repository and other project resources are read-only Источник Using SSLStrip in Kali Linux September 8, 2015 nmap -sP 192.168.1.0/24 The object in this step is to route traffic inbound to Kali to the port that SSLStip will be running on, which is port 1000 (this port does not have to be 1000 — you can select a different one but if you do, make sure you do not select a well-known port). With our arpspoof running in two terminal windows, we need to open a third terminal. Use the following command for iptables: iptables -t nat -A PREROUTING -p tcpВ —destination-portВ 80 -j REDIRECT —to-port 1000 Note the double dashes before destination-port and to-port. Establish a MITMNow that you know the gateway and victim IP address, you need to insert your Kali machine between the two as a man in the middle. The first step to accomplish this is to configure your Kali machine to forward ports. Run the command: echo 1 > /proc/sys/net/ipv4/ip_forward This modifies ip_forward to a 1 which enables port forwarding. If you set it to 0, then Kali will not forward ports. If you set this to 0 after the following steps, you will DOS (aka “sinkhole”) any traffic originating from your victim that would need to cross a router. This includes internet requests. In a larger network, it may also include traffic that passes between subnets.The next step is to use the arpspoof utility. Arpspoof tricks your victim into believing that you are the gateway, when you’re actually just another machine on the network. A Word of WarningThis should be relatively transparent to your victim because you are forwarding ports. However, a clever victim will be able to see the attack, if they’re monitoring for changes in their ARP table. With no man in the middle present, a Windows user could use the command arp -a [gateway IP] to see the MAC address of their router. If a man in the middle is present, the IP address the victim is using for the gateway would not change, but the MAC address returned would be the attacker’s. A clever attacker could determine the MAC address of the gateway and change their Kali interface MAC address to mimic the gateway so this would not be seen by the victim.To use arpspoof, the syntax is: arpspoof -i eth0 -t [victim IP] [gateway IP] The -i flag indicates what network interface to send the ARP packets on. In this case, the interface is eth0, which is the norm for a LAN (ethernet) port. -t signifies the target IP address.The terminal will begin showing ARP pings continuously until you elect to end the spoofing attack by using Ctrl + C.You’ve completed half the man in the middle. To finish, open a second terminal window and use the same command as above, except reverse the order of the IP addresses. This will trick the router into believing that you are the device requesting internet resources. Deliver the ExploitSelect Applications в†’ Kali Linux в†’ Information Gathering в†’ SSL Analysis в†’ sslstripThis spawns a 4th terminal window.Enter the command: sslstrip -w filename.txt -l 1000 This will start SSLStrip and write the results to a file you specify. Be sure to specify the extension of the file. The -l switch identifies the port SSLStrip will be listening on, which we set as 1000 in the previous step. You’re now collecting the internet traffic for websites your target visits and decrypting the HTTPS traffic on the fly while saving the results to a file for review later. The default location for the file is under Kali’s Home folder. Your victim uses 192.168.1.1 as the default gateway and doesn’t notice the MAC address change because you’ve poisoned the ARP table. The victim sends requests to the Kali machine. The Kali attacker runs SSLStrip on all these packets and decrypts them; then saves the results to a file. Decrypted packets are forwarded to the actual gateway router. The router makes the internet request and returns the results to the Kali attacker. Kali decrypts and forwards the results to the victim IP address. Another Word of Warning The moment you launch SSLStrip in the previous command, your victim’s internet browsing will become extremely slow for two reasons: There’s now an extra step in the route between your victim and the actual gateway as your attack machine is forwarding traffic back and forth between the gateway and the victim SSLStrip is a decrypt process and, therefore,В resource-intensive on your attacker machine. Your attacker will delay the forwarded traffic in addition to it being an extra step in the route. This will be noticeable by your victim and may prompt a restart (which may change the IP address of the victim and kill the attack). Depending on the environment, this may also trigger a call to tech support or an investigation into the cause of the slowdown. I’ve also seen this attack trigger 403 errors on the victim’s machine, which will alert the target that something’s wrong (this seems to occur when a remote server forces a higher-grade TLS connection). You may be able to capture a username and password, nonetheless. Usually the pertinent information is located at the bottom of the entry in the file you save the date to. It can be seen with a parameter, such as user= and passwd=. Thanks! Источник Kali Linux: Используем sslstrip для перехвата пароля Утилита sslstrip перехватывает http-трафик с компьютера в локальной сети и таким образом позволяет нам разузнать пароли от каких-нибудь сайтов. Как же пользоваться этой утилитой? Для начала откроем терминал и выполним команду sslstrip -h для того чтобы узнать все опции утилиты. Перед тем как начать работать с sslstrip нам нужно проделать кое-какие действия 1. Нам нужно включить IP Forwarding echo ‘1’ > /proc/sys/net/ipv4/ip_forward 2. Включить перенаправление запросов с порта 80 на 8080 iptables –t nat –A PREROUTING –p tcp –destination-port 80 –j REDIRECT –to-port 8080 3. Определяем наш шлюз netstat -nr 4. Выясняем ip-адрес жертвы (в моем случае это компьютер под управлением Windows XP с IP-адресом 192.168.71.128) 5. Перенаправляем весь http-трафик с нашего компьютера на шлюз arpspoof –i eth0 –t 192.168.71.128 –r 192.168.71.2 Теперь, не закрывая этого окна терминала, открываем еще одно, и запускаем в нем прослушку порта 8080 с помощью sslstrip: sslstrip –l 8080 Теперь, я на компьютере жертвы захожу в гугло-почту: Источник Kali Tools: SSLStrip Today we’re going to be taking a closer look at a useful Kali Linux tool called SSLStrip. As the name implies, it is useful for hijacking HTTP traffic and monitoring HTTPS traffic. Basically, it serves as a type of proxy that makes standard non-encrypted HTTP connections mirror the appearance of encrypted HTTPS sessions. Using this tool, it’s possible to “strip” the security off of HTTPS, and turn an HTTPS link into a regular, plain-vanilla HTTP link, or even change an HTTPS link to an HTTPS link with a private key that the attacker already knows. This tool is rather tricky, too, because it will even send the padlock icon to a browser to give the appearance that the connection has been secured. Essentially, this is a sophisticated version of an MITM attack. MITM attacks are really a rather large umbrella term do describe any attack that collects user data before sending it on the appropriate destination host. And since you control that data, it’s possible to edit it and change the details before sending it on its merry way. Installing SSLStrip and Running It If it’s not already installed on your system, you can grab it at the usual github location. It is a Python tool, so it’s dependent upon Python 2.5 and later. I always recommend running an update before installing code, too. Not only will that ensure that all of your other packages and modules are up to date, but it will help avoid future headaches caused by contrived package dependency problems. After that, you’re going to need to make a few configuration changes on your system as follows. Ensure your computer is in forwarding mode. Simply login as root and run the following command: echo “1” > /proc/sys/net/ipv4/ip_forward Edit iptables to ensure that it can intercept HTTP requests. Once again, you’ll need to be logged in as the root user. Issue the following command: iptables -t nat -A PREROUTING -p tcp –destination-port 80 -j REDIRECT –to-port [DESIRED-LISTENING-PORT] Issue the sslstrip command from the BASH shell. Finally, you’ll need to run arpspoof to facilitate the MITM attack with the following syntax: arpspoof -i [YOUR-IP-ADDRESS] -t [TARGET-IP-ADDRESS] [ROUTER-IP-ADDRESS] SSLStrip Command Syntax The command syntax for SSLStrip is actually rather simple when compared to some of the more advanced Kali tools, such as Metsploit. The following will serve as a reference of the command’s various options and syntax: -w , –write= Specify file to log to (optional). -p , –post Log only SSL POSTs. (default) -s , –ssl Log all SSL traffic to and from server. -a , –all Log all SSL and HTTP traffic to and from server. Port to listen on (default 10000). -f , –favicon Substitute a lock favicon on secure requests. -k , –killsessions Kill sessions in progress. -h Print this help message. SSLStrip Usage Example In this example, we’re going to write the results of SSLStrip to a log file. After the data is logged, you can use it as an input parameter for other hacking tools. SSL runs on port 443, but for the sake of simplicity, it’s pretty standard in the industry to setup listening ports for HTTP/HTTPS traffic on port 8080. All of the well-known service typically run on ports below 1024, but past that, there are a lot of open ports. For that reason, it’s pretty safe to assume that port 8080 isn’t going to be used by a different service. The following is an example of using the SSLStrip command to log data after spoofing the ARP protocol: sslstrip -w mylogfile.log -l 8080 Note that you’ll want to be the root user when running this command. Naturally, the -w option tells sslstrip to write the data to a file, and the -l option tells it what port to listen on. There are a myriad of MITM tools, and some of them even allow an attacker to steal live sessions with the click of a button. Though it is old and outdated, you can still find the FireSheep code online and install it in a web browser, allowing you to hijack session cookies. Last but not least, remember to abstain from using these tools in the real world for a malicious attack. Not only is it immoral, but you could wind up facing tough legal consequences should you get caught. Источник Kali Linux: Используем sslstrip для перехвата пароля Утилита sslstrip перехватывает http-трафик с компьютера в локальной сети и таким образом позволяет нам разузнать пароли от каких-нибудь сайтов. Как же пользоваться этой утилитой? Для начала откроем терминал и выполним команду sslstrip -h для того чтобы узнать все опции утилиты. Перед тем как начать работать с sslstrip нам нужно проделать кое-какие действия 1. Нам нужно включить IP Forwarding echo ‘1’ > /proc/sys/net/ipv4/ip_forward 2. Включить перенаправление запросов с порта 80 на 8080 iptables –t nat –A PREROUTING –p tcp –destination-port 80 –j REDIRECT –to-port 8080 3. Определяем наш шлюз netstat -nr 4. Выясняем ip-адрес жертвы (в моем случае это компьютер под управлением Windows XP с IP-адресом 192.168.71.128) 5. Перенаправляем весь http-трафик с нашего компьютера на шлюз arpspoof –i eth0 –t 192.168.71.128 –r 192.168.71.2 Теперь, не закрывая этого окна терминала, открываем еще одно, и запускаем в нем прослушку порта 8080 с помощью sslstrip: sslstrip –l 8080 Теперь, я на компьютере жертвы захожу в гугло-почту: Источник
- Using SSLStrip in Kali Linux
- Kali Linux: Используем sslstrip для перехвата пароля
- Kali Tools: SSLStrip
- Kali Linux: Используем sslstrip для перехвата пароля
GitLab - S sslstrip
- Project information
- Project information
- Activity
- Labels
- Members
- Repository
- Repository
- Files
- Commits
- Branches
- Tags
- Contributors
- Graph
- Compare
- Locked Files
- Issues 0
- Issues 0
- List
- Boards
- Service Desk
- Milestones
- Iterations
- Requirements
- Merge requests 0
- Merge requests 0
- CI/CD
- CI/CD
- Pipelines
- Jobs
- Schedules
- Test Cases
- Deployments
- Deployments
- Environments
- Releases
- Monitor
- Monitor
- Incidents
- Packages & Registries
- Packages & Registries
- Package Registry
- Container Registry
- Infrastructure Registry
- Analytics
- Analytics
- CI/CD
- Code review
- Insights
- Issue
- Repository
- Value stream
- Snippets
- Snippets
- Activity
- Graph
- Create a new issue
- Jobs
- Commits
- Issue Boards
- Project information
- Activity
- Labels
- Members
- Repository
- Files
- Commits
- Branches
- Tags
- Contributors
- Graph
- Compare
- Locked Files
- Issues 0
- List
- Boards
- Service Desk
- Milestones
- Iterations
- Requirements
- Merge requests 0
- CI/CD
- Pipelines
- Jobs
- Schedules
- Test Cases
- Deployments
- Environments
- Releases
- Monitor
- Incidents
- Packages & Registries
- Package Registry
- Container Registry
- Infrastructure Registry
- Analytics
- CI/CD
- Code review
- Insights
- Issue
- Repository
- Value stream
- Snippets
Collapse sidebar Close sidebar
sslstrip packaging for Kali Linux
Archived project! Repository and other project resources are read-only
Источник
Using SSLStrip in Kali Linux

September 8, 2015
nmap -sP 192.168.1.0/24
The object in this step is to route traffic inbound to Kali to the port that SSLStip will be running on, which is port 1000 (this port does not have to be 1000 — you can select a different one but if you do, make sure you do not select a well-known port). With our arpspoof running in two terminal windows, we need to open a third terminal. Use the following command for iptables:
iptables -t nat -A PREROUTING -p tcpВ —destination-portВ 80 -j REDIRECT —to-port 1000
Note the double dashes before destination-port and to-port. Establish a MITMNow that you know the gateway and victim IP address, you need to insert your Kali machine between the two as a man in the middle. The first step to accomplish this is to configure your Kali machine to forward ports. Run the command:
echo 1 > /proc/sys/net/ipv4/ip_forward
This modifies ip_forward to a 1 which enables port forwarding. If you set it to 0, then Kali will not forward ports. If you set this to 0 after the following steps, you will DOS (aka “sinkhole”) any traffic originating from your victim that would need to cross a router. This includes internet requests. In a larger network, it may also include traffic that passes between subnets.The next step is to use the arpspoof utility. Arpspoof tricks your victim into believing that you are the gateway, when you’re actually just another machine on the network. A Word of WarningThis should be relatively transparent to your victim because you are forwarding ports. However, a clever victim will be able to see the attack, if they’re monitoring for changes in their ARP table. With no man in the middle present, a Windows user could use the command arp -a [gateway IP] to see the MAC address of their router. If a man in the middle is present, the IP address the victim is using for the gateway would not change, but the MAC address returned would be the attacker’s. A clever attacker could determine the MAC address of the gateway and change their Kali interface MAC address to mimic the gateway so this would not be seen by the victim.To use arpspoof, the syntax is:
arpspoof -i eth0 -t [victim IP] [gateway IP]
The -i flag indicates what network interface to send the ARP packets on. In this case, the interface is eth0, which is the norm for a LAN (ethernet) port. -t signifies the target IP address.The terminal will begin showing ARP pings continuously until you elect to end the spoofing attack by using Ctrl + C.You’ve completed half the man in the middle. To finish, open a second terminal window and use the same command as above, except reverse the order of the IP addresses. This will trick the router into believing that you are the device requesting internet resources. Deliver the ExploitSelect Applications в†’ Kali Linux в†’ Information Gathering в†’ SSL Analysis в†’ sslstripThis spawns a 4th terminal window.Enter the command:
sslstrip -w filename.txt -l 1000
This will start SSLStrip and write the results to a file you specify. Be sure to specify the extension of the file. The -l switch identifies the port SSLStrip will be listening on, which we set as 1000 in the previous step. You’re now collecting the internet traffic for websites your target visits and decrypting the HTTPS traffic on the fly while saving the results to a file for review later. The default location for the file is under Kali’s Home folder.
- Your victim uses 192.168.1.1 as the default gateway and doesn’t notice the MAC address change because you’ve poisoned the ARP table.
- The victim sends requests to the Kali machine.
- The Kali attacker runs SSLStrip on all these packets and decrypts them; then saves the results to a file.
- Decrypted packets are forwarded to the actual gateway router.
- The router makes the internet request and returns the results to the Kali attacker.
- Kali decrypts and forwards the results to the victim IP address.
Another Word of Warning The moment you launch SSLStrip in the previous command, your victim’s internet browsing will become extremely slow for two reasons:
- There’s now an extra step in the route between your victim and the actual gateway as your attack machine is forwarding traffic back and forth between the gateway and the victim
- SSLStrip is a decrypt process and, therefore,В resource-intensive on your attacker machine. Your attacker will delay the forwarded traffic in addition to it being an extra step in the route. This will be noticeable by your victim and may prompt a restart (which may change the IP address of the victim and kill the attack). Depending on the environment, this may also trigger a call to tech support or an investigation into the cause of the slowdown.
I’ve also seen this attack trigger 403 errors on the victim’s machine, which will alert the target that something’s wrong (this seems to occur when a remote server forces a higher-grade TLS connection). You may be able to capture a username and password, nonetheless. Usually the pertinent information is located at the bottom of the entry in the file you save the date to. It can be seen with a parameter, such as user= and passwd=. Thanks!
Источник
Kali Linux: Используем sslstrip для перехвата пароля

Утилита sslstrip перехватывает http-трафик с компьютера в локальной сети и таким образом позволяет нам разузнать пароли от каких-нибудь сайтов. Как же пользоваться этой утилитой?
Для начала откроем терминал и выполним команду sslstrip -h для того чтобы узнать все опции утилиты.

Перед тем как начать работать с sslstrip нам нужно проделать кое-какие действия
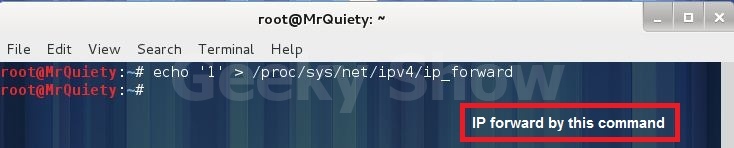
1. Нам нужно включить IP Forwarding
echo ‘1’ > /proc/sys/net/ipv4/ip_forward
2. Включить перенаправление запросов с порта 80 на 8080
iptables –t nat –A PREROUTING –p tcp –destination-port 80 –j REDIRECT –to-port 8080

3. Определяем наш шлюз netstat -nr

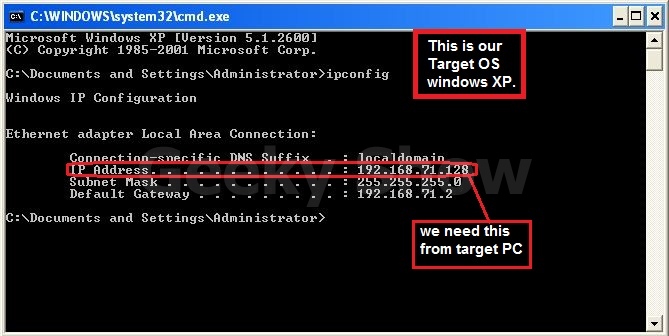
4. Выясняем ip-адрес жертвы (в моем случае это компьютер под управлением Windows XP с IP-адресом 192.168.71.128)
5. Перенаправляем весь http-трафик с нашего компьютера на шлюз
arpspoof –i eth0 –t 192.168.71.128 –r 192.168.71.2

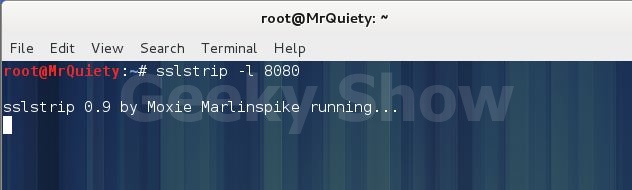
Теперь, не закрывая этого окна терминала, открываем еще одно, и запускаем в нем прослушку порта 8080 с помощью sslstrip:
sslstrip –l 8080
Теперь, я на компьютере жертвы захожу в гугло-почту:
Источник
Kali Tools: SSLStrip
Today we’re going to be taking a closer look at a useful Kali Linux tool called SSLStrip. As the name implies, it is useful for hijacking HTTP traffic and monitoring HTTPS traffic. Basically, it serves as a type of proxy that makes standard non-encrypted HTTP connections mirror the appearance of encrypted HTTPS sessions.

Using this tool, it’s possible to “strip” the security off of HTTPS, and turn an HTTPS link into a regular, plain-vanilla HTTP link, or even change an HTTPS link to an HTTPS link with a private key that the attacker already knows. This tool is rather tricky, too, because it will even send the padlock icon to a browser to give the appearance that the connection has been secured.
Essentially, this is a sophisticated version of an MITM attack. MITM attacks are really a rather large umbrella term do describe any attack that collects user data before sending it on the appropriate destination host. And since you control that data, it’s possible to edit it and change the details before sending it on its merry way.
Installing SSLStrip and Running It
If it’s not already installed on your system, you can grab it at the usual github location. It is a Python tool, so it’s dependent upon Python 2.5 and later. I always recommend running an update before installing code, too. Not only will that ensure that all of your other packages and modules are up to date, but it will help avoid future headaches caused by contrived package dependency problems.
After that, you’re going to need to make a few configuration changes on your system as follows.
Ensure your computer is in forwarding mode. Simply login as root and run the following command: echo “1” > /proc/sys/net/ipv4/ip_forward
Edit iptables to ensure that it can intercept HTTP requests. Once again, you’ll need to be logged in as the root user. Issue the following command: iptables -t nat -A PREROUTING -p tcp –destination-port 80 -j REDIRECT –to-port [DESIRED-LISTENING-PORT]
Issue the sslstrip command from the BASH shell.
Finally, you’ll need to run arpspoof to facilitate the MITM attack with the following syntax: arpspoof -i [YOUR-IP-ADDRESS] -t [TARGET-IP-ADDRESS] [ROUTER-IP-ADDRESS]
SSLStrip Command Syntax
The command syntax for SSLStrip is actually rather simple when compared to some of the more advanced Kali tools, such as Metsploit. The following will serve as a reference of the command’s various options and syntax:
-w , –write= Specify file to log to (optional).
-p , –post Log only SSL POSTs. (default)
-s , –ssl Log all SSL traffic to and from server.
-a , –all Log all SSL and HTTP traffic to and from server.
Port to listen on (default 10000).
-f , –favicon Substitute a lock favicon on secure requests.
-k , –killsessions Kill sessions in progress.
-h Print this help message.
SSLStrip Usage Example
In this example, we’re going to write the results of SSLStrip to a log file. After the data is logged, you can use it as an input parameter for other hacking tools. SSL runs on port 443, but for the sake of simplicity, it’s pretty standard in the industry to setup listening ports for HTTP/HTTPS traffic on port 8080.
All of the well-known service typically run on ports below 1024, but past that, there are a lot of open ports. For that reason, it’s pretty safe to assume that port 8080 isn’t going to be used by a different service. The following is an example of using the SSLStrip command to log data after spoofing the ARP protocol:
sslstrip -w mylogfile.log -l 8080
Note that you’ll want to be the root user when running this command. Naturally, the -w option tells sslstrip to write the data to a file, and the -l option tells it what port to listen on.
There are a myriad of MITM tools, and some of them even allow an attacker to steal live sessions with the click of a button. Though it is old and outdated, you can still find the FireSheep code online and install it in a web browser, allowing you to hijack session cookies. Last but not least, remember to abstain from using these tools in the real world for a malicious attack. Not only is it immoral, but you could wind up facing tough legal consequences should you get caught.
Источник
Kali Linux: Используем sslstrip для перехвата пароля
Утилита sslstrip перехватывает http-трафик с компьютера в локальной сети и таким образом позволяет нам разузнать пароли от каких-нибудь сайтов. Как же пользоваться этой утилитой?
Для начала откроем терминал и выполним команду sslstrip -h для того чтобы узнать все опции утилиты.
Перед тем как начать работать с sslstrip нам нужно проделать кое-какие действия
1. Нам нужно включить IP Forwarding
echo ‘1’ > /proc/sys/net/ipv4/ip_forward
2. Включить перенаправление запросов с порта 80 на 8080
iptables –t nat –A PREROUTING –p tcp –destination-port 80 –j REDIRECT –to-port 8080
3. Определяем наш шлюз netstat -nr
4. Выясняем ip-адрес жертвы (в моем случае это компьютер под управлением Windows XP с IP-адресом 192.168.71.128)
5. Перенаправляем весь http-трафик с нашего компьютера на шлюз
arpspoof –i eth0 –t 192.168.71.128 –r 192.168.71.2
Теперь, не закрывая этого окна терминала, открываем еще одно, и запускаем в нем прослушку порта 8080 с помощью sslstrip:
sslstrip –l 8080
Теперь, я на компьютере жертвы захожу в гугло-почту:
Источник


