- Guide:LinuxServerSetup
- Contents
- Introduction
- Prerequisites
- Libraries
- SteamCmd
- Download and Install
- Running And Downloading Server With SteamCMD
- Downloading The Dedicated Server
- Updating The Server
- Running The Server
- Advanced Usage
- systemd
- Terminal Multiplexers
- GNU Screen
- Byobu
- Starbound dedicated server linux
- Starbound dedicated server linux
Guide:LinuxServerSetup
Contents
Introduction
This guide will help new server owners setup a Starbound server on a Linux server. This guide focuses on using Ubuntu Server 16.04 and Debian 9. It is assumed Ubuntu Server/Debian is already installed and updated. If this is your first linux experience, click here to access a guide from canonical to help you install the server distribution.
It is also assumed you have forwarded the appropriate ports to allow incoming outside connections if you are behind a NAT. Starbound uses port 21025 over TCP and UDP by default and requires a 64-bit operating system to run.
Prerequisites
This section will help you install the necessary dependencies before the server can run.
Libraries
The default Ubuntu and Debian installations do not provide all the necessary packages to run the game and SteamCMD. Install all the dependencies using the following command.
software-properties-common is a library required by SteamCMD. lib32gcc1 is a 32-bit library required by SteamCMD. libvorbisfile3 is required by the Starbound server.
SteamCmd
The Steam Console Client or SteamCMD [1] is a command-line version of the Steam client. Its primary use is to install and update various dedicated servers available on Steam using a command-line interface.
This section will help you install the SteamCMD application used to download the Starbound dedicated server.
Download and Install
Create a non-admin user to install/update/run the server application.
Switch to this new user.
Create a directory for the SteamCMD client and enter it.
Download the SteamCMD application.
Extract the archive.
[ Optional ] Verify files are available in the directory.
Running And Downloading Server With SteamCMD
Downloading The Dedicated Server
Run the SteamCMD client.
When you start the application, you will notice that your prompt switches to steam> instead of the traditional prompt. We will now login for the first time with our steam account and we will install the server files.
SECURITY NOTE: in the following, especially the update script, putting your password in spot of
might risk your Steam account security. It is recommended to leave it out, in which case you will be prompted for your password when you update.
Tip: The directory can be named anything and be put anywhere (e.g. ./starbound_server, /home/steam/starbound, etc.). Do not use
/ to represent the home directory for the user, user the full path instead.
Updating The Server
When Starbound updates, we want to make sure the server is up to date so your players will be able to continue playing on it. This section will help you create a script you can run to keep the server updated.
Use vim to create the shell script.
Write the script that will run SteamCMD and update the server. Press i to enter insert mode.
Tip: Save and quit vim by pressing esc to leave insert mode and then using the vim command :wq .
Change the permissions of the script so it can be executed while at the same time unreadable by other users.
Run the script with the following command every time you want to update the Starbound server.
Running The Server
This section will help you on running the server once it has been downloaded and updated.
Change into the Starbound server directory for Linux.
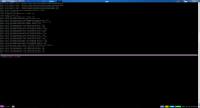
Once the server starts, you should see something similar to the following output
Congratulations! You’re now successfully running your server.
Tip: To shutdown your server, press ctrl + c .
Advanced Usage
This section provides advanced usage for server admins wishing to run their server while not having to be connected to the terminal. There are two main ways to accomplish this: using an init system, or using a terminal multiplexer.
systemd
systemd is an init system that is built into most linux systems including Ubuntu and Debian. It manages the services that start with the server. The Starbound server can be setup as a service for systemd to manage. To use systemd services, your server operating system must use systemd as its init system. [2]
Create a file in /etc/systemd/system/starbound-server.service or the corresponding systemd service location.
Open the file for editing.
In the following example, the server will run as the steam user created above.
Refresh systemd using the systemctl command. [3]
To start the server, use the start command.
You can verify that it is running with the status command.
The result should look like the following.
You can use the stop command to shutdown the server gracefully.
To start the server upon boot you can use the enable command.
To keep the server from starting on boot use the disable command.
Terminal Multiplexers
Multiplexers allow you to use multiple terminal sessions in a single session. Multiplexers will also allow you to start the Starbound server and disconnect the session without killing the server.
GNU Screen
GNU Screen [4] is a multiplexer which should be installed by default on most linux distributions.
If Screen is not installed you can install it with your package manager.
A new terminal session will open up. You can type commands exactly as before.
Enter server directory and run the server.
To disconnect from the screen session, press ctrl + a d . This detaches from the session but it will still be running in the background.
Next time you want to access that terminal session, simply use:
This resumes the previous screen session.
Byobu
I will use byobu in a split screen environment. (Note that all commands are to be executed by your non-admin user)
- If you use windows and access the server via SSH, you will need to set your ssh client to UTF-8 translation and Xterm R6 type of function keys/keypad
- The first step is to tell byobu to start automatically on login for our non-admin user
- You can now press ctrl + a which will ask you if you want to have ctrl + a used as if you use screen or emacs. This is due to the conflict between the two applications. In screen, ctrl + a is used to send commands to the application, while in emacs ctrl + a is used to go to the begining of the line. For this guide we will use the screen type
- Once we are back in our shell inside byobu, it is time to split the screen by pressing ctrl + a then pressing |
- Now our screen is split in two panes horizontally. To switch between the two, we only need to press ctrl + a then press the Tab button.
- On the top tab, navigate to the starbound server folder and start the starbound server
- On the bottom tab, simply navigate to the steam folder. This tab will be used to update the server files. I have this setup as it is more convenient than switching directories all the time.
Voila, you now have a fully running starbound server. Note that I did not do any port forwarding as it is something you should learn before tackling installing a server appliance. To disconnect from your byobu session, you simply need to press F6
Источник
Starbound dedicated server linux
ok before it was a topic about getting help, now it’s about giving help!
Quick setup guide for running a Dedicated Starbound Server on Linux (Ubuntu/Debian)!
This is a quick step by step guide on how I managed to get it working on a fresh install of Ubuntu Server 64-bit v13.10. I’m not going to really sugar coat steps, you should have some basic understanding of working a linux terminal through SSH/Putty or if you’re using VMware through the console there.
1) Install the Libraries
$ sudo apt-get install libsdl1.2debian libvorbisfile3
2) Using your preferred FTP method (in my case vsftpd with CuteFTP 9), upload the linux64 and assets directories into your home directory. For me I found it was faster to archive the assets folder into a ZIP file and upload the zip file, then unarchive it using unzip through the terminal.
Once you’re done it should look like this:
3) chmod both directories to 777
$ sudo chmod 777 assets/
$ sudo chmod 777 linux64/
4) Navigate to the linux64 directory to launch the server, personally I like using screen sessions so I can terminate my console session without killing the process.
/linux64$ screen -dmS starbound ./starbound_server
Voila, you should now have a dedicated server running on Linux for Starbound.
Ctrl+A+D will detach the current screen session returning you to the terminal prompt
To reattach to the session:
Источник
Starbound dedicated server linux


| 407 | уникальных посетителей |
| 3 | добавили в избранное |

Selecting a host can be difficult especially when you don’t know what you are doing. I’ve layed out a guide to make things much easier for you. If you are planning on having a small server then I’d just choose Digital Ocean.
If you would like to support me then use this link 🙂
If you like this guide then please give a
For this I used https://www.digitalocean.com/?refcode=602b8fcc8c76 because I was able to get free $10 (Also if you are a college student then you can get $50 free to use from their Student Developer Pack) Check Github page for more infomation.
1. Create an account on https://www.digitalocean.com/?refcode=602b8fcc8c76 and add some funds
2. Go to Droplets and click on Create Droplet
3. Select Ubuntu 16.04 x64
4. Pick the size of of server you want
1GB for maybe 1-2 users
2GB for more and so on
(You really should use 2GB at the minimum)
5. Pick Region close to you or where ever
6. Enter a sbserver in the hostname field
7. Click Create Droplet at the bottom
You’ll be emailed the IP and password
1. Download putty [the.earth.li]
2. Open Putty and in the Host Name field enter the IP address you got in the email and click open
3. Putty alert will pop up, go ahead and click yes
4. A black prompt should pop up so type
5. Copy the password from the email and left clicking the putty window will paste it.
6. It should ask you to change your password so follow the on screen prompts.
We will be installing SBServers which is a wonderful server management setup and makes it easy for us to run our server.
Before we do anything we need to install dependencies required for steam, starbound, and sbserver.
Run this command::
Now we need to make swap space so starbound doesn’t crash when loading new planets and outpost.
Run this command:
It should show Swap with a total of 1.0G
Now we need to make a user for the server to run with because you should never just use root
Run this command:
It will ask for a you to set a password for the user sbserver and then will ask you a bunch of information so just hit enter to skip them. It should ask if all the info is correct, just type Y and hit enter.
Now lets switch to the user sbserver
Run this command:
Time to download the files that we need for the server and make it an executable.
Run this command:
Run this command:
Run this command:
We now need to add your steam login so sbserver can download starbound
Run this command:
you will need to paste this at the bottom and replace the infomation with your steam login, steam password, and droplet ip
Now we can run SBserver so it can download the server files
Run this command:
It’s going to ask what root directory you can to install the game files and folders. I just normally hit enter and use the same folder as sbserver.
If it asks for the steam guard then you’ll need to enter in the code you get in your email or steam mobile app.
if everything goes smooth just hit enter when it asks
Now we can run start the starbound server 🙂
Run this command:
and now it should be up and running, enjoy starbound.
Sbserver supports an array of different commands and can be found here
https://gameservermanagers.com/lgsm/sbserver/
If you need to edit starbound’s config file
Run this command:


Looks great, thanks for updating it. I was setting it up yesterday at the same time their website went nuts. I tried to set it up again on another user and noticed that the direcotry structure «lgsm/config-lgsm/sbserver/common.cfg» does not exist at the time. I had to run «./sbserver install» and let it crash — because of missing Steam credentials. But the script creates those directories and you can edit them then. Looks to me like they have the same mistake on the website.
What Droplet do you use on Digital Ocean? I tried the 512 MB RAM for 5 USD and looks like it is working fine. Maybe it takes a little longer visiting new locations. Two players. Is there some benefit of using more powerful Droplet?
Источник


