- Руководство по Jenkins
- Как установить Jenkins
- Windows
- Prerequisites
- Installation steps using Windows MSI installer
- Post-installation setup wizard
- Unlocking Jenkins
- Customizing Jenkins with plugins
- Creating the first administrator user
- Troubleshooting Windows installation
- Invalid service logon credentials
- How to Download & Install Jenkins on Windows
- How to Download Jenkins?
- How to Unblock Jenkins?
- Customize Jenkins
Руководство по Jenkins
В руководстве мы расскажем, зачем нужен Jenkins, а также покажем, как установить Jenkins на Ubuntu.
Jenkins — это сервис, с помощью которого можно автоматизировать процесс непрерывной интеграции программного обеспечения. Непрерывная интеграция (Continuous Integration) — один из этапов разработки, на котором происходит сборка рабочих копий проекта в единый макет-черновик, их тестирование, доставка или развёртывание программного обеспечения. Во время интеграции можно выявить слабые места и возможные ошибки в проекте и сразу их исправить.
На этапе интеграции разработчики объединяют код вручную, что занимает много времени. Jenkins позволяет автоматизировать этот этап. Сервис подойдёт как для профессионалов, так и для начинающих специалистов.
- имеет открытый исходный код, написанный на Java;
- поддерживает свыше 1000 плагинов для интеграции с инструментами тестирования, разработки и деплоя;
- работает больше чем в двух средах одновременно без потери эффективности;
- Jenkins хорошо подойдёт для проектов, которые написаны на Python;
- оптимизирует рабочий процесс: вам не нужно нанимать штат профессиональных программистов, в Jenkins можно разобраться даже без специальной подготовки;
- выявляет и устраняет нестандартные ошибки без привлечения человека;
- минимизирует количество ошибок, возникающих в связи с человеческим фактором.
Jenkins можно установить на Windows, macOS, Debian, Ubuntu, CentOS и другие операционные системы. Также Jenkins можно установить через системные пакеты, Docker или запустить автономно на любом компьютере с настроенной Java Runtime Environment (JRE).
Jenkins можно установить с официального сайта одним из двух способов: скачать из раздела «Download» или использовать команды из раздела «Documentation». Для Jenkins документация на русском не разработана, однако именно в этом разделе можно найти рекомендации для быстрой установки. Поэтому установим Jenkins на Ubuntu версий 16.04/18.04/20.04 вторым способом.
Как установить Jenkins
Для Jenkins системные требования следующие:
- 256 Мб оперативной памяти,
- минимум 1 Гб дискового пространства при установке на ОС и 10 Гб при запуске в качестве контейнера Docker.
Windows
The simplest way to install Jenkins on Windows is to use the Jenkins Windows installer. That program will install Jenkins as a service using a 64 bit JVM chosen by the user. Keep in mind that to run Jenkins as a service, the account that runs Jenkins must have permission to login as a service.
Prerequisites
Minimum hardware requirements:
1 GB of drive space (although 10 GB is a recommended minimum if running Jenkins as a Docker container)
Recommended hardware configuration for a small team:
50 GB+ of drive space
Comprehensive hardware recommendations:
For Windows operating system: Windows Support Policy
Installation steps using Windows MSI installer
Refer to the Windows section of the Downloading Jenkins page to download either an LTS release or a weekly release of the Windows installer. After the download completes, open the Windows installer and follow the steps below to install Jenkins.
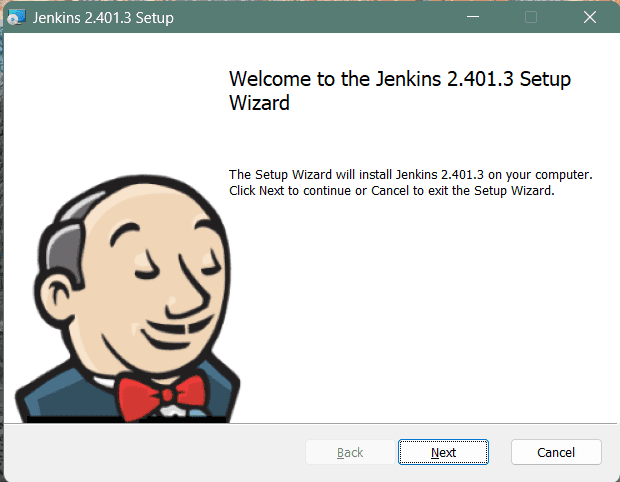
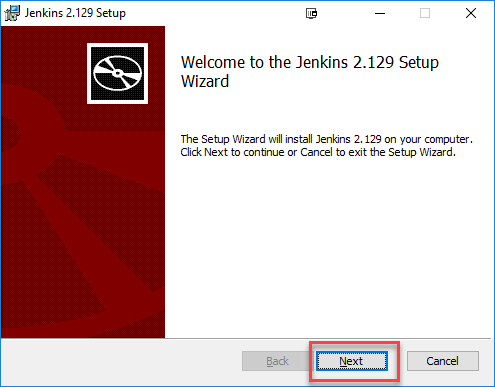
On opening the Windows Installer, an Installation Setup Wizard appears, Click Next on the Setup Wizard to start your installation.
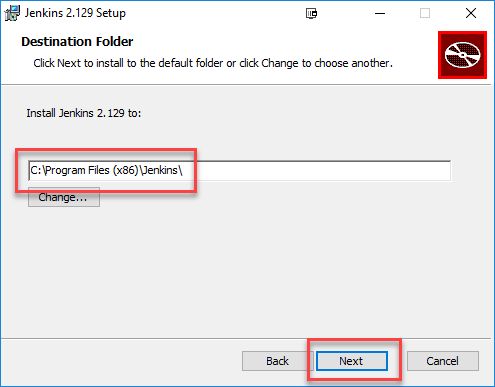
Select the destination folder to store your Jenkins Installation and click Next to continue.

When Installing Jenkins, it is recommended to install and run Jenkins as an independent windows service using a local or domain user as it is much safer than running Jenkins using LocalSystem(Windows equivalent of root) which will grant Jenkins full access to your machine and services.
To run Jenkins service using a local or domain user, specify the domain user name and password with which you want to run Jenkins, click on Test Credentials to test your domain credentials and click on Next.
| If you get Invalid Logon Error pop-up while trying to test your credentials, follow the steps explained here to resolve it. |
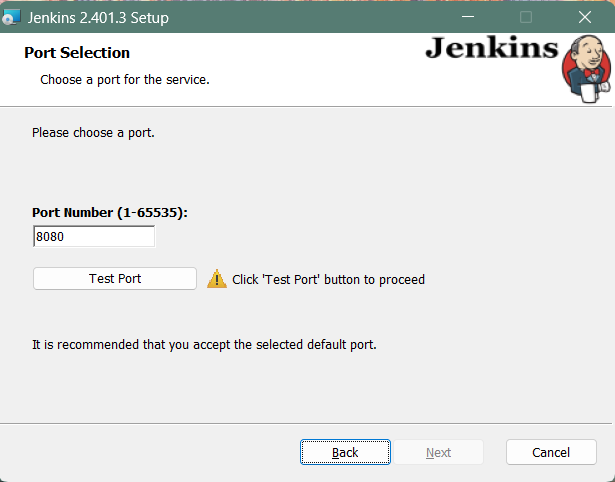
Specify the port on which Jenkins will be running, Test Port button to validate whether the specified port if free on your machine or not. Consequently, if the port is free, it will show a green tick mark as shown below, then click on Next.
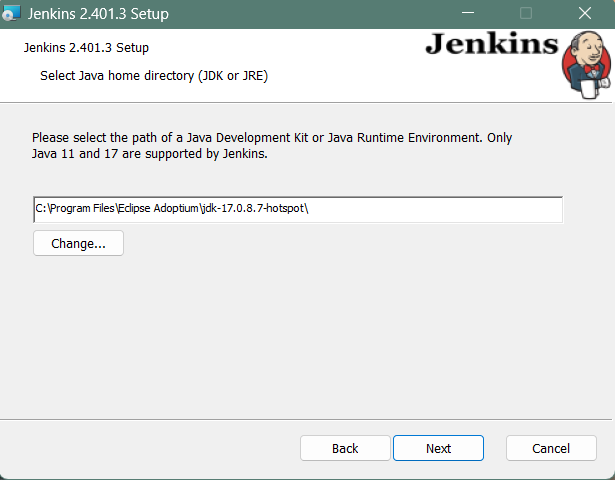
The installation process checks for Java on your machine and prefills the dialog with the Java home directory. If the needed Java version is not installed on your machine, you will be prompted to install it.
Once your Java home directory has been selected, click on Next to continue.
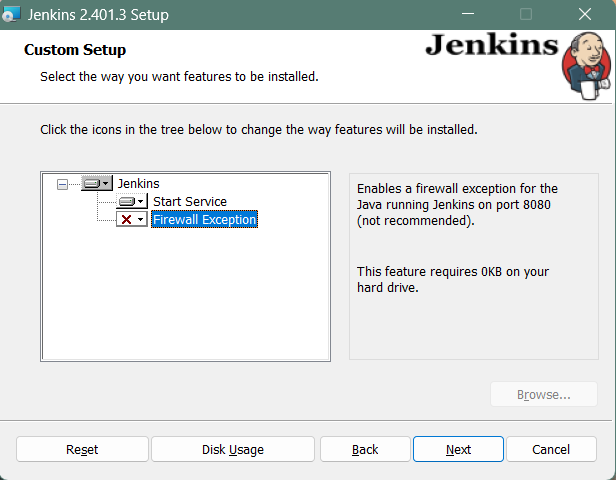
Select other services that need to be installed with Jenkins and click on Next.
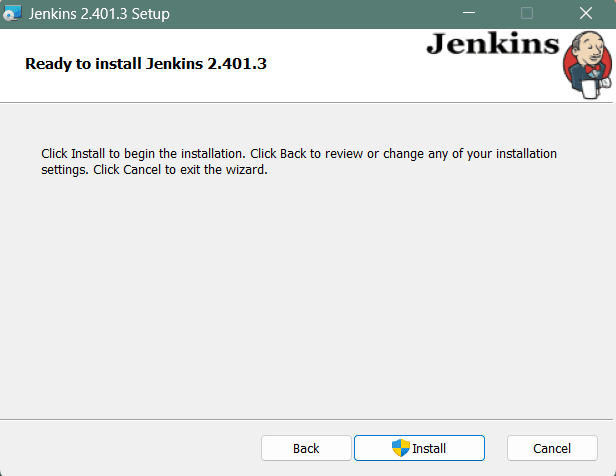
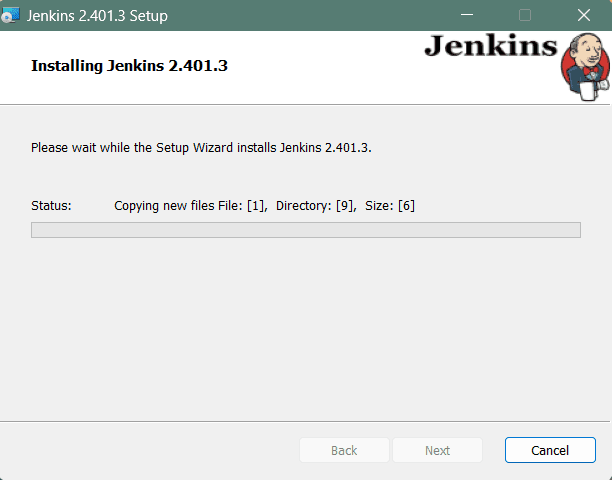
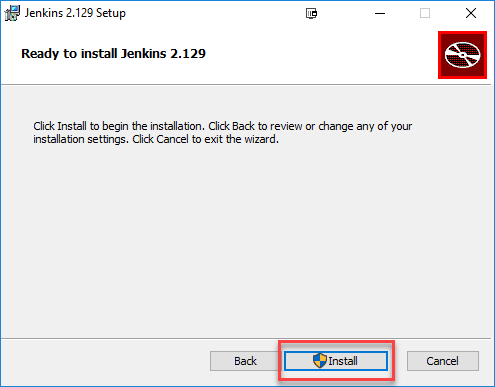
Click on the Install button to start the installation of Jenkins.
Additionally, clicking on the Install button will show the progress bar of installation, as shown below:
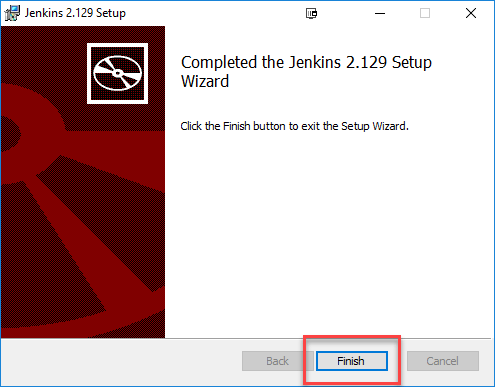
Once the installation completes, click on Finish to complete the installation.
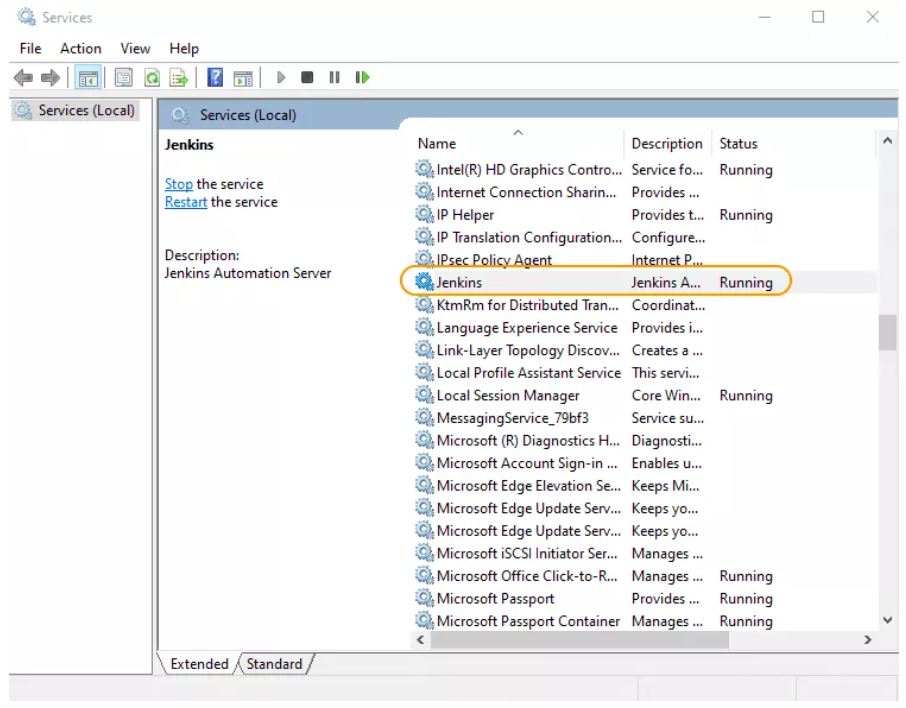
Jenkins will be installed as a Windows Service. You can validate this by browsing the services section, as shown below:
| See the upgrade steps when you upgrade to a new release. |
Post-installation setup wizard
After downloading, installing and running Jenkins, the post-installation setup wizard begins.
This setup wizard takes you through a few quick «one-off» steps to unlock Jenkins, customize it with plugins and create the first administrator user through which you can continue accessing Jenkins.
Unlocking Jenkins
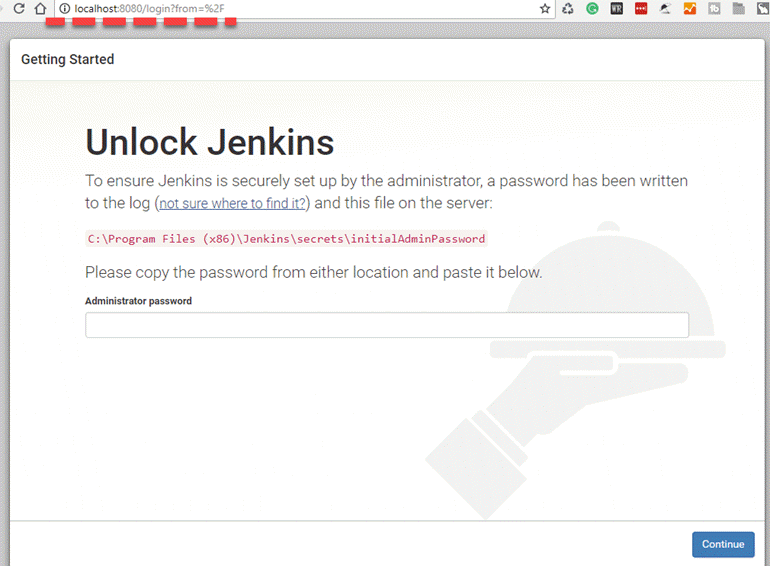
When you first access a new Jenkins instance, you are asked to unlock it using an automatically-generated password.
Browse to http://localhost:8080 (or whichever port you configured for Jenkins when installing it) and wait until the Unlock Jenkins page appears.
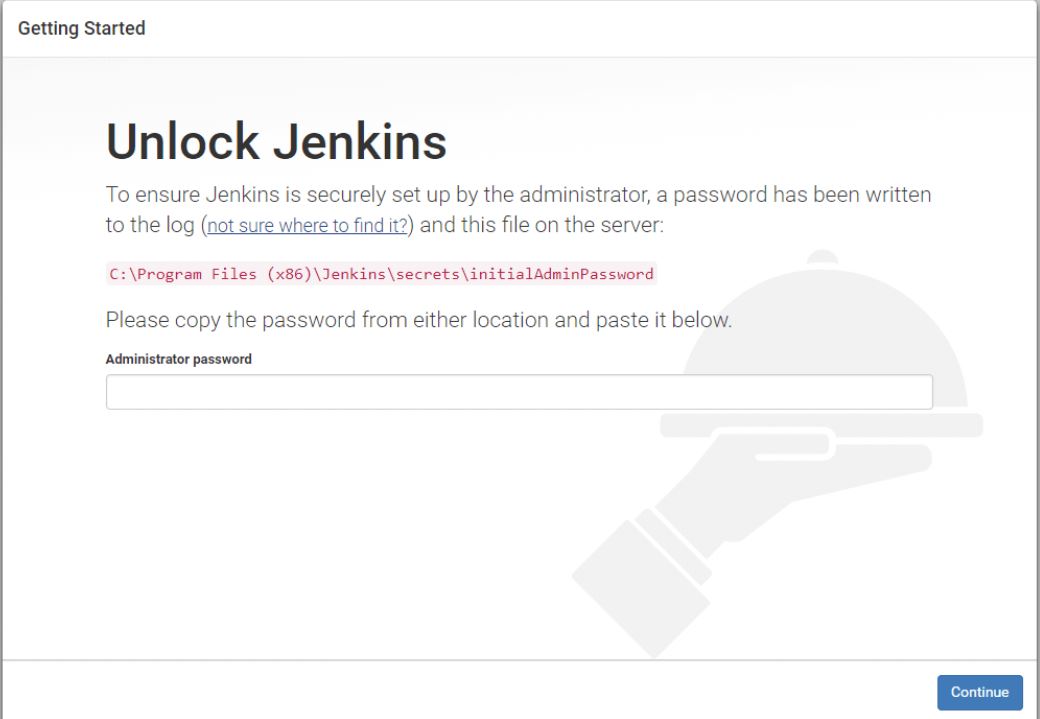
The initial Administrator password should be found under the Jenkins installation path (set at Step 2 in Jenkins Installation).
For default installation location to C:\Program Files\Jenkins, a file called initialAdminPassword can be found under C:\Program Files\Jenkins\secrets.
However, If a custom path for Jenkins installation was selected, then you should check that location for initialAdminPassword file.
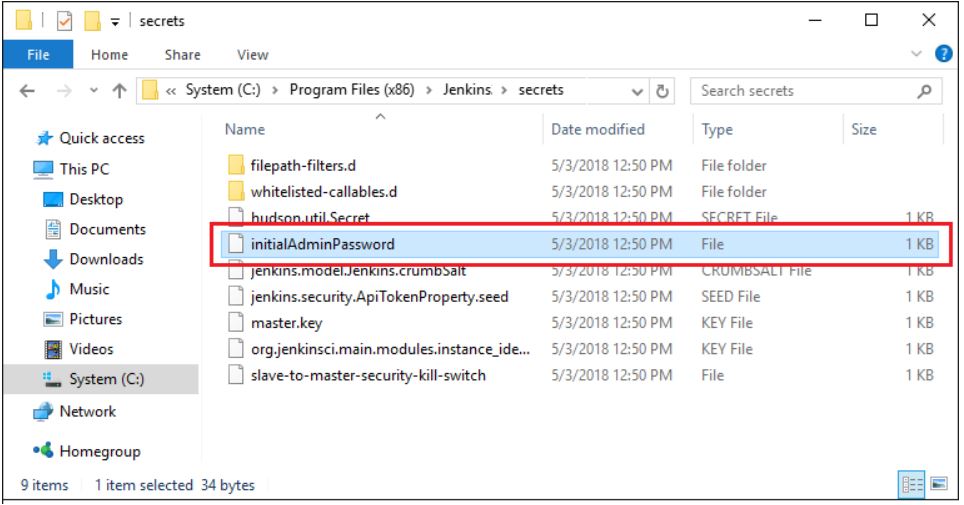
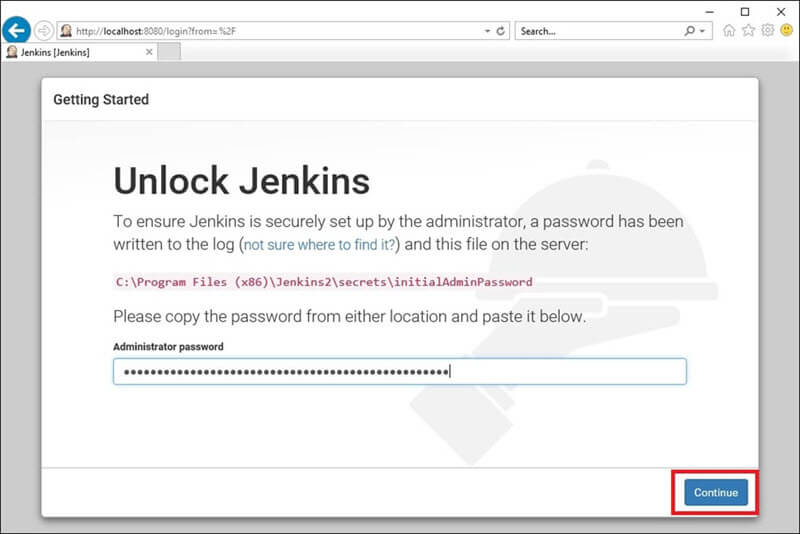
Open the highlighted file and copy the content of the initialAdminPassword file.

On the Unlock Jenkins page, paste this password into the Administrator password field and click Continue.
Notes:
You can also access Jenkins logs in the jenkins.err.log file in your Jenkins directory specified during the installation.
The Jenkins log file is another location (in the Jenkins home directory) where the initial password can also be obtained. 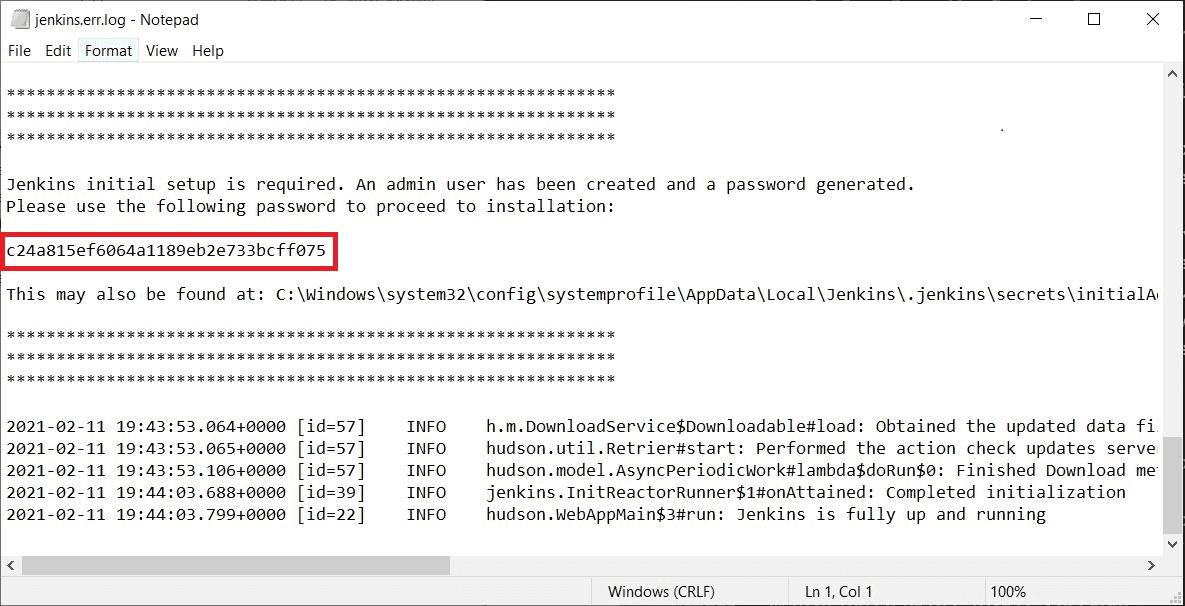 This password must be entered in the setup wizard on new Jenkins installations before you can access Jenkins’s main UI. This password also serves as the default admininstrator account’s password (with username «admin») if you happen to skip the subsequent user-creation step in the setup wizard.
Customizing Jenkins with plugins
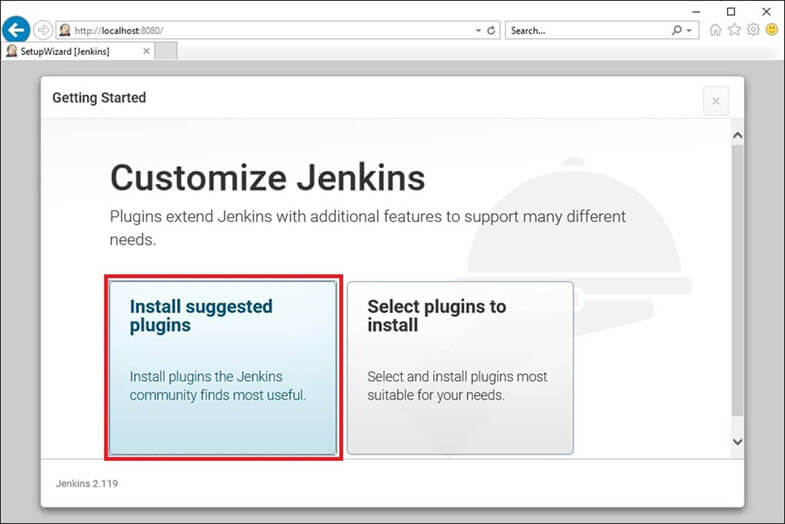
After unlocking Jenkins, the Customize Jenkins page appears. Here you can install any number of useful plugins as part of your initial setup.
Click one of the two options shown:
Install suggested plugins — to install the recommended set of plugins, which are based on most common use cases.
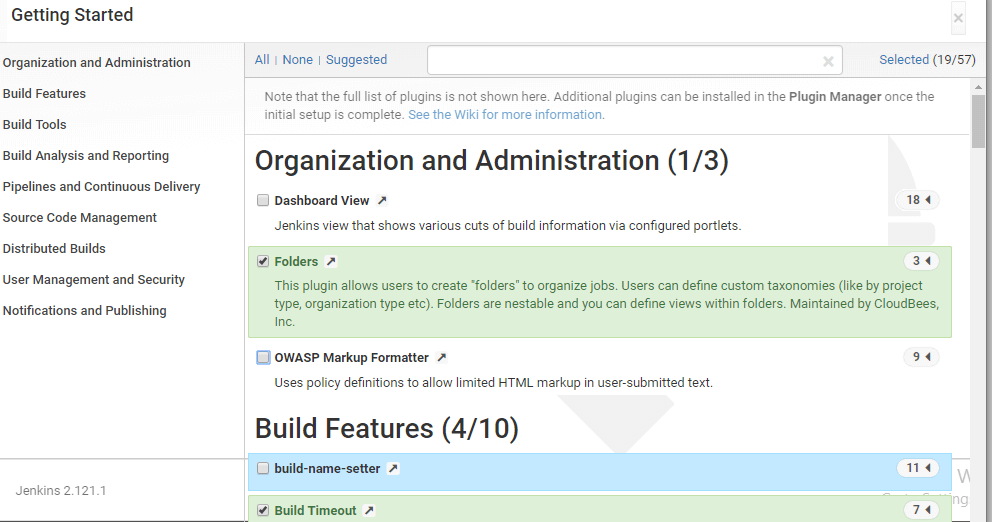
Select plugins to install — to choose which set of plugins to initially install. When you first access the plugin selection page, the suggested plugins are selected by default.
| If you are not sure what plugins you need, choose Install suggested plugins. You can install (or remove) additional Jenkins plugins at a later point in time via the Manage Jenkins > Manage Plugins page in Jenkins. |
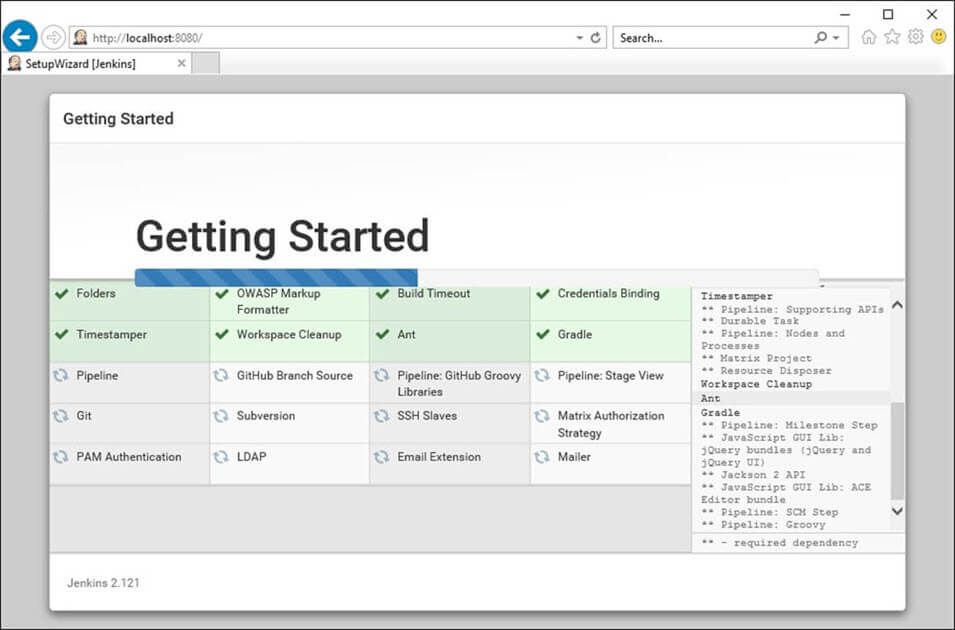
The setup wizard shows the progression of Jenkins being configured and your chosen set of Jenkins plugins being installed. This process may take a few minutes.
Creating the first administrator user
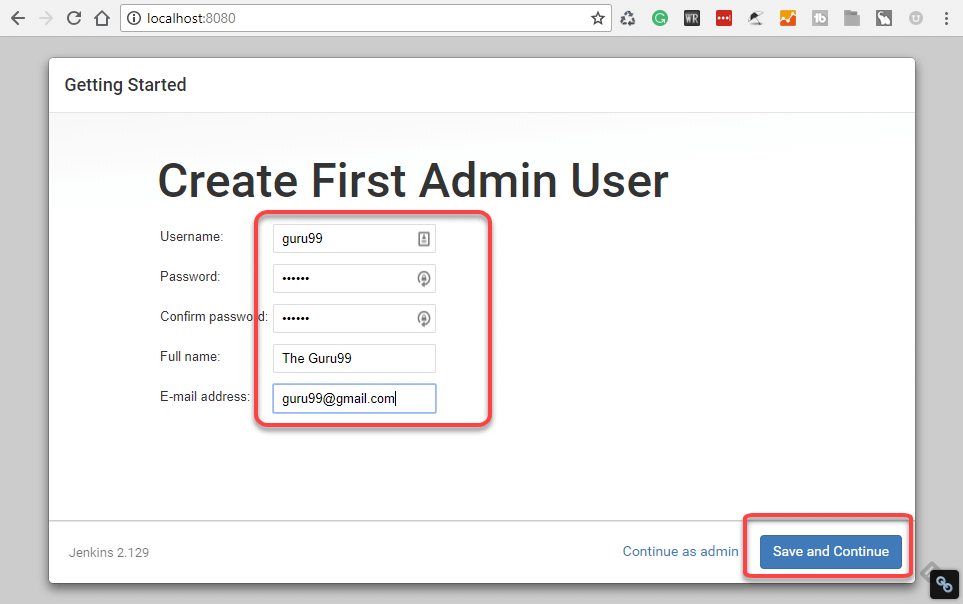
Finally, after customizing Jenkins with plugins, Jenkins asks you to create your first administrator user.
When the Create First Admin User page appears, specify the details for your administrator user in the respective fields and click Save and Finish.
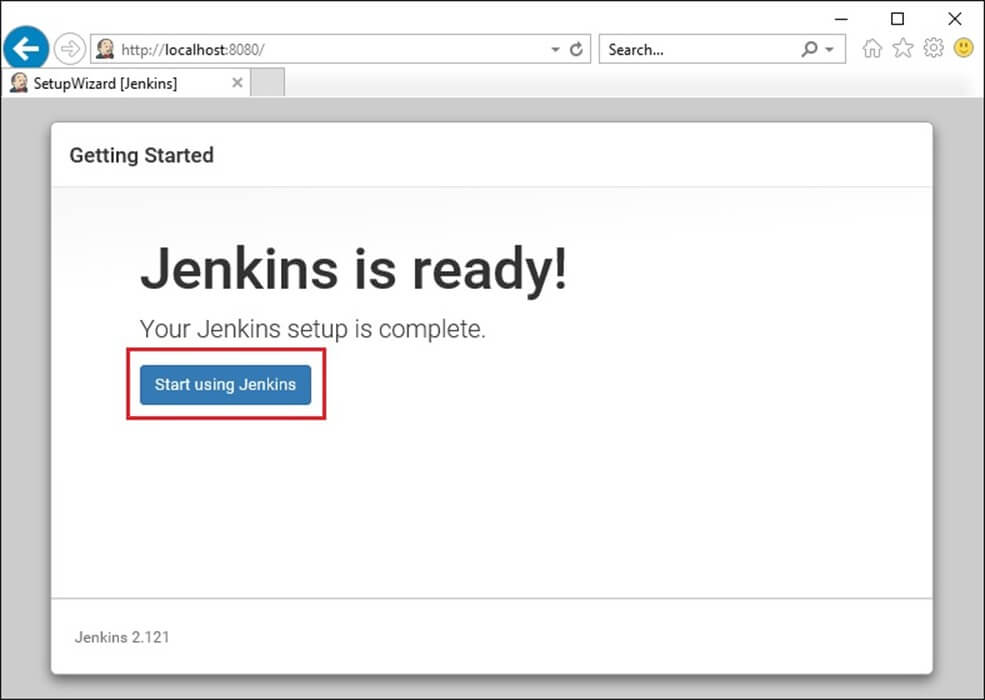
When the Jenkins is ready page appears, click Start using Jenkins.
Notes:
This page may indicate Jenkins is almost ready! instead and if so, click Restart.
If the page does not automatically refresh after a minute, use your web browser to refresh the page manually.
If required, log in to Jenkins with the credentials of the user you just created and you are ready to start using Jenkins!
Troubleshooting Windows installation
Invalid service logon credentials
When installing a service to run under a domain user account, the account must have the right to logon as a service. This logon permission applies strictly to the local computer and must be granted in the Local Security Policy.
Perform the following steps below to edit the Local Security Policy of the computer you want to define the вЂlogon as a service’ permission:
Logon to the computer with administrative privileges.
Open the Administrative Tools and open the Local Security Policy
Expand Local Policy and click on User Rights Assignment
In the right pane, right-click Log on as a service and select properties.
Click on the Add User or Group… button to add the new user.
In the Select Users or Groups dialogue, find the user you wish to enter and click OK
Click OK in the Log on as a service Properties to save changes.
After completing the steps above, try logging in again with the added user.
How to Download & Install Jenkins on Windows
Jenkins may be installed on either Windows or Unix platforms, but we will focus on Windows installation only.
Prerequisites:
Before you proceed to install Jenkins in your windows system, there are some prerequisites for Jenkins to install Jenkins in your computer.
Hardware requirements:
- You need minimum 256 MB of RAM in your computer or laptop to install Jenkins
- You need at least 1 GB of space in your hard drive for Jenkins.
Software Requirements:
- Since Jenkins runs on Java, you need either latest version of Java Development Kit (JDK) or Java Runtime Environment (JRE).
Release Types
Jenkins releases two types of versions based on the organization needs.
- Long-term support release
- Weekly release
Long term support release (LTS) :
Long-term support releases are available every 12 weeks. They are stable and are widely tested. This release is intended for end users.
Weekly release:
Weekly releases are made available every week by fixing bugs in its earlier version. These releases are intended towards plugin developers.
We will use the LTS release though the process remains the same for Weekly release.
How to Download Jenkins?
Following steps should be followed so that to install Jenkins successfully:
Step 1) Got to https://www.jenkins.io/download/ and select the platform. In our case Windows

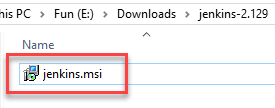
Step 2) Go to download location from local computer and unzip the downloaded package. Double-click on unzipped jenkins.msi. You can also Jenkin using a WAR (Web application ARchive) but that is not recommended.
Step 3) In the Jenkin Setup screen, click Next.
Step 4) Choose the location where you want to have the Jenkins instance installed (default location is C:\Program Files (x86)\Jenkins), then click on Next button.
Step 5)Click on the Install button.
Step 6) Once install is complete, click Finish.
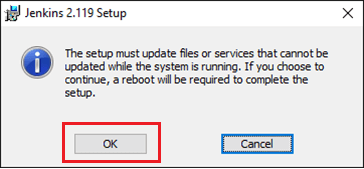
Step 7) During the installation process an info panel may pop-up to inform the user that for a complete setup, the system should be rebooted at the end of the current installation. Click on OK button when the Info panel is popping-up:
How to Unblock Jenkins?
After completing the Jenkins installation phase, you should proceed further and start its configuration. Next steps will guide you how you can unblock Jenkins application:
Step 1) After completing the Jenkins installation process, a browser tab will pop-up asking for the initial Administrator password. To access Jenkins, you need to go to browse the following path in your web browser.
If you can access the above URL, then it confirms that Jenkins is successfully installed in your system.
Step 2) The initial Administrator password should be found under the Jenkins installation path (set at Step 4 in Jenkins Installation).
For default installation location to C:\Program Files (x86)\Jenkins, a file called initialAdminPassword can be found under C:\Program Files (x86)\Jenkins\secrets.
However, If a custom path for Jenkins installation was selected, then you should check that location for initialAdminPassword file.
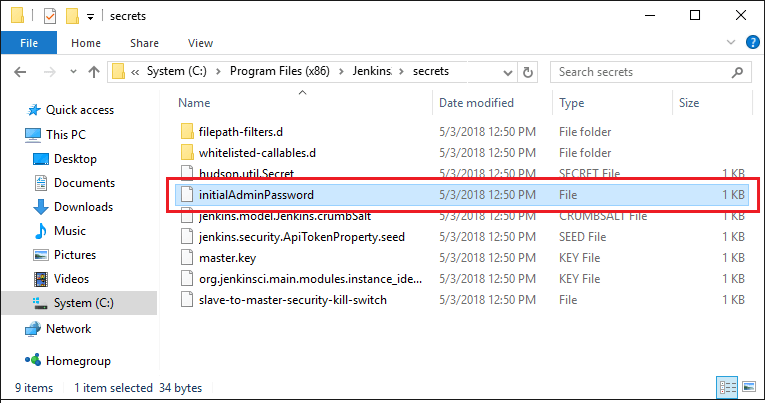
Step 3) Open the highlighted file and copy the content of the initialAdminPassword file.

Step 4) Paste the password it into browser’s pop-up tab (http://localhost:8080/login?form=%2F) and click on Continue button.
Customize Jenkins
You can also customize your Jenkins environment by below-given steps:
Step 1) Click on the «Install suggested plugins button» so Jenkins will retrieve and install the essential plugins
Jenkins will start to download and install all the necessary plugins needed to create new Jenkins Jobs.
Note: You can choose the Option «Select Plugins to Install» and select the plugins you want to install
Step 2) After all suggested plugins were installed, the «Create First Admin User» panel will show up. Fill all the fields with desired account details and hit the «Save and Finish» button.
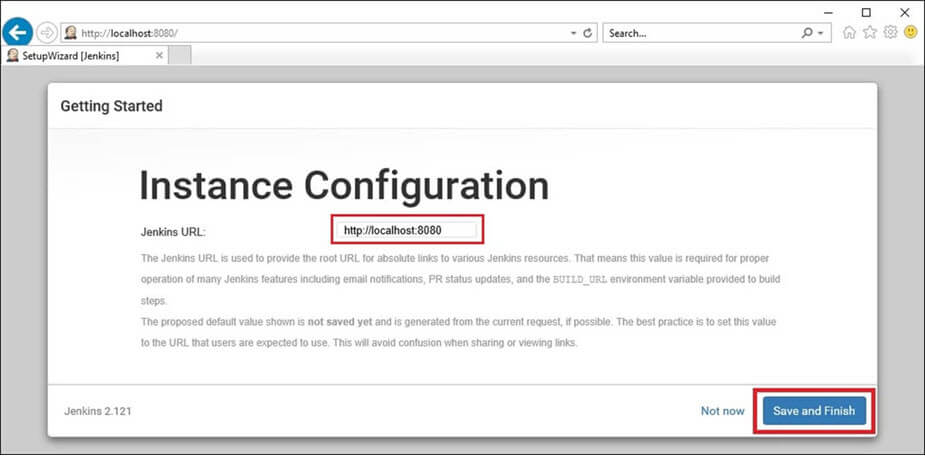
Step 3) Once you have filled the above data, finally it will ask for URL information where you can configure the default instance path for Jenkins. Leave it as it is to avoid any confusions later. However, if another application is already using 8080 port, you can use another port for Jenkins and finally save the settings, and you are done with installation of Jenkins. Hit the «Save and Continue» button:
Congratulations! We have successfully installed a new Jenkins Server. Hit the «Start using Jenkins» button.
Below you can find the Jenkins instance up and run, ready to create first Jenkins jobs:


