- Запуск Python и python-скрипт на компьютере
- Где запускать Python-скрипты и как?
- Запуск Python-кода интерактивно
- Интерактивный режим в Linux
- Интерактивный режим в macOS
- Интерактивный режим в Windows
- Запуск Python-скриптов в интерактивном режиме
- Как выполняются Python-скрипты?
- Блок-схема выполнения кода интерпретатором
- Как запускать Python-скрипты?
- Как запускать скрипт в командной строке?
- Запуск python скрипта в Linux
- Запуск python скрипта в Linux
- ilyasst / python_systemd.md
- Setup a python script as a service through systemctl/systemd
Запуск Python и python-скрипт на компьютере
Код, написанный на языке Python, может храниться в редакторе кода, IDE или файле. И он не будет работать, если не знать, как его правильно запускать.
В этом материале рассмотрим 7 способов запуска кода, написанного на Python. Они будут работать вне зависимости от операционной системы, среды Python или местоположения кода.
Где запускать Python-скрипты и как?
Python-код можно запустить одним из следующих способов:
- С помощью командной строки операционной системы (shell или терминал);
- С помощью конкретной версии Python или Anaconda;
- Использовать Crontab;
- Запустить код с помощью другого Python-скрипта;
- С помощью файлового менеджера;
- Использовать интерактивный режим Python;
- Использовать IDE или редактор кода.
Запуск Python-кода интерактивно
Для запуска интерактивной сессии нужно просто открыть терминал или командную строку и ввести python (или python3 в зависимости от версии). После нажатия Enter запустится интерактивный режим.
Вот как запустить интерактивный режим в разных ОС.
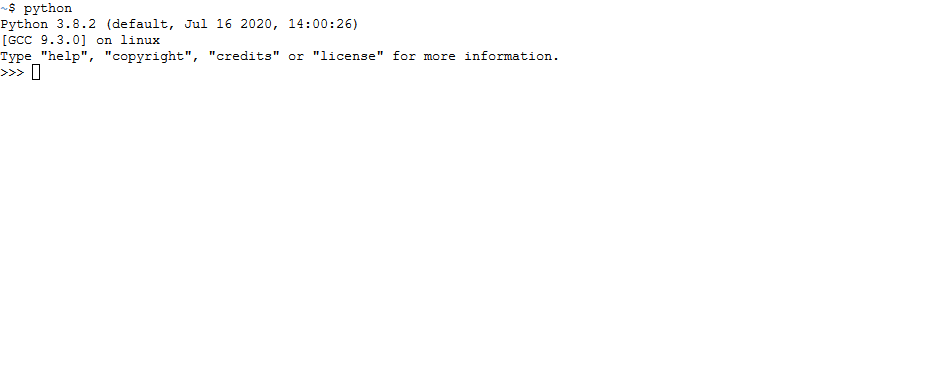
Интерактивный режим в Linux
Откройте терминал. Он должен выглядеть приблизительно вот так :
После нажатия Enter будет запущен интерактивный режим Python.
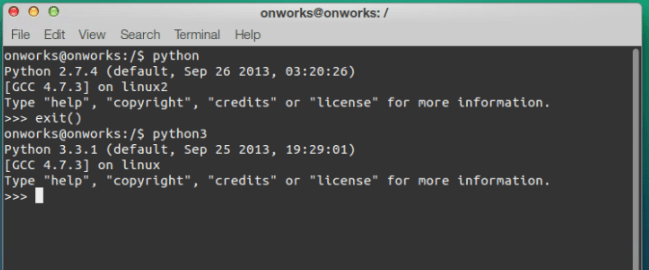
Интерактивный режим в macOS
На устройствах с macOS все работает похожим образом. Изображение ниже демонстрирует интерактивный режим в этой ОС.
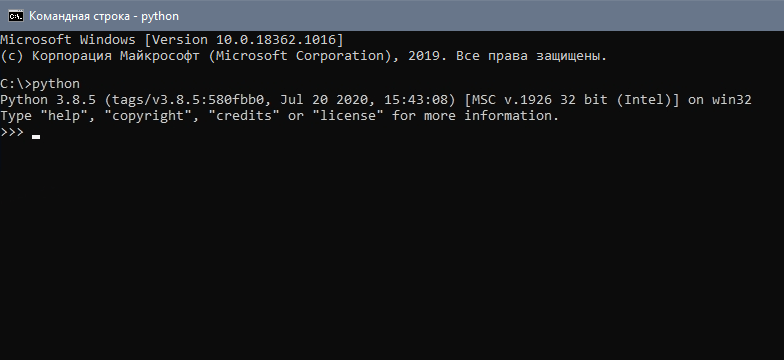
Интерактивный режим в Windows
В Windows нужно открыть командную строку и ввести python . После нажатия Enter появится приблизительно следующее:
Запуск Python-скриптов в интерактивном режиме
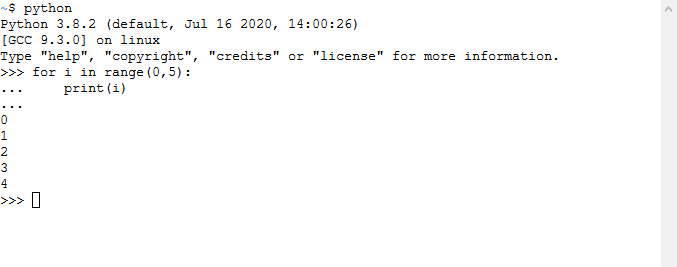
В таком режиме можно писать код и исполнять его, чтобы получить желаемый результат или отчет об ошибке. Возьмем в качестве примера следующий цикл.
Этот код должен выводить целые числа от 0 до 5. В данном случае вывод — все, что появилось после print(i) .
Для выхода из интерактивного режима нужно написать следующее:
И нажать Enter. Вы вернетесь в терминал, из которого и начинали.
Есть и другие способы остановки работы с интерактивным режимом Python. В Linux нужно нажать Ctrl + D, а в Windows — Ctrl + Z + Enter.
Стоит отметить, что при использовании этого режима Python-скрипты не сохраняются в локальный файл.
Как выполняются Python-скрипты?
Отличный способ представить, что происходит при выполнении Python-скрипта, — использовать диаграмму ниже. Этот блок представляет собой скрипт (или функцию) Python, а каждый внутренний блок — строка кода.
При запуске скрипта интерпретатор Python проходит сверху вниз, выполняя каждую из них. Именно таким образом происходит выполнение кода.
Но и это еще не все.
Блок-схема выполнения кода интерпретатором
- Шаг 1: скрипт или .py-файл компилируется, и из него генерируются бинарные данные. Готовый файл имеет расширение .pyc или .pyo.
- Шаг 2: генерируется бинарный файл. Он читается интерпретатором для выполнения инструкций.
Это набор инструкций, которые приводят к финальному результату.
Иногда полезно изучать байткод. Если вы планируете стать опытным Python-программистом, то важно уметь понимать его для написания качественного кода.
Это также пригодится для принятия решений в процессе. Можно обратить внимание на отдельные факторы и понять, почему определенные функции/структуры данных работают быстрее остальных.
Как запускать Python-скрипты?
Для запуска Python-скрипта с помощью командной строки сначала нужно сохранить код в локальный файл.
Возьмем в качестве примера файл, который был сохранен как python_script.py. Сохранить его можно вот так:
- Создать Python-скрипт из командной строки и сохранить его,
- Создать Python-скрипт с помощью текстового редактора или IDE и сохранить его. Просто создайте файл, добавьте код и сохраните как «python_script.py»
Сохранить скрипт в текстовом редакторе достаточно легко. Процесс ничем не отличается от сохранения простого текстового файла.
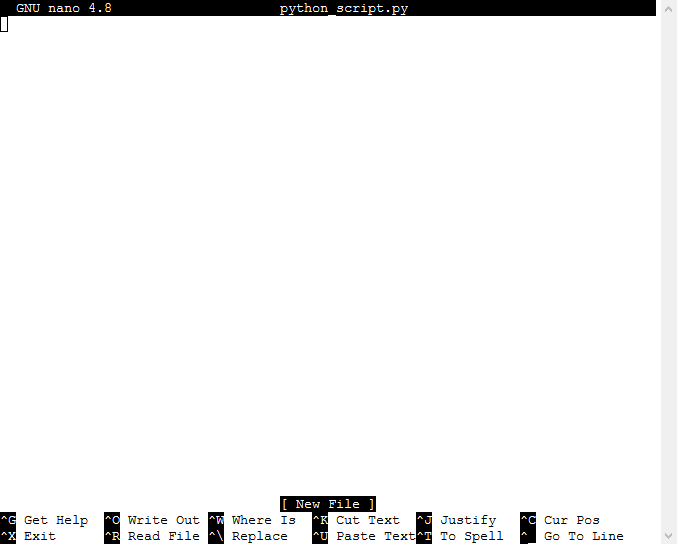
Но если использовать командную строку, то здесь нужны дополнительные шаги. Во-первых, в самом терминале нужно перейти в директорию, где должен быть сохранен файл. Оказавшись в нужной папке, следует выполнить следующую команду (на linux):
После нажатия Enter откроется интерфейс командной строки, который выглядит приблизительно следующим образом:
Теперь можно писать код и с легкостью сохранять его прямо в командной строке.
Как запускать скрипт в командной строке?
Скрипты можно запустить и с помощью команды Python прямо в интерфейсе терминала. Для этого нужно убедиться, что вы указали путь до него или находитесь в той же папке. Для выполнения скрипта (python_script.py) откройте командную строку и напишите python3 python_script.py .
Замените python3 на python , если хотите использовать версию Python2.x.
Источник
Запуск python скрипта в Linux
Python — очень популярный язык программирования для написания различных системных скриптов в Linux. В Windows, там где не хватает возможностей командной оболочки используется PowerShell. В Linux же, когда возможностей Bash не хватает используется язык Python.
На этом языке написано огромное количество системных программ, среди них пакетный менеджер apt, видеоредактор OpenShot, а также множество скриптов, которые вы можете установить с помощью утилиты pip. В этой небольшой статье мы рассмотрим как запустить Python скрипт в Linux с помощью терминала различными способами.
Запуск python скрипта в Linux
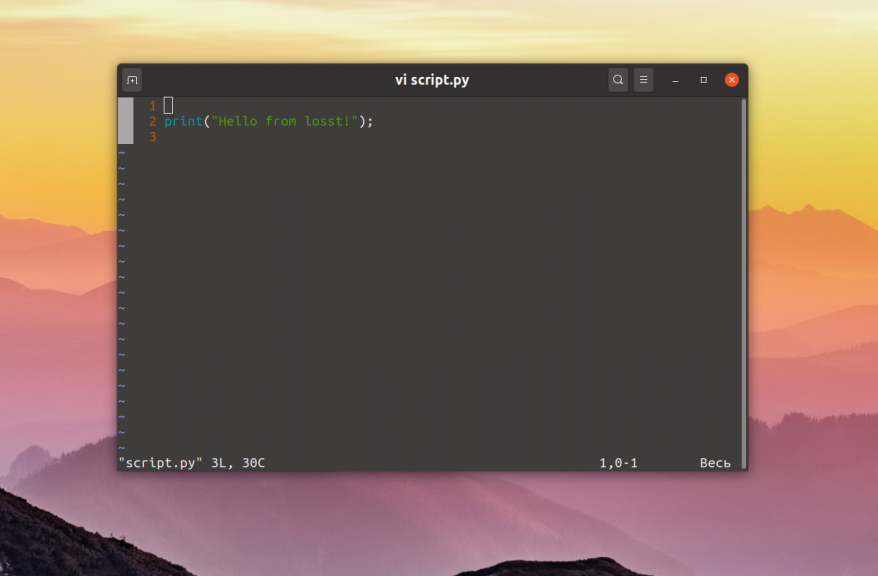
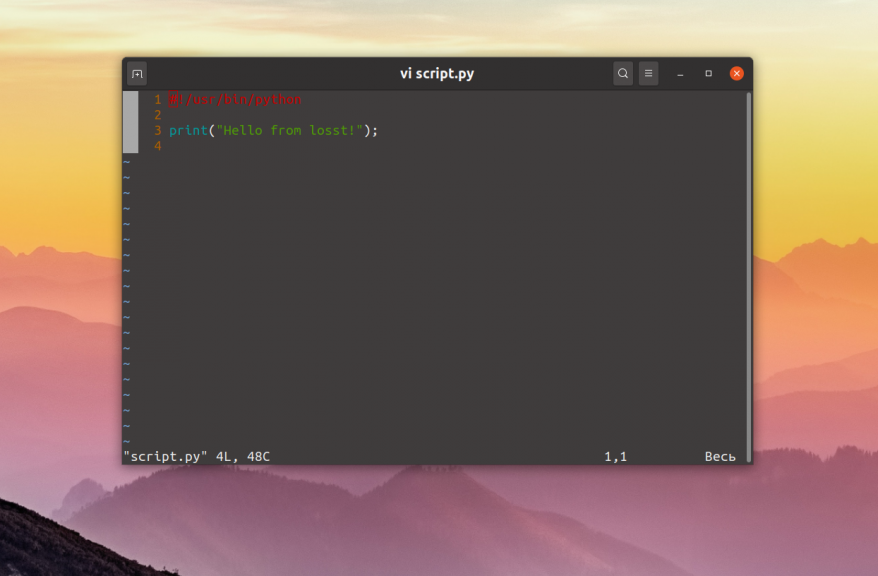
Для примера нам понадобится Python скрипт. Чтобы не брать какой-либо из существующих скриптов, давайте напишем свой:
print(«Hello from losst!»)
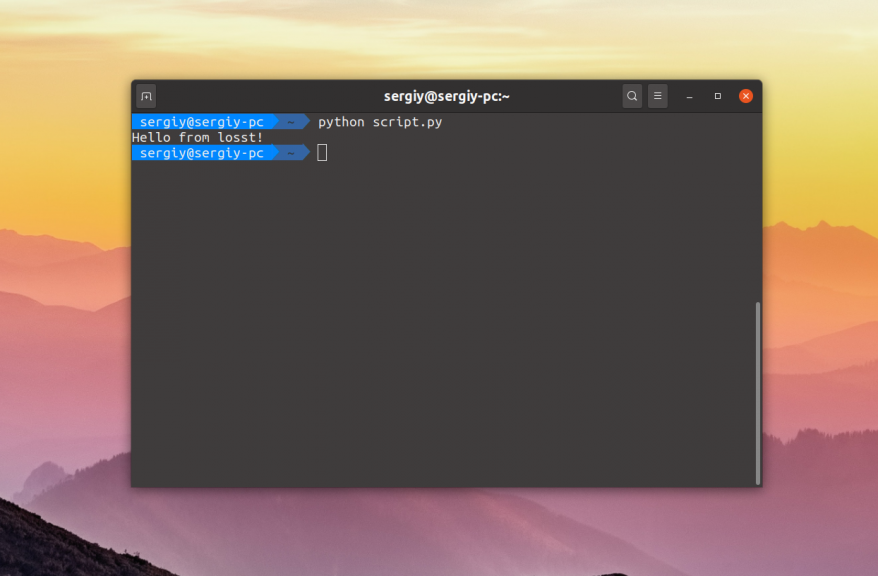
Для того чтобы запустить скрипт необходимо передать его интерпретатору Python. Для этого просто откройте терминал с помощью сочетания клавиш Ctrl + Alt + T, перейдите в папку со скриптом и выполните:
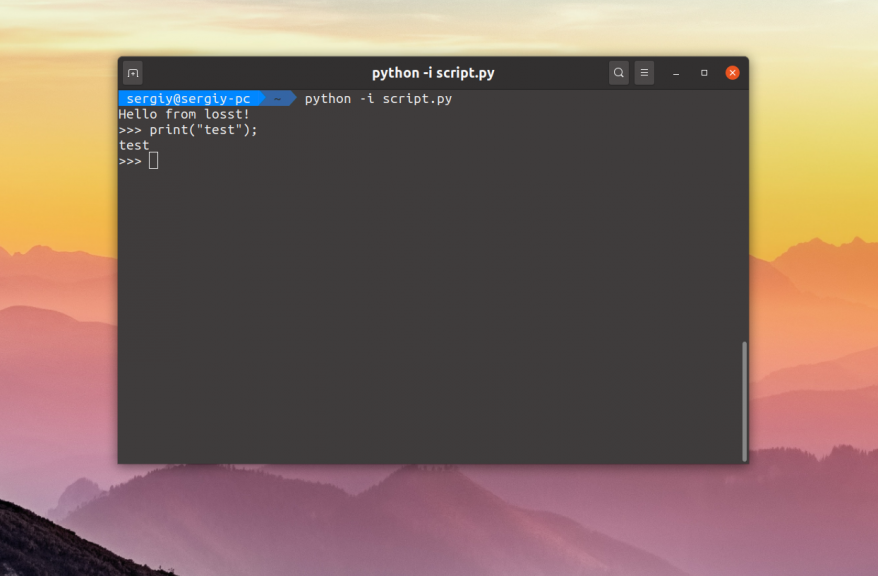
Если вы хотите, чтобы после выполнения скрипта открылась консоль, в которой можно интерактивно выполнять команды языка Python используйте опцию -i:
python -i script.py
Но как вы могли заметить, при запуске apt или openshot не надо писать слово python. Это намного удобнее. Давайте разберемся как это реализовать. Если вы не хотите указывать интерпретатор в командной строке, его надо указать в самом скрипте. Для этого следует в начало скрипта добавить такую строчку:
Сохраните изменения, а затем сделайте файл скрипта исполняемым с помощью такой команды:
chmod ugo+x script.py
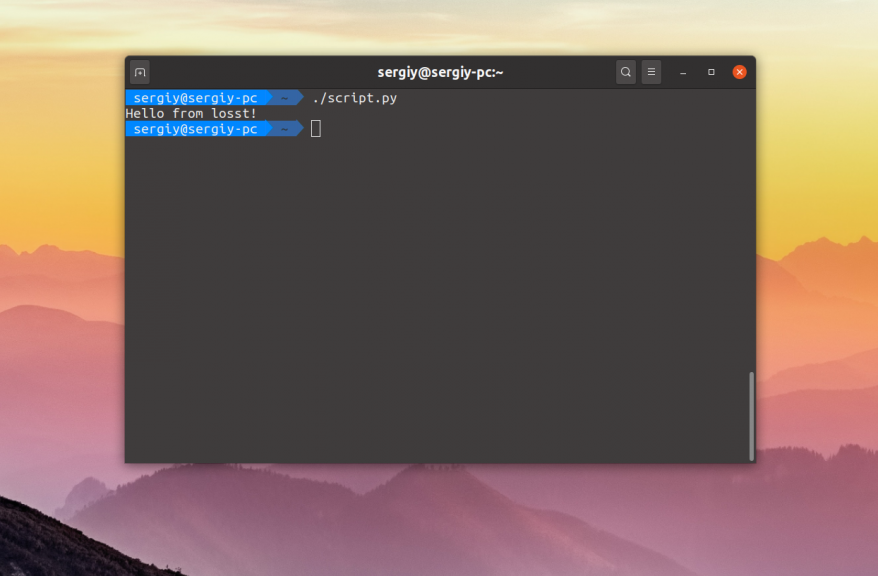
После этого можно запустить скрипт Python просто обращаясь к его файлу:
Если убрать расширение .py и переместить скрипт в каталог, находящийся в переменной PATH, например /usr/bin/, то его можно будет выполнять вот так:
Как видите, запуск команды python Linux выполняется довольно просто и для этого даже есть несколько способов. А каким способом пользуетесь вы? Напишите в комментариях!
Источник
ilyasst / python_systemd.md
Run a python script forever
In this section, we are going to show how to run a python script as a systemd service, allowing you to boot it at the start of a Linux machine and to maintain it alive.
Test method: Telegram Bot
We are going to use a very basic Telegram bot in order to test that our script will:
- Automatically start when the machine boot
- Automatically restart when it crashes/exits for whichever reason
If the bot is alive, then it means that our method works. Of course, we will also be able to check the status of the service through systemd, but just to be sure . This bot is going to send us
/Temp folder on your Raspberry Pi using SSh
Create a virtual environment in
/Temp, you should already have venv we installed it at the beginning.
- Modify the python script, add first line: #!/home/dietpi/Temp/.env/bin/python3 which is the path to the python in the virtual env
- chmod +x the python file to make it executable, it will execute with the python you specified (no need to load the venv yourself, just execute without specifying the python bin)
- Type the following command in your terminal to add a systemd service sudo systemctl edit —force —full dummy.service :
- We also add a Restart flag in order to get systemd to always restart the script if it were to ever fail
- Enable the service sudo systemctl enable dummy.service
- Reboot, wait for 30 seconds
- Try to contact your bot with /help , All good !
- SSH into your RPi
- Check your service status: sudo systemctl status dummy.service
- Manipulate your service:
- Let’s validate that it will really restart on crash. Let’s add a function to our bot that simply kills the script. By killing, I mean that we are going to create an error in order to get the script to crash. When we are working on a telegram bot script, each function is kind of loaded separately, we are going to create an error in a new function and use it to check if the bot truely restarts, add this:
- Deploy (copy/paste) this new script on the Raberry pi, then reboot the RPi, so it properly loads as the new systemd service
- Wait for 30 seconds, then contact your bot using /help to check that it is online
- Use the kill command, the bot should die, wait for a bit more than 10 seconds, as we have a 10 second timer set prior to starting the script
- Try /help again, IT WORKS!
Load the virtual environment: source .env/bin/activate
Let’s also update pip, and install a pip we need.
Let’s give our bot:
Let’s now make this script into a systemd service.
Important
All the paths in your scripts have to be absolute paths, there can be no relative path in your scripts. If there are relative paths that you must keep, you will have to change your current working directory by retrieving
Note that ExecStart is the path to the Python file directly if you made it an executable using the right virtual environment. If you did not, then you have to specify a python binary to execute it.
We have to add an ExecStartPre delay otherwise the service keeps tries to start before internet is even available and we get this error:
Use Ctrl X + Y to save and exit when you finished editing.
If you try ths script (in your Virtual Environment not as a service), you will see that the script will return the /help command, but it will simply crash if you try to run the /kill command which tries to print a variable a that was never defined. Because python sees each telegram bot function as a separate function, it does not check that all variables exist before, as a variable can be defined with an incoming Telegram message.
In order to delete the service:
sudo systemctl disable dummy.service
Freqtrade on Dietpi
UPDATE (March 2020)
The freqtrade code was updated in February 2020 in such a way that freqtrade should now be run from the freqtrade/freqtrade/main.py file instead of freqtrade/bin/freqtrade . This means that there is a difference between the file being edited in the video and the one edited in this document. The version presented in this document should be used.
In addition, the DefaultStrategy was removed from freqtrade. You will thus get an error if you try to run it, use BBRSI instead.
/freqtrade/freqtrade , and edit the file called main.py using nano:
- Change the first line so that your new file looks like this:
- Add the freqtrade systemd service using:
- Paste the following:
Use Ctrl+X then Y followed by Enter to save the new serviced.
Enable the service sudo systemctl enable freqtrade.service
Reboot the Raspberry pi: sudo reboot now
Freqtrade on VM
UPDATE (March 2020)
The freqtrade code was updated in February 2020 in such a way that freqtrade should now be run from the freqtrade/freqtrade/main.py file instead of freqtrade/bin/freqtrade . This means that there is a difference between the file being edited in the video and the one edited in this document. The version presented in this document should be used.
In addition, the DefaultStrategy was removed from freqtrade. You will thus get an error if you try to run it, use BBRSI instead.
/freqtrade/freqtrade , and edit the file called main.py using nano:
- Change the first line so that your new file looks like this:
- Add the freqtrade systemd service using:
- Paste the following:
Use Ctrl+X then Y followed by Enter to save the new serviced.
Источник
Setup a python script as a service through systemctl/systemd
There are several ways you can run your program as a background service in Linux such as crontab, .bashrc, etc but today I’ll write about systemd. I was initially looking for a way to run my python script as a background service so even if the server restarts for some reason, my script will run in the background regardless and I found that systemd allows me to do that. Let’s get started
I’ll be setting this up on an Ubuntu 18.10 machine.
Almost all versions of Linux come with systemd out of the box, but if your’s didn’t come with it then you can simply run the following command:
Note: The -y flag means to install the packages and dependencies quickly.
To check which version of systemd you have simply run the command:
Create a python file whatever you like. I’m going to call mine test.py.
sudo nano test.py
The above script will write the current timestamp in the file after every 10 seconds. Let’s write the service now.
sudo nano /etc/systemd/system/test.service (name of the service which is test in this case)
Insert the username in your OS where is written. The ExecStart flag takes in the command that you want to run. So basically the first argument is the python path (in my case it’s python3) and the second argument is the path to the script that needs to be executed. Restart flag is set to always because I want to restart my service if the server gets restarted. For more information on this, you can go to this link. Now we need to reload the daemon.
Let’s enable our service so that it doesn’t get disabled if the server restarts.
And now let’ start our service.
Now our service is up and running.
Note: The file will be written in the root directory (/) because the program will write in the path from the perspective of systemd. To change that simply edit out the file path. For example:
There are several commands you can do to start, stop, restart, and check status.
To stop the service.
To check status.
This was a very basic introduction to systemd aimed at beginners who want to get started with writing their own systemd services for python. If you want a deep dive into systemd and systemctl, here is a detailed guide by the digital ocean.
NOTE: This doesn’t only apply to python scripts. You can basically run any program with this regardless of the programming language your program is written in.
Источник
