- Stay protected with Windows Security
- Important security info
- Understand and customize Windows Security features
- Status icons indicate your level of safety:
- Run a malware scan manually
- Run a quick scan in Windows Security
- Run an advanced scan in Windows Security
- Schedule your own scan
- Schedule a scan
- Turn Microsoft Defender Antivirus real-time protection on or off
- Turn real-time protection off temporarily
- Windows security baselines
- Using security baselines in your organization
- What are security baselines?
- Why are security baselines needed?
- How can you use security baselines?
- Where can I get the security baselines?
- Community
- Related Videos
- Две скрытые кайфовые фичи Windows Admin Center: как найти, настроить и использовать
- Какие фичи реализованы на текущий момент?
- Что вы могли упустить:
- Управление AD (превью):
- Управление DNS (превью):
- Управление Windows Defender (превью):
- Установка на Windows Server / Windows 10
- Установка на Server Core
- Выводы
Stay protected with Windows Security
Windows 10 includes Windows Security, which provides the latest antivirus protection. Your device will be actively protected from the moment you start Windows 10. Windows Security continually scans for malware (malicious software), viruses, and security threats. In addition to this real-time protection, updates are downloaded automatically to help keep your device safe and protect it from threats.
Windows 10 in S mode
Some features will be a little different if you’re running Windows 10 in S mode. Because this mode is streamlined for tighter security, the Virus & threat protection area has fewer options. But don’t worry—the built-in security of this mode automatically prevents viruses and other threats from running on your device, and you’ll receive security updates automatically. For more info, see Windows 10 in S mode FAQ.
Important security info
Windows Security is built-in to Windows 10 and includes an antirvirus program called Microsoft Defender Antivirus. (In previous versions of Windows 10, Windows Security is called Windows Defender Security Center).
If you have another antivirus app installed and turned on, Microsoft Defender Antivirus will turn off automatically. If you uninstall the other app, Microsoft Defender Antivirus will turn back on automatically.
If you’re having problems receiving Windows Security updates, see Fix Windows Update errors and the Windows Update FAQ.
For info on how to uninstall an app, see Repair or remove an app in Windows 10.
To change your user account to an admin account, see Create a local user or administrator account in Windows 10.
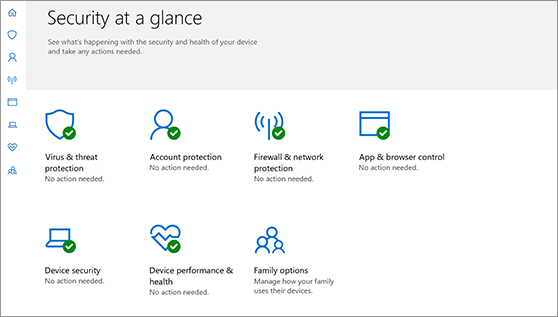
Understand and customize Windows Security features
Windows Security is your home to manage the tools that protect your device and your data:
Virus & threat protection. Monitor threats to your device, run scans, and get updates to help detect the latest threats. (Some of these options are unavailable if you’re running Windows 10 in S mode.)
Account protection. Access sign-in options and account settings, including Windows Hello and dynamic lock.
Firewall & network protection. Manage firewall settings and monitor what’s happening with your networks and internet connections.
App & browser control. Update settings for Microsoft Defender SmartScreen to help protect your device against potentially dangerous apps, files, sites, and downloads. You’ll have exploit protection and you can customize protection settings for your devices.
Device security. Review built-in security options to help protect your device from attacks by malicious software.
Device performance & health. View status info about your device’s performance health, and keep your device clean and up to date with the latest version of Windows 10.
Family options. Keep track of your kids’ online activity and the devices in your household.
You can customize how your device is protected with these Windows Security features. To access them, select Start > Settings > Update & Security > Windows Security . Then select the feature you want to explore.
Open Windows Security settings
Status icons indicate your level of safety:
Green means your device is sufficiently protected and there aren’t any recommended actions.
Yellow means there is a safety recommendation for you.
Red is a warning that something needs your immediate attention.
Run a malware scan manually
When you’re concerned about risks to a specific file or folder, you can right-click the file or folder in File Explorer, then select Scan with Microsoft Defender.
If you suspect there’s malware or a virus on your device, you should immediately run a quick scan. This is much faster than running a full scan on all your files and folders.
Run a quick scan in Windows Security
Select Start > Settings > Update & Security > Windows Security and then Virus & threat protection.
Open Windows Security settings
Under Current threats, select Quick scan (or in previous versions of Windows 10, under Threat history, select Scan now).
If the scan doesn’t find any issues, but you’re still concerned, you may want to check your device more thoroughly.
Run an advanced scan in Windows Security
Select Start > Settings > Update & Security > Windows Security and then Virus & threat protection.
Under Current threats, select Scan options (or in previous versions of Windows 10, under Threat history, select Run a new advanced scan).
Select one of the scan options:
Full scan (check files and programs currently running on your device)
Custom scan (scan specific files or folders)
Microsoft Defender Offline scan (run this scan if your device has been, or could potentially be, infected by a virus or malware). Learn more about Microsoft Defender Offline
Select Scan now.
Note: Because of streamlined security, this process isn’t available if you’re running Windows 10 in S mode.
Schedule your own scan
Even though Windows Security is regularly scanning your device to keep it safe, you can also set when and how often the scans occur.
Schedule a scan
Select the Start button, type schedule tasks in the Search box, and in the list of results, select Task Scheduler.
In the left pane, select the arrow (>) next to Task Scheduler Library to expand it, do the same with Microsoft > Windows, and then scroll down and select the Windows Defender folder.
In the top-center pane, select Windows Defender Scheduled Scan. (Point to the choices to see the full names.)
In the Actions pane on the right, scroll down and then select Properties.
In the window that opens, select the Triggers tab, and then select New.
Set your preferred time and frequency, and then select OK.
Review the schedule and select OK.
Note: Because of streamlined security, this process isn’t available if you’re running Windows 10 in S mode.
Turn Microsoft Defender Antivirus real-time protection on or off
Sometimes you may need to briefly stop running real-time protection. While real-time protection is off, files you open or download won’t be scanned for threats. However, real-time protection will soon turn on automatically again to protect your device.
Turn real-time protection off temporarily
Select Start > Settings > Update & Security > Windows Security and then Virus & threat protection > Manage settings. (In previous versions of Windows 10, select Virus & threat protection > Virus & threat protection settings.)
Open Windows Security settings
Switch the Real-time protection setting to Off and choose Yes to verify.
Note: Because of streamlined security, this process isn’t available if you’re running Windows 10 in S mode.
Windows security baselines
Applies to
- Windows 10
- Windows Server
- Microsoft 365 Apps for enterprise
- Microsoft Edge
Using security baselines in your organization
Microsoft is dedicated to providing its customers with secure operating systems, such as Windows 10 and Windows Server, and secure apps, such as Microsoft Edge. In addition to the security assurance of its products, Microsoft also enables you to have fine control over your environments by providing various configuration capabilities.
Even though Windows and Windows Server are designed to be secure out-of-the-box, many organizations still want more granular control over their security configurations. To navigate the large number of controls, organizations need guidance on configuring various security features. Microsoft provides this guidance in the form of security baselines.
We recommend that you implement an industry-standard configuration that is broadly known and well-tested, such as Microsoft security baselines, as opposed to creating a baseline yourself. This helps increase flexibility and reduce costs.
What are security baselines?
Every organization faces security threats. However, the types of security threats that are of most concern to one organization can be completely different from another organization. For example, an e-commerce company may focus on protecting its Internet-facing web apps, while a hospital may focus on protecting confidential patient information. The one thing that all organizations have in common is a need to keep their apps and devices secure. These devices must be compliant with the security standards (or security baselines) defined by the organization.
A security baseline is a group of Microsoft-recommended configuration settings that explains their security impact. These settings are based on feedback from Microsoft security engineering teams, product groups, partners, and customers.
Why are security baselines needed?
Security baselines are an essential benefit to customers because they bring together expert knowledge from Microsoft, partners, and customers.
For example, there are over 3,000 Group Policy settings for Windows 10, which does not include over 1,800 Internet Explorer 11 settings. Of these 4,800 settings, only some are security-related. Although Microsoft provides extensive guidance on different security features, exploring each one can take a long time. You would have to determine the security impact of each setting on your own. Then, you would still need to determine the appropriate value for each setting.
In modern organizations, the security threat landscape is constantly evolving, and IT pros and policy-makers must keep up with security threats and make required changes to Windows security settings to help mitigate these threats. To enable faster deployments and make managing Windows easier, Microsoft provides customers with security baselines that are available in consumable formats, such as Group Policy Objects Backups.
How can you use security baselines?
You can use security baselines to:
- Ensure that user and device configuration settings are compliant with the baseline.
- Set configuration settings. For example, you can use Group Policy, Microsoft Endpoint Configuration Manager, or Microsoft Intune to configure a device with the setting values specified in the baseline.
Where can I get the security baselines?
You can download the security baselines from the Microsoft Download Center. This download page is for the Security Compliance Toolkit (SCT), which comprises tools that can assist admins in managing baselines in addition to the security baselines.
The security baselines are included in the Security Compliance Toolkit (SCT), which can be downloaded from the Microsoft Download Center. The SCT also includes tools to help admins manage the security baselines.


Community

Related Videos
You may also be interested in this msdn channel 9 video:
Две скрытые кайфовые фичи Windows Admin Center: как найти, настроить и использовать

Недавно я шерстил Хабр и встретил комментарий от Inskin:

Я впервые познакомился в Windows Admin Center, когда в нем был только счетчик управления файлами и больше ничего. Сейчас все инструменты из RSAT потихоньку переезжают в Windows Admin Center.
Пока я не видел ни одного толковой русской статьи про настройку Windows Admin Center и решил написать ее сам. Под катом подробный обзор, две скрытые кайфовые фишки WAC, а также инструкции по установке и настройке.
Какие фичи реализованы на текущий момент?
Чуть больше года назад WAС был практически неюзабельным, в превью версии был только красивый дашборд и управление процессами.
Теперь, можно делать полноценный деплой новых серверов прямо из браузера.
- Диспетчер задач
- Управление сертификатами
- Управление устройствами
- Просмотр событий
- Проводник
- Брандмауэр
- Установка и удаление программ и служб и ролей
- Regedit
- Планировщик задач
А еще WAC может служить шлюзом для WinRM и RDP.
Кстати, для подключения, Windows Admin Center использует WinRM и общий runspace вместе с WSMan’ом, поэтому, если у вас подключены сетевые диски, то подключаться к серверам что хостят эти диски можно будет без ввода логина и пароля.
Попробуйте сделать Enter-PSSession без указания Credentials, если команда не попросит логин или пароль, то значит можно будет войти и через WAC без ввода логина и пароля.
Что вы могли упустить:
Часть функционала все еще скрыта за плагинами, поэтому, вы могли упустить две очень крутые фишки и одну не очень крутую.
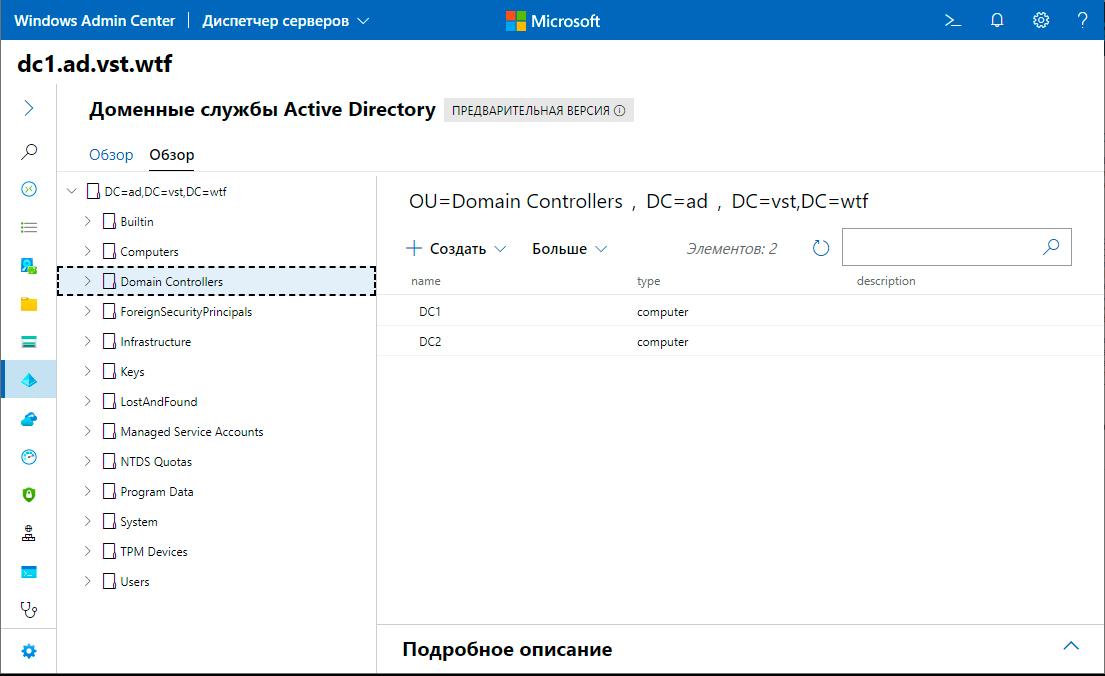
Управление AD (превью):
Органы управления Active Directory тут похожи на что-то между ADAC и ADDC. Хорошо, что они переосмыслили интерфейс, в целом это выглядит даже удобнее, чем через RSAT. В еще одном вопросе можно целиком перейти на WAC.
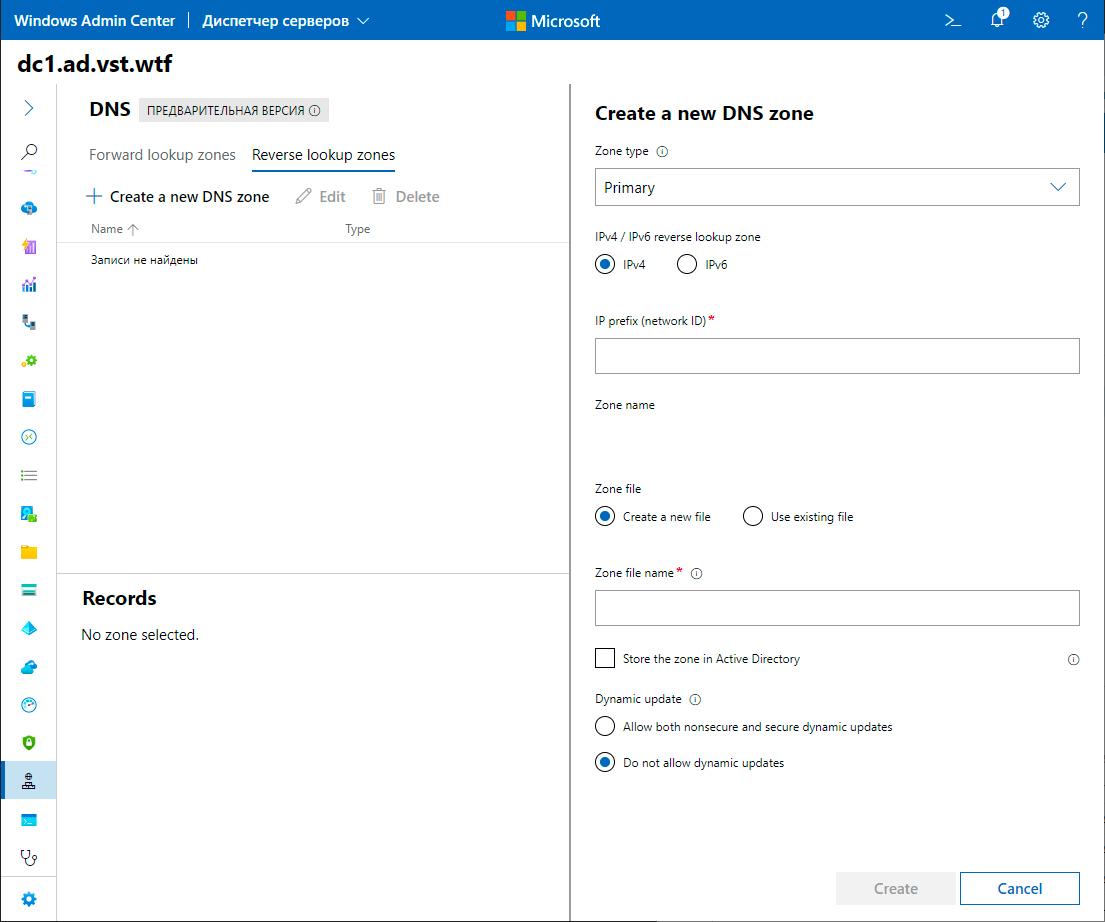
Управление DNS (превью):
В WAC переехал полностью функционал управления DNS. Создание новых зон, PTR записей, теперь все это доступно через Windows Admin Center.
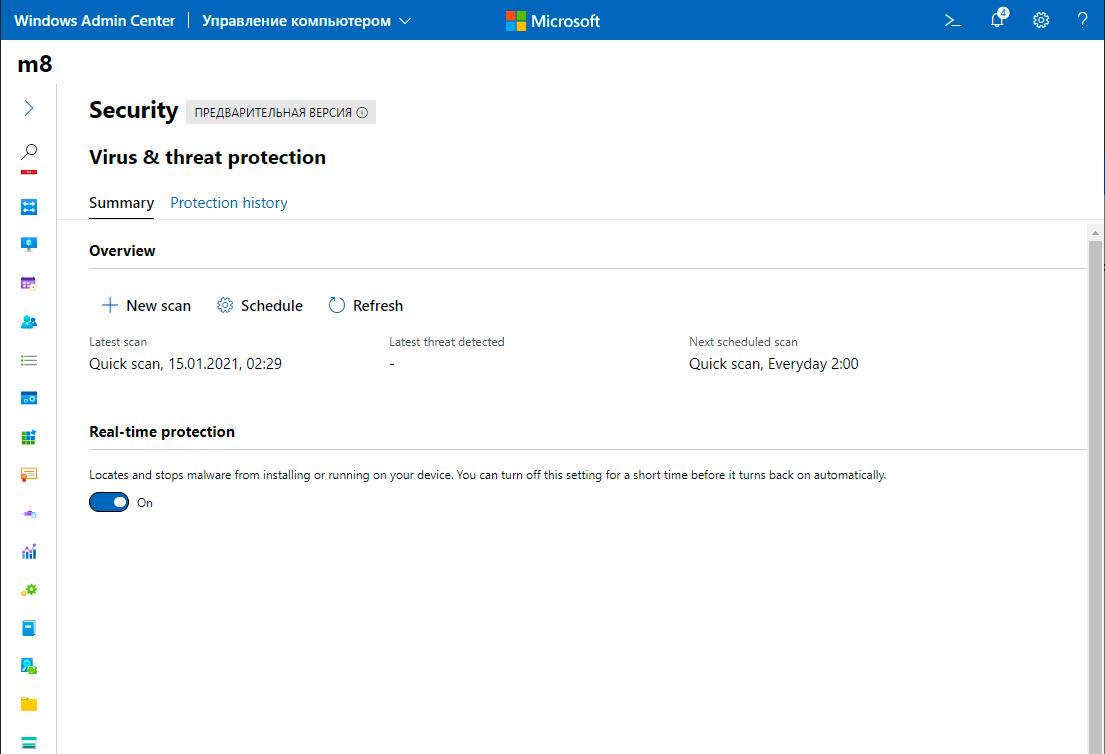
Управление Windows Defender (превью):
Пока что можно только управлять сканированием и отключать защиту в реальном времени. Отсутствуют все пункты защитника, плюс нельзя управлять защитой от программ-шантажистов.
Установка на Windows Server / Windows 10
По моему мнению, самая правильная установка это – установка на локальный компьютер. Сначала нужно скачать установочный файл по ссылке:
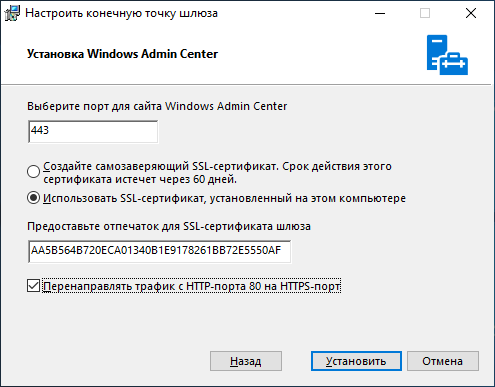
Установка очень проста, «далее, далее, готово», но пару рекомендаций дать нужно. Обязательно выберите пункт об автоматическом обновлении WAC, гарантирую, вам это пригодится, но по непонятным причинам, этот пункт по умолчанию снят.

WinRM работает по HTTP протоколу, поэтому, чтобы Windows Admin Center не подключался к удаленным серверам по HTTP обязательно включите этот пункт. Он тоже снят по умолчанию.

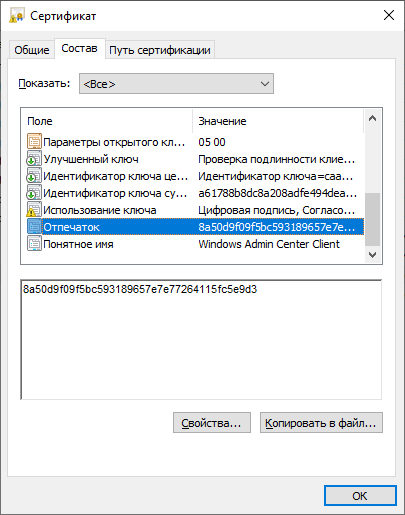
Если вы используете WAC на домашней системе, рекомендую оставить самоподписанный сертификат. Он автоматически добавляется в доверенные и не доставляет неудобств, но если у вас есть свой собственный сертификат и вы хотите использовать его, то впишите его отпечаток в графу, как показано ниже:
Можно перейти в certmgr → Личное → Сертификаты, перейти в свойства сертификата и найти его отпечаток.
Тоже самое с помощью PowerShell:
Установка на Server Core
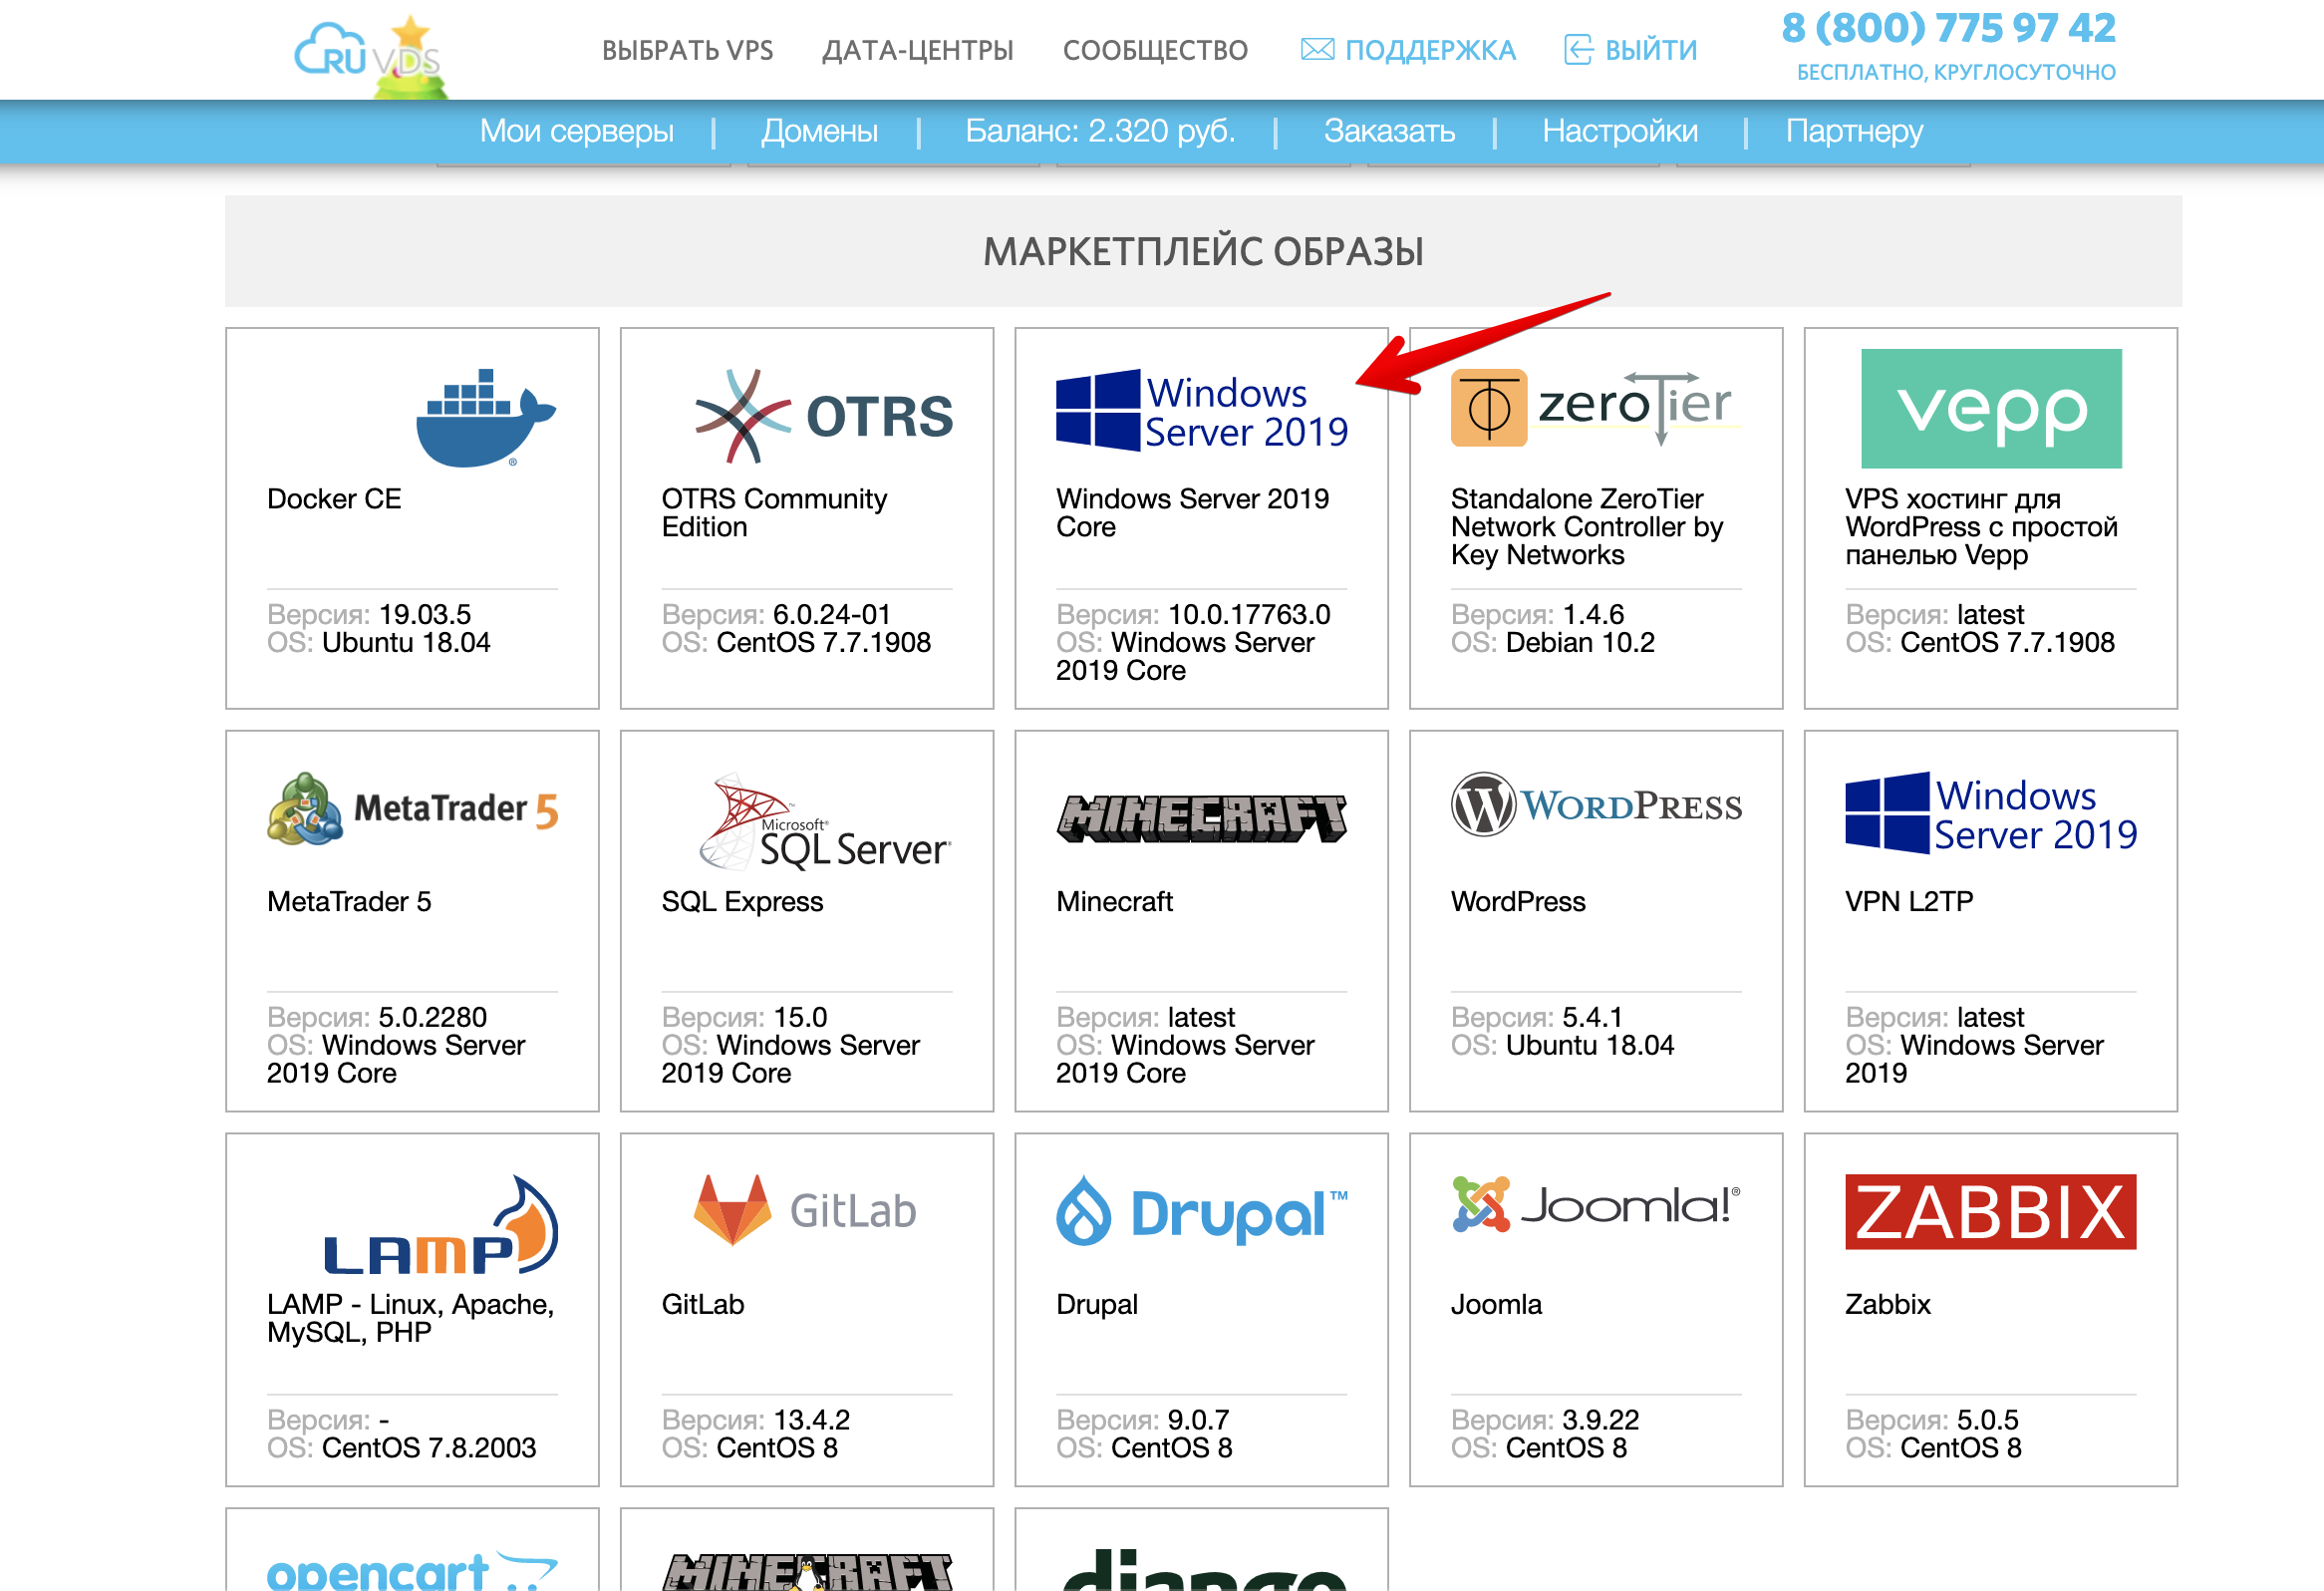
VPS с Windows Server Core можно взять прямо из маркетплейса
Чтобы использовать Windows Admin Center в качестве управляющего узла, обязательно нужна Active Directory. Войти в Windows Admin Center развернутую на Server Core можно только под административной ролью в AD.
Устанавливаем с самоподписанным сертификатом:
Если у вас есть купленный сертификат или серитфикат от Let’s Encrypt, установленный в системной хранилище сертификатов, то впишите его Thumbprint в аргументы установщика.
Получить отпечаток сертификата можно вот так:

Вписать отпечаток нужно после SME_THUMBPRINT, как в примере:
Чтобы изменить сертификат, нужно будет еще раз запустить установщик, вписав в отпечаток нового сертификата.
Выводы
С каждой новой версией Windows Admin Center становится все функциональнее и функциональнее.
До полного счастья нужно разве что доделать все диспетчеры связанные с AD, добавить поддержку RRAS, IIS, перенести целиком проводник вместе с нормальным управлением SMB и Bitlocker, управление групповыми политиками и нормальный Windows Defender, и чтобы все диспетчеры, которые работают с файлами умели открывать и выбирать пути с диска машины, к которой ты подключен. А еще чтобы когда ты закрываешь WAC, нужно чтобы он закрывал PSSession и освобождал память на сервере, еще неплохо было бы, чтобы можно было ставить на Server Core без обязательного наличия AD, а когда закончат, можно перейти к MS SQL Server.
А в целом очень даже неплохо, очень рекомендую ознакомиться.


