- Центр обновления Windows — дополнительные ресурсы Windows Update — additional resources
- Устранение неполадок WSUS WSUS Troubleshooting
- Как сбросить компоненты Центра обновления Windows? How do I reset Windows Update components?
- Сброс компонентов Центра обновления Windows вручную Reset Windows Update components manually
- Fix: Windows Update Service could not be Stopped
- What Causes the Windows Update Service to prevent being Stopped?
- Solution 1: Stopping wuauserv Process
- Solution 2: Clearing the Contents of Update Folder
- Solution 3: Perform a Repair Installation
Центр обновления Windows — дополнительные ресурсы Windows Update — additional resources
Относится к: Applies to:
- Windows 10 Windows 10
- Windows Server 2016 Windows Server 2016
- Windows Server 2019 Windows Server 2019
Windows Server 2016 поддерживает политики, доступные в Windows 10 версии 1607. Windows Server 2016 supports policies available in Windows 10, version 1607. Windows Server 2019 поддерживает политики, доступные в Windows 10 версии 1809. Windows Server 2019 supports policies available in Windows 10, version 1809.
В следующих ресурсах содержатся дополнительные сведения об использовании Центра обновления Windows. The following resources provide additional information about using Windows Update.
Устранение неполадок WSUS WSUS Troubleshooting
Как сбросить компоненты Центра обновления Windows? How do I reset Windows Update components?
- Попробуйте использовать средство устранения неполадок Центра обновления Windows, которое проанализирует ситуацию и сбросит компоненты, которым это требуется. Try using the Windows Update Troubleshooter, which will analyze the situation and reset any components that need it.
- Попробуйте выполнить действия из статьи Устранение неполадок при обновлении Windows 10. Try the steps in Troubleshoot problems updating Windows 10.
- Попробуйте выполнить действия из статьи Исправление ошибок Центра обновления Windows. Try the steps in Fix Windows Update errors.
Если другие действия не помогают, попробуйте сбросить агент Центра обновления Windows, выполнив следующие команды из командной строки с повышенными привилегиями. If all else fails, try resetting the Windows Update Agent by running these commands from an elevated command prompt:
Сброс компонентов Центра обновления Windows вручную Reset Windows Update components manually
Откройте командную строку Windows. Open a Windows command prompt. Чтобы открыть командную строку, нажмите Пуск > Выполнить. To open a command prompt, click Start > Run. Скопируйте и вставьте (или введите вручную) следующую команду в командную строку, затем нажмите клавишу ВВОД: Copy and paste (or type) the following command and then press ENTER:
Остановите службу BITS, службу Центра обновления Windows и службу шифрования. Stop the BITS service, the Windows Update service and the Cryptographic service. Для этого введите следующие команды в командной строке. To do this, type the following commands at a command prompt. После ввода каждой команды нажимайте клавишу ВВОД. Press ENTER after you type each command.
Удалите файлы qmgr*.dat. Delete the qmgr*.dat files. Для этого введите следующую команду в командной строке и нажмите клавишу ВВОД: To do this, type the following command at a command prompt, and then press ENTER:
Если вы впервые пытаетесь устранить неполадки Центра обновления Windows, выполнив действия, перечисленные в этой статье, перейдите к шагу 5, не выполняя действия шага 4. If this is your first attempt at resolving your Windows Update issues by using the steps in this article, go to step 5 without carrying out the steps in step 4. Действия, описанные на шаге 4, необходимо выполнять при устранении неполадок только в случае, если неполадки Центра обновления Windows не удается устранить, выполнив все шаги, кроме шага 4. The steps in step 4 should only be performed at this point in the troubleshooting if you cannot resolve your Windows Update issues after following all steps but step 4. Действия шага 4 также выполняются в «агрессивном» режиме указанного выше решения «Исправить». The steps in step 4 are also performed by the «Aggressive» mode of the Fix it Solution above.
- Переименуйте следующие папки в *.BAK: Rename the following folders to *.BAK:
Для этого введите следующие команды в командной строке. To do this, type the following commands at a command prompt. После ввода каждой команды нажимайте клавишу ВВОД. Press ENTER after you type each command.
- Сбросьте службу BITS и службу Центра обновления Windows до значений дескриптора безопасности по умолчанию. Reset the BITS service and the Windows Update service to the default security descriptor. Для этого введите следующие команды в командной строке. To do this, type the following commands at a command prompt. После ввода каждой команды нажимайте клавишу ВВОД. Press ENTER after you type each command.
Введите следующую команду в командной строке и нажмите клавишу ВВОД: Type the following command at a command prompt, and then press ENTER:
Зарегистрируйте файлы BITS и файлы Центра обновления Windows. Reregister the BITS files and the Windows Update files. Для этого введите следующие команды в командной строке. To do this, type the following commands at a command prompt. После ввода каждой команды нажимайте клавишу ВВОД. Press ENTER after you type each command.
Сбросьте WinSock. Reset Winsock. Для этого введите следующую команду в командной строке и нажмите клавишу ВВОД: To do this, type the following command at a command prompt, and then press ENTER:
Если вы используете Windows XP или Windows Server 2003, необходимо настроить параметры прокси-сервера. If you are running Windows XP or Windows Server 2003, you have to set the proxy settings. Для этого введите следующую команду в командной строке и нажмите клавишу ВВОД: To do this, type the following command at a command prompt, and then press ENTER:
Перезапустите службу BITS, службу Центра обновления Windows и службу шифрования. Restart the BITS service, the Windows Update service and the Cryptographic service. Для этого введите следующие команды в командной строке. To do this, type the following commands at a command prompt. После ввода каждой команды нажимайте клавишу ВВОД. Press ENTER after you type each command.
Если вы используете Windows Vista или Windows Server 2008, очистите очередь BITS. If you are running Windows Vista or Windows Server 2008, clear the BITS queue. Для этого введите следующую команду в командной строке и нажмите клавишу ВВОД: To do this, type the following command at a command prompt, and then press ENTER:
Fix: Windows Update Service could not be Stopped
This problem appears when users are unable to stop the Windows Update Service using the Services tool or Command Prompt. The reasons for trying to stop the service are numerous and many problems regarding Windows Update can be resolved simply by stopping the service and starting it once again.
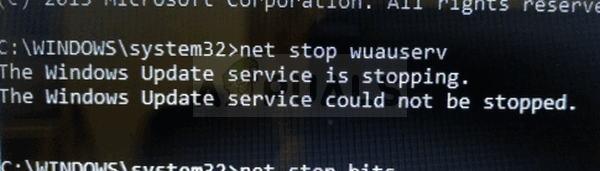 Windows Update Service could not be Stopped
This article will feature some modules which may cause this problem to occur as well as some workarounds which can be used to stop the service forcefully. Make sure you follow the instructions carefully and the problem should be resolved in no time.
What Causes the Windows Update Service to prevent being Stopped?
The causes of this problem are often unknown and this problem often needs to be circumvented rather than resolved. Nonetheless, when Windows Update service stops misbehaving, new updates are installed and they often resolve the problem. However, here are some common causes:
- Missing administrator privileges may prevent Windows Update Service from stopping and you should use an elevated Command Prompt in order to stop it.
- Something is wrong with your computer on a more serious note and you should consider an in-place upgrade or a repair installation.
Solution 1: Stopping wuauserv Process
Command Prompt with administrative permissions can be used to circumvent this problem. The command you will use will end the process recognized by its PID and it should be stopped. Note that you will need to use the Services tool to restart the process once you stop it if you wish to use the Windows Update functionality in the future.
- Use the Ctrl + Shift + Esc key combination by pressing the keys at the same time to open the Task Manager utility.
- Alternatively, you can use the Ctrl + Alt + Del key combination and select Task Manager from the popup blue screen which will appear with several options. You can also search for it in the Start menu.
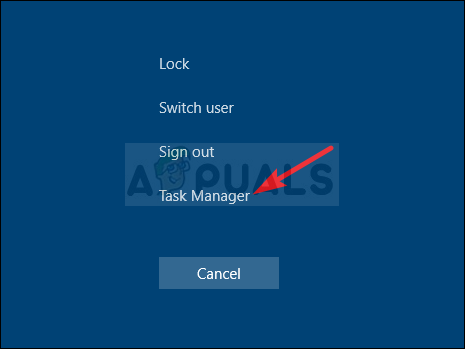 Running Task Manager
- Click on More details at the bottom left part of the window in order to expand Task Manager. Navigate to the Services tab and right-click somewhere around the names of the columns and check the box next to the PID entry in the context menu.
- Locate the Windows Update service by checking the Description column or by looking for the ‘wuauserv’ service under the Name column. Note down its PID number.
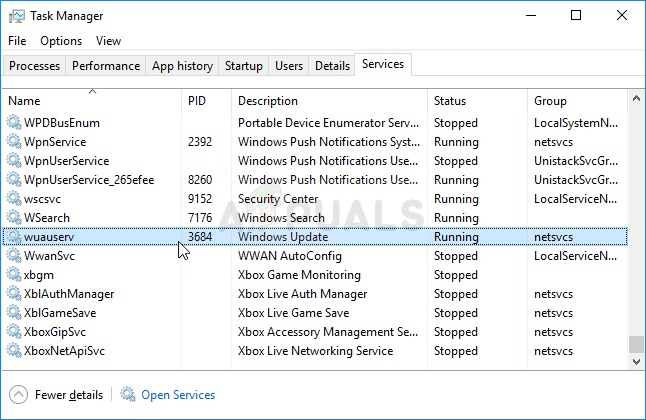 Locating the PID of Windows Update Service
- Search for “Command Prompt” either right in the Start menu or by tapping the search button right next to it. Right-click on the first result which appears at the top and select the “Run as administrator” option.
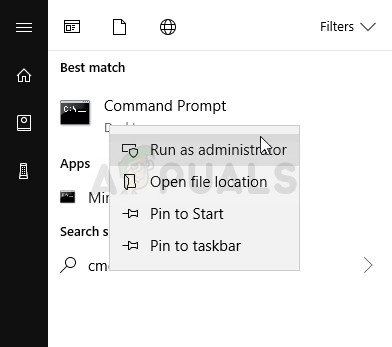 Running CMD with admin permissions
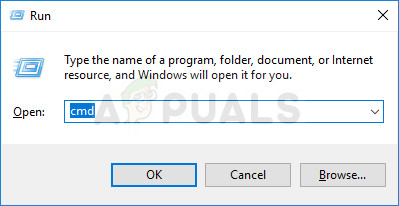
- Users who are using an older version of Windows can use the Windows Logo Key + R key combination in order to bring up the Run dialog box. Type in “cmd” in the box and use the Ctrl + Shift + Enter key combination in order to run Command Prompt as an administrator.
- Copy and paste the command shown below and make sure you click the Enter key on your keyboard.
- Make sure you replace [PID] with the number you noted down regarding Windows Update Service. If the Command Prompt reports that the service was successfully stopped, your problem is resolved!
Solution 2: Clearing the Contents of Update Folder
If you want to stop the Windows Update Service because you are either resetting Windows Update components or if you are simply trying to solve a problem regarding the automatic updates, you can follow this set of commands along with deleting the contents of a folder. The method is similar to Solution 1 but the command is different.
- Search for “Command Prompt” either right in the Start menu or by tapping the search button right next to it. Right-click on the first result which appears at the top and select the “Run as administrator” option.
- Users who are using an older version of Windows can use the Windows Logo Key + R key combination in order to bring up the Run dialog box. Type in “cmd” in the box and use the Ctrl + Shift + Enter key combination in order to run Command Prompt as an administrator.
 Running CMD using Run box
 - Copy and paste the command shown below and make sure you click the Enter key on your keyboard.
 Running CMD using Run box
- Navigate to the following location on your computer by opening the Windows Explorer and clicking on This PC:
- Use the Ctrl+ A key combination to select all files, right-click on one of them and choose Delete from the context menu.
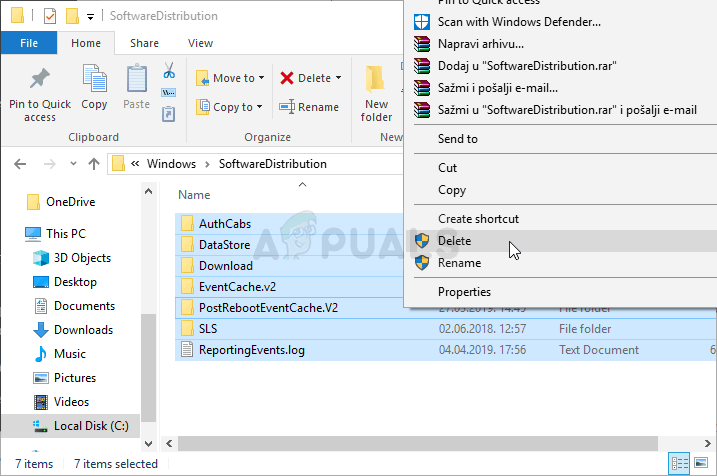 Deleting the contents of SoftwareDistribution folder
- If you wish to restart both the BITS and the Windows Update service, run the following set of commands in Command Prompt:
Solution 3: Perform a Repair Installation
This method might seem desperate as it includes creating a bootable Windows 10 media and actually performing a repair installation but it can help you since you won’t lose any of your personal files. This has helped plenty of users deal with the problem and you should check it out as a last resort, especially if you are trying to get Windows Update to work as this will also install the latest version of Windows.
- Download the Media Creation Tool software from Microsoft’s website. Open the downloaded file you just downloaded and accept the terms and conditions.
- Select the Create installation media (USB flash drive, DVD, or ISO file) for another PC option from the initial screen.
 Choose Create installation media for another PC
- The language, architecture, and other settings of the bootable drive will be chosen based on your computer’s settings, but you should uncheck the Use the recommended options for this PC in order to select the correct settings for the PC which has the password attached to it (if you are creating this on a different PC, and you probably are).
- Click Next and click on the USB drive or DVD option when prompted to choose between USB or DVD, depending on which device you want to use to store this image on.
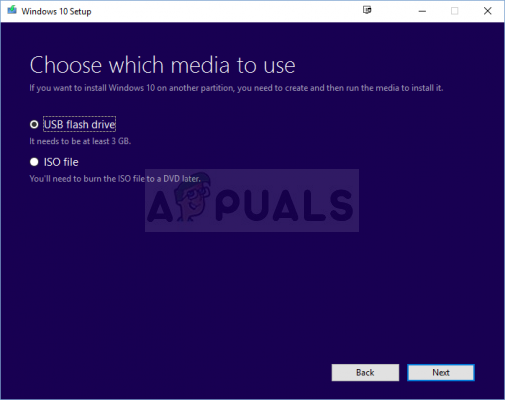 Choose between USB or DVD
- Click Next and choose the USB or DVD drive from the list which will show the storage media connected to your computer.
- Click Next and the Media Creation Tool will proceed to download the files necessary to install create the installation device.
Now that you probably have your recovery media, we can start actually solving the booting issue by starting the recovery drive which you should boot from.
- Insert the installation drive you own or which you have just created and boot your computer. The initial screen will differ depending on the operating system you have installed.
- Windows Setup should open prompting you to enter the preferred language and time and date settings. Enter them correctly and choose the Repair your computer option at the bottom of the window.
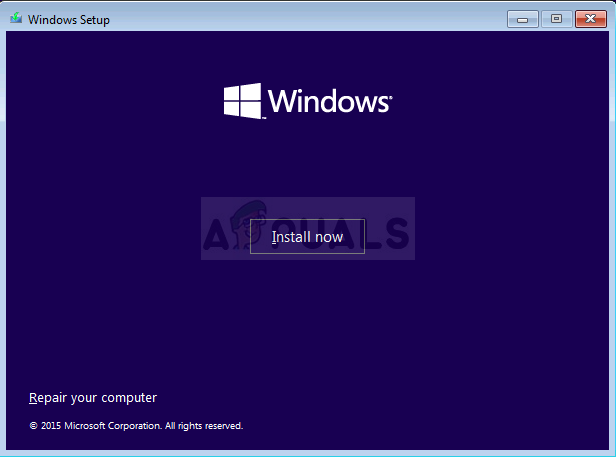 Choose Repair your computer
- The Choose an option screen will appear so navigate to Troubleshoot >> Reset this PC. This will let you keep your personal files but it will delete the apps you have installed. Follow the further set of instructions on-screen and wait for the process to finish. Check to see if the BSODs still appear in a loop!


