- compizomania
- Страницы
- 09 июня 2018
- Установка Etcher в Ubuntu 18.04 и производные
- How can I install Startup Disk Creator on Ubuntu 17.04?
- 3 Answers 3
- Создаём загрузочный USB диск с Windows из под Linux
- Подготовка USB диска
- Копирование файлов Windows на USB диск
- Делаем USB-диск загрузочным
- Если создаем MBR загрузочный диск
- Если создаем UEFI загрузочный диск
- How to Create Bootable USB Drive on Ubuntu / Linux Mint
- Startup Disk Creator
- UNetbootin
- dd (Command line Utility)
- Test Your Bootable Disk
compizomania
Азбука в Linux для начинающих и не только. Я знаю только то, что ничего не знаю, но другие не знают и этого. Сократ
Страницы
09 июня 2018
Установка Etcher в Ubuntu 18.04 и производные
В дистрибутивах Ubuntu и производных от него по умолчанию установлена программа Startup Disk Creator для записи .iso-образа на USB-диск (флешку) или карту памяти SD.
Startup Disk Creator или Создание загрузочного диска преобразует USB-диск или карту памяти SD в том, с которого можно выполнить загрузку и запустить Ubuntu.
Программа также работает в Debian и любой другой основанной на Debian системе, для которой у вас есть CD или .iso-образ. Так гласит аннотация к программе.
Но вот беда, Startup Disk Creator с успехом пишет на флешку или карту памяти SD только образы Ubuntu и производных от него, а образы других дистрибутивов Linux в упор не видит.
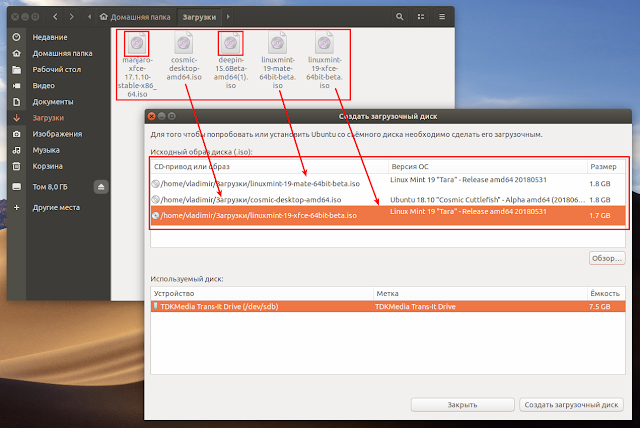
На представленном снимке видно, что в моей папке Загрузки отображены 5 образов с дистрибутивами Linux. Три из них: 2 — Linux Mint 19 и Ubuntu 18.10 программа видит, а значит их можно записать, но вот два других из пяти: Manjaro и Deepin в упор не замечает и записать их Startup Disk Creator невозможно.
Как же быть в таком случае?
Конечно «старожилы» в Linux могут записать любой образ дистрибутива консольной утилитой dd, но не каждому новичку в Linux по душе терминал, если в Windows он привык всё делать графической программой.
В данном случае нам поможет программа Etcher.
Etcher — это кроссплатформенная (Windows, MacOS и Linux) программа для записи iso-образа с дистрибутивом на флешку или микро SD-карту.

Установка Etcher в Ubuntu 18.04 и производные
Откройте терминал (Ctrl+Alt+T), скопируйте и выполните (нажмите Enter), следующие команды:
echo «deb https://dl.bintray.com/resin-io/debian stable etcher» | sudo tee /etc/apt/sources.list.d/etcher.list
sudo apt-key adv —keyserver keyserver.ubuntu.com —recv-keys 379CE192D401AB61
sudo apt update
sudo apt install etcher-electron
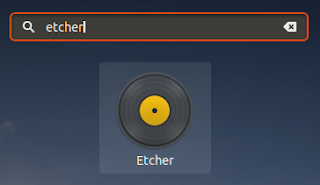
По окончании установки откройте Etcher из системного меню:
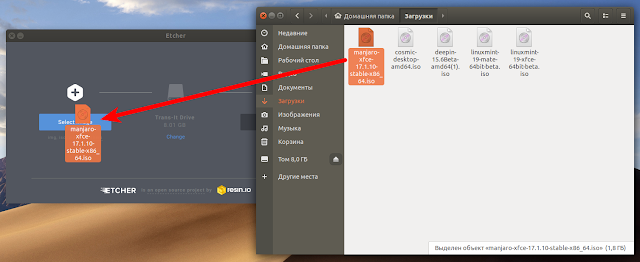
Для записи образа в Etcher, вставьте флешку/карту памяти SD в порт компьютера, откройте файловый менеджер, перетащите .iso-образ с дистрибутивом и нажмите на кнопке Flash.
Теперь данной программой мне удалось записать загруженные образы с дистрибутивами Deepin и Manjaro:


По окончании записи образа программа известит вас, что Flash Complete:
Источник
How can I install Startup Disk Creator on Ubuntu 17.04?
I tried to install Startup Disk Creator using:
But it didn’t appear in the dash.
What should I do?

3 Answers 3
If you cannot find it just install it running in terminal those commands (first two are optional, to update the repos, and upgrade what should be upgraded, but if you just want to make pendrive with installer, just skip to the third line.
For me it worked, Ubuntu tutorials and forums stated that it is build in, from 18.04, but it’s not if you have other flavor than «vanilla» Ubuntu, for example Budgie.
Then you may also start this from terminal:
«Click on the Ubuntu icon in the top left corner of the screen. After that type the letters of the program name and you should see them (the letters). And you should also see the selected items change. The more letters you type, the more specific selection, and after a few letters (and maybe some other characters (in this case the minus sign, ‘-‘) only one icon is left.»
/sudodus — in the comments
Additonally you may pick (with the mouse) a visible icon and drag it into the Launcher, and it will sit there until you remove it.

if it doesn’t appear in the dash then go to your package manager and search for startup, there you will find a package named «startup disk creator», right click on it and select mark for installation and then apply changes, after that close the package manager then search for startup disk creator, you will find it.
Источник
Создаём загрузочный USB диск с Windows из под Linux
В ubuntu уже есть приложение для создания образов дисков — Startup Disk Creator, но оно умеет создавать только загрузочные USB с Linux. Для создания загрузочного USB-диска с Windows из Linux, существует WinUSB, но она довольно давно не обновлялась, и честно говоря, у меня не заработала. Данный пост довольно подробный, и рассчитан преимущественно на людей, плохо знакомых с Linux.
Перед тем как я продолжу, следует указать что в Windows мире два метода загрузки:
- MBR, при котором в начале диска резервируется место, и располагается специальный загрузочный файл;
- EFI, при котором исполняемый файл загрузчика хранится в стандартном расположении на FAT32 файловой системе;
Если вы не знаете какой выбрать, то наиболее часто используемый вариант который работает без модификации файлов Windows — это msdos таблица разделов с fat32 файловой системой и загрузочным флагом.
Прежде всего USB-диск необходимо подготовить. В Linux наиболее простой и удобной для этих целей утилитой является gparted.
Ставим его если не установлен:
Подготовка USB диска
Выбираем нашу USB флэшку, отмонтируем её если она смонтирована:
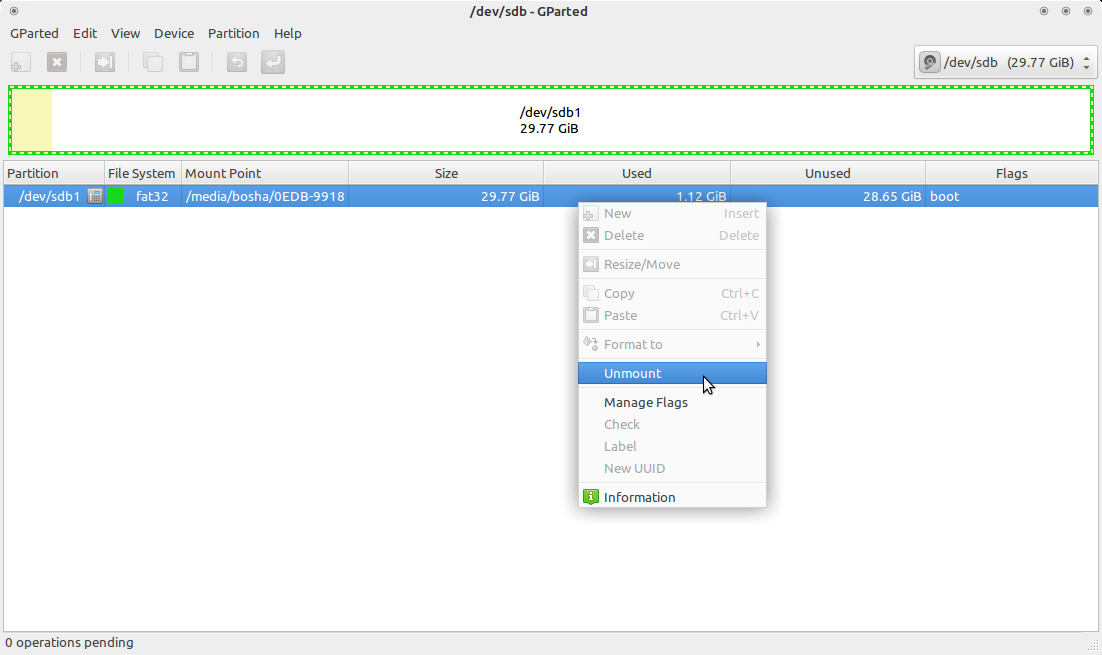
Отмонтирование USB диска в gparted
Теперь необходимо пересоздать таблицу разделов, при этом выбрать тип msdos . Заходим в меню Устройство (Device) и выбираем Создать таблицу разделов (Create partition table) :
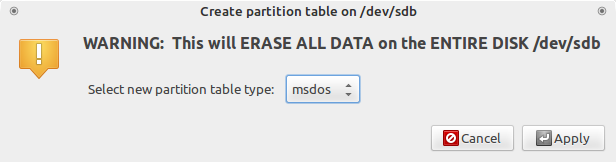
Gparted создание таблицы разделов
После этого выбираем неразмеченную область, нажимаем правой кнопкой мыши по ней же и выбираем пункт меню «Новый». В появившемся окне выбираем файловую систему NTFS или FAT32. Если у вас какая-то нестандартная сборка в которой могут быть файлы больше 4 гигабайт, то файловая система должна быть определенно NTFS, в противном случае, можно выбрать FAT32, и, тогда, так же можно будет загрузиться с UEFI. Так же необходимо указать метку для USB-диска. Важно: метка должна быть не просто «Windows», а какой либо более уникальной. Если файловая система FAT32, то метка должна быть указана заглавными буквами.
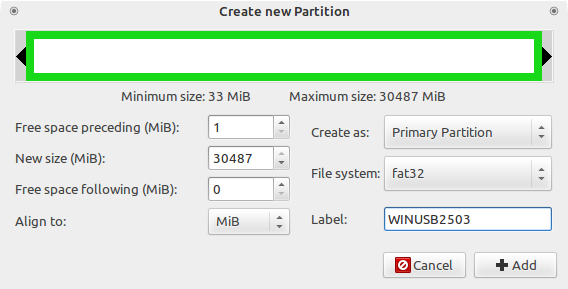
Создание нового раздела Gparted
Применяем все наши изменения:
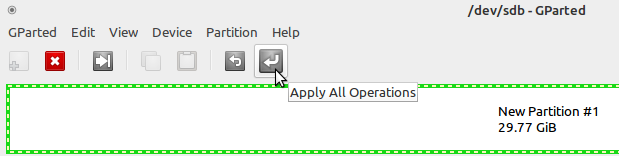
Применение изменений в Gparted
Выходим из gparted.
Копирование файлов Windows на USB диск
Теперь необходимо смонтировать образ с Windows и скопировать данные с него на наш подготовленный ранее usb диск. В большинстве современных рабочих окружений это можно сделать из файлового менеджера. По необходимому образу нажимаем правой кнопкой мыши, выбираем Открыть с помощью и выбираем Disk Image Mounter :
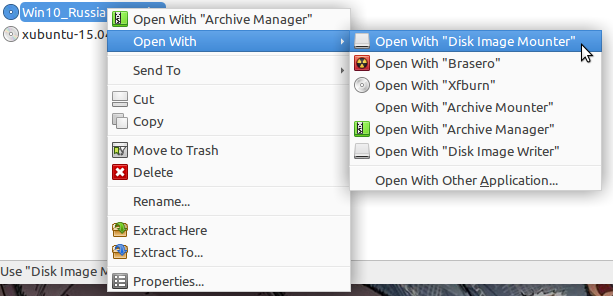
Монтирование образа с Windows в файлом менеджере Thunar
Если у вас нет такой утилиты, то можно смонтировать из командной строки:
Где $HOME/Загрузки/Windows.iso необходимо заменить на путь до образа с Windows. Образ будет смонтирован в директорию /mnt/cdrom .
Делаем USB-диск загрузочным
Если создаем MBR загрузочный диск
Для создания MBR загрузочной записи будем использовать grub:
- $user — имя текущего пользователя;
- $drive — название образа;
- /dev/sdX — расположение диска (в моем случае /dev/sdb ;
Если образ монтировали руками, то /media/$user/$drive/boot необходимо заменить на /mnt/cdrom/boot .
В случае, если не было никаких ошибок, то в консоли должны увидеть примерно следующее:
Теперь на USB-диске в директории boot/grub необходимо создать файл grub.cfg с таким содержимым:
В листинге выше, $USB_drive_label необходимо заменить на метку, которую мы присвоили диску на первом шаге. В данном случае WINUSB2503 .
Перезагружаемся, загружаемся с USB-диска и выбираем Start Windows Installation .
Если создаем UEFI загрузочный диск
С UEFI все несколько проще. Следует обратить внимание, что данный способ подходит только для Windows 7 x64 и выше.
После того, как все файлы скопировались, необходимо зайти в директорию efi/boot . Если в ней присутствуют файлы bootx64.efi или bootia32.efi то всё в порядке, можно пробовать загрузиться с диска.
Источник
How to Create Bootable USB Drive on Ubuntu / Linux Mint
When planning to install any Linux distributions, you definitely need a bootable USB flash drive or bootable DVD. There are several 3 rd party applications that helps you turn the ISO file into a Bootable USB disk. With a Bootable drive, you can not only install distro applications, you can also use the disk to test the desktop experience of Ubuntu without needing to meddle with your computer’s configuration or even help in fixing any configuration issues. In this article, we’ll show you how to create a bootable usb flash drive on Ubuntu / Linux Mint.
When it comes to creating bootable usb drive, there are many tools available and we are going to discuss about the following tools:
- Startup Disk Creator
- UNetbootin
- dd (command line utility)
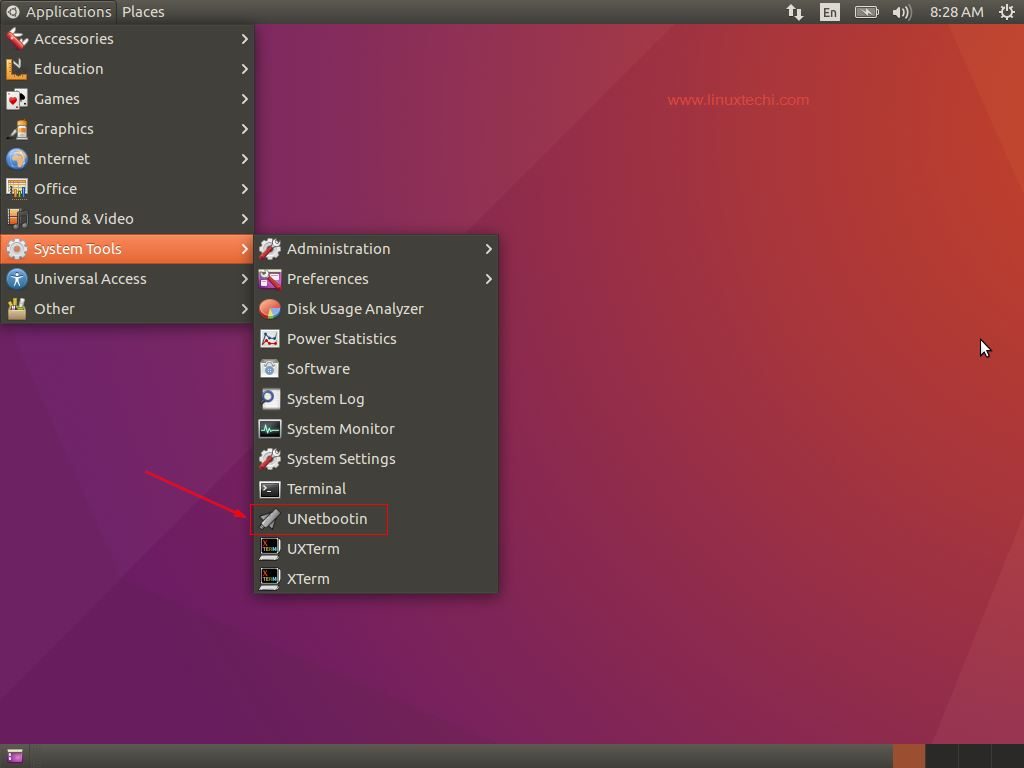
Startup Disk Creator
Startup Disk Creator is a utility that is readily available with Ubuntu to help you create bootable disks easily. Whenever we install Ubuntu and Linux Mint then this installed automatically as part of default tools. Refer the beneath steps to Create Bootable USB stick or DVD using startup Disk Creator
Step: 1) Insert the USB disk / DVD into your computer
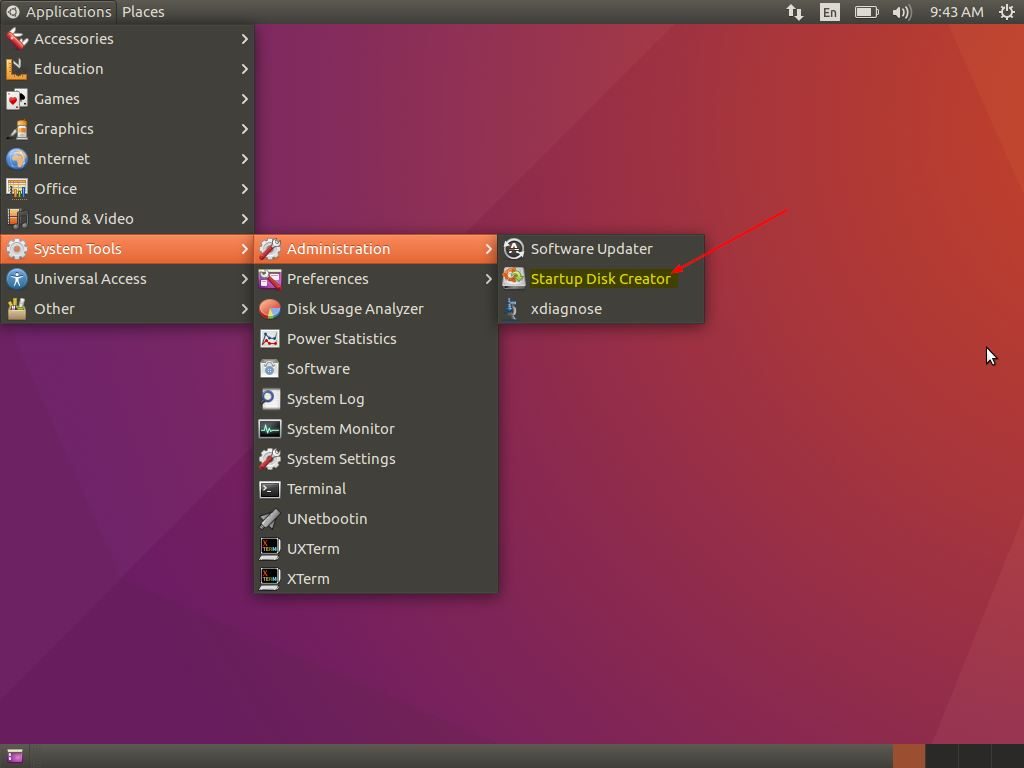
Step:2 ) Open the Start Disk Creator application in Ubuntu
Step:3 ) Once the application is launched, it automatically looks for any ISO file in your Downloads folder and lists that ISO file in the Source image area of the utility,
If you want to choose another ISO file, click “Other” button to open the file and select the ISO you need
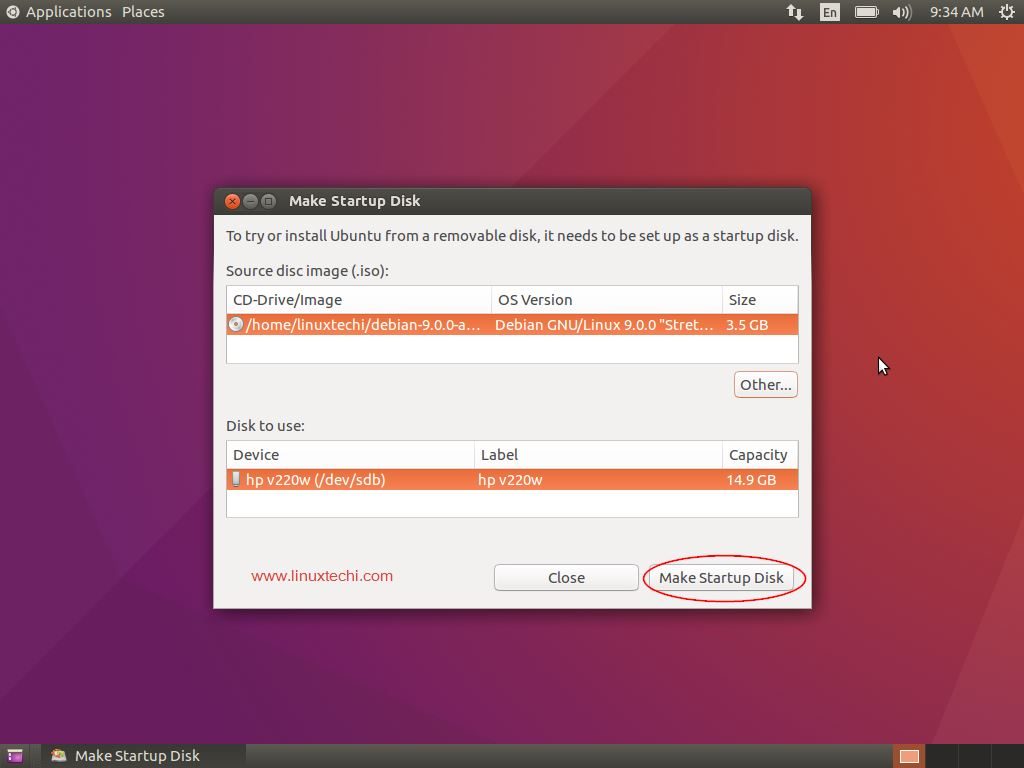
The USB flash drive or DVD whichever is connected to your computer is also automatically detected and placed in the “Disk to Use” section.
If not, Click “Other” button to choose the desired disk in which a bootable disk need to be created
Once everything is set, select “Make Startup disk” button to create the bootable disk
UNetbootin
UNetbootin is another tool that allows you to create bootable USB drives as it either downloads the ISO file or you can provide the downloaded ISO file to create a bootable disk easily. With UNetbootin you can create bootable disks for Ubuntu, Fedora and other Linux distributions easily. UNetbootin also helps you to load a lot of system utilities into the USB disk to repair any configuration issues.
UNetbootin is not installed by default during Ubuntu and Linux Mint installation. Follow below steps to Install UNetbootin on Ubuntu Linux & Linux Mint
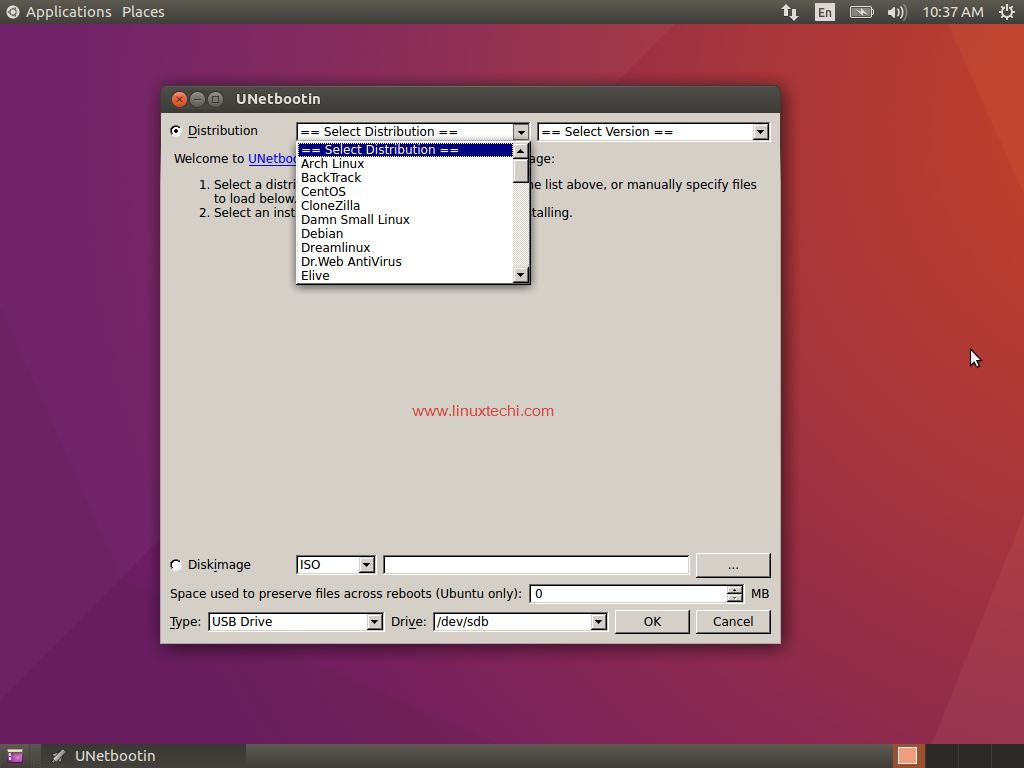
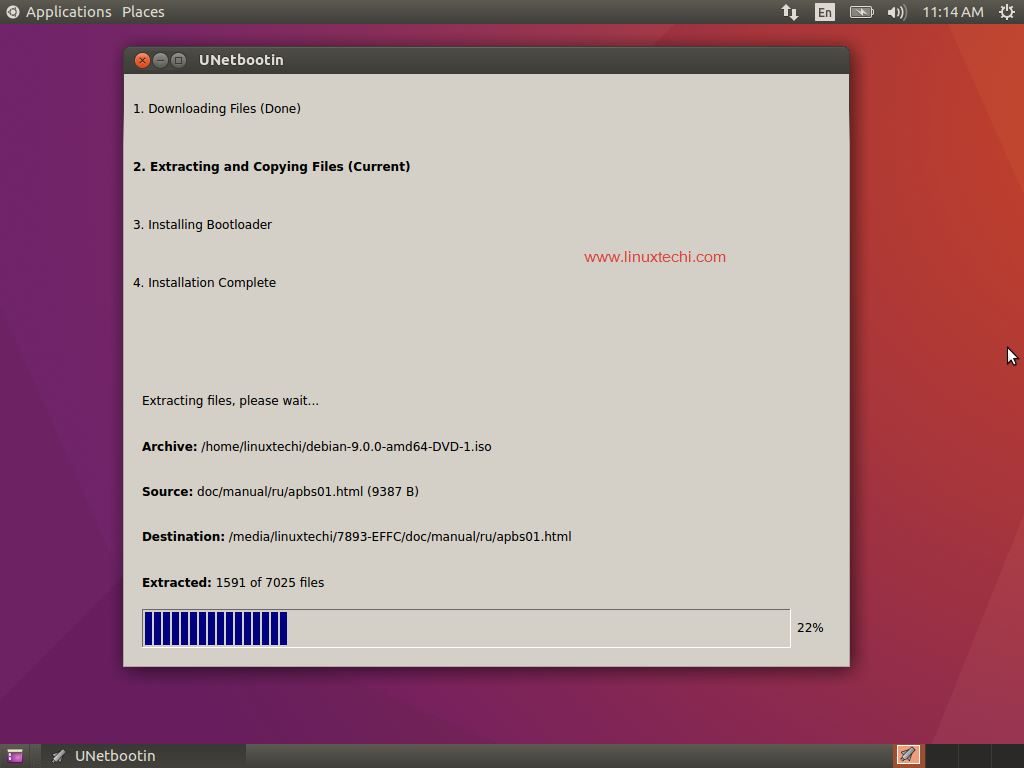
To create a bootable USB disk / DVD using UNetbootin use the beneath steps:
Step:1 ) Open the tool and select the distribution and the version as shown below
Step:2 ) Select the location of the ISO file
Step:3 ) Choose the type of disk USB / DVD in which the bootable disk needs to be created and also specify the drive letter of the USB / DVD disk
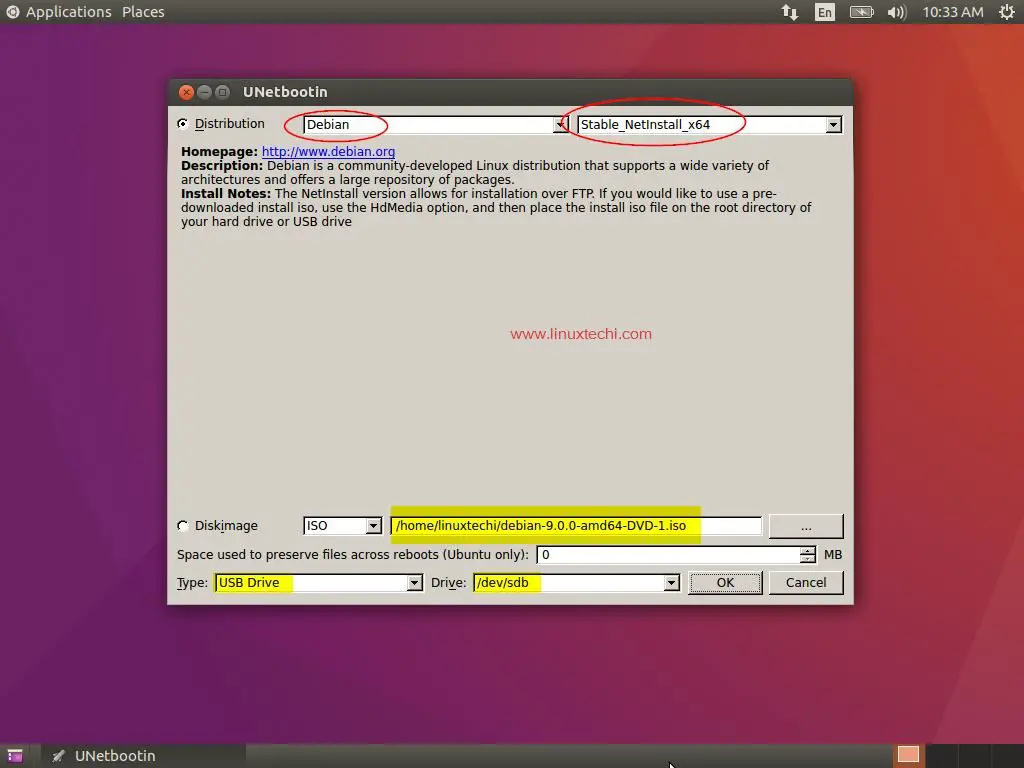
Step:4 ) Click “OK” to start the process
dd (Command line Utility)
People looking to burn an ISO from the command line can go for “dd“, an easy and simple command line utility to create your bootable USB flash drive / DVD for Ubuntu/ Linux Mint.
To create a bootable USB disk / DVD using “dd”:
Step:1 ) First step is insert the USB disk in your computer and open the terminal (Press CTRL + ALT + T)
Step:2 ) To find the USB device, you can use the following command:
Take for example our USB disk is in /dev/sdb
Now it is time to unmount the USB disk using the following command
step:3 ) For now let’s assume that the ISO file is in the current folder and then type the following command to burn the ISO into the USB device
‘ubuntu-17.10-desktop-amd64.iso‘ is the ISO file and
‘bs=4M‘ is an optional command to speed up the creation process of the bootable disk
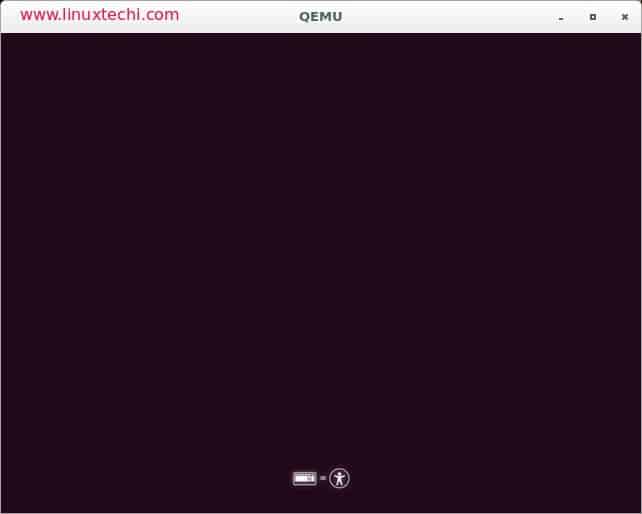
Test Your Bootable Disk
It is better to check if the bootable disk has been created successfully. To check that you need to download a utility called QEMU, a machine emulator and virtualizer.
Open the terminal and install qemu using the following command
Once the qemu has been installed successfully then run the following command
Your booting process is successful if you see a virtual machine booting from your USB disk / DVD.
That’s conclude the article, I hope you guys got an idea how we can create Bootable USB / DVD Disk using the above described methods, please do share your feedback and comments if you like the article.
Источник


