Stm32 hal linux download

Artwork by dangercook

Artwork by dangercook
HAL — это дальнейшее развитие библиотеки SPL, выпущенной фирмой «ST Microelectronics», ориентированный на то, что бы дать разработчику единый инструмент для работы со всеми чипами STM32. Этим единым инструментом стала кросс-платформенная утилита с графическим интерфейсом STM32CubeMX, а сам фреймворк HAL стал называться STM32Cube. И если утилита STM32CubeMX действительно одна для всех микроконтроллеров STM32, то фреймворк STM32Cube/HAL для каждой линейки чипов свой. Т.е. все так же как и в SPL.
STM32CubeMX — позволяет сгенерироваль проект на основе CMSIS+HAL под различные IDE, что помогает избежать многих граблей, на начальном этапе освоения STM32.
Нас будет интересовать линейка STM32F1xx, документация по HAL для этой линейке доступна на официальном сайте Description of STM32F1xx HAL drivers. User Manual UM1850 Description of STM32F1xx HAL drivers. User Manual UM1850
Установка связки STM32CubeMX + IDE в системах Windows, тривиальна и многократно описана в сети, а вот в Linux могут возникнуть сложности.
Для Eclipse существует плагин STM32Cube, который позволяет запустить STM32CubeMX в окошке Eclipse. Есть в сети пошаговая инструкция как этим плагином пользоваться: Установка и настройка Eclipse, STM32CubeMX под Windows, и я даже где-то видел видео, где все работает. Но в моем случае, проект который в итоге генерировался, Eclipse-ом почему-то не желался приниматься:


И хотя возможно, что можно было бы доконфигурировать проект Eclipce’а, лучше будет воспользоваться готовым IDE «SystemWorkbench for STM32″(он же SW4STM32) компании AC6 на базе того же Eclipse:


SW4STM32 полностью бесплатный, доступный для Linux, Windows и MacOS, не содержит никаких ограничений на размер генерируемого кода. Скачать его можно c официального сайта компании AC6 http://www.ac6-tools.com/downloads/SW4STM32/
Установка STM32CubeMX под Linux тоже не доставляет труда. Процесс можно посмотреть на youtube:
Попробуем написать Blink с помощью этих двух инструментов. Целевым микроконтроллером будет STM32F103CBT6, светодиод будет на PB1, тактирование от внешнего кварца на 8 MHz. Версия java:
Запускаем STM32CubeMX и создаем новый проект:


Через выпадающие списки выбираем целевой микроконтроллер:


Во вкладке «Pinout», в пункте SYS включаем отладку по SerialWire, а в через регистры контроля и тактирования RCC устанавливаем внешний кварц — HSE. На ножке PB1 выставляем режим GPIO_Output:


Во вкладке «Clock Configuration» подключаем кварц и устанавливаем нужные делители и множитель PLLMul


Во вкладке «Configuration» устанавливаем режим GPIO для PB1:


Последний этап, через меню->Genrate Code запускаем экспорт проекта. Здесь в качестве целевой IDE указываем SW4STM32, рабочий каталог должен совпадать с рабочим каталогом SW4STM32:


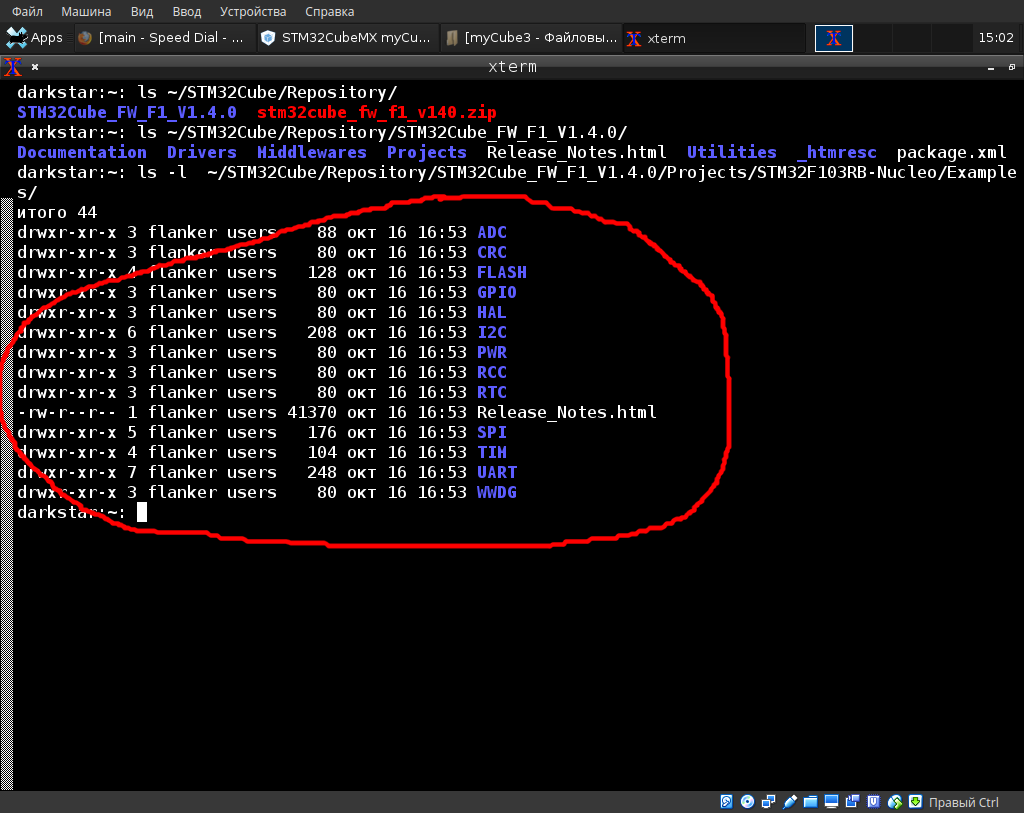
При этом если STM32CubeMX был запущен впервые на данном компьютере, то перед сохранением проекта, будет закачана библиотека HAL для данной линейки микроконтроллеров. Библиотеку можно будет найти в
/STM32Cube. Так же как SPL она содержит проекты с примерами для работы с той или иной периферией:

Осталось запустить SW4STM32, и через меню->File->Import импортировать сгенерированный проект:


После чего можно попытаться собрать проект:


Если проект собрался успешно, то во вкладке Console будет соответствующий отчет:


Осталось написать саму программу. В while-цикле функции main() следует вставить код:


Осталось скомпилировать проект и прошить чип:
Работать должно без вопросов.

Иследование работы программы с помощью отладчика, называется динамическим анализом кода

Иследование работы программы с помощью отладчика, называется динамическим анализом кода
Попробуем исследовать работу программы с помощью отладчика:
Поставим точку останова на главный цикл программы:
Попробуем ткнуть наугад:
Здесь вроде все нормально, как и должно быть.
Здесь задержки формируются с помощью функции HAL_Delay. Функция использует внутренний таймер ARM — SysTick. Почитать о нем можно здесь: ARM. Учебный Курс. SysTick — Системный таймер. Это обычный 24-битный счетчик, который ничего не умеет, этакий аналог TIMER0 в AVR и TIM4 в STM4. SysTick предназначен специально для формирования задержек или как таймер планировщика в операционной системе.
Заглянем внутрь функции:
так это работает:
Теперь посмотрим, как происходит переключение светодиода:
Здесь нас будет интересовать число 0x40010c00 в r0. Можно предположить, что это адрес порта. Изучение аппнота AN3422 Application note Migration of microcontroller applications from STM32F1 to STM32L1 serie подтверждает догадку:


Структура GPIO описана в заголовочном файле stm32f103xb.h
Регистр GPIOB->BSRR в пятом столбце первой строчки, в котором записано значение 0х10. Посмотрим как он меняется:
Как видно значение регистров ODR и BSRR изменилось. Идем дальше:
Значение регистров снова сбросилось. Думаю, что здесь все понятно.
Источник
Stm32 hal linux download
STM32CubeF1 HAL Driver MCU Component

STM32Cube is an STMicroelectronics original initiative to ease the developers’ life by reducing efforts, time and cost.
STM32Cube covers the overall STM32 products portfolio. It includes a comprehensive embedded software platform, delivered for each STM32 series.
- The CMSIS modules (core and device) corresponding to the ARM(tm) core implemented in this STM32 product.
- The STM32 HAL-LL drivers, an abstraction layer offering a set of APIs ensuring maximized portability across the STM32 portfolio.
- The BSP drivers of each evaluation, demonstration or nucleo board provided for this STM32 series.
- A consistent set of middleware libraries such as RTOS, USB, FatFS, graphics, touch sensing library.
- A full set of software projects (basic examples, applications, and demonstrations) for each board provided for this STM32 series.
Two models of publication are proposed for the STM32Cube embedded software:
- The monolithic MCU Package: all STM32Cube software modules of one STM32 series are present (Drivers, Middleware, Projects, Utilities) in the repository (usual name STM32Cubexx, xx corresponding to the STM32 series).
- The MCU component: each STM32Cube software module being part of the STM32Cube MCU Package, is delivered as an individual repository, allowing the user to select and get only the required software functions.
This stm32f1xx_hal_driver MCU component repo is one element of the STM32CubeF1 MCU embedded software package, providing the HAL-LL Drivers part.
Copyright (c) 2016 STMicroelectronics.
This software component is licensed by STMicroelectronics under BSD 3-Clause license. You may not use this file except in compliance with the License. You may obtain a copy of the License here.
Details about the content of this release are available in the release note here.
In this table, you can find the successive versions of this HAL-LL Driver component, in line with the corresponding versions of the full MCU package:
It is crucial that you use a consistent set of versions for the CMSIS Core — CMSIS Device — HAL, as mentioned in this table.
| HAL Driver F1 | CMSIS Device F1 | CMSIS Core | Was delivered in the full MCU package |
|---|---|---|---|
| Tag v1.1.4 | Tag v4.3.1 | Tag v5.4.0_cm3 | Tag v1.8.0 (and following, if any, till next HAL tag) |
| Tag v1.1.5 | Tag v4.3.1 | Tag v5.4.0_cm3 | Tag v1.8.1 (and following, if any, till next HAL tag) |
| Tag v1.1.6 | Tag v4.3.2 | Tag v5.4.0_cm3 | Tag v1.8.2 (and following, if any, till next HAL tag) |
| Tag v1.1.8 | Tag v4.3.2 | Tag v5.4.0_cm3 | Tag v1.8.3 (and following, if any, till next HAL tag) |
| Tag v1.1.8 | Tag v4.3.3 | Tag v5.4.0_cm3 | Tag v1.8.4 (and following, if any, till next HAL tag) |
The full STM32CubeF1 MCU package is available here.
If you have any issue with the software content of this repository, you can file an issue here.
For any other question related to the product, the tools, the environment, you can submit a topic on the ST Community/STM32 MCUs forum.
About
Provides the STM32Cube MCU Component «hal_driver» of the STM32F1 series.
Источник
Stm32 hal linux download
HAL for the STM32F1 family of microcontrollers
![]()

![]()
Quick start guide
Embedded Rust development requires a bit more setup than ordinary development. For this guide, we’ll assume you’re using a stm32 blue pill board (shown below), but if you have another f1 microcontroller, you should be able to adapt it.

You will also need a debug probe, for example an stlink v3 mini for programming and debugging. (There are many different STLink probes out there, all of them should work fine with the instructions given here, other JTAG or SWD debug probes will work as well but will need different software or configuration).
To program your microcontroller, you need to install:
- openocd
- gdb-multiarch (on some platforms you may need to use gdb-arm-none-eabi instead, make sure to update .cargo/config to reflect this change)
Finally, you need to install arm target support for the Rust compiler. To do so, run
Setting up your project
Create a new Rust project as you usually do with cargo init . The hello world of embedded development is usually to blink an LED and code to do so is available in examples/blinky.rs. Copy that file to the main.rs of your project.
You also need to add some dependencies to your Cargo.toml :
If you build your project now, you should get a single error: error: language item required, but not found: eh_personality . This unhelpful error message is fixed by compiling for the right target.
We also need to tell Rust how to link our executable, and how to lay out the result in memory. To accomplish all this, copy .cargo/config and memory.x from the stm32f1xx-hal repo to your project.
If everything went well, your project should have built without errors.
Programming the microcontroller
It is now time to actually run the code on the hardware. To do so plug your debug probe into the blue pill and start openocd using
If you are not using an stlink V3, change the interface accordingly. For more information, see the embeddonomicon.
If all went well, it should detect your microcontroller and say Info : stm32f1x.cpu: hardware has 6 breakpoints, 4 watchpoints . Keep it running in the background.
We will use gdb for uploading the compiled binary to the microcontroller and for debugging. Cargo will automatically start gdb thanks to the .cargo/config you added earlier. gdb also needs to be told to connect to openocd which is done by copying .gdbinit to the root of your project.
You may also need to tell gdb that it is safe to load .gdbinit from the working directory.
If everything was successful, cargo should compile your project, start gdb, load your program and give you a prompt. If you type continue in the gdb prompt, your program should start and the green led on the blue pill should start blinking.
From here on, you can start adding more code to your project to make it do something more interesting. For crate documentation, see docs.rs/stm32f1xx-hal. There are also a lot more examples available. If something is unclear in the docs or examples, please, open an issue and we will try to improve it.
Selecting a microcontroller
This crate supports multiple microcontrollers in the stm32f1 family. Which specific microcontroller you want to build for has to be specified with a feature, for example stm32f103 .
If no microcontroller is specified, the crate will not compile.
You may also need to specify the density of the device with medium , high or xl to enable certain peripherals. Generally the density can be determined by the 2nd character after the number in the device name (i.e. For STM32F103C6U, the 6 indicates a low-density device) but check the datasheet or CubeMX to be sure.
- 4, 6 => low density, no feature required
- 8, B => medium feature
- C, D, E => high feature
- F, G => xl feature
For microcontrollers of the connectivity line ( stm32f105 and stm32f107 ) no density feature must be specified.
- stm32f100
- stm32f101
- stm32f103
- stm32f105
- stm32f107
Trying out the examples
You may need to give cargo permission to call gdb from the working directory.
Compile, load, and launch the hardware debugger.
$INTERFACE should be set based on your debugging hardware. If you are using an stlink V2, use stlink-v2.cfg . For more information, see the embeddonomicon.
Using as a Dependency
When using this crate as a dependency in your project, the microcontroller can be specified as part of the Cargo.toml definition.
The documentation can be found at docs.rs.
Licensed under either of
Unless you explicitly state otherwise, any contribution intentionally submitted for inclusion in the work by you, as defined in the Apache-2.0 license, shall be dual licensed as above, without any additional terms or conditions.
About
A Rust embedded-hal HAL impl for the STM32F1 family based on japarics stm32f103xx-hal
Источник


