- How to stream from a PC to a TV
- Cables galore
- Wireless HDMI
- Chromecast
- Steam Link
- Basic media streaming
- Game streaming
- Final thoughts
- How to stream media from your PC to your HDTV over Wi-Fi
- What to do when your PC is in one room, and your HDTV is in another.
- Setting up a DLNA server on Windows
- Windows 10, Miracast, and DLNA
- Set up DLNA-compatible media players
- Connect Windows 10 PC to Smart TV
How to stream from a PC to a TV
We run through the various ways to stream your PC to your TV, from cables to wireless solutions.
Although having the latest Android set top box or ultra-smart TV enables you to view a plethora of content, it can’t do everything. It’s times like these where the PC’s capabilities come into play.
Whether it’s triple-A title gaming, enhanced browsing using the latest Silverlight and other wonderful web-based technologies, or being able to watch and listen to virtually any form of media (with the right codecs installed), the PC has you covered – and that’s regardless of whether you’re using Windows or Linux.
However, most normal PCs are pretty ugly-looking large boxes that you don’t necessarily want in your living room. There are some exceptional, living room-friendly, cases out there, but they’re generally far more expensive than the standard desktop. So if you don’t want to spend a huge amount on a PC with little upgrade potential inside a tiny, bespoke chassis, how on earth can you get what’s on your desktop to the TV in living room?
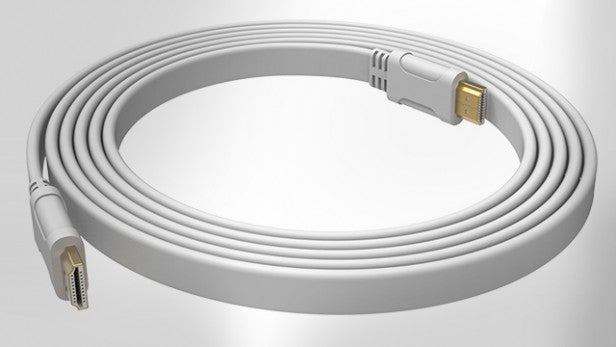
Cables galore
One method is to run a very long HDMI cable form your PC to the TV. Although it’ll work, and you’re essentially streaming content from one to the other, it comes with its own set of impracticalities.
For one, running a HDMI cable around your home isn’t the neatest job you’re ever likely to accomplish. Unless you have trunking, wall points, and you’re handy with a drill, the end result could end up looking like the dangling vines from an old Tarzan movie.
Related: Best TV
Secondly, although there are plenty of 50ft HDMI cables available to buy, the agreed maximum length before the signal starts to degrade appears to be around 25ft. This means that you’ll need to be fairly close to the living room to begin with, and you probably won’t be able to neatly tuck the HDMI cable around the door frame to hide it from view; so you’re back to issue number one again.
Thirdly it can get extraordinarily expensive very quickly. The cable, any splitters/boosters, any kit to make the layout neat etc. will soon add up, and you’re left spending a hefty sum on running a cable from one room to the other.
It’s an idea, of course; just not a particularly good one.
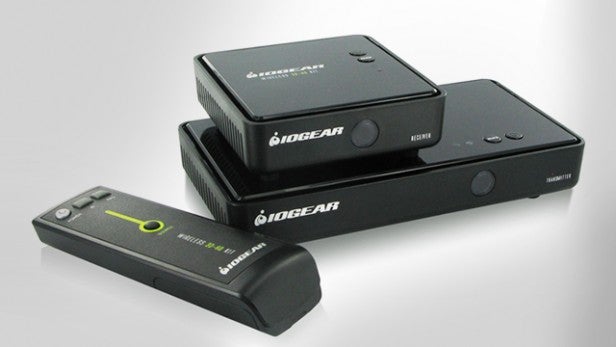
Wireless HDMI
If running HDMI cables around the home isn’t for you, then consider a wireless HDMI approach.
There are countless wireless HDMI kits available, from as low as £40 through to several hundred. But essentially they all do pretty much the same thing.
A HDMI Wireless kit usually consists of two main components: the transmitter and the receiver unit. Basically, you’ll install the transmitter unit on your PC, along with any software necessary to make it work. Then you’ll plug the receiver unit into a spare HDMI port on your TV. Providing all goes well, everything that’s displayed on your desktop will be streamed to the TV via the two wireless units.
Related: Best gaming PC
While a good choice for those who don’t want to run a cable, there can be some issues with the wireless HDMI option. One of the worst offenders is the transmission through solid objects. Some wireless HDMI units can cope with sending the signal through a wall, floor, or even across the house. Others will cut out if someone walks in front of a line of sight signal.
Another issue is that of lag. While the signal works through walls, the units themselves may not be able to cope with the fast update that your PC’s HDMI output displays, therefore there’ll be some significant lag when you’re trying to watch or play anything, rendering the entire project fairly useless. A common problem is also the lag between audio and video, with one or the other being out of sync.
Again it can be an expensive affair should you end up buying a unit that doesn’t perform as well as you’d hoped. The best advice here is to read as many reviews as possible before spending any money on a wireless HDMI kit.
Chromecast
A good compromise with the wireless option is to use Google’s Chromecast 2 device.
Although the Chromecast is designed primarily for use with pairing your Android based devices, you can use the Google Cast extension for the Google Chrome Browser and stream any content through the browser to the Chromecast 2 that’s installed in the HDMI port in your TV.
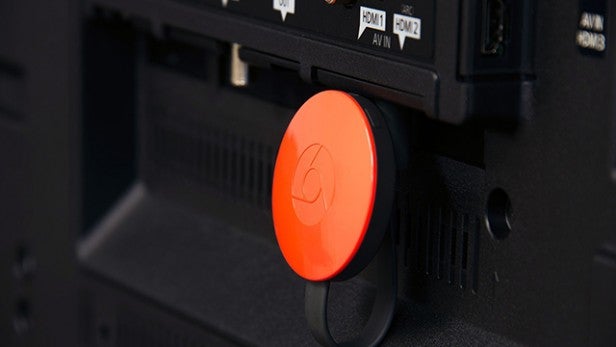
It’s not perfect though, and you’ll need decent Wi-Fi to make it work to its full potential. But if you do have a strong Wi-Fi network then all you’ll need to do is drag and drop any videos into the browser from the PC side to begin viewing.
Again it’s not a perfect solution, and there are limits to what you can do. But if all you need is a simple streaming solution, the Chromecast option may tick all the right boxes for you.
Steam Link
The Steam Link is Valve’s contribution to PC game streaming from your gaming PC to the best screen in the house – the TV.
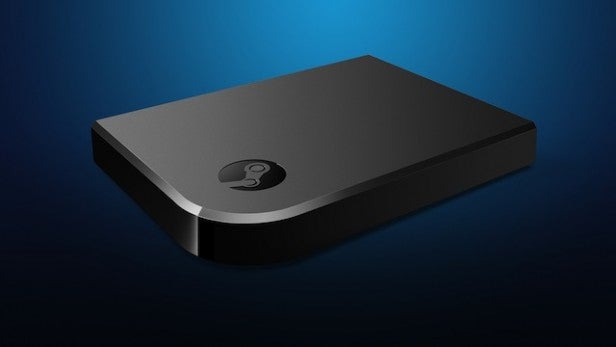
It’s a slimline box that connects to the TV’s HDMI port, with several USB ports and a gigabit Ethernet port. All you need to do is plug the Link into the TV, along with power and any keyboard, mouse, or Steam Controller. It’s then just a case of launching Steam from your PC.
With the Link powered up it’ll scan your network for any PCs running Steam and issue you a code. You can then opt to connect to the PC, where you’ll need to enter the code directly into the Steam Client.
Once everything is connected though, you’ll be able to view the Steam Big Picture client on your TV downstairs, and you’ll be able to play any of the games in your Steam library.
In addition, if you minimise the Steam client – don’t close it down as that will drop the connection to the Link – you’ll be presented with your Windows or Linux Desktop, and from there you can control the mouse and keyboard as normal to watch videos, pictures, and browse the internet.
The downside to this setup is that you ideally need to have a wired connection for the best possible streaming quality and speed. Although WiFi is perfectly possible (the Link has 802.11ac 2×2 MIMO built-in), to stream those fast paced games and movies in the best possible quality you’ll need a solid 100Mbps or gigabit wired setup.
Considering the Steam Link only costs around £40, or thereabouts, it’s not a bad streaming solution.
Basic media streaming
If you’re not too concerned about viewing or accessing your desktop from the TV, just media in the form of videos and images, then you can easily accomplish that with Windows Media Player.
Start by opening up WMP, and click on the Stream menu option. From there select ‘Turn on Media Streaming’ and follow the instructions to enable media streaming from your PC to any DLNA capable devices on your network – including your Smart TV.
Related: Windows 10
With the media streaming from the Network and Sharing Centre within Windows, you can choose to allow access to the physical hardware installed on your PC, the Blu-Ray optical drive for example, and any secondary storage devices where the media in question is located.
Once you name your media library, all you’ll need to do is search for it from the Smart TV DLNA function and your Windows PC streamed content should be available for you to view.
Game streaming
If the Steam Link doesn’t work for you, or you have games that belong to another PC game library platform – one that doesn’t play well with adding it to Steam – then you may want to check out the Nvidia Shield TV.
Related: Best PC games

This marvellous Android-based box of tricks will allow you to stream your installed games on your PC, including any you add, to the TV with an exceptional degree of quality. However, you will need a compatible Nvidia graphics card installed in your system before you’ll be able to do that.
If you own an Nvidia 650 card or above, then you should be able to stream the games through the Nvidia GeForce Experience program on your PC. As with the Link, you can plug a keyboard and mouse into the Shield downstairs and play the games, including anything from the Steam library, as well as you could on the main PC upstaris.
As before though, you will need a decent home network setup for the games to stream smoothly. Ideally a wired connection is best, but you can tweak the streaming to enjoy a more balanced experience.
Final thoughts
There are, as you can see, plenty of streaming solutions for accessing your PC content from the TV; it’s just a case of working out which will work best for you.
If you have any other ideas or solutions you’d like to add, then please mention them in the comments section.
How to stream media from your PC to your HDTV over Wi-Fi
What to do when your PC is in one room, and your HDTV is in another.


Today’s Best Tech Deals
Picked by PCWorld’s Editors
Top Deals On Great Products
Picked by Techconnect’s Editors
Say you have a nice collection of media on your PC in one room, but you’d like to be able to view it on your nice big TV in another room. Windows offers a simple way to do that over Wi-Fi.
There’s actually an open standard for sharing media files across a home network. It’s called the Digital Living Network Alliance (DLNA), and you probably already have everything you need to use it. There’s also a second, and newer, standard called Miracast that will be of particular note to Windows 10 users.
First, some definitions for DLNA: The device that sends the stream—such as a PC—is the DLNA server. The device that receives the stream—such as an HDTV or something connected to the TV—is the DLNA renderer (I really hate that term; player or receiver would be much friendlier). Both devices must be on the same network.
Setting up a DLNA server on Windows
Assuming that your PC is running Windows 7 or higher, it can serve your media without additional software. Windows Media Player (WMP) is, among other things, a DLNA server, but you have to enable it first.
In WMP 12, select Stream > Turn on media streaming from the menu bar at the top.
In Windows 10, you’ll now see a permissions dialog box. Click Turn on media streaming one more time.
This brings you to another dialog box that allows you to control which devices on the network can receive the stream.
Don’t worry about this box at the moment. Just click OK at the bottom, but you may want to return to it at another time.
You can also find DLNA servers for other operating systems, including Android, iOS, Mac OS X, and Linux. Consumer network-attached storage (NAS) systems almost always contain DLNA server software as well.
Windows 10, Miracast, and DLNA
If you have a Windows 10 PC there’s an extra feature you can try. The above process with Windows Media Player will still work, but Microsoft has also built streaming, or casting, right into the operating system via DLNA and Miracast.
Casting has been present in Windows since version 8.1; however, we’re only going to cover Windows 10 here. Using this feature is pretty straightforward as long as you have a DLNA- or Miracast-compatible device.
Right-click on media in Windows 10 to cast it.
If you’ve ever used a Chromecast, then the process of casting from Windows 10 will be familiar. Right-click on a video or other piece of media on your PC. From the right-click context menu select Cast to Device. You’ll then see the devices on your local network that you can cast to. Pick one and you’re done.
Cast from Edge with a few clicks.
Things work similarly in Microsoft Edge. Open the browser, select the webpage you want to cast such as a YouTube video. Then in the upper-right corner select the More options menu (the three horizontal dots) and select Cast media to device. After that a Windows 8-style side panel will appear on the right with available devices.
Set up DLNA-compatible media players
The vast majority of network-capable HDTVs, Blu-ray players, and game consoles can render DLNA.
Check your device’s home screen for music, pictures, and video options. When you select one of these, you’ll likely get a list of DLNA servers currently running on the home network. From here, you simply select the media file you want to stream. If you don’t see any DLNA servers, check the device manual for DLNA support.
BubbleUPnP on an Android phone
Alternately, with the right apps, you can turn a Chromecast or a Roku into a DLNA renderer.
If you have a Chromecast and an Android phone, download the free Android app BubbleUPnP. The app’s setup wizard will recommend installing its own server on your PC, but you don’t have to. That said, the app doesn’t play well with Windows Media Player so you may have no choice.
Next, open the menu on the left under the “hamburger” menu icon, and under Renderer select the device that will receive the content.
Then under Library select the DLNA server that has the media you want, and choose your content. In my case, I can choose from my PC’s hard drive, as well as my Plex Media Server.
Connect Windows 10 PC to Smart TV
Multimedia files can be projected/played on a Smart TV from a Windows 10 PC by the following methods:
1. CAST (Media Streaming): Media is streamed in compressed file format from a source device to the media player on a receiver device which decompresses the file stream to play the media in real time.
2. PROJECT (Screen Mirroring): The image displayed on the screen of a device is replicated on the display screen of another device in real time. In essence, the video-out port of the sender device is connected to the video-in port of the receiver device. The bandwidth required for Screen Project is much higher than Cast, because the pixel data stream between the source and receiver is raw video in decompressed format.
3. DLNA (Media Sharing): A Media File is streamed from a media storage Server on request from a media player Client which decompresses the file stream to play the media in real time. Cast is a variation of DLNA where the sender (server) initiates media streaming to a ready-to-connect receiver (client) listening on a common Wired / Wireless network.
1. CAST: Cast is the easiest method to play a multimedia from a PC on to a Smart TV called Smart as they have an Operating System. However file formats supported for casting are limited to MP4, WMV, AVI, MOV for video and MP3, WMA, WAV for audio. The audio system of the TV can either be built-in or externally connected to a Hi-fi system.
The Cast setup requires that (i) the PC and the Smart TV are connected to the same Home WiFi network (ii) Network discovery And File sharing are enabled on your currently active network profile (Private / Public) through Control Panel > Networking and Sharing Centre > Change advanced sharing settings (on left panel).
Just as networking needs to be configured on the PC, similarly networking has to be configured on the Smart TV through the Settings menu, to either establish a peer-to-peer direct communication path Or inter-connect by hooking up to a common access point. As with any operating system, a network once created on a Smart TV, persists as the default network until a new network is created.
To play a video, Open File Explorer on the PC, right click on the video file and from the shortcut menu choose Cast to Device > Smart TV (name). It may take some time for the PC to search for the TV on the network before displaying its name on the shortcut menu.
Select the TV name on the shortcut menu and the media will automatically start playing on the TV, with the Cast Window for media control appearing on the PC. You can use the PC for other work by minimising the Cast Window while the media continue to play on the TV.
Once a TV is successfully linked to a PC, the TV-name gets registered in the Devices list under Windows Settings and the TV-name will be readily available thereafter in the Cast to Device menu.
On Windows 10, Casting is the simplest and most reliable choice for playing multimedia files from PC to any TV.
2. PROJECT: Project or Screen Mirroring allows a Windows 10 PC to project its Screen to a Smart TV by using the Miracast technology. Unlike Cast, Screen Mirroring allows any type of file that displays on the PC screen to be projected on to the TV, be it a text document or a movie played from the DVD drive.
Miracast is a standard introduced in 2012 by «Wi-Fi Alliance» – a non-profit organisation, for wireless screen mirroring of devices with an operating system like PC and Mobile, on to Displays such as TV, LED panels and Screen Projectors.
Microsoft is one of the main promoters of Miracast in their Windows OS, while Google dropped Miracast support in their Android OS starting Android 6 Marshmallow, in favour of Google’s own proprietary Chromecast technology. Miracast in android devices is now possible through miracast apps in Google Play Store. Some mobile device manufacturers with customised android provide Miracast built into their OS.
At the core of Miracast standard is the WiFi Direct technology originally developed by Intel but subsequently discontinued, on adoption by the Miracast organisation. Much like bluetooth, WiFi Direct devices creates its own hotspot to network with other WiFi enabled devices without the need of a Wireless Access Point. WiFi Direct must be built into the hardware of one of the communicating devices. In contrast, Chromecast works on a WiFi network hosted by the Router.
Miracast serves to establish a peer-to-peer WiFi Direct connection between a OS device and a Display device, and allows streaming of up to 1080p HD video and 5.1 surround sound.
The objective of Miracast is to separate the streaming network from the Home WiFi network used to access the internet. A PC on a home network use the WiFi direct path to stream data to a TV receiver, without having to consume the bandwidth of the home network used by other devices for inter-communication and accessing the internet. The PC can simultaneously stream data and access internet, but that could strain the WiFi port on the PC unless it has two separate WiFi ports – one configured for Miracast and the other for internet access.
Windows 10 implementation of Miracast requires that (i) the PC take ownership of the media streaming part of Miracast to effect pixel data streaming of the PC screen, and (ii) the Display Device (TV) take ownership of the WiFi Direct networking part of Miracast to establish a direct communication path with the PC, by incorporating the WiFi-Direct hardware technology which we shall henceforth refer to as a Miracast adapter.
In Windows 10, the Miracast feature is part of Windows installation depending upon the capability of the hardware. In other words, it is upto the PC manufacturer to provide the necessary hardware to ensure that the media streaming part of Miracast is in place. The hardware elements that engines the Miracast feature in a PC are the Processor, Graphics driver and the WiFi adapter driver which should correspond to the Windows 10 Network Driver Interface Specification (NDIS) version number.
Miracast is natively available on a TV when the Miracast adapter is integrated into the TV electronics. Even if a TV has Miracast built-in, it might not support the Windows 10 Wireless display protocol. Miracast can also go entirely missing on an android TV.
Whatever may be the case, a TV can be made to support Windows Wireless Display by attaching a Miracast dongle, which among others is also offered by Microsoft specifically for Windows PC projection. The dongle called Microsoft Wireless Display Adapter has to be connected to the HDMI port of the TV with the USB end of the adapter connected to an USB port — preferably the one on the TV set, to draw power.
To project a PC screen to a TV, the following steps are necessary:
(i) Enable WiFi on the PC and the TV. They can be on the same / different network.
(ii) First determine if the PC is Miracast compliant. Press Windows Key + P on the PC keyboard to open the Project action bar (Charms Menu) which must contain the link «Connect to a wireless display» at the bottom. Miracast is not available on the PC if the link is not seen on the action bar.
(iii) Ensure that the TV has a built-in Miracast adapter Or a Microsoft Wireless Display Adapter is attached to the TV.
(iv) Mirroring is enabled on the Smart TV.
(v) Set the Signal source for the TV with a built-in Miracast adapter to the Mirroring port; Or set the signal source to the HDMI port where the Microsoft Wireless Display adapter is attached.
(vi) Press Windows Key + P on the PC keyboard to invoke the Project action bar / Charms menu and select the «Connect to a wireless display» link at the bottom. The action bar will now broadcast the Microsoft adapter name Or the TV-name if it has a built-in Miracast adapter Or both including all nearby devices which are ready to connect via Miracast. Select the one applicable to start mirroring the PC screen on to the TV. If the TV-name or the Microsoft adapter name is not found on the Project action bar, ensure that you add the TV-name / adapter within Devices of Windows Settings.
If Miracast is not available / not possible on a PC, then the fail-safe alternative is to go for the legacy wired connection by a HDMI cable between the HDMI port of PC and the HDMI port of TV, provided the TV and the PC are in close proximity. Set the Signal source for the TV to the HDMI port where the cable is attached. Press Windows Key + P on the PC keyboard to invoke the Project action bar / Charms menu and choose the Duplicate option to simultaneously display the PC screen on to the TV.
Since Miracast evolved as an WiFi extension to HDMI, it is sometimes referred by the mnemonic «HDMI over WiFi».
A TV with Miracast will contain a Setting within the Networks section, which will show the SSID and Password of the WiFi Direct Access point. This access point on being enabled will show up as a hotspot on the «WiFi available networks list» of a PC. A PC can use the WiFi Direct hotspot for Cast and DLNA without the need of a Home network. However, Miracast will not be possible when using the WiFi Direct hotspot as a WiFi access point.
Caution ! A Smart TV can broadcast two names: The system defined Miracast SSID for Screen Project and the user defined name when using the Home network for Cast and DLNA.
3. DLNA: DLNA (Digital Living Networking Alliance) is the older standard for interoperability of digital multimedia devices. All participating devices must be DLNA certified to establish a network connection. Windows 10 is DLNA certified and you have to ensure that DLNA is available on the Smart TV.
The DLNA network between a PC (Digital Media Server) and a Smart TV (Digital Media Receiver) can be set up through a wired Ethernet connection or a wireless WiFi connection. The DLNA framework for communication is constituted by the Windows 10 Library Folders of the user which is configured by design to be the Digital Media Server (DMS) for sourcing and streaming the media files to a receiver TV via a wired or wireless network.
The TV performs the Digital Media Receiver (DMR) client functions by acting as a Digital Media Controller (DMC) for being able to access the media files on the DMS (PC) and instruct the PC to stream the media file, AND as a Digital Media Player (DMP) having a decoder unit capable of decompressing the streamed media for playing, AND also as a Digital Media Renderer to display the decoded stream on its screen.
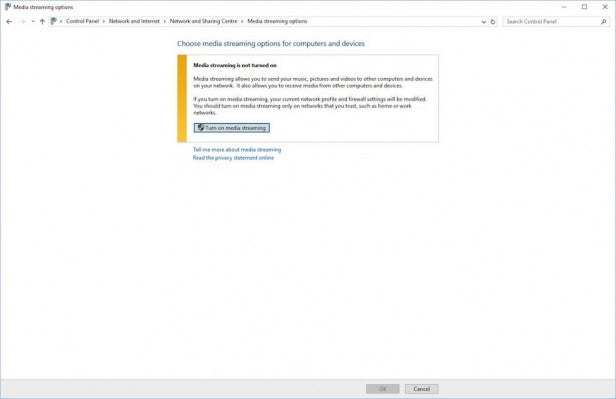
DLNA services has to be explicitly enabled on a Windows 10 PC by opening the Control Panel > Networking and Sharing Centre > Media streaming options (on the left panel) > Turn on media streaming (button).
On the media steaming options window (screenshot above), enter a name for the user’s library folders on the PC and allow access to the TV-name appearing under the devices list on the Local network.
If the TV-name does not appear, first ensure that both the TV and PC are connected to the same local network. Then use the Cast to Device menu on any MP4 file to register the TV-name within the Devices list of Windows Settings and also to show up on the Media streaming options window.
Once enabled, DLNA services will automatically start everytime the PC is powered ON. To disable DLNA you need to open the Services applet by calling Run dialog (WinKey+R) and then entering services.msc in the dialog > scroll down on the Services applet and double click on «Windows Media Player Network Sharing Service» to open its Properties window > Stop the Service by clicking on the Stop button > change the Startup type to «Manual» from the drop-down > click OK and close the Services applet.
The DLNA network can be implemented in one of the following ways:
(i) Wired: A direct connection by an Ethernet Cross-Cable between the LAN (RJ-45) port of PC and the LAN (RJ-45) port of TV.
(ii) Wired: The PC and the TV connects to a Router / Switch by a normal Ethernet cable.
(iii) Wireless: The PC and the TV connects to a Router through WiFi.
(iv) Wireless: The PC connects to the WiFi Direct Hotspot of the TV.
The direct Ethernet cross-cable connection is the most reliable and simplest method. The WiFi connection although simple can cause stuttering and latency issues during HD video streaming.
Once the PC and TV establish a network path for mutual communication, the TV will automatically identify the PC as a DLNA server. If everything goes right, the PC-name will appear on the Device / Port / Server list of the TV, generally accessible from its Home Screen.
Finally, the PC has to be chosen as the signal source for the TV from the input port list Or the connected device / server list of the TV. The Windows 10 Library folders will display on the TV screen from which a media file can be selected for playing on the TV.
The Digital Media Player (DMP) module within the TV must provide native support to the media file format for playing on the TV, and this DMP which is built specific to every TV model defines all the types of media it can support. The easiest way to ascertain the capability of DMP within a TV, is to experiment playing different multimedia file types from a Pen Drive directly attached to an USB port of the TV.
DLNA scores over CAST when it comes to browsing and choosing to play files from the Media Library on the PC, right from your TV seat with the aid of TV Remote acting as a DMC — without having to move around and reach the PC to initiate media streaming individually for each file.
Windows Media Player (WMP) which was the original DLNA Server for Media Library and Media Streaming, now supports Cast. Right click on any media file on the WMP Library and you get the Cast to device function in the shortcut menu. WMP has a Playlist feature but the streaming controls remain in the Player itself — not accessible from a TV. Films and TV app is the new age media player in Windows 10 and is the one in the advancement path, although WMP remains a more popular and preferred DLNA networking device.
On the reverse direction, when the TV is enabled as a DLNA Server through the TV Network settings, it allows media files in storage devices attached to the TV to be accessible from the WMP of a networked PC.


