- Редакторы субтитров для Linux
- 1. Gnome Subtitles
- 2. Aegisub
- 3. Gaupol
- 4. Subtitle Editor
- 5. Jubler
- 6. Subtitle Composer
- Editing Subtitles in Linux
- Extracting subtitles from closed captions data
- Editing subtitles with SubtitleEditor Tool
- Manipulating Frame-rates to sync with Media file
- Changing the Starting position of a subtitle file
- Manipulating Duration
- Conclusion
Редакторы субтитров для Linux
Оригинал: What is a good subtitle editor on Linux
Автор: Adrien Brochard
Дата публикации: 24 сентября 2014 года
Перевод: А. Кривошей
Дата перевода: апрель 2015 г.
Если вы регулярно смотрите фильмы на иностранных языках, например в процессе их изучения, чтобы поднять свой уровень, огромную помощь здесь оказывают субтитры. Кроме того, иногда интересно посмотреть фильм в оригинальной озвучке, здесь также помогут субтитры. Поскольку они могут найтись в интернете в каком угодно формате, часто возникает необходимость откорректировать их и сохранить в виде, понятном для плеера. К счастью, в Linux имеются прекрасные редакторы субтитров с открытым исходным кодом. Ниже мы рассмотрим некоторые из них.
1. Gnome Subtitles
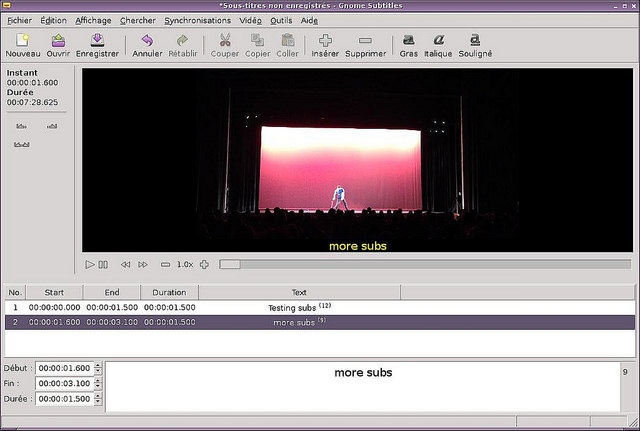
Gnome Subtitles я обычно использую, когда нужно быстро отредактировать существующие субтитры. Вы можете загрузить видео, загрузить текстовые файлы с субтитрами и сразу начать работу. Я ценю баланс между простотой использования и продвинутыми возможностями. Программа имеет инструменты синхронизации и поддерживает проверку орфографии. И наконец, важный момент — горячие клавиши. При редактировании текста предпочтительно иметь возможность не отрывать руки от клавиатуры для выполнения различных операций.
2. Aegisub
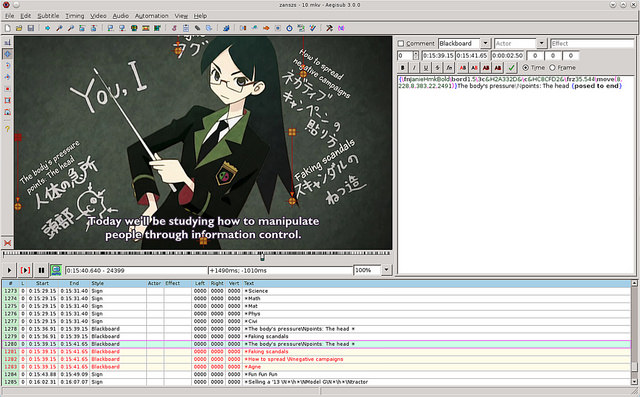
Aegisub — это уже другой уровень сложности. Об этом говорит даже интерфейс программы. Но помимо этого аспекта, Aegisub является очень мощным решением, обеспечивая инструменты для решения любых задач, какие вы только сможете представить. Как и Gnome Subtitles, Aegisub работает в концепции WYSIWYG, но на новом уровне: здесь можно перетаскивать субтитры на экран, выводить в боковой панели спектр звука, и выполнять все операции с помощью горячих клавиш. Кроме того, программа включает утилиту Kanji, имеет режим караоке, а также возможность импорта скриптов на lua для автоматизации некоторых задач. Перед началом работы с программой я настоятельно советую вам почитать man-страницу .
3. Gaupol
На другом конце линейки сложности находится Gaupol . В отличие от Aegisub, Gaupol очень прост, а его интерфейс похож на Gnome Subtitles. Но за этой простой скрываются все необходимые инструменты: горячие клавиши, расширения от сторонних разработчиков, проверка орфографии, и даже распознавание речи (любезно предоставленное CMU Sphinx ). В качестве недостатка могу отметить притормаживания, которые я наблюдал во время тестирования программы. Ничего серьезного, но достаточно, чтобы заставить меня предпочесть Gnome Subtitles.
4. Subtitle Editor
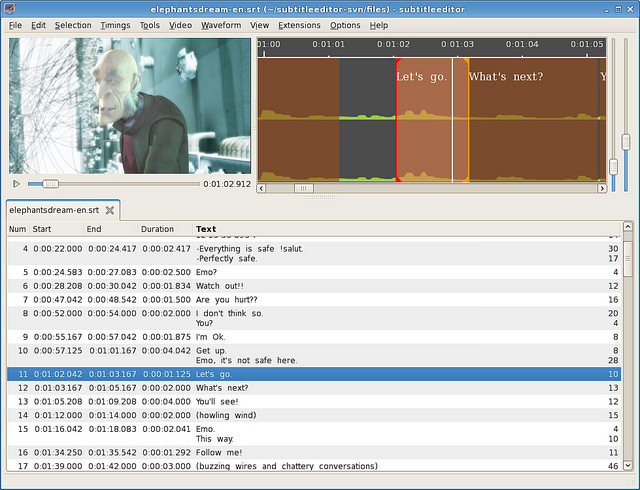
Subtitle Editor очень похож на Gaupol, однако его интерфейс немного менее интуитивный, а возможности более продвинутые. Мне понравилась возможность определить «ключевые кадры» и все опции синхронизации. Однако увеличение количества иконок и уменьшение количества текста могли бы сделать интерфейс более приятным. Кроме того, Subtitle Editor может эмулировать режим «писателя», хотя я не уверен в его большой полезности. И последнее по счету, но не по значимости — поддержка задаваемых пользователем горячих клавиш.
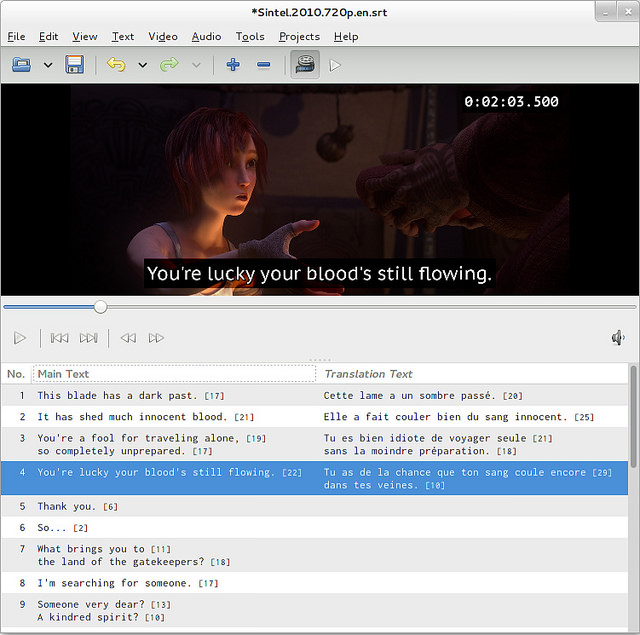
5. Jubler
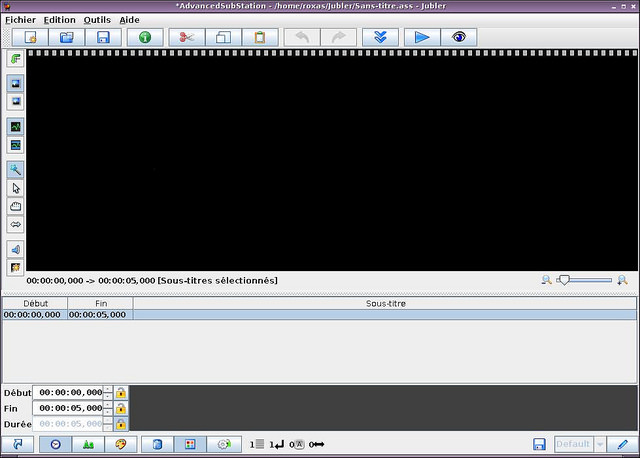
Jubler — это кроссплатформенный редактор субтитров, написанный на Java. На меня большое впечатление произвел его хорошо продуманный интерфейс. Как и в Aegisub, вы можете перетаскивать субтитры на картинку. Также можно определить стили для субтитров, воспроизводить звук с другой дорожки, переводить субтитры и пользоваться проверкой орфографии. Однако обратите внимание, что для того, чтобы вы могли пользоваться всеми возможностями Jubler, необходимо установить и правильно настроить MPlayer. Отдельно хочу отметить, что команда разработчиков программы смогла значительно упростить процедуру установки с помощью специального скрипта, которой можно скачать на официальной странице Jubler.
6. Subtitle Composer
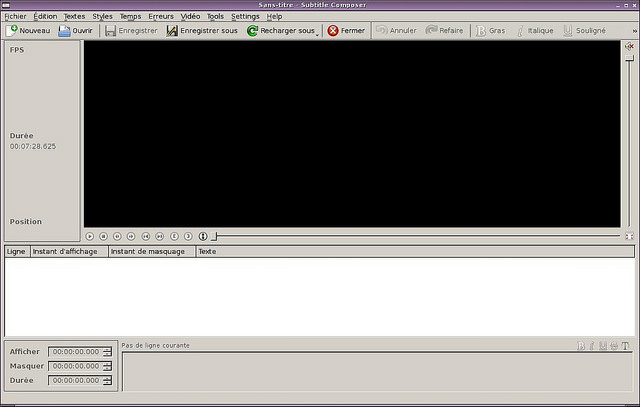
Subtitle Composer позиционируется как редактор субтитров для KDE, и имеет все традиционные для таких программ возможности, упакованные в интерфейс KDE. При этом он поддерживает очень важную для меня возможность переопределения горячих клавиш. Помимо этого, отличительной чертой Subtitle Composer является возможность написания скриптов для него на JavaScript, Python, и даже на Ruby. Несколько демонстрационных скриптов прилагаются к программе.
В заключение могу сказать, что для любой задачи — нужно ли вам просто отредактировать несколько субтитров, как мне, или вы хотите сделать с нуля субтитры для целого фильма, в Linux вы найдете подходящие для ваших задач инструменты. Для меня главными критериями были горячие клавиши и простота в использовании, для кого-то другого это может быть поддержка скриптов и распознавания речи. Все, что вам нужно — выбрать наиболее подходящий вам вариант.
Источник
Editing Subtitles in Linux
Last updated January 14, 2019 By Shirish 13 Comments
I have been a world movie and regional movies lover for decades. Subtitles are the essential tool that have enabled me to enjoy the best movies in various languages and from various countries.
If you enjoy watching movies with subtitles, you might have noticed that sometimes the subtitles are not synced or not correct.
Did you know that you can edit subtitles and make them better? Let me show you some basic subtitle editing in Linux.

Extracting subtitles from closed captions data
Around 2012, 2013 I came to know of a tool called CCEextractor. As time passed, it has become one of the vital tools for me, especially if I come across a media file which has the subtitle embedded in it.
CCExtractor analyzes video files and produces independent subtitle files from the closed captions data.
CCExtractor is a cross-platform, free and open source tool. The tool has matured quite a bit from its formative years and has been part of GSOC and Google Code-in now and then.
The tool, to put it simply, is more or less a set of scripts which work one after another in a serialized order to give you an extracted subtitle.
You can follow the installation instructions for CCExtractor on this page.
After installing when you want to extract subtitles from a media file, do the following:
The output of the command will be something like this:
| $ ccextractor $something.mkv |
| CCExtractor 0.87, Carlos Fernandez Sanz, Volker Quetschke. |
| Teletext portions taken from Petr Kutalek’s telxcc |
| ————————————————————————– |
| Input: $something.mkv |
| [Extract: 1] [Stream mode: Autodetect] |
| [Program : Auto ] [Hauppage mode: No] [Use MythTV code: Auto] |
| [Timing mode: Auto] [Debug: No] [Buffer input: No] |
| [Use pic_order_cnt_lsb for H.264: No] [Print CC decoder traces: No] |
| [Target format: .srt] [Encoding: UTF-8] [Delay: 0] [Trim lines: No] |
| [Add font color data: Yes] [Add font typesetting: Yes] |
| [Convert case: No] [Video-edit join: No] |
| [Extraction start time: not set (from start)] |
| [Extraction end time: not set (to end)] |
| [Live stream: No] [Clock frequency: 90000] |
| [Teletext page: Autodetect] |
| [Start credits text: None] |
| [Quantisation-mode: CCExtractor’s internal function] |
| —————————————————————– |
| Opening file: $something.mkv |
| File seems to be a Matroska/WebM container |
| Analyzing data in Matroska mode |
| Document type: matroska |
| Timecode scale: 1000000 |
| Muxing app: libebml v1.3.1 + libmatroska v1.4.2 |
| Writing app: mkvmerge v8.2.0 (‘World of Adventure’) 64bit |
| Title: $something |
| Track entry: |
| Track number: 1 |
| UID: 1 |
| Type: video |
| Codec ID: V_MPEG4/ISO/AVC |
| Language: mal |
| Name: $something |
| Track entry: |
| Track number: 2 |
| UID: 2 |
| Type: audio |
| Codec ID: A_MPEG/L3 |
| Language: mal |
| Name: $something |
| Track entry: |
| Track number: 3 |
| UID: somenumber |
| Type: subtitle |
| Codec ID: S_TEXT/UTF8 |
| Name: $something |
| 99% | 144:34 |
| 100% | 144:34 |
| Output file: $something_eng.srt |
| Done, processing time = 6 seconds |
| Issues? Open a ticket here |
| https://github.com/CCExtractor/ccextractor/issues |
It basically scans the media file. In this case, it found that the media file is in malyalam and that the media container is an .mkv container. It extracted the subtitle file with the same name as the video file adding _eng to it.
CCExtractor is a wonderful tool which can be used to enhance subtitles along with Subtitle Edit which I will share in the next section.
Interesting Read: There is an interesting synopsis of subtitles at vicaps which tells and shares why subtitles are important to us. It goes into quite a bit of detail of movie-making as well for those interested in such topics.
Editing subtitles with SubtitleEditor Tool
You probably are aware that most subtitles are in .srt format . The beautiful thing about this format is and was you could load it in your text editor and do little fixes in it.
A srt file looks something like this when launched into a simple text-editor :
| 1 |
| 00:00:00,959 –> 00:00:13,744 |
| «THE CABINET |
| OF DR. CALIGARI» |
| 2 |
| 00:00:40,084 –> 00:01:02,088 |
| A TALE of the modern re-appearance of an 11th Century Myth |
| involting the strange and mysterious influence |
| of a mountebank monk over a somnambulist. |
The excerpt subtitle I have shared is from a pretty Old German Movie called The Cabinet of Dr. Caligari (1920)
Subtitleeditor is a wonderful tool when it comes to editing subtitles. Subtitle Editor is and can be used to manipulate time duration, frame-rate of the subtitle file to be in sync with the media file, duration of breaks in-between and much more. I’ll share some of the basic subtitle editing here.

First install subtitleeditor the same way you installed ccextractor, using your favorite installation method. In Debian, you can use this command:
When you have it installed, let’s see some of the common scenarios where you need to edit a subtitle.
Manipulating Frame-rates to sync with Media file
If you find that the subtitles are not synced with the video, one of the reasons could be the difference between the frame rates of the video file and the subtitle file.
How do you know the frame rates of these files, then?
To get the frame rate of a video file, you can use the mediainfo tool. You may need to install it first using your distribution’s package manager.
Using mediainfo is simple:
Now you can see that framerate of the video file is 25.000 FPS. The other Frame-rate we see is for the audio. While I can share why particular fps are used in Video-encoding, Audio-encoding etc. it would be a different subject matter. There is a lot of history associated with it.
Next is to find out the frame rate of the subtitle file and this is a slightly complicated.
Usually, most subtitles are in a zipped format. Unzipping the .zip archive along with the subtitle file which ends in something.srt. Along with it, there is usually also a .info file with the same name which sometime may have the frame rate of the subtitle.
If not, then it usually is a good idea to go some site and download the subtitle from a site which has that frame rate information. For this specific German file, I will be using Opensubtitle.org
As you can see in the link, the frame rate of the subtitle is 23.976 FPS. Quite obviously, it won’t play well with my video file with frame rate 25.000 FPS.
In such cases, you can change the frame rate of the subtitle file using the Subtitle Editor tool:
Select all the contents from the subtitle file by doing CTRL+A. Go to Timings -> Change Framerate and change frame rates from 23.976 fps to 25.000 fps or whatever it is that is desired. Save the changed file.

Changing the Starting position of a subtitle file
Sometimes the above method may be enough, sometimes though it will not be enough.
You might find some cases when the start of the subtitle file is different from that in the movie or a media file while the frame rate is the same .
In such cases, do the following:
Select all the contents from the subtitle file by doing CTRL+A. Go to Timings -> Select Move Subtitle.

Change the new Starting position of the subtitle file. Save the changed file.

If you wanna be more accurate, then use mpv to see the movie or media file and click on the timing, if you click on the timing bar which shows how much the movie or the media file has elapsed, clicking on it will also reveal the microsecond.
I usually like to be accurate so I try to be as precise as possible. It is very difficult in MPV as human reaction time is imprecise. If I wanna be super accurate then I use something like Audacity but then that is another ball-game altogether as you can do so much more with it. That may be something to explore in a future blog post as well.
Manipulating Duration
Sometimes even doing both is not enough and you even have to shrink or add the duration to make it sync with the media file. This is one of the more tedious works as you have to individually fix the duration of each sentence. This can happen especially if you have variable frame rates in the media file (nowadays rare but you still get such files).
In such a scenario, you may have to edit the duration manually and automation is not possible. The best way is either to fix the video file (not possible without degrading the video quality) or getting video from another source at a higher quality and then transcode it with the settings you prefer. This again, while a major undertaking I could shed some light on in some future blog post.
Conclusion
What I have shared in above is more or less on improving on existing subtitle files. If you were to start a scratch you need loads of time. I haven’t shared that at all because a movie or any video material of say an hour can easily take anywhere from 4-6 hours or even more depending upon skills of the subtitler, patience, context, jargon, accents, native English speaker, translator etc. all of which makes a difference to the quality of the subtitle.
I hope you find this interesting and from now onward, you’ll handle your subtitles slightly better. If you have any suggestions to add, please leave a comment below.
Like what you read? Please share it with others.
Источник


