- Amin ‘s Blog
- Рубрики
- Метки
- Последние комментарии
- Supermicro IPMI — ISO не монтируется
- Supermicro — монтируем ISO образ
- Configure and mount samba share in Supermicro IPMI Virtual media (CD-ROM)
- STEP 1) Install samba server in CentOS 7
- STEP 2) Configure samba server CentOS 7 for the purpose of using it in IPMI Virtual share.
- STEP 3) Mount a disk in IPMI Virutal Media and boot from it
- STEP 3.1) Fill “Share host” and “Path image” only, because we configured our samba share without a password
- STEP 3.2) Upon a successful configuration saving you’ll get a confirmation dialog.
- STEP 3.3) After saving the configuration click on “Mount” to load your ISO file in the virtual CD-ROM.
- STEP 3.4) This dialog is always shown no matter there is such share or not: “Please check the device status to confirm whether the image is mounted/unmounted.”
- STEP 3.5) If the Supermicro IPMI accessed successfully the share resource it would mount it (load the ISO file as s CD in the virtual CD-ROM).
- * Troubleshooting
- 14 thoughts on “Configure and mount samba share in Supermicro IPMI Virtual media (CD-ROM)”
- How to make Web ISO work in Virtual Media on SuperMicro ipmi?
- 1 Answer 1
- Supermicro IPMI and Windows Share
- 3 Answers 3
Amin ‘s Blog
Рубрики
- По жизни (62)
- Приколы (104)
- Аудиофилы (6)
- Веганутое (12)
- Долбы (9)
- Фотки (15)
- IT (536)
- Hardware (56)
- Networks (48)
- Security (82)
- Software (120)
Метки
Последние комментарии
 | Amin к записи About |
 | alex к записи About |
 | Eronex к записи linux (fedora) russian console… |
| Amin к записи Big Sur — всё так плохо… |
 | foxy к записи Big Sur — всё так плохо… |
| Big Sur — всё… к записи 🍏 самые гламурные никсы 🍏 | |
| Amin к записи как тебе такое, Илон Маск… |
Supermicro IPMI — ISO не монтируется
Ситуация: IPMI сервера supermicro не монтирует ISO-образ с SMB-шары, если монтировать его из веб-морды IPMI — «Virtual Media» — «CD-ROM Image».

Были попробованы разные размеры бубнов, логины/пароли и методы авторизации, расковыряны разные настройки сосамбы. Помог обходной путь — сперва открыть ява-апплет для местной KVM-консоли, и уже из этого апплета выбрать «Virtual Media» — «Virtual Storage» и подключить ISO из своей локальной файловой системы, без всякой самбы.

Похоже на баг веб-морды IPMI, из файлового менеджера самба-ресурс доступен.
Вот такой вот обходной путь. Возможно, это решается обновлением прошивок на блейде, но про это я напишу позже, если не забуду.
Supermicro — монтируем ISO образ


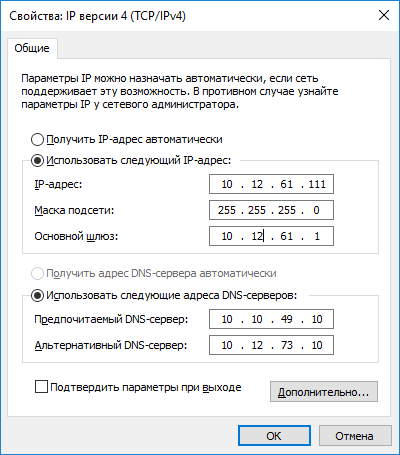
Подключаем патчкордом сервер к сетевой карте своего компьютера. Настраиваем на своём компьютере IP адрес из той же подсети, что и IPMI:
Заходим на сервер в IPMI через web-интерфейс:
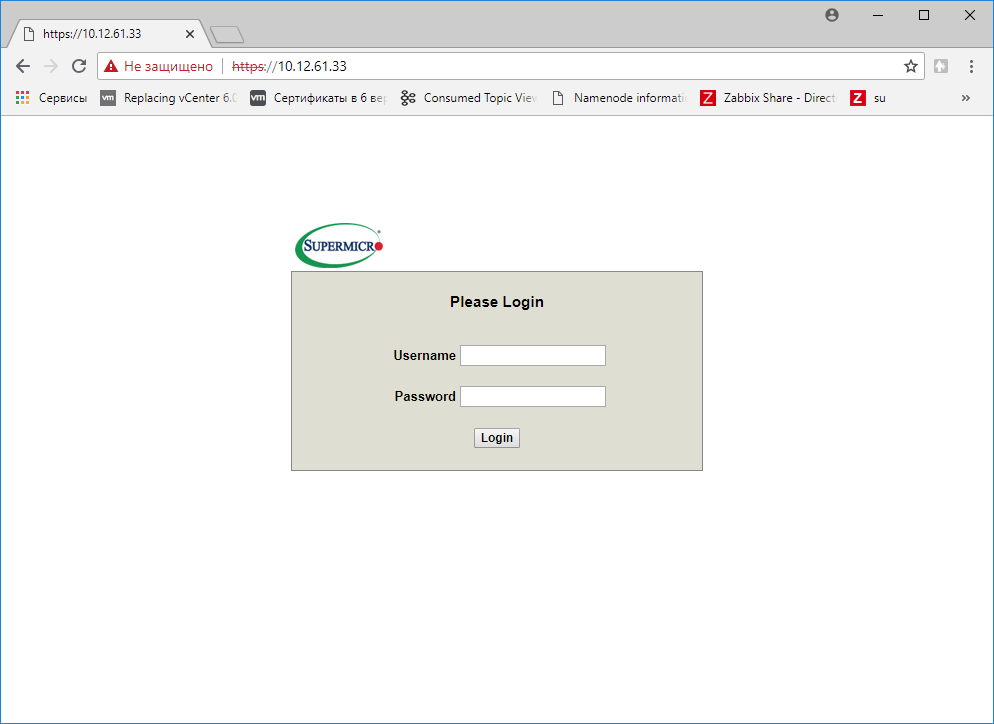
- Логин Supermicri IPMI по умолчанию ADMIN.
- Пароль для Supermicri IPMI по умолчанию ADMIN.
Регистр имеет значение.
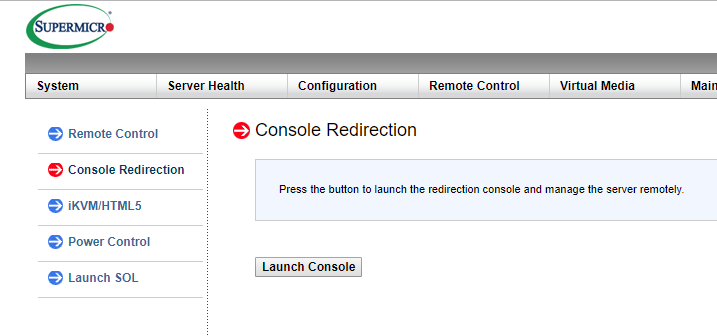
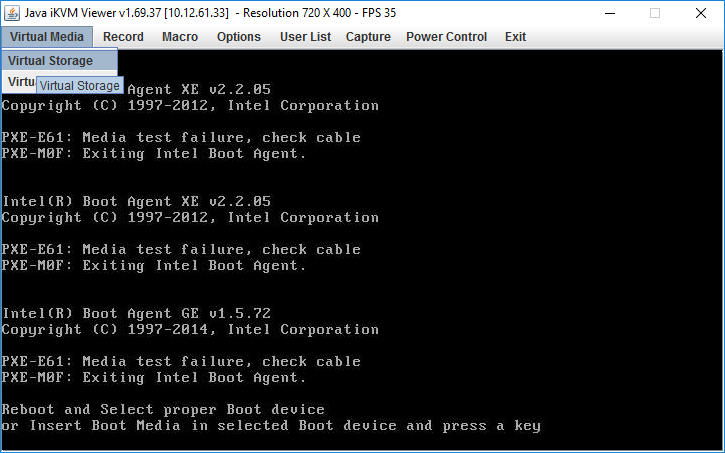
Запускаем консоль. Remote Control > Console Redirection > Launch Console:
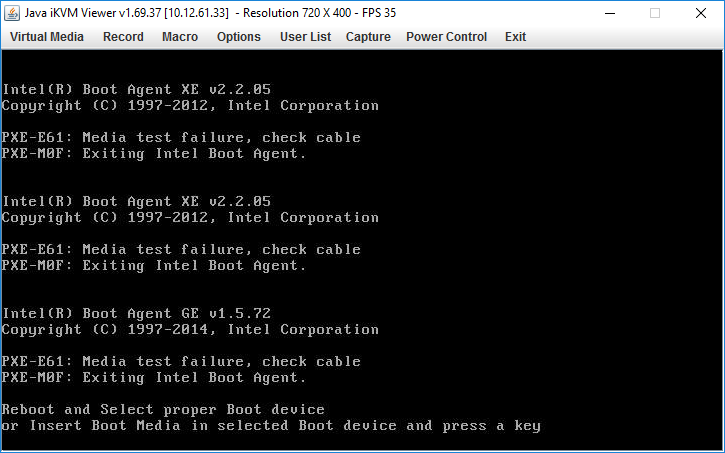
Видим экран сервера:
Монтируем ISO образ.
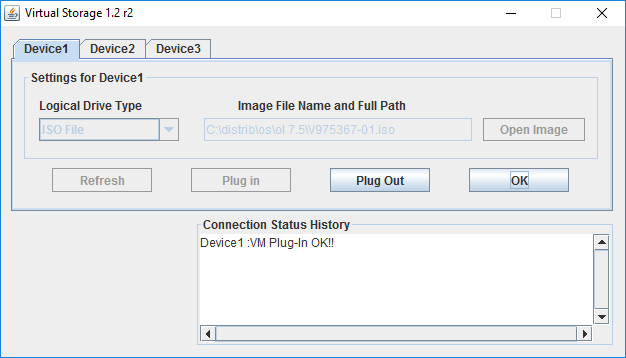
Virtual Media > Virtual Storage:
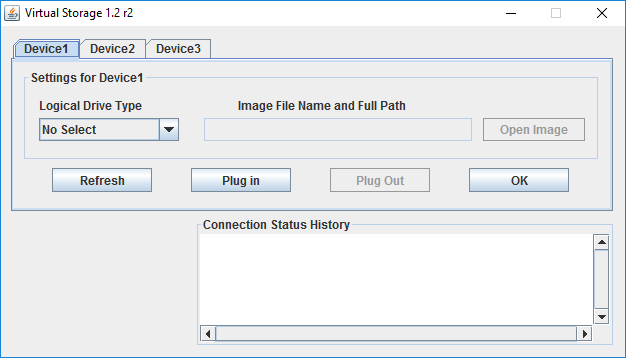
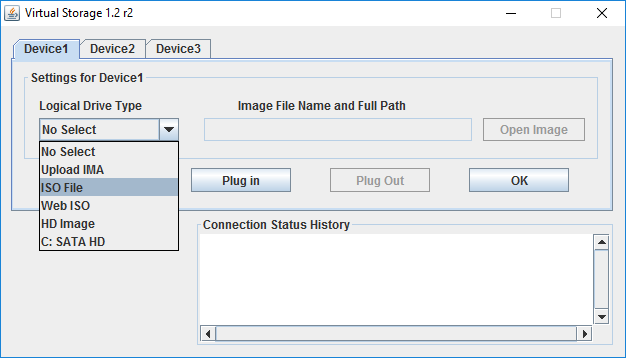
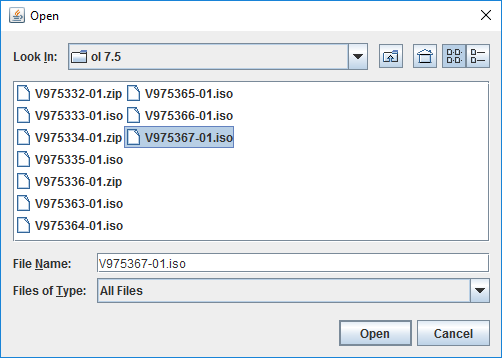
Выбираем тип — ISO File:
Затем Open Image:
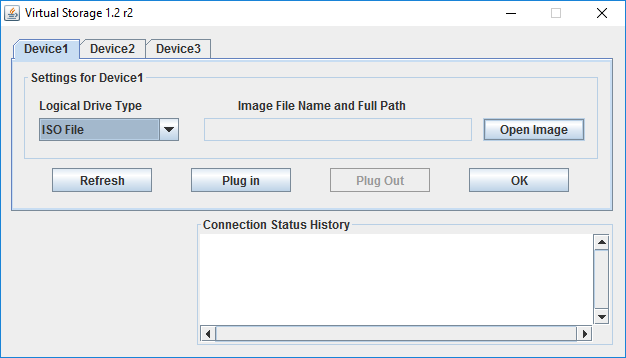

Кликаем Plug In:
Ok. Ключи можно посмотреть в Hotkey Settings:
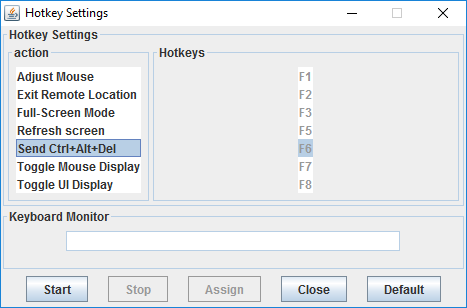
Перезагружаем сервер F6 (передаёт Ctrl+Alt+Del):
Configure and mount samba share in Supermicro IPMI Virtual media (CD-ROM)
Having many Supermicro servers we used multiple times Virtual Media to install, diagnose and rescue Supermicro server. It is really simple to open the Console Redirection – java web start and just mount the ISO file from Virtual Media -> ISO File, but this way if your server is not local to your network and it is located in a colocation as it should be the connection is slow and in many cases bogus! Because it uses UDP it happened many times to remount or just to lose the connection and the media to disappear in the middle of the booting/loading process from the installation media, for example. And probably you have noticed there is additional option in the web interface of mounting ISO file from a windows share. Of course, in linux world it might be samba share as in our case and the share could be easily configured on a server in your colocation.
And we noticed was several times we have no problems using it, but some time the share could not be even saved and respectively could not be mounted. No error reported, just the edit boxes resets to blank and apparently everything was the same as the previous box, which it worked as a charm!
Here are the steps to enable one of your CentOS 7 servers to share a resource and to use it in your Supermicro IPMI KVM. The server is selinux enabled and the policy is Enforcing.
STEP 1) Install samba server in CentOS 7
STEP 2) Configure samba server CentOS 7 for the purpose of using it in IPMI Virtual share.
We are going to use a share without login credentials, because our KVM IP are always local ones and accessed via a vpn network and in addition only the network of the IPMI IPs could access the share (the samba server has a firewall configured).
Set the configuration file of the samba server – one directory storing the files shared with no login credentials (no username/password means anonymous login).
The configuration file is:
As you can see we use “/mnt/storage1/samba” for our directory where the ISO files will be located. Change this path if you want to put your ISO files somewhere else.
Set the right permissions for the directory and selinux (if you server is not selinux enabled, you could skip the selinux part) and run the samba daemon:
Configure the firewall to allow only connections from the IPMI KVM IP networks (or a single IP if you need to expose it in the Internet). You can work with build in zone “trusted”, but here we prefer more generic approach, which could be used not only for local IP networks but for real IPs:
STEP 3) Mount a disk in IPMI Virutal Media and boot from it
You could check our additional tutorial for it here –
STEP 3.1) Fill “Share host” and “Path image” only, because we configured our samba share without a password
STEP 3.2) Upon a successful configuration saving you’ll get a confirmation dialog.
If no confirmation is shown you would not be able to mount the share, check out our Troubleshooting below! 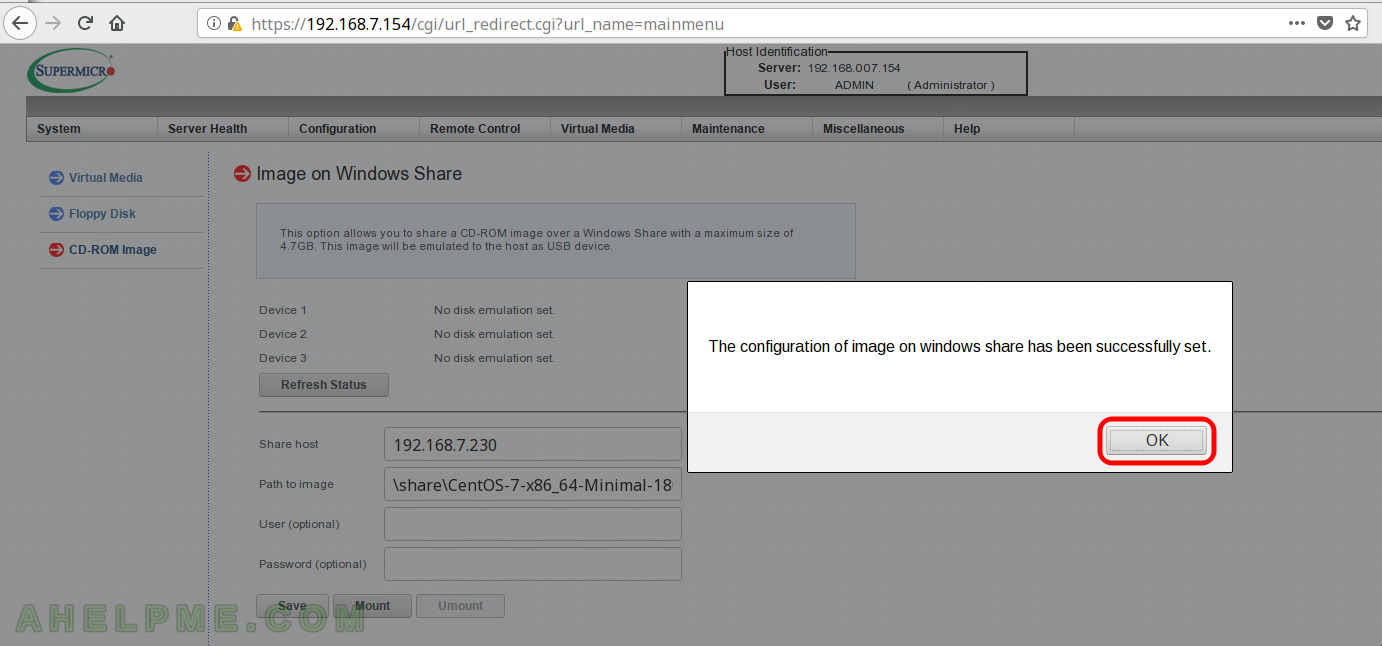 Save configuration of Image on Windows Share
STEP 3.3) After saving the configuration click on “Mount” to load your ISO file in the virtual CD-ROM.
STEP 3.4) This dialog is always shown no matter there is such share or not: “Please check the device status to confirm whether the image is mounted/unmounted.”
STEP 3.5) If the Supermicro IPMI accessed successfully the share resource it would mount it (load the ISO file as s CD in the virtual CD-ROM).
If not the three Device 1,2,3 will show the same: “No disk emulation set.”, which means the samba share is not accessible, check the permissions for the file and the firewall first (and the logs files, too). 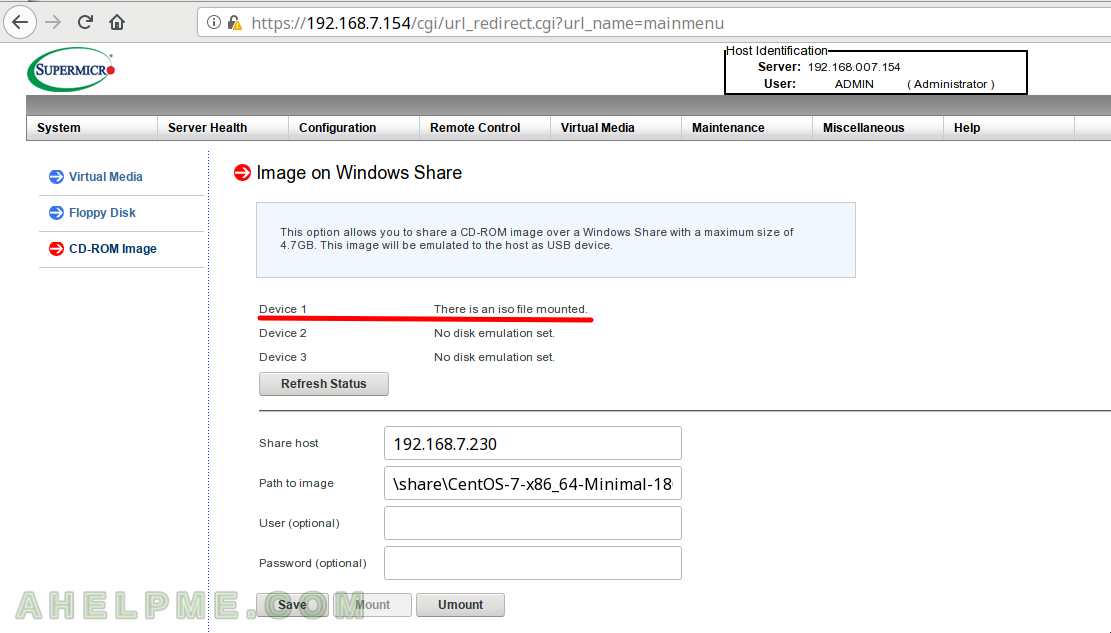 There is an iso file mounted
* Troubleshooting
– if you click on button “Save” and just nothing happen – no dialog for successful saving and no dialog at all, probably there is a Javascript error, try to open the web interface from a different browser with clean history or click ctrl+F5 when loading the Virtual Media page! More in Cannot save and mount a Supermicro IPMI Virtual media mount – javascript error?
14 thoughts on “Configure and mount samba share in Supermicro IPMI Virtual media (CD-ROM)”
This tip is very useful and helped me a lot. Only an additional information, the semanage tool wasn’t installed in the server, so I ran the command “yum provides /usr/sbin/semanage” and checked it’s provide by core python utilities, so I ran “yum -y install policycoreutils-python”, and I could continue the steps with sucess.
Thank you very much for share.
Hi,
yes you need policycoreutils-python for semanage and I added it to the tutorial above.
Thank you for the note.
Try to do it on centos8 and it didnt work for me.
Can you please let me know if there are more special step?
Hi, Try to do it on centos8 and it didnt work for me. Can you please let me know if there are more special step?
Thanks for this. I am having a little trouble. My share is available -I accessed the ISO from a Chromebook.
As you state – browser can be an issue. Firefox from my Linux laptop failed. Chromium was good. There were no javascript errors from Firefox.
How to make Web ISO work in Virtual Media on SuperMicro ipmi?
How does Virtual Media Web ISO work on SuperMicro ipmi? I am using SuperMicro sever. I want to be able to mount bootable ISO image to a server, launch long process there (disk formatting), and then turn off my laptop. But if I do it, the remote booted OS will hang, because of virtual CD ROM will become unreadable.
In ipmi java application in Virtual Storage there is an item called Web ISO. I thought I could upload my ISO to a personal site, and make it available over http(s), so media will stay online even when I turn off my laptop. But the «Image File Name and Full Path» field and «Open Image» button for the web iso are greyed out, so I cannot select it. I also checked that java application in Windows OS, and still that button is greyed out there.  Is it possible to mount an iso image from a web site as a virtual storage?

1 Answer 1
From the supermicro ipmi manual:
Web ISO: Select this feature to select a Web ISO and mount it from the web page. The file will be mounted from the web interface. To specify the file location, set the image path on the CD-ROM Image page in the IPMI.
So under web iso they mean not your personal site, but a web page of ipmi. That page allows you to set a samba share.
You can store a samba share on an IP that is accessible from network in which ipmi works, possibly in the public internet. You can see how to configure a share here https://ahelpme.com/linux/tips/configure-and-mount-samba-share-in-supermicro-ipmi-virtual-media-cd-rom/
This could be an answer to my own question, but even when configured some values in the CD ROM page of ipmi web interface, the option is still unusable (greyed out). Help and improving an answer is appreciated.
Also, I have found out that supermicro-update-manager can mount using http. From manual:
And this is probably the key of the problem. Seems like BMC FW should support this function. I need to update BMC and check and also check on different motherboards.
Supermicro IPMI and Windows Share
I am trying to do a Windows Share for a Supermicro IPMI. I go to «Virtual Media» and then «CD-ROM image». I need to enter:
I know to enter my Windows 2008 server IP in share to Host, and I entered the Administrator username and password. However, when I enter the path image as C:\Users\Administrator\Desktop\OperatingSystems\CentOS-5.7-x86_64-netinstall.iso I get this
error: The image path is invalid or contain /:*?»<>|
3 Answers 3
I’m not familiar with IPMI, so take this as you wish, but you should probably use an UNC path instead of a drive letter. After all, it’s talking about a Windows share.
Try to create a network share on your server, with a path of C:\Users\Administrator\Desktop\OperatingSystems\ , and name it OperatingSystems, for example. Then, use the UNC path in IPMI, though I’m not sure in what format the parameters are expected.
The error reported by the web interface is misleading — what it really wants is to have the Path to image: entry beginning with a backslash ( \ ) so it would look like \sharename\filename.iso . The host name (or IP address) in the Share host field has to be entered without backslashes though.
The share has to be an SMB share, but at least the BMC thingy is using NTLMv2 authentication, so it works with current Windows servers out of the box (i.e. without modifying security settings or installing additional software) and presumably should also work with Samba as well.
On my SMT-based IPMI 2.0, which is a rather old generation, a ISO-image won’t mount no matter what. I had success via Java-console, which also allows mounting images.


