- How to Install and Switch Desktop Environments in Fedora
- Installing Additional Desktop Environments in Fedora
- Switching Desktop Environments in Fedora
- If You Appreciate What We Do Here On TecMint, You Should Consider:
- Switching desktop environments
- Installing additional desktop environments
- Switching desktop environments using GUI
- Switching desktop environments using CLI
- Support Articles
- Table of Contents
- Desktop Environment (Change)
- Different Desktop Environments
- Cinnamon
- GNOME
- KDE Plasma
- Troubleshooting
- Customize Notification Dialog
- Remove Duplicate Options From Login Screen
- Change Automatic Startup Programs
- Double Lock Screen Passwords
- Enable Cinnamon Lock Screen
- Removing Desktop Environments
- How to Switch Desktop Environments in Ubuntu/Debian From the Command Line
- Objective
- Prerequisites
- Switching Between Desktop Environments
- Switching to Ubuntu Budgie Desktop Environment
- Switching Between Desktop Environments From the Command Line for Chrome Remote Desktop
- Switching to Ubuntu Budgie Desktop Environment for Chrome Remote Desktop
- Switching Between Desktop Environments From the Command Line for VNC Server
- Conclusion
- Resources & Acknowledgements
- Revisions & Updates of this Article
How to Install and Switch Desktop Environments in Fedora
Do you want to use or try a different desktop environment in Fedora Workstation spin, other than the default, GNOME 3. In this article, we will show how to install and switch desktop environments in Fedora Linux using the graphical user interface (GUI) and via the command line interface (CLI).
Installing Additional Desktop Environments in Fedora
To install different desktop environments in Fedora, first you need to list all the available desktop environments by running the following command.
![]() List Desktop Environments in Fedora
List Desktop Environments in Fedora
From the output of the above command, look for the section called Available Environments Groups and install the chosen desktop environment using the dnf install command. Make sure to prefix with the @ sign, for example:
![]() Install Cinnamon Desktop in Fedora
Install Cinnamon Desktop in Fedora
Switching Desktop Environments in Fedora
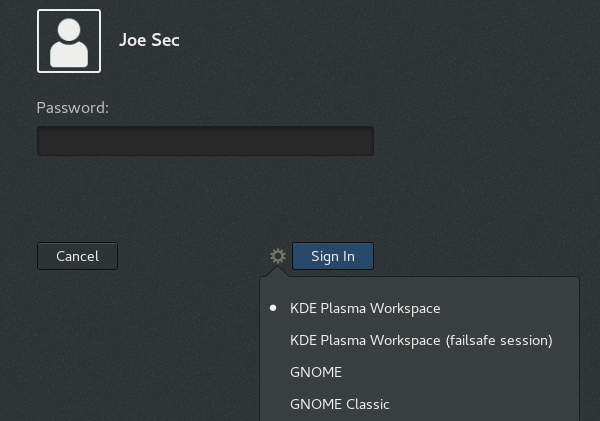
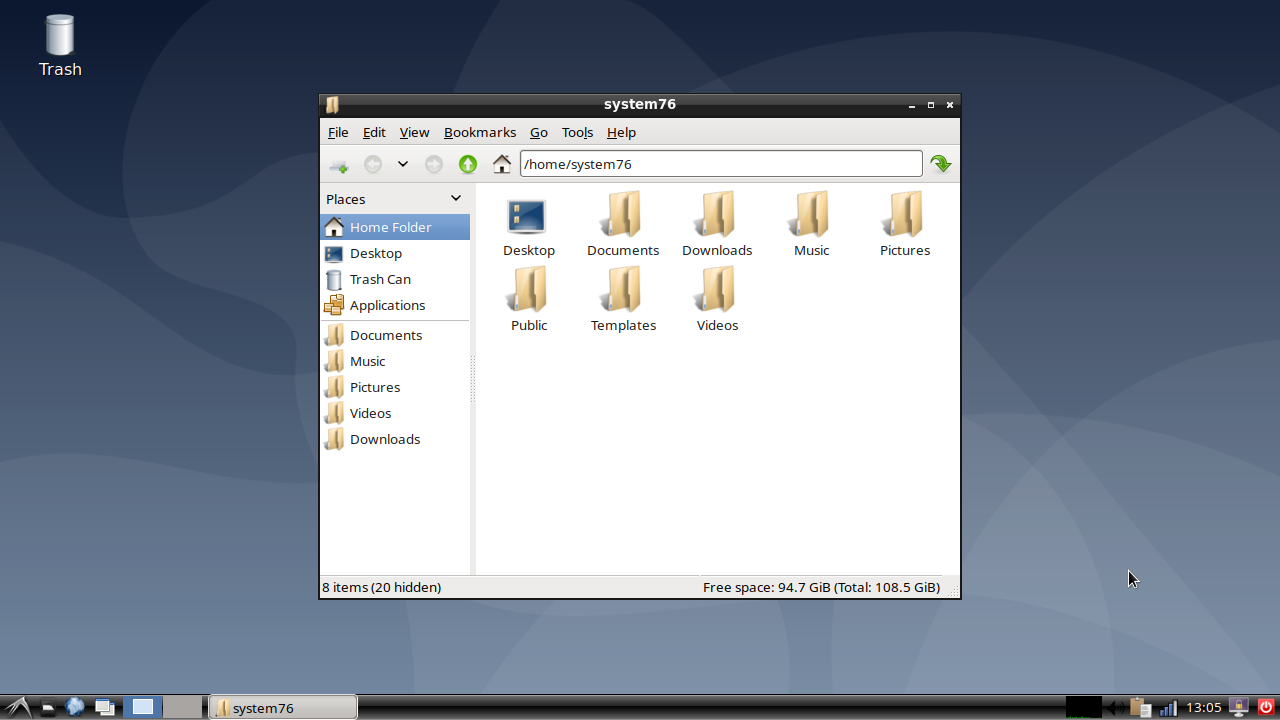
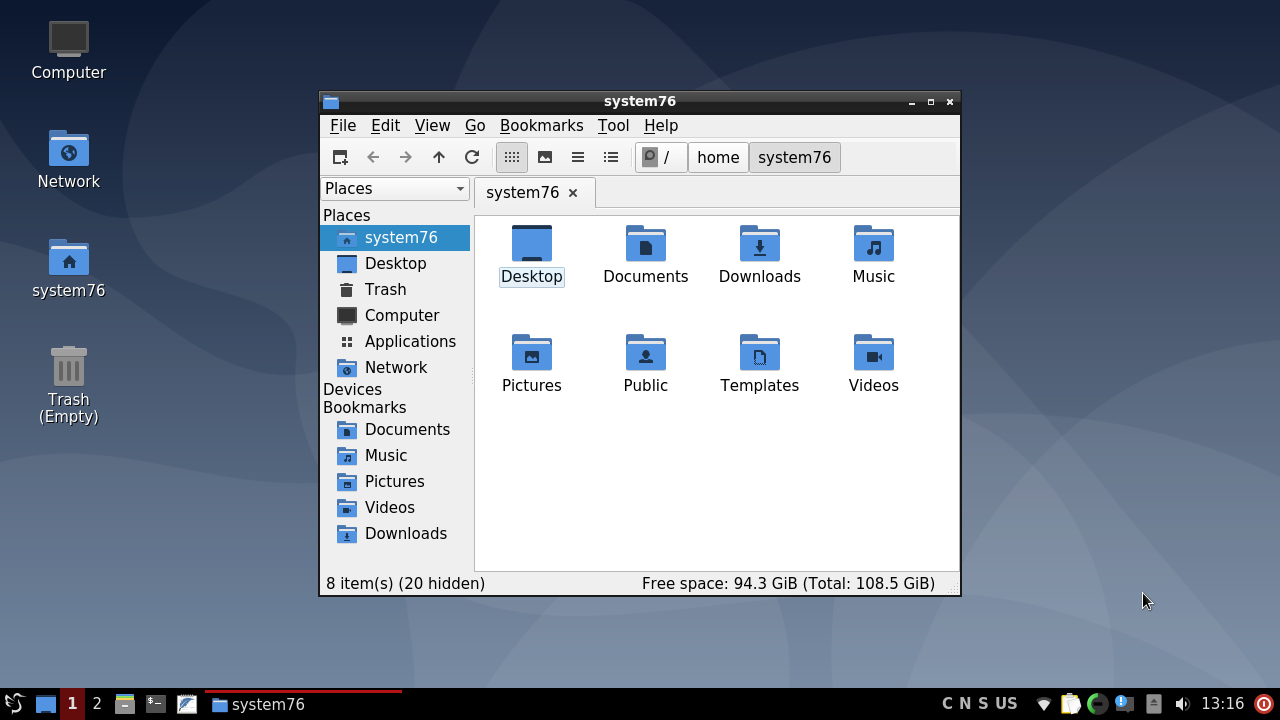
Before login, at the login screen, select your username (e.g TecMint) from the list of usernames (if there is no other user, the default username will appear). Then click on the Preferences icon right below the password field, near the Sign In button.
A window showing a list of several different desktop environments should appear. Select the desktop if you want, and enter the password to log in, as shown in the screenshot below.
![]() Select Desktop Environment in Fedora
Select Desktop Environment in Fedora
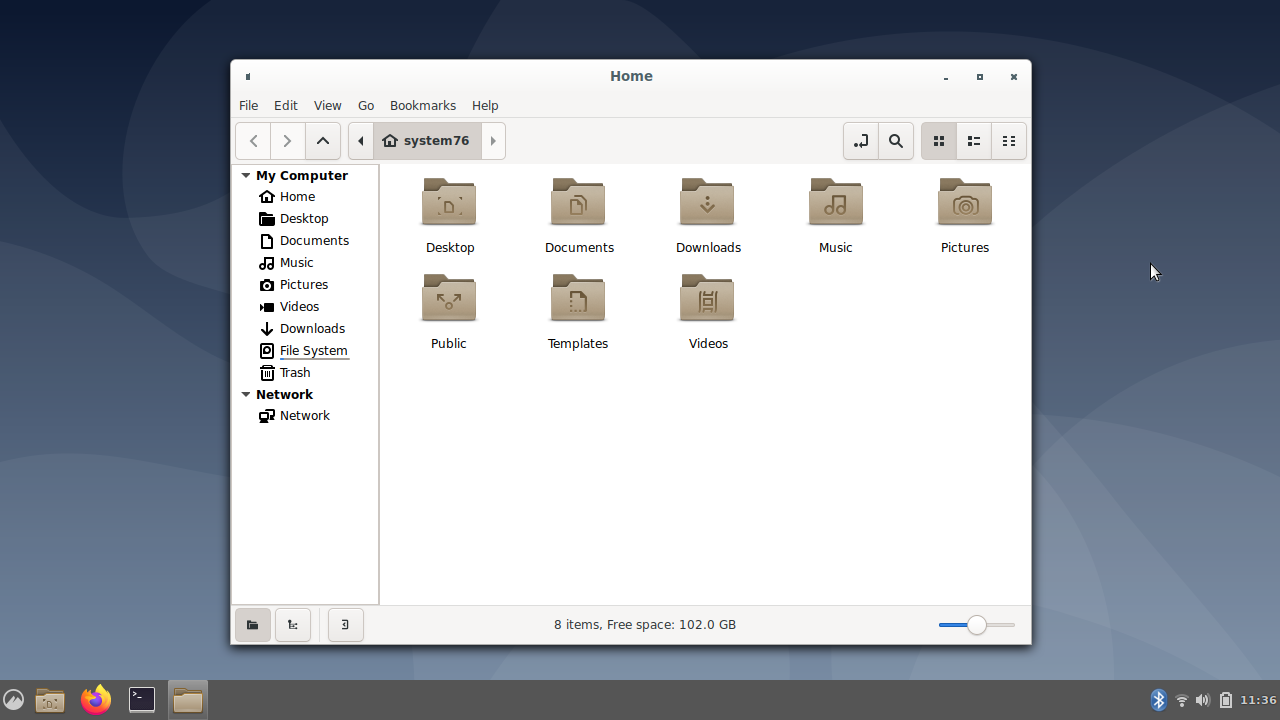
After login, you should now have Cinnamon desktop environment as shown in the following screenshot.
![]() Cinnamon Desktop Fedora
Cinnamon Desktop Fedora
Alternatively, install the switchdesk (used to switch desktop from command-line) and switchdesk-gui (used to switch desktop from GUI).
![]() Install Switchdesk in Fedora
Install Switchdesk in Fedora
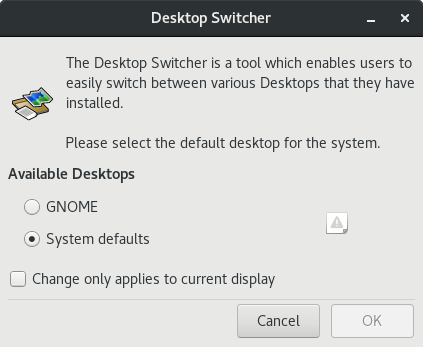
Once you have installed the above programs, launch the desktop switching program switchdesk-gui by searching for it in the Activities search bar. After it opens, select the default desktop from the list of available desktop environments, and click OK.
![]() Fedora Desktop Environment Switching
Fedora Desktop Environment Switching
You can also switch your Fedora desktop from the command-line by simply passing the selected desktop environment as the only argument to the switchdesk command, for example, to switch to cinnamon, run the following command.
That’s all! In this article, we have shown how to install and switch desktop environments in Fedora Linux. If you have any questions or queries, use the comment form below to ask us.
If You Appreciate What We Do Here On TecMint, You Should Consider:
TecMint is the fastest growing and most trusted community site for any kind of Linux Articles, Guides and Books on the web. Millions of people visit TecMint! to search or browse the thousands of published articles available FREELY to all.
If you like what you are reading, please consider buying us a coffee ( or 2 ) as a token of appreciation.

We are thankful for your never ending support.
Источник
Switching desktop environments
This page has been converted from the Fedora Project Wiki and cleaned up for publishing here on the Fedora Docs Portal, but it has not yet been reviewed for technical accuracy. This means any information on this page may be outdated or inaccurate. Reviews for technical accuracy are greatly appreciated. If you want to help, see the README file in the source repository for instructions.
Fedora’s default desktop environment is GNOME 3 in the Workstation spin, but it is very easy to try any of the many other desktop environments that are available without affecting your current desktop environment.
Installing additional desktop environments
List available desktop environments:
Install the selected desktop environment using the dnf install command. Ensure to prefix with the @ sign, for example:
Switching desktop environments using GUI
Install the desired desktop environment as described in Installing additional desktop environments.
To login with a different desktop for a single session:
On the login screen, select a user from the list.
Click on the Preferences icon right below the password field. A window appears with a list of several different desktop environments.
Choose one, and enter password as usual.
Alternatively, install the switchdesk and switchdesk-gui packages:
Run the Desktop Switching Tool application.
Select the default desktop from the list of available desktop environments, and confirm.
Switching desktop environments using CLI
Install the desired desktop environment as described in Installing additional desktop environments
Install the switchdesk package:
Pass the selected desktop environment as the only argument to the switchdesk command, for example:
See the switchdesk(1) man page.
Alternatively, edit the /etc/sysconfig/desktop file as root. This file specifies the desktop for new users and the display manager to run when entering runlevel 5.
Correct values are:
DESKTOP=» » , where is one of the following:
GNOME — Selects the GNOME desktop environment.
KDE — Selects the KDE desktop environment.
DISPLAYMANAGER=» » , where is one of the following:
GNOME — Selects the GNOME Display Manager.
KDE — Selects the KDE Display Manager.
XDM — Selects the X Display Manager.
All Fedora Documentation content available under CC BY-SA 4.0 or, when specifically noted, under another accepted free and open content license.
Источник
Support Articles
Table of Contents
Desktop Environment (Change)
Pop!_OS and Ubuntu both include the GNOME desktop environment by default. A desktop environment is responsible for the look and feel of the graphical desktop, and includes many of the key programs that get used every day.
You can install an alternative desktop environment using the instructions below. If you run into trouble while using an alternative desktop environment, you may wish to revert to the default environment. To ensure the default GNOME desktop environment is installed in Pop!_OS, install the pop-desktop package:
For Ubuntu, install the ubuntu-desktop package instead:
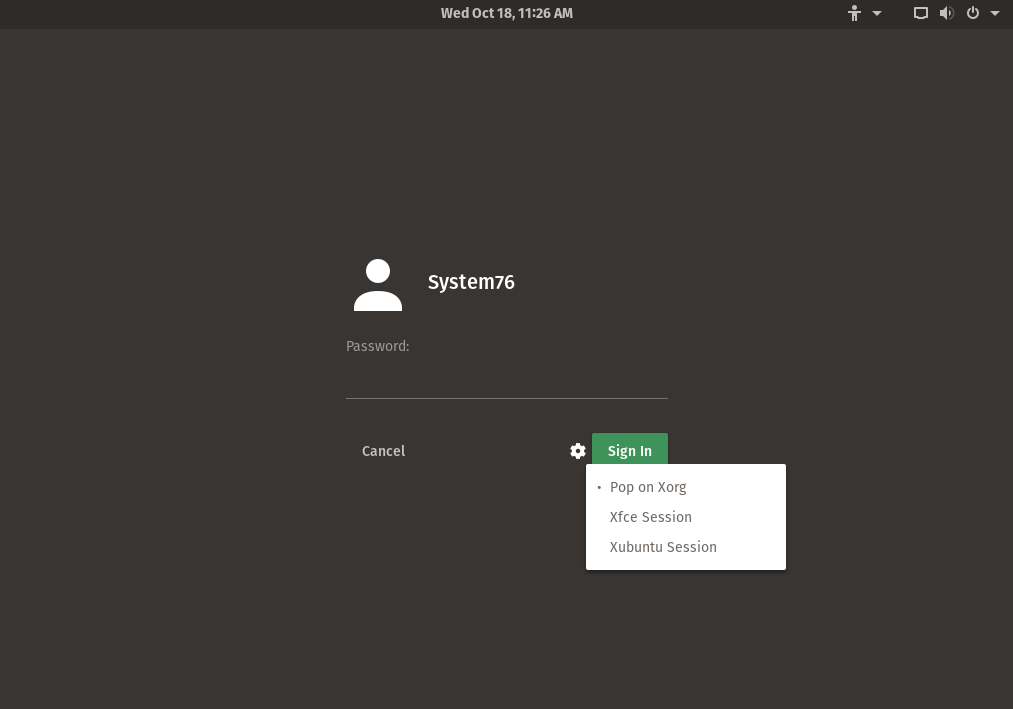
The desktop environment is basically the top graphical layer of the OS. The desktop environment is launched by a display manager; Pop!_OS and Ubuntu both use GDM (GNOME Display Manager) by default.
If multiple desktop environments are installed, GDM will display a gear icon, which will allow you to select the desktop environment you want to launch. You will need to either reboot or restart your display manager using sudo systemctl restart gdm before a newly-installed desktop environment will show up in the list of options.
Different Desktop Environments
MATE is a simple and attractive desktop using traditional concepts. MATE is a fork of GNOME 2.
This command will install MATE and its dependencies:
Cinnamon
Cinnamon is used in Linux Mint by default. Cinnamon strives to provide a traditional experience and is a fork of GNOME 3.
Cinnamon is installed with:
GNOME
While Pop and Ubuntu contain GNOME by default, both include a number of customizations to GNOME. You can also install a vanilla GNOME session to get the upstream GNOME experience.
You can install the vanilla GNOME session using this command:
KDE Plasma
The KDE Plasma desktop environment is a familiar working environment and looks similar to Windows’ desktop. It is highly customizable and looks clean.
The KDE Plasma desktop and its dependencies can be installed with this command:
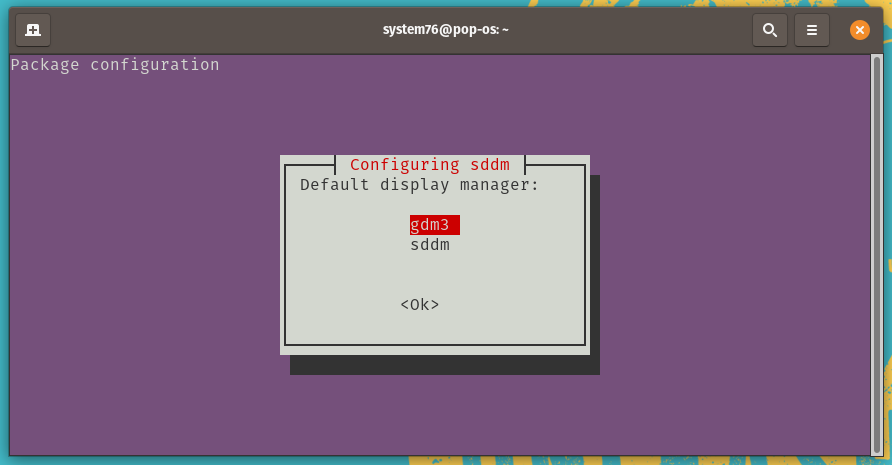
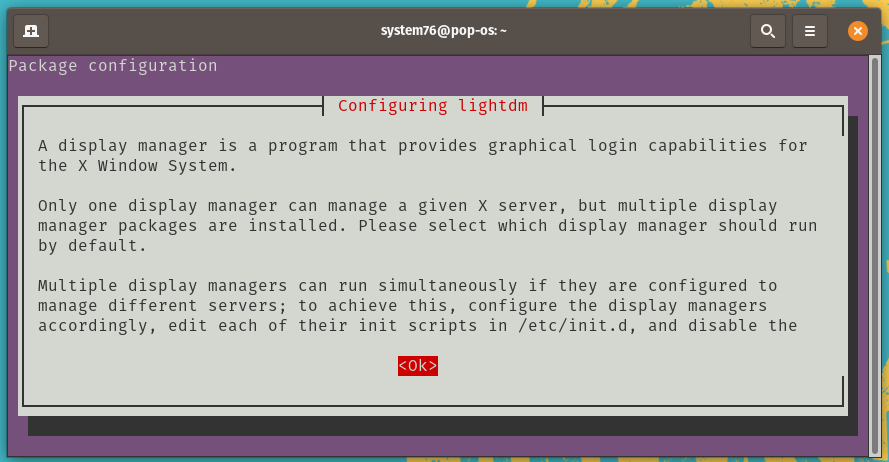
While installing KDE, you’ll be prompted to choose a display manager:
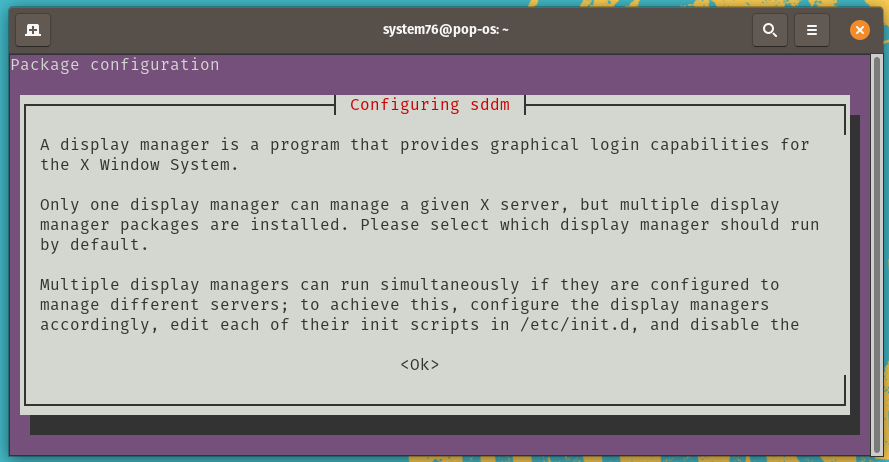
Press Enter to select the OK option. (If the OK option is not selected, press Tab to select it.) At the list, press Enter again to keep gdm3 as your display manager:
UKUI is a lightweight desktop environment based on a pluggable framework for Linux and other UNIX-like distributions. It provides a simple experience for browsing, searching, and managing your computer. It is developed using GTK and Qt.
UKUI can be installed with:
XFCE embodies the traditional UNIX philosophy of modularity and re-usability. This environment provides a good amount of conformity for the programs written for it. XFCE also provides a highly customizable environment, while being leaner on resources.
You can install XFCE and its dependencies with this command:
While installing XFCE, you’ll see a prompt to select your default display manager:
Press Enter to select the OK option. (If the OK option is not selected, press Tab to select it.) At the list, press Enter again to keep gdm3 as your display manager:

The Lightweight X11 Desktop Environment is a fast and energy-saving desktop environment. It looks similar to older versions of Windows. This is a lean desktop environment and can help extend battery life in laptops.
LXDE can be installed with:
While installing LXDE, you’ll see a prompt to select your default display manager:
Press Enter to select the OK option. (If the OK option is not selected, press Tab to select it.) At the list, press Enter again to keep gdm3 as your display manager:
LXQt is a lightweight Qt desktop environment. It’s being developed as a successor to LXDE. It is focused on being a classic desktop with a modern look and feel.
LXQt can be installed with:
Troubleshooting
Desktop environments can interfere with each other or change system-wide settings. Issues with a desktop environment’s appearance can generally be fixed by changing the theme in the Appearance control panel.
Customize Notification Dialog
Xfce will change the notification dialog to its own. It can be configured with this command:
Remove Duplicate Options From Login Screen
Some desktop environments provide more than one session. For example, Cinnamon provides both a 2D and a 3D session. The options available at login are located in the /usr/share/xessions directory, and unneeded options can be removed by deleting the corresponding files. For example, to remove Cinnamon’s extra option:
Change Automatic Startup Programs
Some desktop environments configure additional programs to start at boot. To change them, run the Startup Applications program and turn off any unwanted startup programs.
Double Lock Screen Passwords
GNOME does not use a screensaver (only a lock screen), but other desktop environments may install the classic GNOME screensaver package as a dependency. If you’re being prompted for a password twice after suspending or locking the screen, disable the second prompt with this command:
Or, if that doesn’t stop the second prompt, uninstall the redundant screensaver with this command:
Enable Cinnamon Lock Screen
If Cinnamon’s desktop lock screen isn’t functioning, this command will re-enable it:
Removing Desktop Environments
If you no longer want to use a desktop environment, it can be removed by using:
Источник
How to Switch Desktop Environments in Ubuntu/Debian From the Command Line

This comes in useful when needing to switch between desktop environments on a Ubuntu 20.04 server, when using it as a remote desktop.
Currently I’m using this with remote desktops that I’m connecting to via xRDP. This may not work for all remote desktop solutions, or all scenarios, however.
I’ve added in how to switch desktop environments for Chrome Remote Desktops, and another section for VNC, after realizing the method is different.
If your scenario is different and this method doesn’t work for you then please feel free to contact us via the comments section or our contact us page.
Objective
In this tutorial we’ll switch between multiple desktop environments from the command line, on a machine running a Debian based Linux distro.
Table of Contents
Prerequisites
- A machine running a Debian based Linux distro with multiple desktop environments installed. (I’m using Ubuntu 20.04)
Switching Between Desktop Environments
To switch between desktop environments on a Debian based distro run the following command:
Then you should be presented with the desktop environments you have installed on your system so you can choose one of them:
Then you can fill in the number corresponding to the desktop environment that you want and press enter.
Then you can logout and log back in, and the desktop launched should be the one that you selected.
Switching to Ubuntu Budgie Desktop Environment
The above method doesn’t seem to work with Ubuntu Budgie.
What does work, however, is editing the /etc/xrdp/startwm.sh file, by commenting out the last 2 lines, and adding budgie-desktop at the end.
To edit the file run:
And comment out the last two lines and add budgie-desktop at the end:
Now when you log in again you should be using Ubuntu Budgie.
I had found this solution here Froth and Java – Ubuntu Budgie and xRDP , but it hasn’t worked for me.
I’ll update this article when I find a fix.
Switching Between Desktop Environments From the Command Line for Chrome Remote Desktop
To configure Chrome Remote Desktop to use a different desktop environment, then run the following command, replacing CHOSEN_DESKTOP_ENVIRONMENT with the desktop environment that you want.
For example, to configure Chrome Remote Desktop to use XFCE you would run:
I’m not sure of a clean way of listing the paths for each desktop environment, at the moment, but you can run the following command and to see the path for each desktop environment:
As mentioned above, you’ll be shown something like the following, where you can see the executables for the desktop environments installed on your system under Path .
And you’ll use the Path for the desktop environment that you want, replacing /usr/bin/CHOSEN_DESKTOP_ENVIRONMENT with it.
Switching to Ubuntu Budgie Desktop Environment for Chrome Remote Desktop
The path to Budgie is /usr/bin/budgie-desktop so to switch to it you can run:
I’m not clear on how to find the path to Budgie in a clean command, however you can switch to it, right now. But the above command should work.
Switching Between Desktop Environments From the Command Line for VNC Server
To see how to switch between desktop environments from the command line for VNC, please visit our related article on installing and configuring a VNC server on Ubuntu 20.04 , in the Configuring VNC to Use Other Desktop Environments (And Switching Between Them) section.
We cover this exact topic in detail in that section.
We recommend reading through the entire tutorial in order to get some background info on how we set up our server.
For example, we mention that in that tutorial we’re using TigerVNC, and that TightVNC has not worked for every desktop environment for us.
Conclusion
I hope this article helps you in changing between desktop environments from the command line.
If you’re having any issues, or have any feedback, we’d love to hear from you in the comments or via the channels on our contact us page.
Resources & Acknowledgements
Alternative way of switching to Ubuntu Budgie Desktop Environment adapted from:
Revisions & Updates of this Article
[Mar 23 2021]: Added workaround to switch to Budgie, along with acknowledgements.
Источник


