- Как переключиться с Windows Phone на Android Phone
- Как переключиться с Windows Phone на Android Phone
- Шаг 1. Переместите контакты и календарь из Windows Phone в телефон Android
- Шаг 2. Перенос данных с Windows Phone на телефон Android
- Шаг 3. Синхронизируйте старые данные с учетной записью Google
- Four ways to transfer data from Windows phone to Android device for free
- Solution 1. How to transfer files from Winphone to Android with 1 Click
- Dr.Fone — Phone Transfer
- Steps about how to transfer data from Windows phone to Android device with Dr.Fone
- Step 1. Launch Winphone to Android Transfer
- Step 2. Connect Windows Phone and Android
- Step 3. Transfer from Windows Phone to Android
- Solution 2. Transfer data from Windows phone to Android device with computer
- Pros and cons of this way
- Solution 3. Transfer content from Windows Phone to Android with OneDrive
- Pros and cons of this way
- Solution 4. Transfer contacts with Outlook and Gmail
Как переключиться с Windows Phone на Android Phone
Телефоны Windows были неоспоримо глотком свежего воздуха обратно в 2011 году Но, давайте просто принять тот факт, что телефоны Windows не конкурируют хорошо, как люди могли бы ожидать. Конечно, есть магазин приложений, который лучше, чем раньше, но немногих громких имен по-прежнему не хватает, и люди уже живут без этих важных приложений. Я имею в виду, конечно, нехватка приложений была одним из факторов убийства сделок здесь.
Есть много факторов, которые мы рассматриваем в эти дни перед покупкой нового телефона. Качество сборки, камера, аппаратное обеспечение, дисплей и, что самое важное, его экосистема, потому что именно это определяет ваш общий опыт. Если вы уже хорошо знакомы с одной ОС, переход на другую кажется довольно сложным, и почему бы и нет? В конце концов, вы потратили время на понимание всей экосистемы.
Итак, теперь, когда вы, наконец, решили войти в сферу ОС Android, ваш разум наверняка будет наводнен множеством вопросов, например, как переключиться с телефона с Windows Mobile на телефон Android , не теряя при этом свой данные, как перенести контакты и данные с телефона Windows на телефон Android и т. д. Не беспокойтесь! Мы ознакомили вас и постарались сделать этот переход плавным с помощью этого пошагового руководства.
Как переключиться с Windows Phone на Android Phone

Шаг 1. Переместите контакты и календарь из Windows Phone в телефон Android
Поскольку вы являетесь пользователем Windows Phone, очень высоки шансы, что вы используете учетную запись Microsoft. Все, что вам нужно сделать, – это использовать свою Gmail и учетную запись Microsoft для переноса календаря и контактов с телефона Windows на телефон Android . Вот как вы можете синхронизировать контакты и календарь Outlook позже на устройстве Android.
1. В первую очередь, сделайте резервную копию и синхронизируйте все с вашей учетной записью Windows. Вам просто нужно зайти в настройки и нажать на него. Вы увидите учетные записи электронной почты + в списке, нажмите на Hotmail и введите свои учетные данные. Когда на экране появится запрос на синхронизацию данных, нажмите «Контакты», «Электронная почта» и «Календарь». Телефону потребуется некоторое время для синхронизации всех ваших данных, и вы сделали первый шаг.
2. Теперь вот как вы можете синхронизировать эти данные на вашем Android-устройстве. Просто зайдите в настройки, нажмите на «Учетная запись» и нажмите «Добавить учетную запись». Там вы должны ввести адрес электронной почты и пароль своей учетной записи Microsoft. После входа в систему вас попросят настроить учетную запись. Нажмите на параметры синхронизации электронной почты, календаря и контактов. Таким образом, ваша учетная запись Microsoft будет синхронизироваться с новым устройством, и вы будете иметь свой календарь и контактную информацию на своем новом телефоне Android.
Шаг 2. Перенос данных с Windows Phone на телефон Android
1. Вы можете безболезненно переносить данные с телефона Windows на телефон Android через рабочий стол старомодным способом. Просто подключите ваш телефон Windows к рабочему столу с помощью кабеля Micro USB. Выберите элемент, который вы хотите иметь на своем новом устройстве Android, и вставьте их в папку. Затем аналогичным образом подключите устройство Android к рабочему столу и получите все данные на своем телефоне из этой папки, будь то фотографии, музыка, видео или документы.
2. Если у вас нет компьютера, не берите в голову! В любом случае мы вас обеспечим. Доступно множество сторонних приложений, таких как Phone Copier , которые помогают передавать данные между смартфонами. SHAREit – это еще один вариант, доступный как для платформ Windows, так и для Android. Вам просто нужно скачать приложение SHAREit на обоих устройствах. И да, не забудьте подключиться к точке доступа Wi-Fi, созданной SHAREit на устройстве Windows. Вы должны быть подключены к Hotspot для отправки файлов.
Теперь откройте его на Windows Phone, нажмите на кнопку отправки и выберите фотографии, музыку, документы, которые вы хотите иметь на устройстве Android. После выбора нажмите на название устройства, отображаемое на радаре приложения, и файлы будут отправлены.
Шаг 3. Синхронизируйте старые данные с учетной записью Google
В отличие от экосистемы iOS, единственная потребность Google, которая вам нужна на смартфоне Android, – это учетная запись Google. Теперь, когда у вас есть старые данные на новом устройстве Android, мы предлагаем вам синхронизировать их с учетной записью Gmail. Это облегчает доступ к вещам, и всегда полезно делать это заранее.
Профессиональный совет
Поскольку вы только что прошли весь процесс перехода с телефона Windows на телефон Android, позвольте мне сказать, что вы не можете перемещать данные приложения. Следовательно, если ваш следующий вопрос «как перенести сообщения WhatsApp с телефона Windows на телефон Android», я боюсь, что такого способа нет. Это касается не только ОС Windows; даже другие экосистемы не позволяют пользователям получать доступ к данным приложения.
Так что, если вы планируете перейти с Windows Mobile Phone на телефон Android, эти советы пригодятся вам, чтобы сделать ваш переход максимально безболезненным. Если вы сделали это другим способом, сообщите нам о своем опыте в разделе комментариев, и мы будем очень рады поучиться у вас.
Планируете перейти на iPhone? Прочитайте наш пост о том, как перейти с Windows Phone на iPhone.
Four ways to transfer data from Windows phone to Android device for free

Alice MJ
Dec 21, 2020 • Filed to: Data Transfer Solutions • Proven solutions
Solution 1. How to transfer files from Winphone to Android with 1 Click
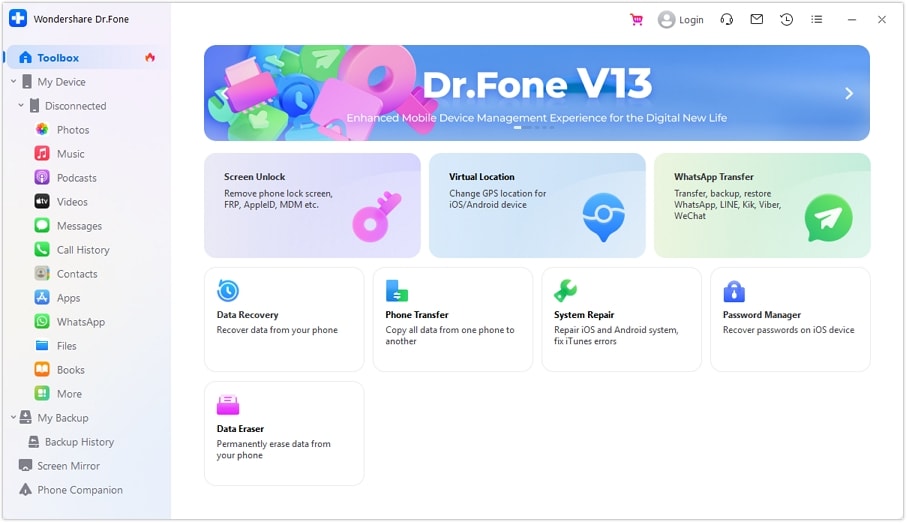
Dr.Fone — Phone Transfer can transfer your photos, videos, music contacts, messages and other files directly from your Winphone to Android. It can also restore your contacts from Onedrive backup of Winphone to your Android device totally hassle-free. With Dr.Fone — Phone Transfer, you can transfer files from Windows phone to Android in batch.
![]()
Dr.Fone — Phone Transfer
Transfer Data from Windows Phone to Android in 1 Click!.
- Easily transfer all videos, music, contacts and photos from Windows phone to Android devices.
- Enable to transfer from HTC, Samsung, Nokia, Motorola and more to iPhone X/8/7S/7/6S/6 (Plus)/5s/5c/5/4S/4/3GS.
- Works perfectly with Apple, Samsung, HTC, LG, Sony, Google, HUAWEI, Motorola, ZTE, Nokia and more smartphones and tablets.
- Fully compatible with major providers like AT&T, Verizon, Sprint and T-Mobile.
- Fully compatible with iOS 11 and Android 8.0
- Fully compatible with Windows 10 and Mac 10.13.


Steps about how to transfer data from Windows phone to Android device with Dr.Fone
Step 1. Launch Winphone to Android Transfer
Open the Dr.Fone on your computer and click on the “Phone Transfer” option.
Step 2. Connect Windows Phone and Android
Use USB cables to connect both your Android device and windows device to your computer. On connecting both devices, click the “Flip” button on the program in order to switch the destination and source phones.
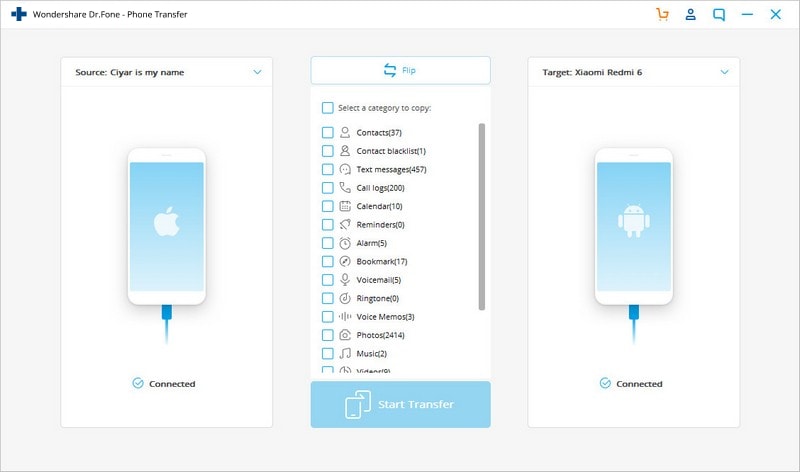
At this point, you will have to select the desired files to transfer by ensuring the box beside the file types is checked. You also have the choice of clearing the data in the destination phone if desired.
Note: Transferring contacts from windows phone to Android device will require you to backup contact to you Onedrive first while Dr.Fone — Phone Transfer helps you restore it to your Android device.
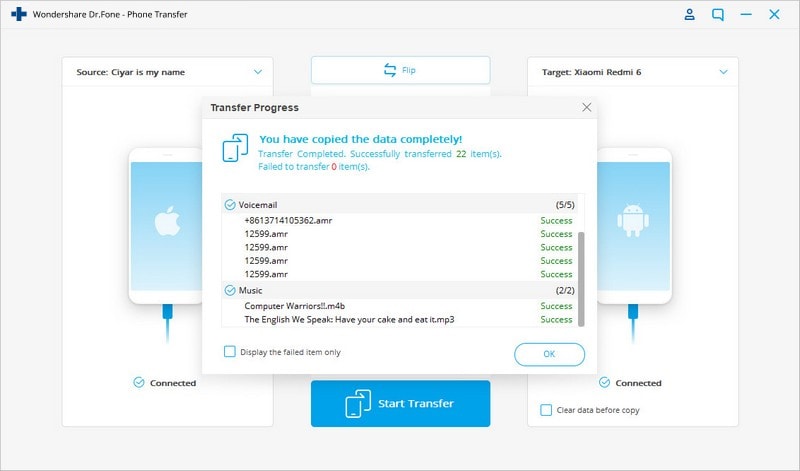
Step 3. Transfer from Windows Phone to Android
Click “Start Transfer” to start transferring. Ensure both phones stay connected during the transfer process.
Solution 2. Transfer data from Windows phone to Android device with computer
When it comes to transferring contacts, documents, audio video files and other data from Windows phone to Android devices, connecting both devices to your PC for data transferring is the most preferred Solution.
All that you need to do is to connect both devices to your computer or laptop with the help of data cables. Open each folder one by one, and simply copy-paste the content from windows phone folders to Android device folders.
Pros and cons of this way
This is the simplest method to transfer content from one device to the other. There is no need for an internet connection. Files are transferred within just few seconds.
The negative aspect is perhaps the fact that files and folders are transferred in their existing format. So, some videos, images, and files that you open in your Windows phone might not be compatible with Android device and may not even open after transferring. Same is the problem with transferring phone contacts, as every handset stores contacts in a different format. This method cannot be used to transfer text messages from one device to another.
Solution 3. Transfer content from Windows Phone to Android with OneDrive
Microsoft’s smart phone operating system may not be as popular as Android or iOS. But, some of Microsoft’s apps are impressive for sure! Microsoft’s OneDrive app is one of those apps that can really prove to be helpful for transferring data from one device to the other. The app supports Windows, iOS and Android devices. With OneDrive, you can transfer Windows Phone files to Android as well. Check the detailed steps below.
![]()
First step is to download OneDrive app in both devices. After downloading, the app will prompt you to sign in using your Microsoft account.
![]()
Once you sign-in using your outlook username and password, the app will open its home page and display your existing content that you have stored in OneDrive.
![]()
Now, open the same app in your windows phone and click on upload icon.
![]()
Click on «Upload files» Solution if you wish to upload documents, audio files, and other supported formats. If you wish to upload videos and photos from your device, just choose the dedicated Solution.
The app will display all the folders and sub-folders from your Windows phone. Open the folder one by one and choose the content that you wish to transfer in your new phone.
![]()
Once you select the concerned files, just click on «upload». The app will start uploading all the selected content on OneDrive server.
![]()
After uploading all the necessary content from Windows phone on OneDrive, open the OneDrive app on your Android device.
Select the content that you wish to sync with your Android phone and simply download the same.
![]()
This Solution is suitable for people who travel in various countries around the world and change their cell phone several times. As all the important content remains stored on OneDrive, users can retrieve it any time and from anywhere. All that they need is an Android, Windows, or iOS handset that supports the OneDrive app.
Pros and cons of this way
As mentioned earlier, this Solution is best suitable for people who wish to transfer contacts, documents, and files without using PC. Several people use this method to transfer their content from one phone to another while on the go. Images, documents and videos can be viewed with the help of OneDrive app, and can be downloaded in compatible format.
Now the drawback! You need an active internet connection in your Windows and Android device, most preferably, Wi-Fi. Transferring data may take considerable time, as files are first transferred to OneDrive, and then, from OneDrive to your Android device.
Unfortunately, this app cannot help in transferring contacts or text messages from one phone to another.
Solution 4. Transfer contacts with Outlook and Gmail
Follow the steps below to transfer contacts from Windows phone to Android phone:
In-order to transfer contacts from Windows phone to Android device, sync your contacts from Windows phone with Outlook. Then, sign-in to your Outlook account from desktop PC or tablet, and click on «People» Solution from the drop down menu.
![]()
In the next screen, click on «Manage» and select «Export for Outlook and other service» from drop down menu.
![]()
Once you click on that Solution, Outlook will automatically download contacts on your device in the form of .CSV file.
![]()
Now, open Gmail, and click on Gmail’s contact Solution.
![]()
The next screen will show you several Solutions, and you need to select «import.»
![]()
Once the pop-up window appears, click on choose file Solution, and select the Outlook contacts CSV file that you downloaded from Outlook. Then, simply click on import.
![]()
Within few seconds, Gmail will sync all the contacts from the Outlook’s file and merge them with your existing contacts on Google. Start your Android device, and simply sync Google’s contacts with your phone’s contacts. That’s it! This is perhaps the best way to transfer contacts from Windows phone to Android device, and that too, free of cost.


