- How to Sync Files and Folders in Windows 7 Computer?
- Scenario
- What Is File Sync?
- Set up File Sync with Windows 7 Built-in Tool
- Synchronize Files in Windows 7 with AOMEI Backupper
- Summary
- 8 best Windows 10 file sync software
- What are the top 8 file sync tools for Windows 10?
- SyncBack (recommended)
- Easy2Sync
- FreeFileSync
- PureSync
- Sync files with OneDrive in Windows
- Productivity apps, 1 TB of OneDrive, and advanced security.
- Install and set up
- If you have no accounts signed in to OneDrive
- Key points in OneDrive Setup
- See and manage your OneDrive files
How to Sync Files and Folders in Windows 7 Computer?
Files sync can help people make a copy of needed files so that the files can be used in different places. Here you can learn how to synchronize files in Windows 7 computer in two different ways.

By Cherry  / Last Updated August 4, 2020
Scenario
How do I sync files in Windows 7?
Hi everybody, I have a folder (with many pictures taken over 10 years) that I want to sync with my another computer over my network. Does Windows 7 have a sync tool that I can copy a folder to another place? Thanks!
— Question from Sevenforums.com
Page contents:
What Is File Sync?
Sync (short for synchronization) is an operation that can keep files in multiple locations up-to-date. That is to say, file sync is to make two files or more stay the same and transfer the newly-created or updated files and folders from the source directory to the target directory.
In other words, file sync is file backup in a certain way. Most of us know that we need to backup system before system crash or data corruption. If we synchronize files or folders to another place, we can get the files or folders back from the copies when the source data is damaged.
The files can be synchronized to the local space or different PCs though network and we call the process single file synchronization or remote file synchronization. When doing file sync, it will scan the files of both source and target directories to find the changed files, and then transmit the needed files or delete the needless files to keep the files in different places same.
Set up File Sync with Windows 7 Built-in Tool
It is easier to sync files in Windows 7 than in earlier Windows operating systems. Windows 7 has the function called Sync Center to synchronize files. With Sync Center, you can sync files on Windows 7 network drive to local so that you can work with those files even when you’re not connected to the network, or when the server is unavailable. Follow the guidance below to sync network files to local:
1. Click the Start button > All Programs > Accessories > Sync Center to open the Sync Center. Then, click Manage offline files on the left pane.

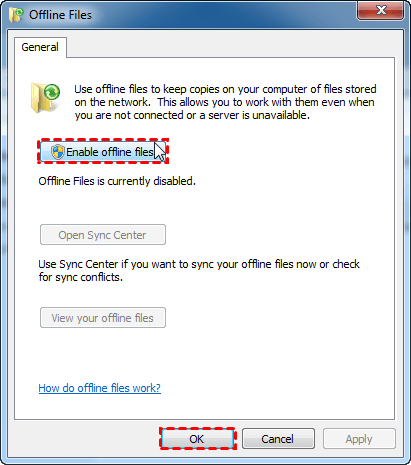
2. In the pop-up window, click Enable offline files and OK. Then, restart your computer to make changes take effect.
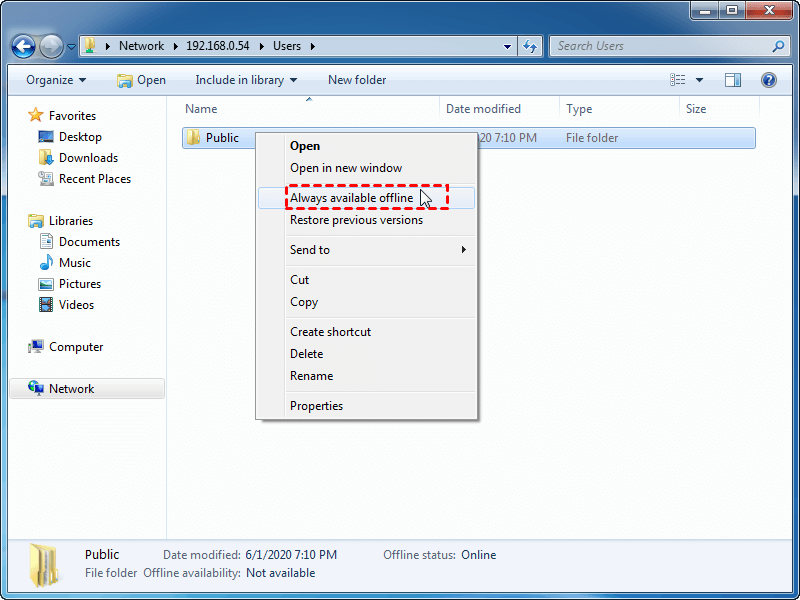
3. Search “\\IP address” or “\\hostname” from Start to open network drive. All shared folders will be displayed. Right click on the folder or file you want to sync and select Always available offline.
4. After the process is done, the folder or file will get a sync overlay icon which means it has already been synced. You can also view sync results in Sync Center.
Sync Center in Windows 7 is designed to help you sync with files in network locations. If you want to sync a mobile device with the computer, Windows gives you several other options. However, some users get stuck on Windows 7 Sync Center problems like “Offline Files cannot be activated in Windows” and “Access is denied”, etc. Is there a superior sync tool to help you sync files in Windows?
Synchronize Files in Windows 7 with AOMEI Backupper
AOMEI Backupper Standard is free file sync software with multiple powerful functions:
The File Sync feature enables you to synchronize files from one folder/disk/computer to another folder/disk/computer. It makes transfer files from PC to PC such an easy thing.
Most commonly used cloud drives are supported by AOMEI Backupper, including Google Drive, Dropbox, OneDrive, Box, SugarSync, hubiC and Cloudme. You are allowed to sync local folders to cloud and vice versa.
The Schedule feature can help you set up automatic sync based on the daily/weekly/monthly mode.
All Windows PC operating systems are supported by AOMEI Backupper. You can use it to sync files in Windows 10/8.1/8/7/Vista/XP. The operations are easier than Windows 7 built-in tool. Learn how to sync files in Windows 7 via AOMEI Backupper below:
Step 1. Download, install and launch AOMEI Backupper Standard edition. Click “Sync” and select “Basic Sync”.

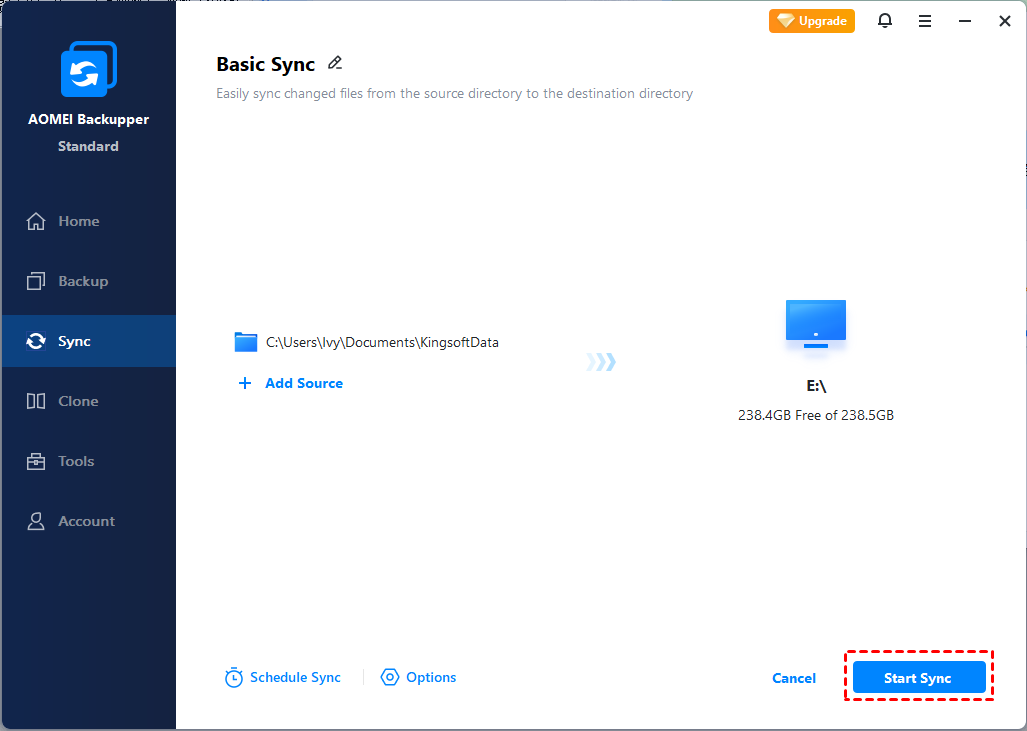
Step 2. Then you will go to the following interface. Click “Add Folder” to select the folder you want to synchronize.

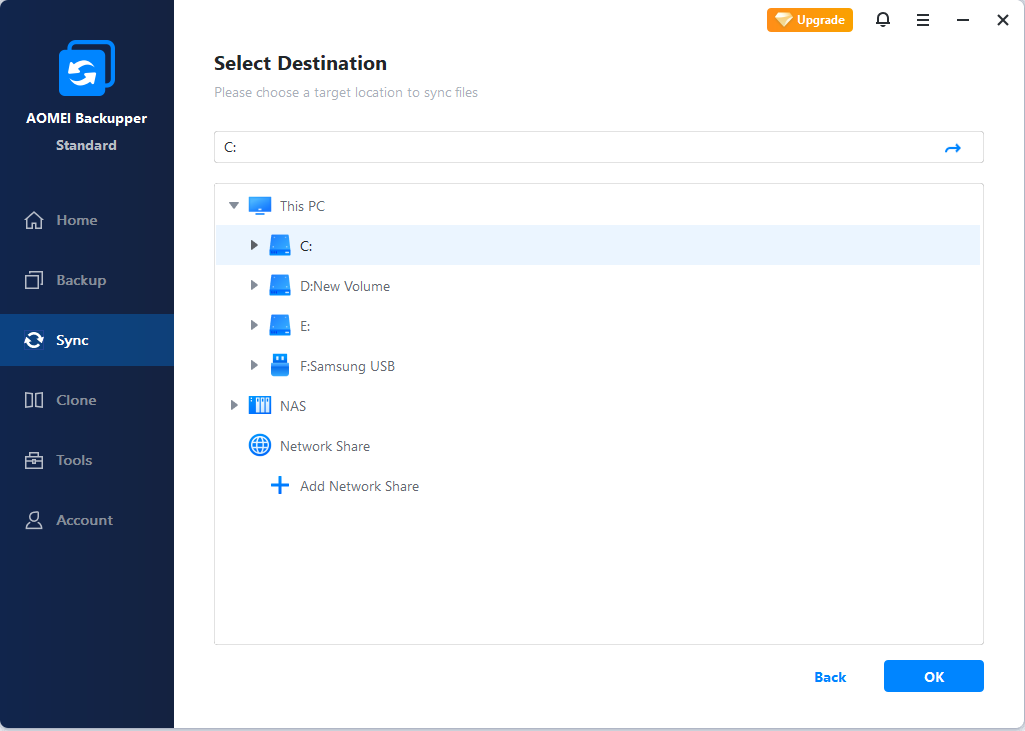
Step 3. Choose the target directory where you would like to put the folder in.
Step 4. Click the “Start Sync” button to proceeding.
>> Options: you can write a comment for this sync task to distinguish it from others. You can also enable email notification to inform you of the sync results.
>> Schedule: you can schedule the sync task to run daily, weekly, or monthly. If you want more advanced schedule modes like Event triggers or USB plug in, you may upgrade to AOMEI Backupper Professional.
Notes:
It cannot synchronize files or folders to CD/DVD/Blue-Ray.
It cannot synchronize single file larger than 4 GB to FAT/FAT32, because FAT/FAT32 only supports single file size up to 4 GB.
It only supports one-way file sync currently so changes made in source can be reflected in destination but destination cannot.
Summary
You have learned two ways to sync files in Windows 7 from this page. Sync Center can help you sync Windows 7 network drive to local while AOMEI Backupper supports various sync locations. Apart from syncing files, AOMEI Backupper offers backup and restore features to help you backup Windows 10 to NAS. Don’t hesitate to give it a try!
8 best Windows 10 file sync software

- File sync solutions are ideal for businesses and professionals that must keep files updated on workstations. But they are also great for home users and work-from-home individuals who wish to improve their productivity.
- Synchronizing files is similar to creating mirror backups: changes made to one location are reflected in another. The best file sync tools let you schedule tasks, set file filters, and configure a bunch of advanced settings.
- If you prefer Windows 7, check out the best file sync tools for Windows 7!
- Visit our File Sync hub to read more awesome guides!

- Download Restoro PC Repair Tool that comes with Patented Technologies (patent available here).
- Click Start Scan to find Windows issues that could be causing PC problems.
- Click Repair All to fix issues affecting your computer’s security and performance
- Restoro has been downloaded by 0 readers this month.
Using file sync software is essential for enterprises because most users work on more than one Windows 10 computer. Often entire teams work on the same document. As a result, all the changes made by different users have to be visible to all users.
File sync software is a lifesaver for many users. It saves you from manually syncing files on different computers. In this manner, the latest version of a file will be available on all the computers you and your teamwork on.
File sync software also acts as a backup tool, which can be very handy in the case of an unexpected event. Thus, you can avoid data loss in case of corruption or deletion of your files.
Here’s how you should consider when picking a reliable sync solution for Windows 10:
- Interface: the GUI should be user-friendly and intuitive, whether you’re an experienced user or a beginner.
- Features: basic features such as schedulers, as well as advanced sync features, should be available.
- Stability: technical issues should be rare events and immediately fixed.
To help you decide which file sync software to install, we’ll list the 10 best Windows 10 file sync software. Together with a description of their main features and user feedback.
What are the top 8 file sync tools for Windows 10?
SyncBack (recommended)
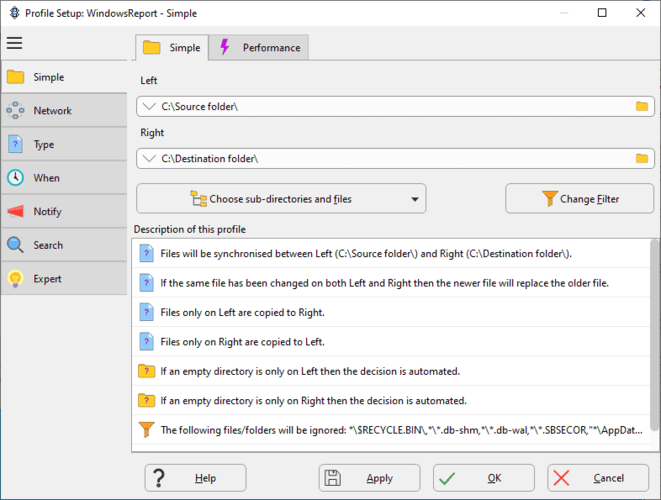
SyncBack is the best Windows backup and synchronization program on the planet, according to its developers. This tool is reliable, flexible and robust, and its performance has been constantly improved thanks to all the upgrades it received since its launch in 2003.
SyncBack has 3 flavors:
- SyncBackFree – a basic, free solution for casual users
- SyncBackSE – a more complete edition for home users
- SyncBackPro – ideal for professionals at the workplace
You can install all three versions on your computer to better compare the tools and spot the differences.
Here are the key features of SyncBack:
- Copy files to synchronize any two folders
- Create and restore backups easily
- Run programs before and after profiles
- Schedule backups at fixed times
- Unicode enabled for non-English filenames
- Process unlimited filename lengths
- Simple and Advanced mode
SyncBack certainly deserves its #1 spot when it comes to the best Windows 10 file sync software.
Easy2Sync
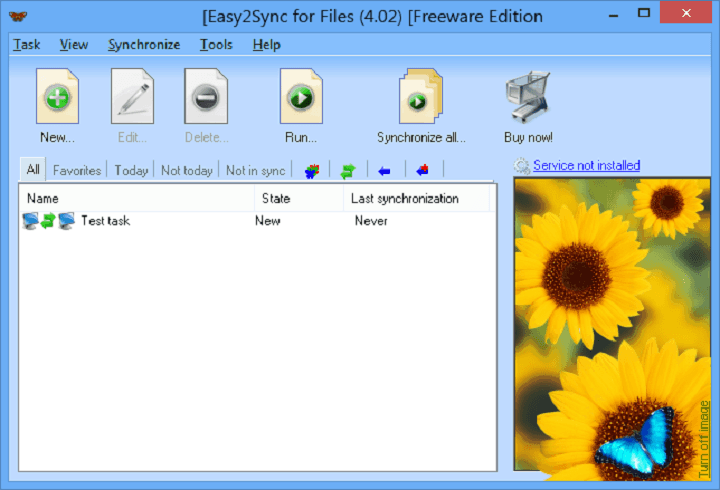
Easy2Sync keeps your data synced between your computers. It is rather a specialized software that comes in two variants: Easy2Sync for files and Easy2Sync for Outlook.
Easy2Sync for Files has a dedicated wizard to help you get started. All data is kept on your computers, no third-party elements are involved in the sync process. You can set the tool to sync your files silently or prompt dialog pop-ups when necessary. It’s a great Windows 10 file sync software solution.
Other features of Easy2Sync include:
- Easy2Sync supports all file types: Office files, mp3, images, movies, and any other file types
- Unlimited folders/number of files
- Various sync filters supported
- Update your homepage: s imply synchronize your files with the (s)FTP server and all changes will be recognized and transferred.
Easy2Sync for Outlook works on Outlook 97 to 2016 and Windows NT to Windows 10. This software allows you to sync and share your Google calendar, synch the Exchange server with Outlook, back up your Outlook emails, and more.
User feedback: “I should add, you really do make a fine product, especially when compared with everyone else out there. In short, you have no competition.”
You can try Easy2Sync for free or buy the software for $66.30 and you’ll get 1 year of free support and free updates, and a 90-day money-back guarantee.
FreeFileSync
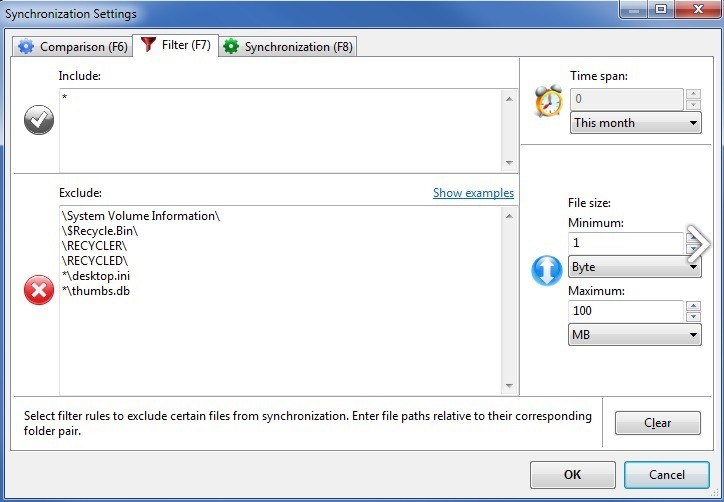
FreeFileSync is a free and open-source software solution, one of the best for file sync jobs on Windows 10. It saves your time by setting up and running backup actions.
Install Freefile Sync, customize your sync settings and let this tool do its job. The user interface is very intuitive, full of colors and you can easily see what each option does.
The list of FreeFileSync ‘s features is impressive and includes:
- No limitations on how many files you can sync
- Synchronize MTP devices
- Process multiple folder pairs
- Comprehensive and detailed error reporting
- Detect conflicts and propagate deletions
- Cross-platform: runs on Windows, Linux, Mac OS X
- Case-sensitive synchronization
User feedback: “After wasting $40+ dollars on a competitor’s product, I tried out Freefilesync. FreefileSync was able to compare hundreds of thousands of files […] in 10 minutes, which was taking the competitor’s product over 3 hours.”
PureSync
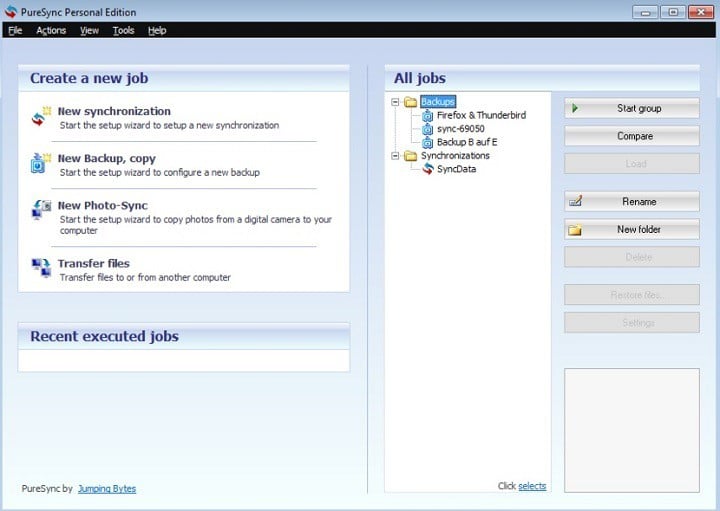
PureSync synchronizes your files and folders automatically in the background. This file sync software solution works great with Windows 10. It offers an impressive list of features and an easy-to-use interface.
PureSync supports local drives, server volumes, FTP, some MTP devices, WebDAV and can copy open/locked files, and run synchronization/backup with another user.
It can also restore files from a Windows restore point and supports photo-syncing for digital cameras.
Other features of PureSync include:
- Transfer files from one computer to another
- Automatic adaption to the folder at the destination
- Various automatic sync/ back up options: scheduled, drive connected, on modification of a file at logon/logoff or custom events
- Filenames/path with more than 260 characters are supported
- Many filter possibilities
Sync files with OneDrive in Windows
Productivity apps, 1 TB of OneDrive, and advanced security.
Important:
Support for the old OneDrive for Business sync app with SharePoint Online has ended. If you see this  icon in your taskbar, read this article to learn more.
With OneDrive, you can sync files between your computer and the cloud, so you can get to your files from anywhere — your computer, your mobile device, and even through the OneDrive website at OneDrive.com. If you add, change, or delete a file or folder in your OneDrive folder, the file or folder is added, changed, or deleted on the OneDrive website and vice versa. You can work with your synced files directly in File Explorer and access your files even when you’re offline. Whenever you’re online, any changes that you or others make will sync automatically.
This article describes how to download the OneDrive sync app and sign in with your personal account, or work or school account, to get started syncing. If you use Microsoft 365 Apps for business, you can also sync files from your SharePoint sites. If you’re not using Microsoft 365 Apps for business, see Sync SharePoint files with the OneDrive for Business sync app (Groove.exe).
Note: For information about syncing files on macOS, see Sync files with OneDrive on Mac OS X.
Note: For more information about how to use OneDrive, see OneDrive video training.

Install and set up
If you’re using Windows 10, your computer already has the OneDrive app installed — skip to step 2.
If you don’t have Windows 10 or Office 2016, install the Windows version of the new OneDrive sync app.
Start OneDrive Setup.
If you have no accounts signed in to OneDrive
If you don’t currently have an account signed in to OneDrive, use these instructions to start OneDrive.
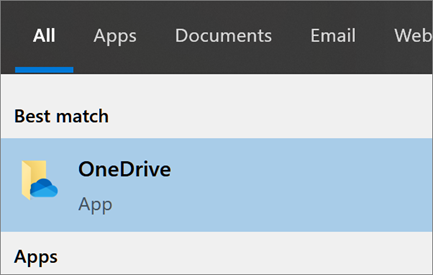
Select the Start button, search for “OneDrive”, and then open it:
In Windows 10, select OneDrive.
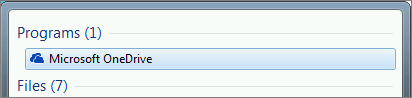
In Windows 7, under Programs, select Microsoft OneDrive.
In Windows 8.1, search for OneDrive for Business, then select the OneDrive for Business app.
When OneDrive Setup starts, enter your personal account, or your work or school account, and select Sign in.

Key points in OneDrive Setup
There are two screens in OneDrive Setup that are helpful to watch for:
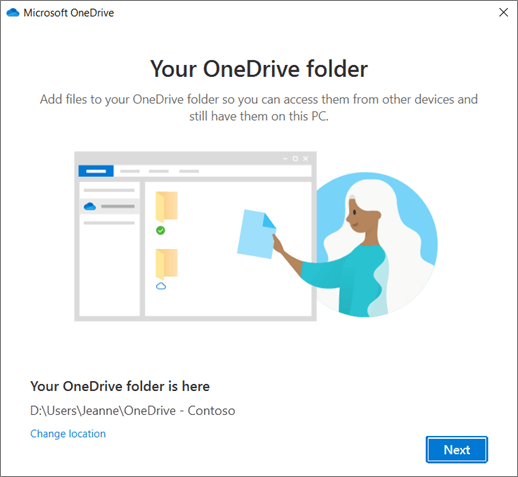
On the This is your OneDrive folder screen, select Next to accept the default folder location for your OneDrive files. If you want to change the folder location, select Change location — this is the best time to make this change.
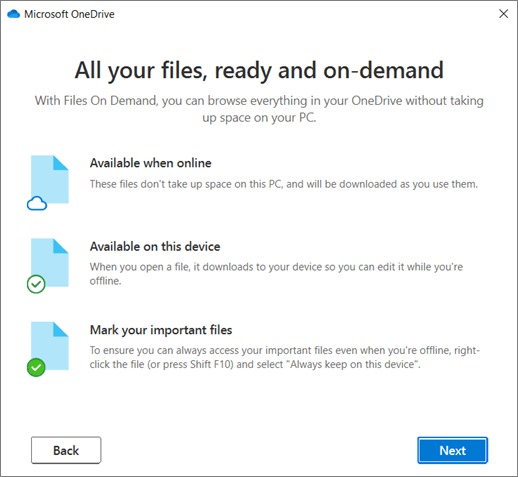
On the All your files, ready and on-demand screen, you’ll see how files are marked to show them as online-only, locally available, or always available. Files On-Demand helps you access all your files in OneDrive without having to download all of them and use storage space on your Windows device. Select Next.
Note: If you were already syncing OneDrive for work or school to your computer (using the previous sync app) and you’ve just installed the sync app, you won’t see the This is your OneDrive folder or the Sync files from your OneDrive screen during OneDrive Setup. The sync app automatically takes over syncing in the same folder location you were using before. To choose which folders you’re syncing, right-click the blue cloud icon in the taskbar notification area, and select Settings > Account > Choose folders.
See and manage your OneDrive files
You’re all set. Your OneDrive files will appear in File Explorer in the OneDrive folder. If you use more than one account, your personal files appear under OneDrive – Personal and your work or school files appear under OneDrive — CompanyName.
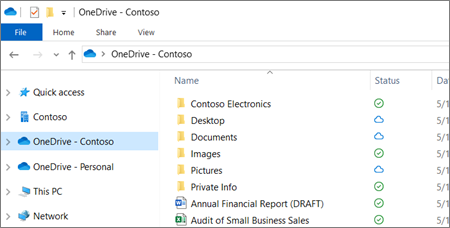
You now have a new white or blue cloud icon (or both) in your notification area and your files are synced to your computer. Your blue cloud icon will appear as OneDrive – [YourTenantName] when you hover over the icon.

Note: Contoso is an example name — yours will show the name of your organization.
Any time you want to change the folders you sync on your computer, right-click that cloud icon in the taskbar notification area, and select Settings > Account > Choose folders. Find other information about your account and change other OneDrive settings from here.


