- Системный монитор linux mint
- Установка:
- Подробная информация о пакете:
- Зависимости:
- Системный монитор Mint
- Glances
- Stacer
- Psensor
- Gnome Logs
- ScreenFetch
- HardInfo
- Gnome System Monitor
- Monitorix
- How to Install and Use GNOME System Monitor and Task Manager in Ubuntu
- Install GNOME System Monitor through the Command Line
- Launch System Monitor from Command Line
- Uninstall
- Install System Monitor through the UI
- Launch System Monitor from the Desktop
- Uninstall from GUI
- Using GNOME System Monitor
- The GNOME System Monitor Environment
- The Processes tab
- The Resources Tab
- The File Systems tab
- Karim Buzdar
Системный монитор linux mint
Установка:
Для установки gnome-system-monitor в Ubuntu / Linux Mint / Debian, введите в Терминал :

Подробная информация о пакете:
Монитор процессов и системный ресурс для GNOME
Зависимости:
Библиотека GNU C: общие библиотеки
Библиотека поддержки GCC
Библиотека GDK Pixbuf
Библиотека GLib подпрограмм C
C++-оболочка для инструментария GLib (разделяемые библиотеки)
Библиотека графического интерфейса пользователя GTK+
C++-оболочки для GTK+ (разделяемые библиотеки)
Gtop система мониторинга (общая)
Макет и предоставление интернационализированного текста
Макет и предоставление интернационализированного текста
Библиотека рендеринга на основе SAX для файлов SVG (среда выполнения)
Безопасная сигнальная структура для C++ – время выполнения
Продолжаем изучать Linux Mint и сегодня поговорим о мониторинге ресурсов, для этих целей есть «Системный монитор». С его помощью можно узнать информацию о системе и оборудование, запущенных процессах и ресурсах а также файловой системе. Так же с его помощью можно посмотреть активные процессы и при необходимости завершить их. Все это очень важная информация которую каждый пользователь должен знать где посмотреть.
Так же рекомендую прочитать статью про настройку пользователей в Centos 7, добавление удаление назначение прав и многое другое.
Системный монитор Mint
Для того чтобы открыть «Системный монитор» в Linux Mint нужно зайти в Menu в списке с приложениями выбрать «Системные» и найти «Системный монитор».

Откроется основное окно монитора на первой вкладке «Система» будет отображена информация о версии ОС, ядре а также оборудование ПК памяти, процессоре и жесток диске.

На второй вкладке «Процессы» можно посмотреть список запущенных процессов, их состояние, загрузку, используемую память и приоритете. Так же тут можно завершить или приостановить какой либо процесс изменить приоритет или просмотреть параметры.

Через пункт меню «Вид» можно отсортировать процессы, выбрать только активные, мои процессы или включить отображение зависимости что очень удобно.

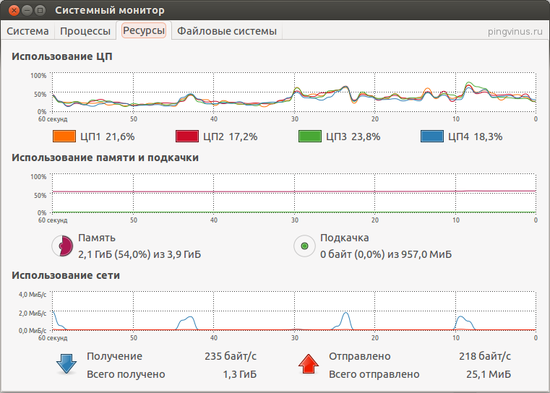
Вкладка «Ресурсы» покажет загрузку ЦП количестве используемой памяти и сети. Статистика очень подробная, например можно узнать, сколько информации была принято и отправлено через Интернет.

Если перейти на вкладку «Файловые системы» можно посмотреть информацию о жестких дисках их количестве объеме занятом и доступном месте.

Если сравнить с Windows то Системный монитор что-то похожие на Диспетчер задач. Им обязательно нужно уметь пользоваться хотя бы для того чтобы суметь закрыть зависшую программу или процесс.
Glances
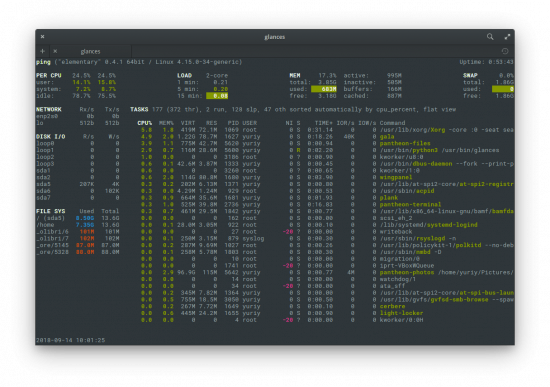
Glances — консольный монитор системных ресурсов, который отображает максимум информации на одном экране.
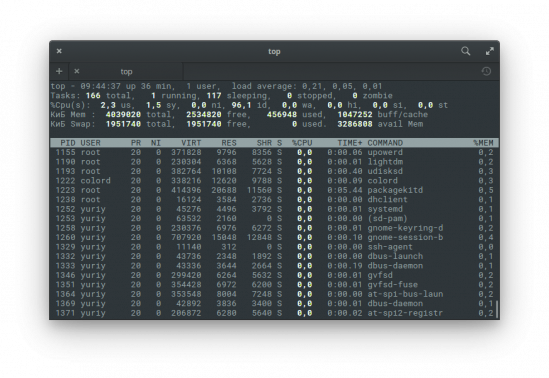
Top — консольный таск-менеджер для Linux. Позволяет просматривать информацию о процессах и загруженности ресурсов.
Stacer

Stacer — утилита для мониторинга, оптимизации, настройки и очистки системы.
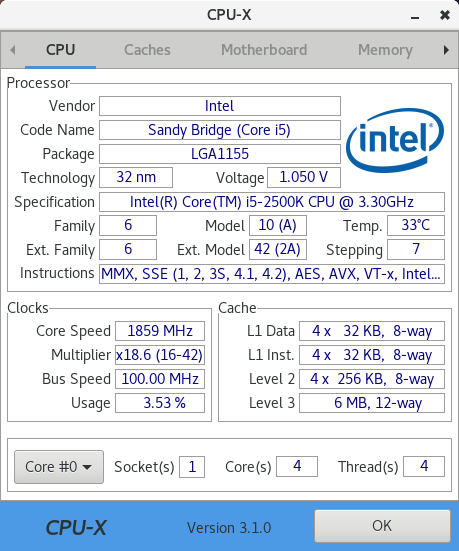
CPU-X — программа для просмотра основной информации о комьютере (процессор, кэш, материнская плата, оперативная память, операционная система, графическая подсистема).
Psensor

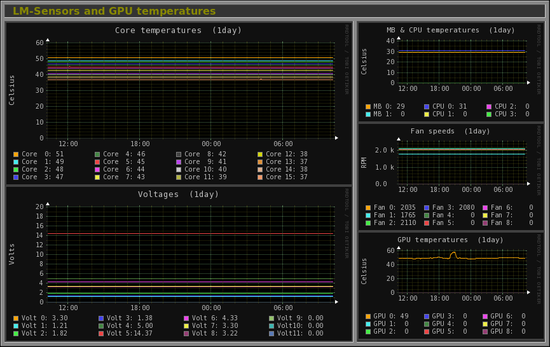
Psensor — простая утилита с графическим интерфейсом для мониторинга температуры оборудования компьютера.
Gnome Logs
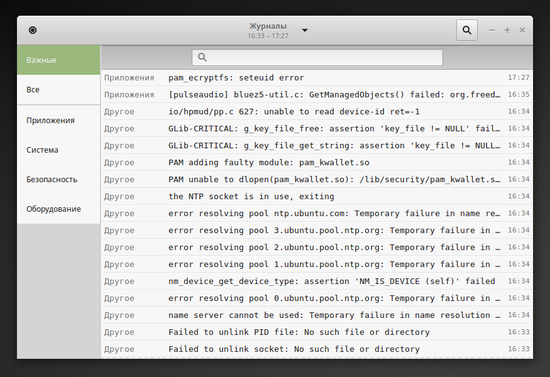
Gnome Logs (или просто Logs) — простая программа для просмотра системных журналов (systemd).
ScreenFetch
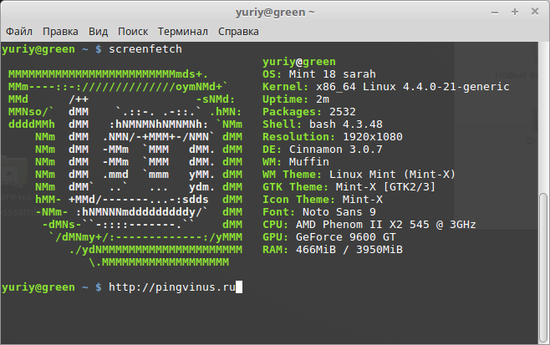
screenFetch — простая консольная утилита для вывода информации о системе и ресурсах.
HardInfo
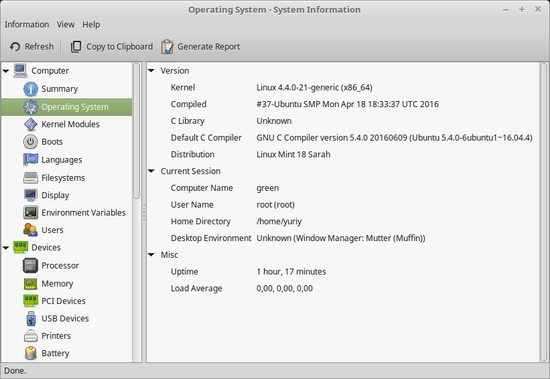
HardInfo — программа для просмотра подробной информации об оборудовании и системе, мониторинга системы, построения отчетов и запуска бенчмарков.
Gnome System Monitor
Gnome System Monitor — программа для мониторинга работы системы. Является штатным системным монитором в рабочей среде Gnome.
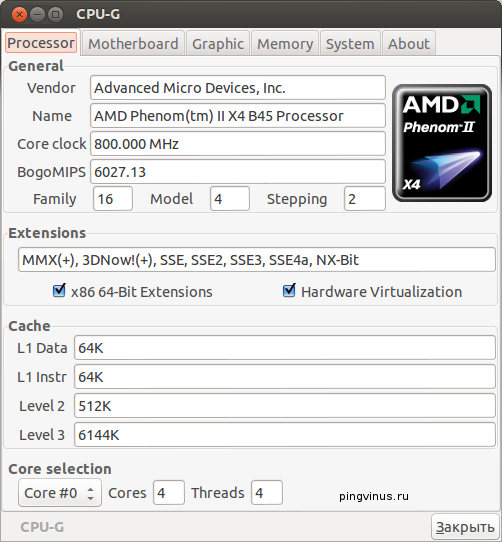
CPU-G — программа для просмотра информации о компьютере. В CPU-G можно просматривать информацию об оборудовании компьютера и краткую информацию о системе.
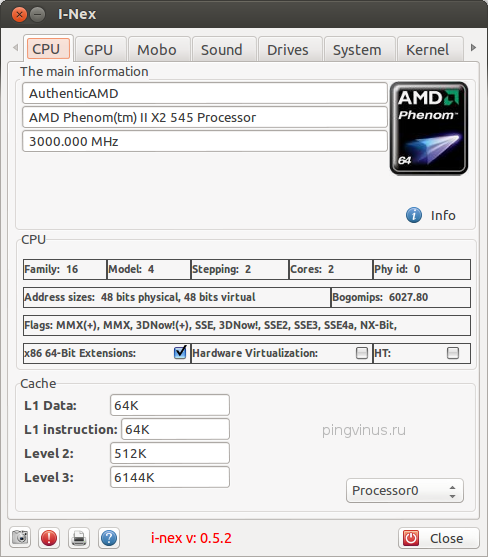
I-Nex — программа под Linux для отображения информации об оборудовании компьютера (аналогично популярной программе CPU-Z). Можно просмотреть информацию о компонентах вашего компьютера и некоторые системные вещи.
Monitorix
Monitorix — бесплатный монитор системных ресурсов. Позволяет просматривать загруженность и использование множества системных ресурсов (как аппаратных, так и программных).
Источник
How to Install and Use GNOME System Monitor and Task Manager in Ubuntu
Just like the Windows Task Manager that you might be using for years, Ubuntu also comes with a built-in processes & resources monitoring utility called the Gnome System Monitor. This Ubuntu task manager allows you to kill, end, stop and resume processes on your Ubuntu. Although most Ubuntu systems have it installed by default, you might have a version that lacks it. In this article, we will explain how to install/uninstall and launch the Ubuntu task manager both through the command line and the Ubuntu GUI. The article also explains some basic functions that you can perform through the System Monitor utility.
We have run the commands and procedures mentioned in this article on a Ubuntu 18.04 LTS system.
Install GNOME System Monitor through the Command Line
Open your Ubuntu command line, the Terminal, either through the Dash or by using the Ctrl+Alt+T shortcut. Enter the following command in order to refresh the list of available packages:
This command will update your system’s software repository index with that of the Internet so that you can install the latest release of a software.

The system will ask you for your password as only an authorized user can add, update, remove and configure software on Ubuntu.
Now enter the following apt-get command in order to install the latest Gnome System Monitor application:

The system will prompt you with a Y/n to confirm the beginning of the installation procedure. Enter Y and then hit Enter. This will install the software on your system.
Launch System Monitor from Command Line
You can launch System Monitor by entering the following command in your Terminal:

This will launch the Ubuntu Task Manager in the UI.
You can quit the application from the Terminal by using Ctrl+C and also quit the Terminal by typing Exit and then hitting Enter.
Uninstall
In order to uninstall System Monitor from your system, enter the following command as sudo:
The system will prompt you with a Y/n option in order to begin the uninstall procedure. Please enter Y and hit Enter to begin. Gnome System Monitor will then be removed from your system.

Install System Monitor through the UI
For a person who does not want to open the Command Line much, installing a software present in the Ubuntu repository through the UI is very simple. On your Ubuntu desktop Activities toolbar, click the Ubuntu Software icon.

In the following view, click on the search icon and enter System Monitor or even Task Manager in the search bar. The search results will list the GNOME System Monitor entry as follows:

Click on the GNOME System Monitor entry as it is the official system monitoring application by Canonical. The following dialog will appear:

Click the Install button to begin the installation process. The following authentication dialog will display for you to provide your authentication details as only an authorized user can install software on Ubuntu.

Enter your password and click the Authenticate button. After that, the installation process will begin, displaying a progress bar as follows.

System Monitor application will then be installed to your system and you will get the following message after a successful installation:

Through the above dialog, you can choose to directly launch System Monitor and even Remove it immediately for whatever reason.
Launch System Monitor from the Desktop
You can launch Gnome System Manager through the UI any time you want by searching for system monitor or even task manager in the Ubuntu Dash, or otherwise access it directly from the Applications list.

Uninstall from GUI
Although Gnome System Monitor is a very useful utility, you can uninstall it through the Ubuntu Software manager by first searching for it through the Search button and then clicking the Remove button from the following view:

A dialog will ask you if you are sure about removing the software from your system. Please enter the Remove button to uninstall the software. An authentication dialog will display for you to provide the authentication details for a sudo user as only an authorized user can install software on Ubuntu. Enter your password and click the Authenticate button. After that, the uninstall process will begin, removing System Monitor from your system.
Using GNOME System Monitor
We are all familiar with the Ctrl+Alt+Del shortcut that we use to bring up Task Manager in Windows and then use it to monitor processes and also kill unwanted ones. In Ubuntu, however, Ctrl+Alt+Del shortcut brings up the logout dialog.
When you have launched the System Dash either through the system Dash or the command line, you will see the following screen:

Let us explain this environment a little:
The GNOME System Monitor Environment
The Processes tab
This is the tab that the System Monitor opens in, by default. This tab displays all the processes running on your Linux system. Here you can see the Process name, Process ID, CPU use, memory use, and priority of each process. Based on this information, you can decide what you want to do with the process. The right-click menu that you get for each process helps you in:
- Viewing its detailed properties
- Viewing its memory maps
- Open used files
- Change priority
- Stop the Process
- Continue a stopped process
- End a process
And most importantly,
- Kill a Process

The Resources Tab
This tab gives you an analytical view of your system resources such as:
- CPU History
- Memory and Swap History
- Network History

This tab is very helpful in monitoring the performance of your system but you can not customize much on this tab other than the color of the graphs.
The File Systems tab
This tab displays information about the hard disk device(s) of your system. You can view the following information about the devices and also sort the listing based on the following:
- Device Name
- Directory
- Type
- Total Size
- Available Memory
- Used Memory

By reading this article, we are sure that you will not miss the Windows Task Manager on your Ubuntu system. You can monitor and manage your processes and thus the system resources by the complete package, the Gnome System Monitor.
Karim Buzdar
About the Author: Karim Buzdar holds a degree in telecommunication engineering and holds several sysadmin certifications. As an IT engineer and technical author, he writes for various web sites. You can reach Karim on LinkedIn
Источник


