- Customize the Out of Box Experience (OOBE)
- OOBE flow
- Windows Welcome
- In this section
- How to: Complete the Windows 10 Out of Box Experience
- Out Of Box Experience
- Before You Begin
- Manual execution of assessment
- Settings
- Take out box with windows
- Required Cookies & Technologies
- Персонализированная реклама
- How to Use your Box Account as a Network Drive
Customize the Out of Box Experience (OOBE)
When customers turn on their Windows PCs for the first time, they will see the Windows Out of Box Experience (OOBE). OOBE consists of a series of screens that require customers to accept the license agreement, connect to the internet, log in with, or sign up for a Microsoft Account, and share information with the OEM.
During OOBE, Cortana voice-over strings will assist users by setting the context of each screen, and requesting their input. While voice assistance is more accessible to the non-sighted, the design is focused at being inclusive to all our customers. Cortana voice is intended to be novel and supplementary to increase user engagement in all places in OOBE. Cortana voice also helps reduce cognitive load by offering informationally-identical, but differently-phrased information. We still expect non-sighted users to enable screen readers to get through OOBE. Some pages in OOBE do not accept voice input, and instead require a keyboard or mouse to complete the action. Cortana voice will clearly communicate input requirements (voice or keyboard/mouse) to the user.
We recommend you target a 65 decibel peak volume during OOBE. To test for this volume, measure an audio sample from 2 feet (60 centimeters) away from the device.
The OOBE flow is also designed to reduce cognitive load significantly by breaking up tasks into discrete chunks. Although there are several pages in the OOBE flow, each one requests a specific action or input from the user. This is helpful for our average customer (and even many power users) and has shown to reduce fatigue significantly.
OOBE flow
The following is a non-exhaustive list of screens the user may see during OOBE, in order:
- Language selection
- Cortana welcome
- Region selection
- Keyboard selection
- Connect to a network
- Automatic download of critical ZDP and driver updates. See Windows updates during OOBE for more details.
- Get the latest from Windows. Prior to Windows 10, version 1803, this screen was named Your PC has an update waiting and it appeared at the end of OOBE.
- End User License Agreement (EULA)
- Sign in to, or create, a local account or Microsoft account (MSA). If a user chooses the local account option, the Sign in with Microsoft instead? screen will appear next in the OOBE flow. This screen encourages the user to sign in with their MSA for an optimal Windows experience.
- Create security questions for a local account. New in Windows 10, version 1803. Only displays if the user chose to create a local account, rather than logging into their MSA, on the previous screen. See OOBE screen details to learn more about this new screen in OOBE.
- Windows Hello setup
- Link your phone and PC. This screen will only appear if the user signed into their Microsoft account, and connected to a network, on the previous screens.
- Save files to OneDrive. This is a cloud service page.
- Set up Office. This screen is only displayed if the user is connected to a network, and has provided their Microsoft account information. Content on the page will vary depending on the user’s account type. For example, if their Microsoft account qualifies for a free trial of Office, the page will encourage them to setup their free trial. This is a cloud service page.
- Payment information. New in Windows 10, version 1803. Only displays if a user opts-in to a free trial of Office from the Set up Office screen. This is a cloud service page.
- Make Cortana my personal assistant
- Privacy settings. Users will see up to seven privacy settings on this screen. Not all users will see the same settings.
- OEM Registration pages
Some pages displayed during OOBE are delivered via cloud service, as opposed to being delivered as part of a Windows release. Cloud service pages can be rolled out to users, or groups of users, at any time. Page content can also be modified or adapted based on user input. Using cloud service for OOBE pages enables Microsoft to offer targeted, relevant content to users quickly, rather than waiting for the next Windows release.
When testing OOBE, keep in mind that you may not see cloud service pages during the flow.
Windows Welcome
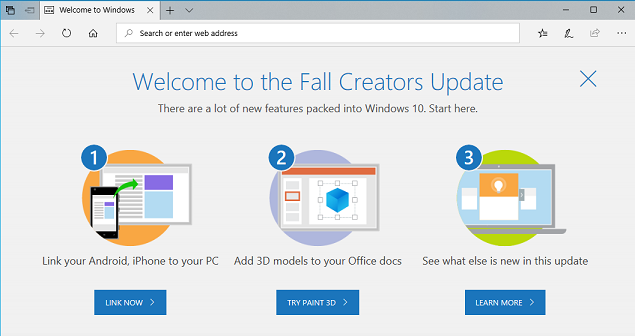
In Windows 10, version 1803, Windows Welcome is displayed to more users than ever as soon as they complete OOBE and reach their desktop. Here’s an example Windows Welcome experience:
In this section
The following topics describe OOBE customization considerations.
How to: Complete the Windows 10 Out of Box Experience
Technical Level : Basic
The Out of Box Experience or OOBE for short is the phase of Windows setup that allows you to customize your Windows 10 experience. Some of the task you can accomplish include defining personalized settings, create user accounts, join a business network, join a wireless network and define privacy settings. In this article, we take a closer look at the options presented whether you upgrade from a previous version or perform a clean install.
Depending on how Windows 10 was installed you might see different options. The following is based on using retail Windows 10 media. If you purchase Windows 10 preloaded on a new device, you might see additional screens with specific OEM offerings; also you might see different screens if you are using Windows 10 Enterprise edition.
If you did not enter a product key during setup, you might be prompted to enter one.
Other wise, you can skip entering a key and do that after. Click Do this later. Please note, if you upgraded using Windows Update, you will not be prompted to enter a product key since it is pre-keyed.
The above screen is where you can choose to either carefully customize your Windows experience or Use Express settings and let Windows 10 decide whats best for you. Please note, you can always adjust these options after setup. For now lets just use the Express option.
Create an account and Welcome Back
If you performed a clean install, you will need to create an account so you can authenticate on Windows. A user account keeps your personal data safe. Enter a user name, create a password, confirm it and provide a hint just in case you forget it. If you upgraded from a previous version, you will be prompted to log in. If you are using Windows 10 Enterprise edition, you might be offered the option to join a Domain which is a type of account that authenticates on a business network.
If a Wireless network is available, you can connect to one. Click Next
Wait while Windows 10 prepares bundled Universal Apps, this screen won’t be here for long.
Log in and you are now ready to start using Windows 10.
If you want to configure settings you might have skipped during the OOBE, open Privacy from within Settings.
If you would like to enter or update your product key, open Settings > Update & Security > Activation > Change product key
Out Of Box Experience
Applies To: Windows 8.1, Windows 10
This assessment measures the duration of key aspects of the first startup experience (OOBE) that are typically impacted by image customizations and software add-ons applied to the Windows retail image. The measurements are obtained from performance traces collected using Event Tracing for Windows (ETW) during a Windows 10 system’s first startup. The assessment measures the duration of First Logon as well as specific aspects such as Active Setup and Provisioned App Install.
Before You Begin
Warning This assessment does not execute in an automated fashion.
Warning The image being tested needs to be in a never-been-booted state in order for measurements to be successfully collected. Attempting to revert an assessed image back to the pre-OOBE state will not yield comparable results and is not a supported scenario.
Manual execution of assessment
This assessment requires manual execution in order to collect the data necessary to provide results. Please follow the following instructions.
Create a new package job with just the OOBE assessment.
- In the Windows Assessment Console, select the Manufacturing and Deployment tab. If the tab is not opened, click the Home page and then double-click the job to open it.
- Click Package.
- In the Package a Job to Run on Another Computer dialog box, enter notes that will help you identify this job when you select results to open and view, such as Packaged Manufacturing and Deployment Job.
- In the Package path box, type the location where you want to store the job package. For this exercise, the location should be on removable media such as a USB flash drive.
- In the Results path box, type the location where you want to store the results. By default, this is the relative path of a .\Results folder in the same location where the job is run.
- Click OK. When the job is packaged, the location where you stored the job will open.
- Eject the USB flash drive.
Prepare a machine by installing the Windows image that will be assessed.
Copy the package to this machine (ideally on a different disk and partition).
Boot the machine.
When the first prompt appears, press “shift + F10” to open an admin command prompt.
Navigate to your ADK package. Run “cd Assessment1\%PROCESSOR_ARCHITECTURE%” and then run “add_autologger.reg”. Confirm the registry settings were imported successfully.
Run “shutdown /r /t 0” in the command prompt. The machine will reboot.
Upon reboot, enter the required data to have the machine proceed through OOBE. Use a local or live account depending on the scenario you wish to test..
Upon reaching the desktop, navigate to your ADK package. Run “cd Assessment1\%PROCESSOR_ARCHITECTURE%” and run ”stop_autologger.cmd”. This will collect the ETW trace that was started with the autologger and other relevant logs. The folder named “Assessment1\%PROCESSOR_ARCHITECTURE%\ _ _ ” is where results are created.
Copy these contents to a machine that has the ADK installed to analyze the results.
Settings
By default, this assessment uses the recommended settings. These settings are defined by Microsoft to ensure that the results can be compared across different computer configurations or over time on the same computer. When you review the results, the run information includes metadata that indicates that the recommended settings were used so that you can easily identify results that use recommended settings in addition to those that don’t.
You can also customize these settings if you want to gather different data than what is captured by default. For example, you might identify specific data that would help you do a more detailed analysis of a particular aspect of the computer.
The following table describes the assessment settings, recommended setting values, and alternative values for each setting.
| Setting | Description |
|---|---|
 Open up Windows Explorer and click on “Map Network Drive”
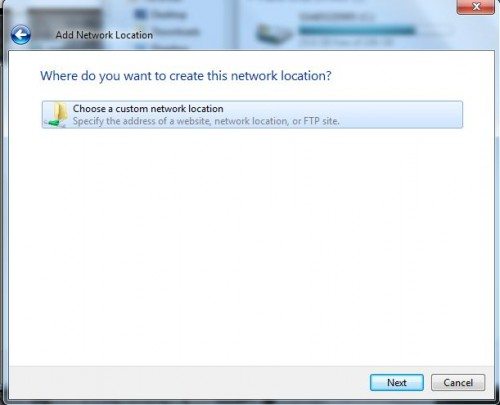
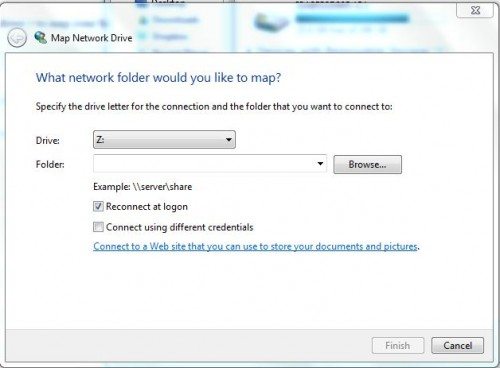 Click on “Connect to a Web site that you can use to store your documents and pictures”
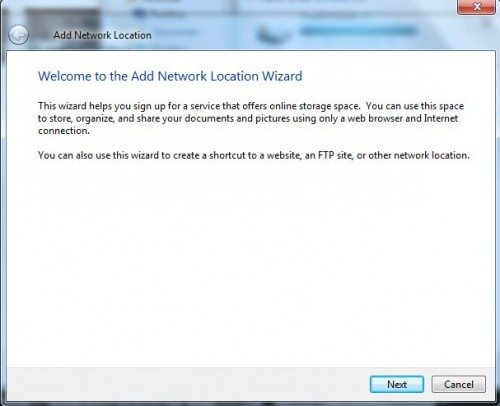
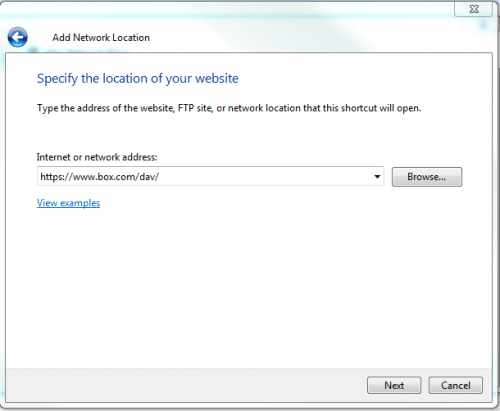 Enter “https://dav.box.net/dav/”
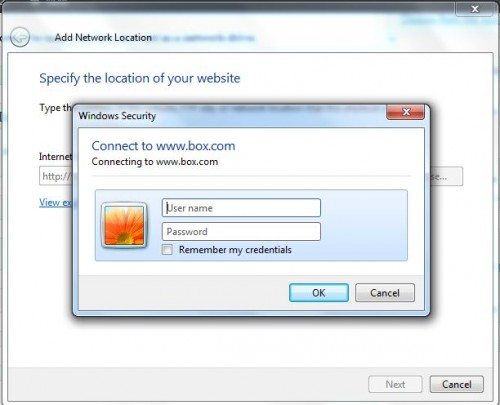 Enter your Box.com login details.
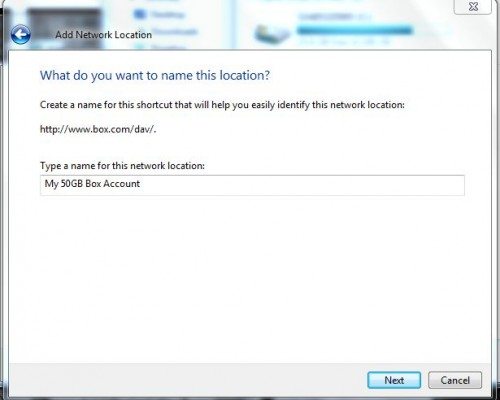 Name your Network Location
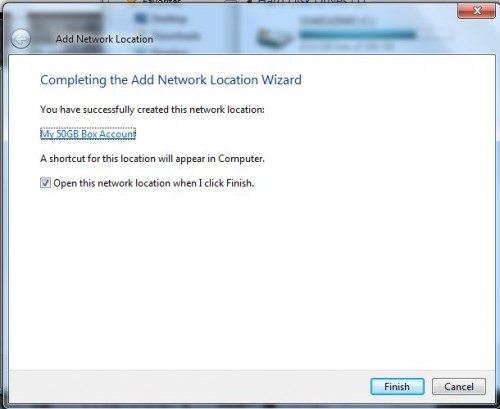 Click Finish 🙂
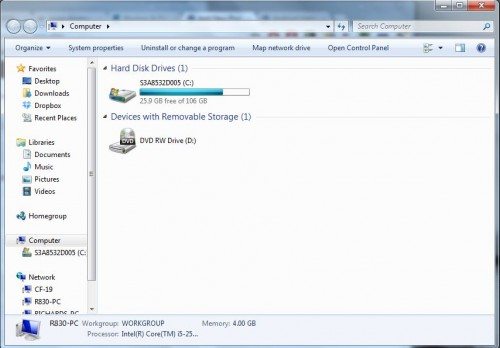
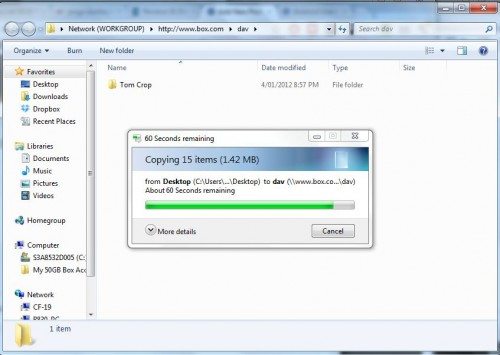 Voila ! Your Box account now appears in your Explorer Windows under Computer ( see LHS ).


