- Telnet для windows server 2016
- Что такое телнет?
- Что такое клиент Telnet и сервер Telnet в Windows?
- Каковы последствия использования Telnet для безопасности?
- Установка Telnet через PowrShell
- Установка Telnet через командную строку
- How to install telnet client on Windows Server 2019, 2016 or 2012
- Install Telnet Client on Windows Server 2019, 2016 or 2012 using the command line
- Install Telnet Client on Windows Server 2016 using Server Manager
- Check that Telnet is installed
- Check Ports with Telnet
- Reader Interactions
- Trackbacks
- RootUsers
- Guides, tutorials, reviews and news for System Administrators.
- How To Enable Telnet Client in Windows Server 2016
- Enabling the Telnet Client
- Enabling the telnet client through command prompt
- Enabling the telnet client through PowerShell
- Enabling the telnet client through the graphical user interface
- Verifying that the telnet client is enabled
- Summary
- Telnet для windows server 2016
- Answered by:
- Question
- Answers
- All replies
Telnet для windows server 2016
Добрый день уважаемые читатели блога pyatilistnik.org, сегодня хочу рассказать, как установить Telnet клиента в Windows Server 2012R2. Ранее мы уже рассматривали, как это делается в Windows 7/8.1, процедура мало чем отличается. Напомню, что команда telnet нужна в основном, для определения доступности порта по определенному адресу. Так, что давайте научимся это делать, как минимум несколькими методами.
Что такое телнет?
Telnet — это простой текстовый сетевой протокол, который используется для доступа к удаленным компьютерам через сети TCP/IP, такие как Интернет. Telnet был создан и запущен в 1969 году, и исторически можно сказать, что это был первый Интернет.
В старые времена вам приходилось физически ходить на сервер, чтобы получить доступ к его данным. Это означало, среди прочего, что вам приходилось потратить некоторое время, чтобы добраться до местоположения сервера, а затем вам пришлось ждать своей очереди для работы с сервером. Даже если у сервера было достаточно мощности для одновременного выполнения нескольких задач, вам было запрещено использовать его по полной программе, и вам приходилось ждать, пока другие закончат свою работу. Во многих случаях вы не могли даже коснуться реального сервера.
Telnet принес изменения. Его использование означает, что вы можете одновременно подключить несколько пользователей к одному серверу. Чтобы подключиться к серверу, людям нужен был только доступ к терминалу, который может быть самым простым и дешевым из доступных компьютеров. Этот компьютер не должен был иметь мощного оборудования, ему нужно было только сетевое соединение и текстовый интерфейс. По сути, их клиент Telnet был похож на командную строку, которую люди могли использовать для работы со своими серверами. Это принесло огромный прирост производительности.
Что такое клиент Telnet и сервер Telnet в Windows?
В Windows вы можете добавить две функции, связанные с Telnet :
- Сервер Telnet — если вы установите эту функцию, вы сможете настроить компьютер Windows для работы в качестве сервера Telnet. Это означает, что ваш компьютер будет прослушивать входящие соединения и позволять другим использовать его. Если у вас нет брандмауэра и у вас есть общедоступный IP-адрес, любой человек в мире сможет удаленно управлять вашим компьютером с помощью клиента Telnet .
- Клиент Telnet — это позволит вам подключаться через Telnet к любому серверу этого типа, используя только окно командной строки.
Каковы последствия использования Telnet для безопасности?
Даже если Telnet был грандиозен, когда был изобретен и революционизировал использование технологий, у него есть некоторые недостатки. Хуже всего то, что это небезопасно! Telnet отправляет и получает данные только в виде открытого текста, без какого-либо шифрования. Это означает, что всякий раз, когда вы подключаетесь к серверу Telnet, ваши личные данные, такие как имя пользователя и пароль, будут передаваться в виде открытого текста. Любой, кто знает, как использовать приложение для отслеживания сетевых подключений, увидит все передаваемые данные.
По сути, любой, кто пытается использовать Telnet для серьезных вещей, таких как передача ценной информации или администрирование бизнес-серверов, просто сумасшедший. Когда этот протокол был изобретен, у нас не было высокоскоростного Интернета, много хакеров, создателей вредоносных программ и так далее. Впервые он был использован учреждениями с закрытыми сетями, которые давали контролируемый доступ через Telnet к своим серверам. В то время шифрование не было в списке чьих-либо потребностей. Но сегодня Telnet — это самый небезопасный протокол, который вы можете использовать для передачи данных.
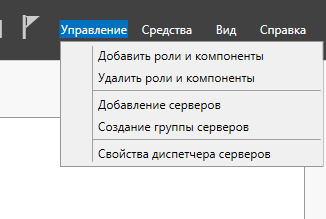
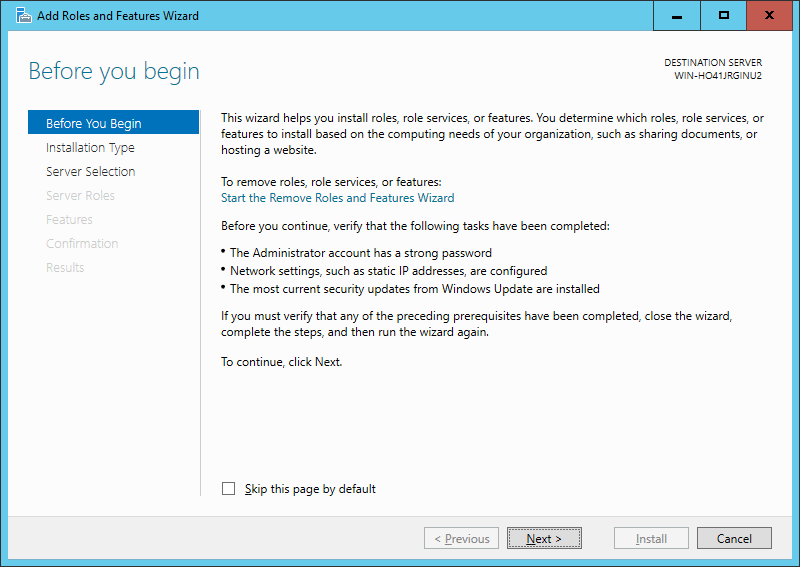
Открываем Диспетчер сервера-Управление-Добавить роли и компоненты.
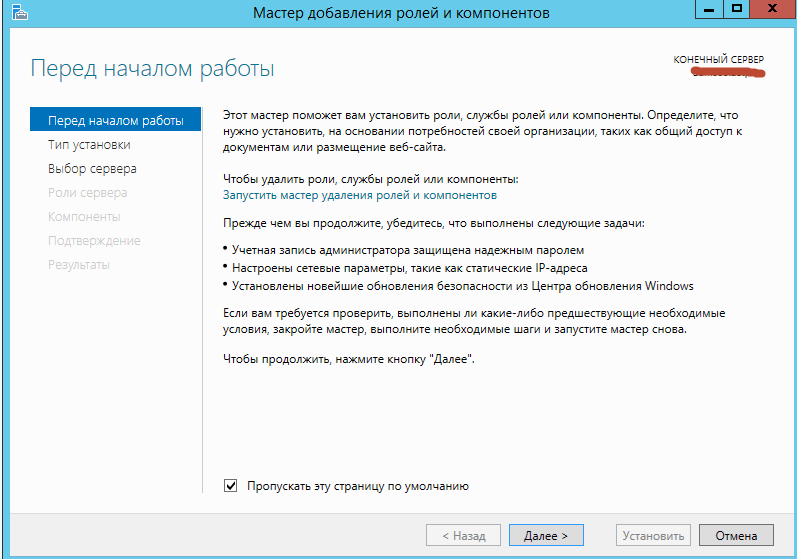
Пропускаем первое окно мастере, советую поставить галку, чтобы оно больше не появлялось
Как установить Telnet клиента в Windows Server 2012R2-02
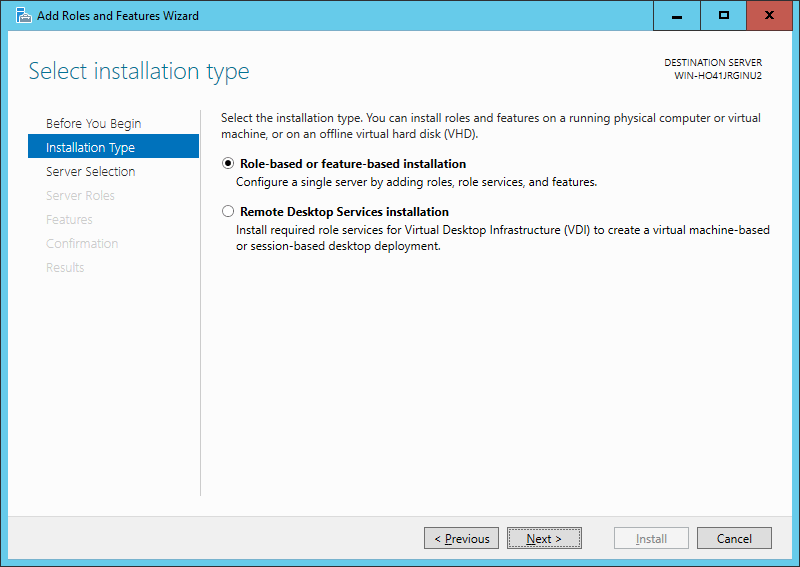
Оставляем переключатель Установка ролей и компонентов и жмем далее.

Как установить Telnet клиента в Windows Server 2012R2-03
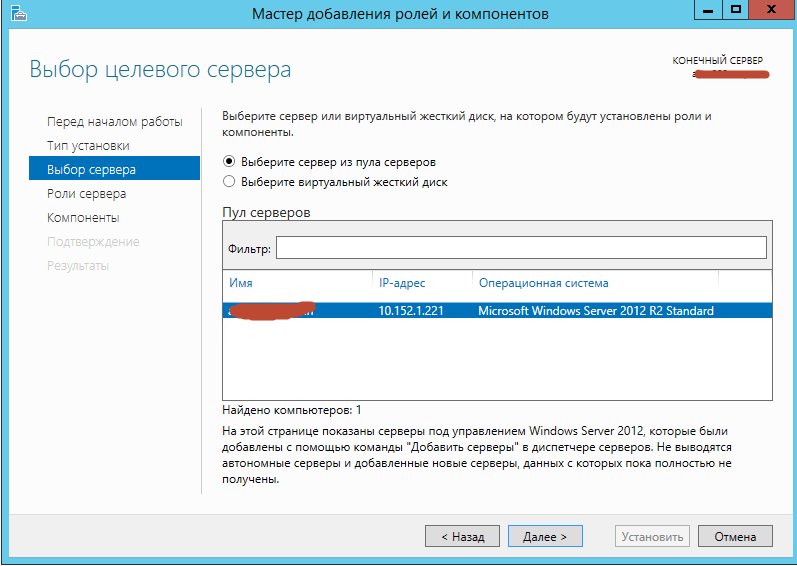
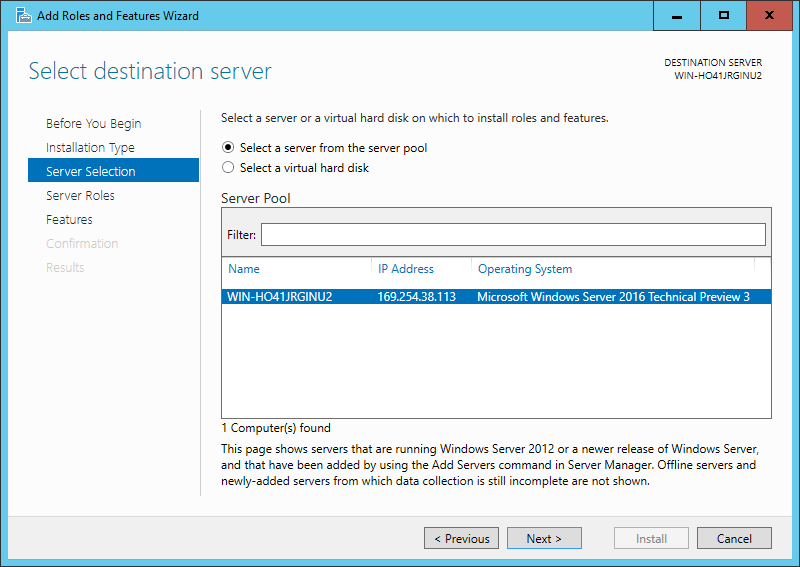
Оставляем пул серверов, тот что есть и жмем далее.
Как установить Telnet клиента в Windows Server 2012R2-04
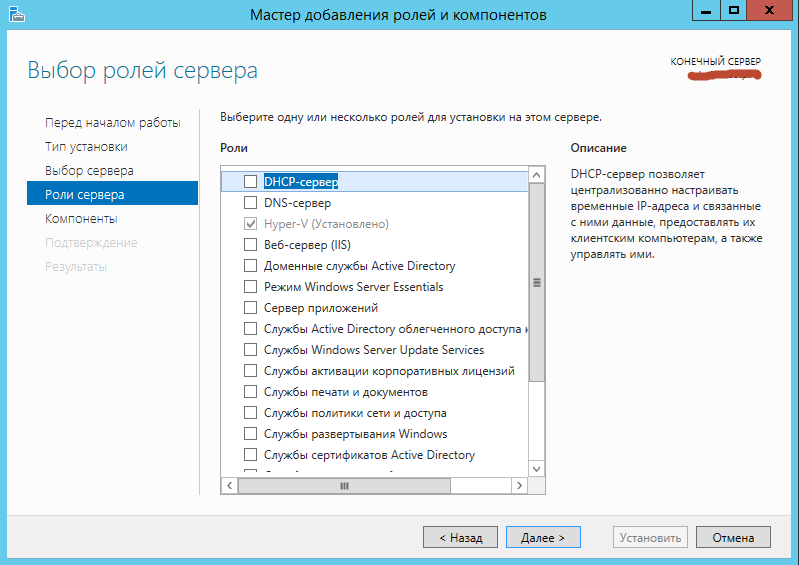
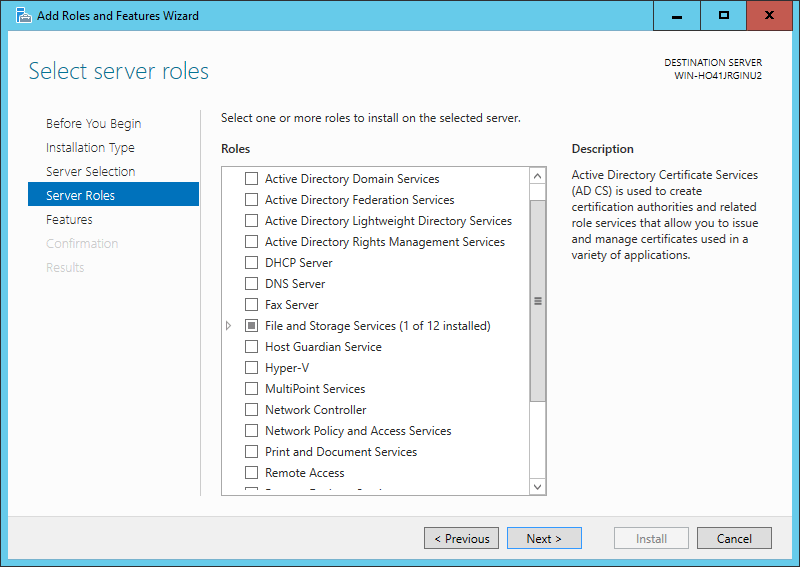
В выборе ролей мы ничего с вами не выбираем
Как установить Telnet клиента в Windows Server 2012R2-05
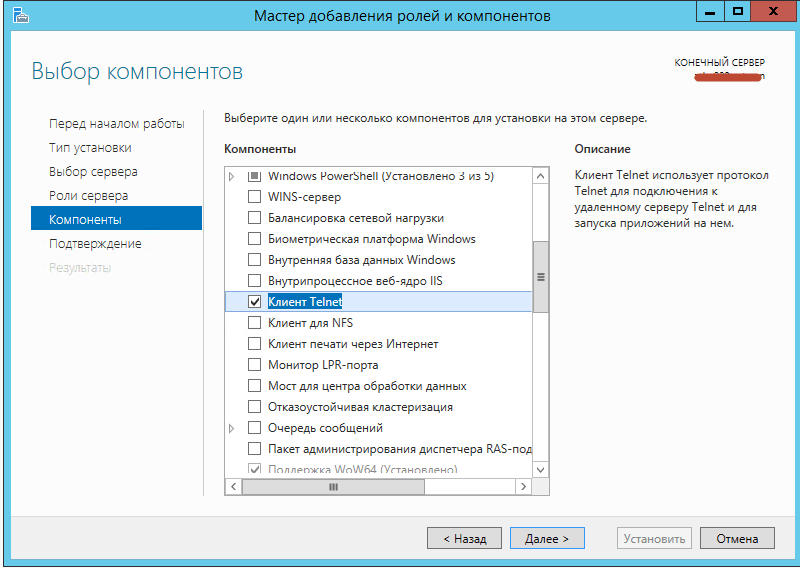
а в компонентах ставим галку на Клиент Telnet и жмем далее
Как установить Telnet клиента в Windows Server 2012R2-06
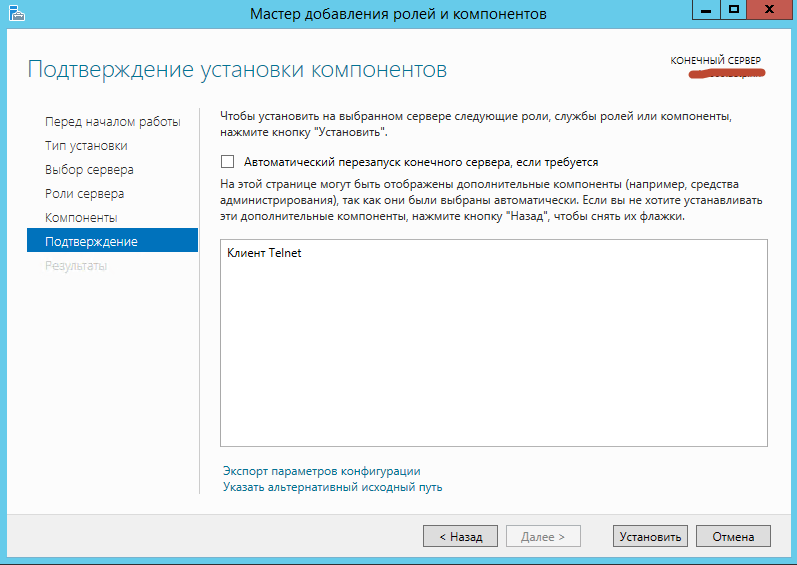
Для установки telnet клиента жмем кнопку Установить
Как установить Telnet клиента в Windows Server 2012R2-07
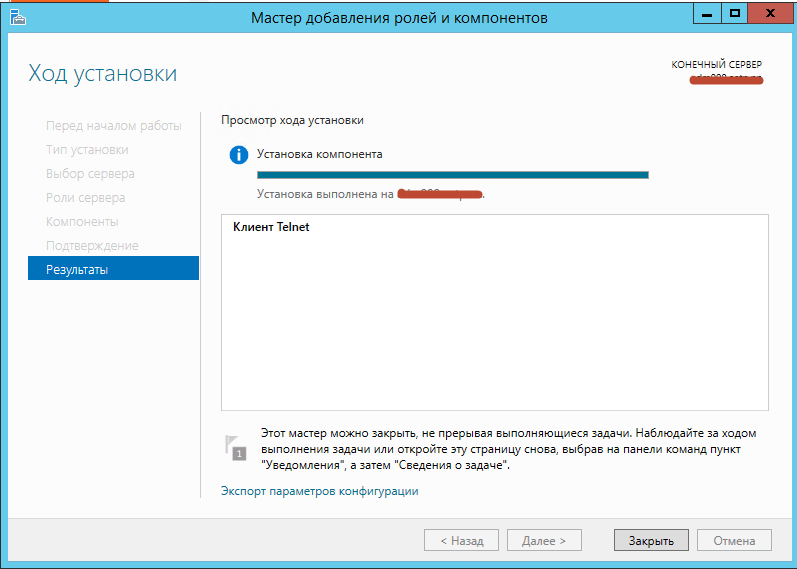
После установки жмем Закрыть
Как установить Telnet клиента в Windows Server 2012R2-08
После чего команда Telnet появится у вас в cmd или power shell.
Установка Telnet через PowrShell
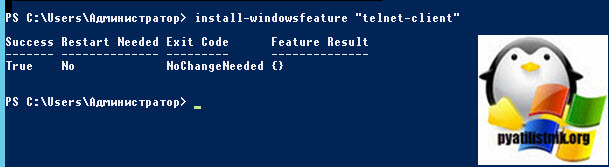
Можно гораздо быстрее проинсталлировать компонент, для этого откройте оболочку PowerShell и введите команду:
Кстати в PowerShell есть свой отдельный командлет, который проверяет порты на предмет прослушивания, таким образом пропадает необходимость в установке старой утилиты.
Установка Telnet через командную строку
Не могу не пройти мимо у старой и доброй командной строки, где была команда dism. Чтобы проинсталлировать telnet, там мы выполняли:
How to install telnet client on Windows Server 2019, 2016 or 2012
Telnet is not installed on Windows Server by default. I don’t understand why, because it is a useful tool and uses little space. It is however, easy to enable telnet on Windows Server 2016 or 2012. If you do not have telnet installed you will see this message from the command line:
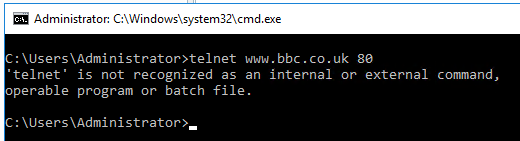 Telnet is not recognized as an internal or external command.
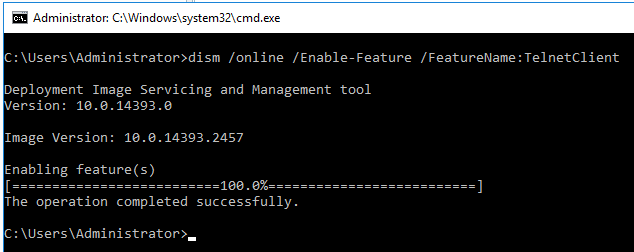
Install Telnet Client on Windows Server 2019, 2016 or 2012 using the command line
The command line is the quickest way of installing the telnet client, very simply just type:
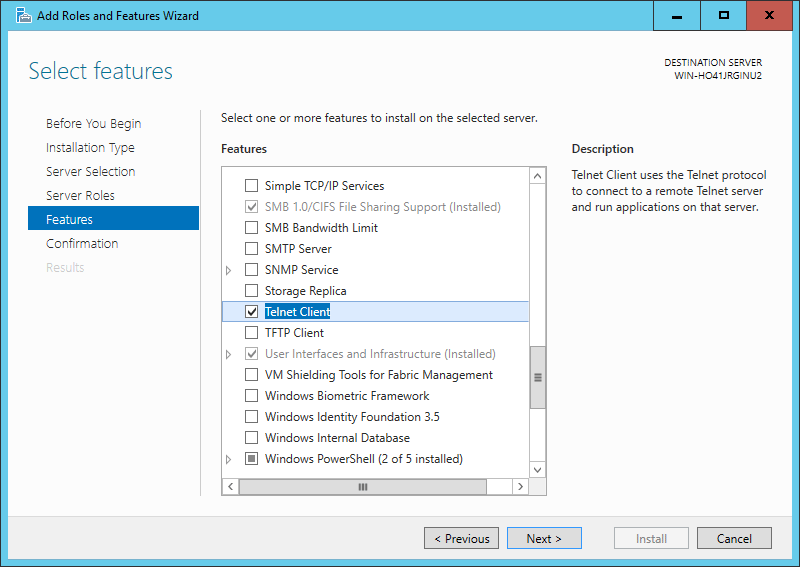
Install Telnet Client on Windows Server 2016 using Server Manager
You can use Server Manager to install the telnet client, but it is a much longer process than doing it via the command line, here is a short video of the correct options to select.
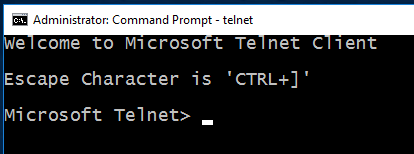
Check that Telnet is installed
To check if your installation was successful, just go into a command prompt and type “telnet” and you should come to the interactive telnet prompt, like this:
Check Ports with Telnet
Now that you have got telnet installed, you can use it to test open ports ports and connect to remote machines.
Reader Interactions
Trackbacks
[…] Microsoft stopped including the telnet client by default on Windows Server, so you will need to install the telnet client first if it is not already […]
RootUsers
Guides, tutorials, reviews and news for System Administrators.
How To Enable Telnet Client in Windows Server 2016
By default the telnet client in Microsoft’s Windows operating systems is disabled, this is unfortunate as it is an extremely useful tool which can be used for testing TCP connectivity to external hosts on a specified port.
This is great when you’re trying to troubleshoot network connectivity problems, for example, say we have a web server which should be listening on port 80 to serve HTTP traffic but we are not able to load a web page, by using telnet to connect to the web server on port 80 we can verify the connectivity.
It may be that the connectivity is fine but there is a problem with the web server, or that the web server is stopped and the port is not listening at all, for instance. With telnet we can get a better understanding of what’s going on.
Enabling the Telnet Client
Firstly you need to enable the telnet client, if you don’t enable it you’ll get a result similar to the below message when trying to use it.
You can enable the telnet client either by command line or through the graphical interface.
Enabling the telnet client through command prompt
Using the command line is the easiest and fastest way to install the telnet client. Run the below command in command prompt with administrator permissions.
That’s it, after a few seconds telnet should be ready to use.
Enabling the telnet client through PowerShell
Again we can also do this instead with PowerShell, we can run the below command in a PowerShell console with administrator permissions.
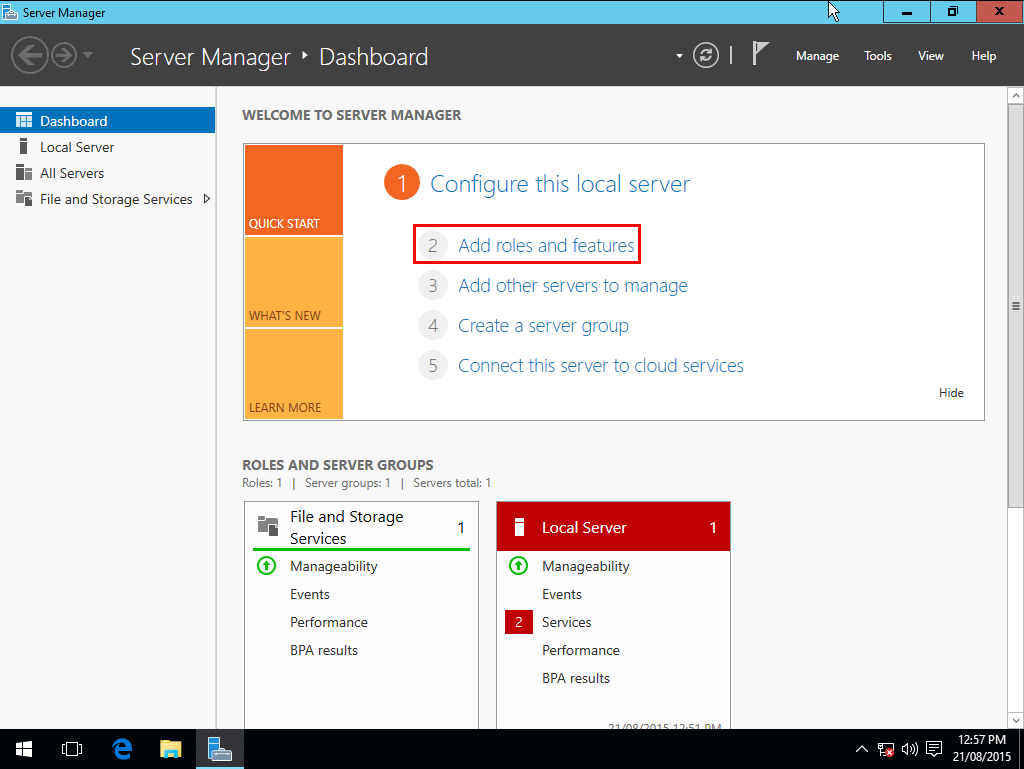
Enabling the telnet client through the graphical user interface
- Open Server Manager.
- From Server Manager click “Add roles and features”.

- The Add Roles and Features Wizard opens to the Before you Begin screen, click next.
- On the Installation Type screen, leave Role-based or Feature-based installation selected and click next.
- On the server selection screen, select the server to install on. By default it should be the local server itself, click next.
- On the Server Roles screen, click next. We are installing a feature rather than a role so don’t select anything here.
- On the Features screen, tick the check box next to Telnet Client.
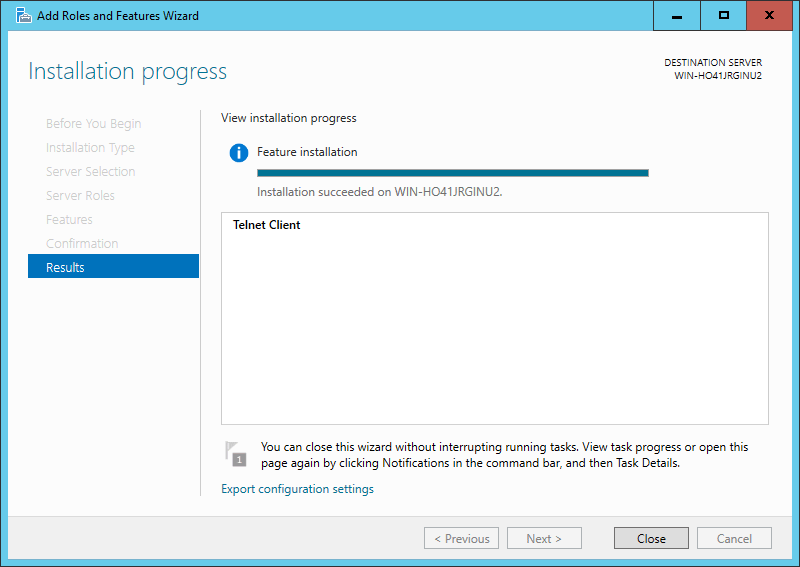
- On the Confirmation screen, click Install.
- Once the installation succeeds, click the Close button. The telnet client is now installed and ready for use.

Verifying that the telnet client is enabled
Simply open command prompt or powershell, type ‘telnet’ and press enter. If this was successful you should have a prompt similar to the below:
Already have telnet installed but still failing?
In some cases you must run command prompt or powershell as administrator in order to issue the telnet command, otherwise it will give the same error as if it was not enabled at all.
Summary
Now that you have enabled telnet in Windows Server 2016 you should be able to start issuing commands with it and using it to troubleshoot TCP connectivity problems.
Telnet для windows server 2016
This forum has migrated to Microsoft Q&A. Visit Microsoft Q&A to post new questions.
Answered by:
![]()
Question
![]()
![]()
Could any one help me ,
I have installed win 2016 Tech Preview 5. I wanted to install telnet server on it. I couldnt find it in «add roll and features», i found only telnet client on it.tried to enable telnet server by cli but failed.
C:\WINDOWS\system32>dism /online /Enable-Feature /FeatureName:TelnetServer
Deployment Image Servicing and Management tool
Version: 10.0.14342.1000
Image Version: 10.0.14342.1000
Feature name TelnetServer is unknown.
A Windows feature name was not recognized.
Use the /Get-Features option to find the name of the feature in the image and try the command again.
The DISM log file can be found at C:\WINDOWS\Logs\DISM\dism.log
Answers
![]()
![]()
Does not surprise me telnet sever is not in server 2016 as it is old technology and not secure. I do not think it will be included.
PowerShell has remote access, so look into that as an alternative. After enabling you can use PowerShell ISE it has a New Remote PowerShell Tab. option on the File menu.
All replies
![]()
![]()
Does not surprise me telnet sever is not in server 2016 as it is old technology and not secure. I do not think it will be included.
PowerShell has remote access, so look into that as an alternative. After enabling you can use PowerShell ISE it has a New Remote PowerShell Tab. option on the File menu.
![]()
![]()
Thanks for your post.
As far as I know, Telnet Server feature was not included in Windows server 2016 Tech Preview 5, so we could not install this on it. Please wait for the later updates and official announcements for Windows Server 2016.
Everything you Need to Know About Windows Server 2016
Please Note: Since the web site is not hosted by Microsoft, the link may change without notice. Microsoft does not guarantee the accuracy of this information.


