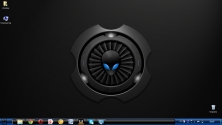
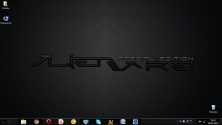
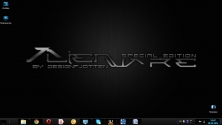
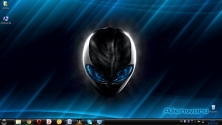
- Темы для Windows 7: Alienware
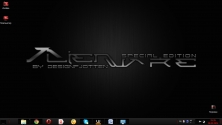
- Alien Themes Pack for Windows 7 (01.08.2014)
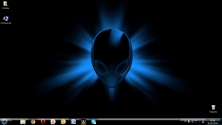
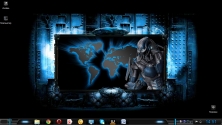
- Тема alien для windows
- Тема на Windows 7: Snow VII
- Тема на Windows 7: Win7…
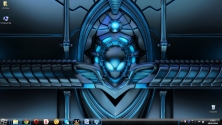
- Тема на Windows 7: Star Tech
- Навигация по сайту
- Последние комментарии
- Alienware Windows 10 Theme
- Introduction & Preparation
- Installing Alienware Visual Style
- Adding Alienware Rainmeter Skin
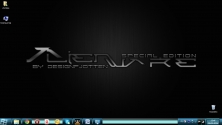
Темы для Windows 7: Alienware
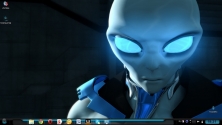
Невероятно красочный мистический стиль, выделяющийся благодаря нестандартному
Загадочный стиль, проработанный до мельчайших подробностей.
Невероятно красочный стиль, который с первого взгляда притягивает своими
Тема, выполненная в темных тонах, привлекает необычным дизайном уже привычной
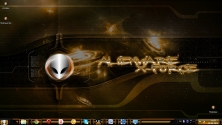
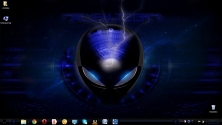
Космические мотивы по-прежнему продолжают царствовать и в этом оформлении.
В теме присутствует два одинаковых изображения, одно из которых служит основным
Слегка измененное оформление с необычайно реалистичным фоновым изображением,
Свежий стиль, который выделяется фоновым рисунком рабочего стола.
Еще одна тема с неземными мотивами и отлично подобранной цветовой гаммой.
Все элементы дизайна смотрятся очень гармонично, а контраст черного и
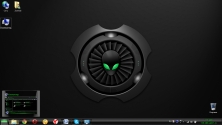
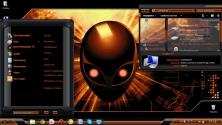
Зловещая и загадочная тема, основным элементом дизайна которой является мелкие
Изящность и загадочность в одном лице воплощено в новом оформлении.
Контрастный стиль, в котором нет ничего лишнего, интерфейс настроен таким
Необычная тема, выполненная в космическом стиле с улучшенным юзабилити.

Качественное и в первую очередь стильное оформление, которое отличается
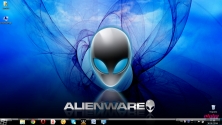
Живописные переходы и яркие краски наблюдаются во всем дизайне нового стиля.
Уникальный дизайн, проработанный до самых мелких графических деталей.
Стильная темная тема с легкими контрастными переходами от черного цвета к более
Космический стиль, выполненный преимущественно в темно-синих тонах.
Очень яркое оформление с необычным фоновым рисунком, который занимает большую
Необычное оформление с невероятно реалистичным фоновым рисунком.
Тема представляет собой своеобразную интерпретацию стандартного стиля с
Необычайно живописная тема, которая выделяется в первую очередь красочными
Alien Themes Pack for Windows 7 (01.08.2014)
Автор: S.E.R.G.E.Y от 19-02-2015, 04:12, Посмотрело: 37 023, Обсуждения: 11


1. Запускаем программу Universal Theme Patcher (есть в архиве)
2. Нажимаем «I Agree»
3. Далее безцветный щит у первой иконки показывает, что файлы еще не пропатчены. Жмем на эту иконку, чтобы пропатчить их.
4. Программа попросит перезагрузки и отказать мы ей не сможем.
5. После перезагрузки можно копировать скачанные темы оформления в папку: C:/Windows/Resources/Themes.
6. Теперь просто заходим «Персонализация» и выбираем установленную тему.
7. Для придания прозрачности окон запустите файл Full glass.exe и поместите его в автозагрузку.
В некоторых архивах вы можете найти папку System Files — это системные файлы, которые не обязательно заменять, но для полного соответствия со скриншотом, необходимо заменить.)
Как заменить системные файлы в Windows 7:
1. Отключаем родительский контроль, если это не сделано.
2. Дальнейшие действия применяются к любому из системных файлов, который нужно заменить.
3. Как правило эти файлы находятся в папке C:/Windows/System32 (C:/Windows для explorer.ехе на примере которого и разберём получение прав на этот файл)
4. Делаем резервную копию файла(ов) в нашем случае это explorer.ехе сохраняем его(их) куда-нибудь, чтобы потом если что заменить обратно на чистый(ые)
5. И так находясь в C:/Windows нажимаем правой кнопкой на файл explorer.ехе и выбираем пункт Свойства —> Безопасность —> Дополнительно. Далее Владелец —> Изменить, выбираем либо имя своей учётки либа админа нажимаем Применить затем ОК и ещё раз ОК. Теперь выбирам Разрешения выбираем ту запись которой мы дали права владельца и нажимаем Изменить разрешения снова выбираем ту запись которой мы дали права владельца и нажимаем Изменить, ставим все галочки и нажимаем ОК затем Применить, появится окно нажимаем Да и вот теперь снова ОК и в остальных окнах ОК.
6. Всё теперь вы можете делать с этим файлом всё что угодно.
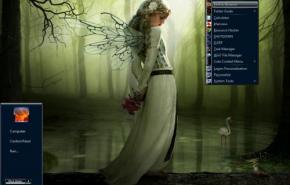
Тема alien для windows

Тема на Windows 7: Snow VII
Светлая снежная тема на Windows 7
Тема на Windows 7: Win7…
Win7 Wishful Dream By Se7enSinner Modified — измененная и модифицированная тема на windows 7, от KeybrdCowboy
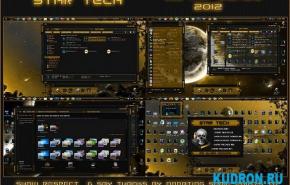
Тема на Windows 7: Star Tech
Визуальный стиль с уникальной установкой на Windows 7 — Новые пользовательские звуки . — 3 wallpapers — Курсоры +…
Навигация по сайту
Последние комментарии
![]()
блин ну помогите мне. кто-нибудь. 1
плииииииииииииз!
спасибо за помощь! в удалении сообщений. за игнор. за другим приходила на ваш сайт.
здраствуйте, подскажите пожалуйста для чайника! установили WIN 7, гаджеты не включаются выходит ошибка «прекращена работа программы Гаджеты рабочего стола Windows», пробовала решение проблемы №3, выдает ошибку «нет доступа к папке, Вам необходимо разрешение на выполнение этой операции, Запросите разрешение от «TrustedInstaller».

Голословное утверждение. Скрины тестов в студию.
PS Самый страшный вирус = пользователь под админом.
![]()

Как решил эту проблему ? Игра после этого запускалась?
![]()
![]()
![]()
Код
?
1
2
3
4
5
6
7
8
9
10
11
12 @echo off
del «%APPDATA%\\Microsoft\\Forms\\*.exd»
del «%APPDATA%\\Microsoft\\Excel\\*.xlb»
del «%APPDATA%\\Roaming\\Microsoft\\Forms\\*.exd»
del «%Temp%\\VBE\\*.exd»
del «%Temp%\\Excel8.0\\*.exd»
del «%APPDATA%\\Microsoft\\Local\\*.exd»
del «%USERPROFILE%\\Local Settings\\Temp\\*.exd»
del «%USERPROFILE%\\Local Settings\\Temp\\VBE\\*.exd»
del «%USERPROFILE%\\Local Settings\\Temp\\Excel8.0\\*.exd»
del «%SystemRoot%\\Temp\\VBE\\*.exd»
del «%SystemRoot%\\Temp\\Excel8.0\\*.exd»
Помог этот bаt файл.Сейчас всё отлично работает. Причина сбоя-декабрьское обновление.Надо же такую хрень сделали. Спасибо за участие.
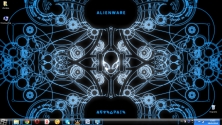
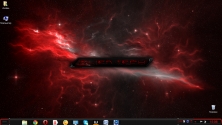
Alienware Windows 10 Theme

– It Came from Outer Space to Take Over Your Desktop –
A few years ago, I put up an Alienware Theme for Windows 7 tutorial that was massively popular. Now it’s time to build up a new desktop with Windows 10. With an amazing Alienware Visual Style for Windows 10 and a sleek Alienware Skin for Windows 10 with Rainmeter, you’ll create the best free Alienware Windows 10 Theme out there.
This theme will be split in to 3 parts: Introduction, Visual Style and Rainmeter. Each part will have step-by-step instructions to guide you along. Ready? Let’s get started!
Introduction & Preparation
The following is high-level desktop customization. You’ll be using various tools and resources to bring together a unique desktop that represents the futuristic sci-fi theme of the Alienware systems regardless of whether you actually own an Alienware PC or not.
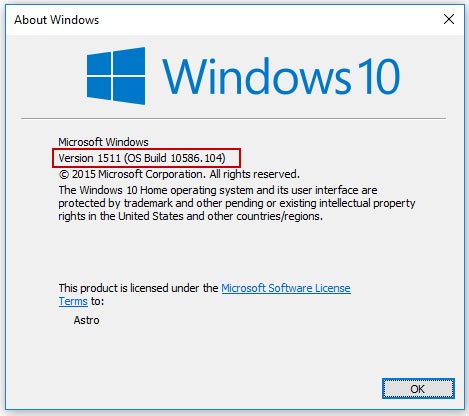
1. REQUIREMENTS: This theme requires that you have Windows 10 with the November 2015 update installed. So it must be Version 1511, Build 10586. Trying this theme on other builds is not likely to work. To find out which version of Windows you have, type winver in the start menu and hit enter.
2. CAUTION: While the process is fairly simple and should take about 15 – 30 minutes to set up, make sure you follow the instructions correctly and backup any file that you may have to modify. Just drop a comment below if you need any help. Before we begin installing the theme, make sure you create a system restore point so that we can restore our PC in case something goes wrong. It is really important you do this before going to the next step.
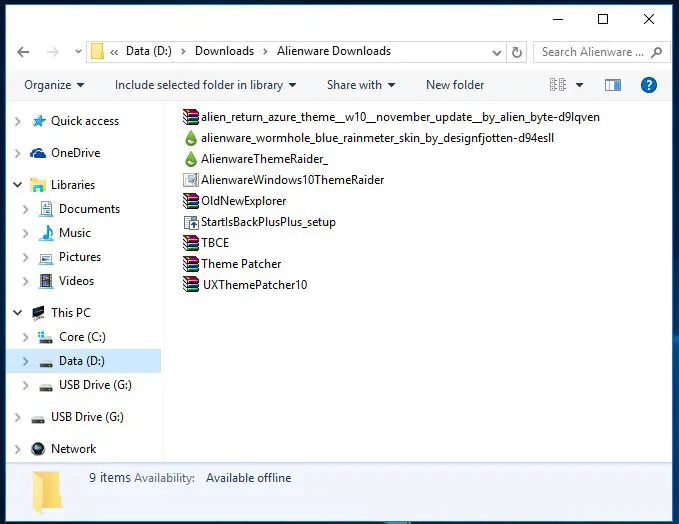
3. TO DOWNLOAD: Imagine we are going to build a spaceship and we need to assemble all the parts first. Download these 4 files that are listed below. Do NOT run any of them for now.
Extract the contents of the AlienwareThemeRaiderDownloads.rar into a new folder and put the other 3 files that you downloaded in there as well. So you end up with a similar folder like this for quick access.
Now we’ll move on to installing the visual style for our theme.
Installing Alienware Visual Style

A Visual Style is a 3rd party theme that will change several aspects of your PC. This includes changes to your explorers, task bar, start menu, cursor, sound and icons. Credits to AlienByte for creating the Alienware visual style that we’ll be using.
In order to use 3rd party themes, you need to patch your system by installing the following applications. If you’ve already used 3rd party themes before it is likely your system is already patched, in which case you may not have to install these applications again.
1. OldNewExplorer: Extract the OldNewExplorer.rar file that you downloaded to a new folder and run the OldNewExplorerCfg program. Set the settings as the same as the screenshot you see below. Hit Install and complete the installation.

2. StartIsBack: Next run the StartIsBackPlusPlus_setup.exe file that you downloaded and complete the installation. After installation, simply close the program if it runs automatically.
3. UXThemePatcher: Now extract the UXThemePatcher10.rar file that you downloaded and run the UXThemePatcher10.exe and complete the setup. After the installation is complete the system will do a quick restart.
4. Copy Theme Files: The next thing we need to do is extract the contents of the alien_return_azure_theme__w10__november_update__by_alien_byte-d9lqven.zip file that you downloaded into a new folder. Navigate to the Theme W10 TH2 Alien Return Azure folder inside it.
Copy paste the two contents of that folder into the C:\Windows\Resources\Themes folder of your PC.

5. More Patching: Extract the contents of the Theme Patcher.rar that you downloaded into a new folder. You’ll find a Add_Take_Ownership_to_context_menu file inside a Take Ownership REG files folder. Run it and confirm to complete the registry change.
5a. Now go to your C:\Windows\System32 folder and search for themeui.dll. Right click the file and click Open File Location.

5b. Right click the file and click Take Ownership. Select Yes when prompted for confirmation.

5c. Now right click the file again and rename it to themeui.dll.del. Click Yes and then Continue when prompted.

5d. Now copy/paste the themeui.dll file that you’ll find in the File Patch x86 (if your Windows 10 is 32-bit) or File Patch x64 (if your Windows 10 is 64-bit) folders from Step 5 to the C:\Windows\System32 folder.
5e. Repeat steps 5a to 5d for two more files: uxtheme.dll and uxinit.dll.
6. RESTART: Once you’ve copy/pasted all 3 files, restart your system for patches to take effect.
7. Taskbar Color Effect: Extract the contents of the TBCE.zip file that you downloaded into a new folder. Run the Taskbar Color Effect.exe file that you extracted. You’ll find it added as a new icon in your systray. Right click the icon and go to Settings.

Once it opens, select Custom Image BG option. It’ll prompt you to select an image so browse to the Taskbar Alien Return Azure TBCE folder that you extracted in Step 4 and select that Alien Return Azure taskbar image.

Click Save for changes to take effect.
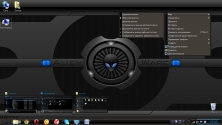
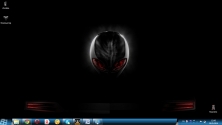
8. Alienware Theme Raider Theme Pack: For the last step, run the AlienwareWindows10ThemeRaider.deskthemepack file that you downloaded. And voila, if you did everything right, you’ll have something that looks like this with modified explorers, task bar, icons, cursors and sounds.

If your taskbar doesn’t look the same, try to run StartIsBack and set the transparency of the taskbar to 100%. Also make sure the taskbar icons are set to Large Size by right clicking the taskbar and selecting Properties.
If it still doesn’t look right, drop a comment below with a screenshot of your PC and I’ll take a look.
That’s it for the visual style. In the next part, we’ll get that cool Rainmeter skin for our desktop.
Adding Alienware Rainmeter Skin
1. Rainmeter: As you may already know, Rainmeter is a light weight productivity application that can change your desktop completely. If you don’t already have it, go right ahead and set it up.
2. Fonts: The rainmeter skin uses a font called DS-Digital so go ahead and download the DS-Digital font. Extract the fonts to a new folder and right click and select Install to install them to your PC.
3. Alienware Theme Raider Skin: Once you’ve installed Rainmeter and got the hang of things, simply run the AlienwareThemeRaider_.rmskin file that you downloaded. Credits to deviantart user designfjotten for creating the rainmeter skin and wallpaper that we use for our theme. With the settings set as below, install it.

The Alienware skin and layout should be loaded automatically. Depending on your monitor resolution the skins might not be placed exactly as you see below. You can simply click and drag as them as you like.
You’ll find several skins that show Hard Disk usage, CPU & RAM usage, Network usage and Recycle Bin status. There are 2 skins that show the Uptime of the PC as well as the current time.

And that’s it! Congrats
! You’ve successfully completed this tutorial. Kudos to you for sticking through to the end!
You can take things one step further by modifying all your icons. Here’s a cool Alienware icon pack that might be of help. You could also check out more rainmeter skins to add to your desktop.
RESET TO DEFAULT: Change the theme back to the default Windows 10 theme to switch back the Visual Style to default. Uninstall StartIsBack to switch back to the Windows 10 task bar and Start Menu.
CREDITS: As mentioned before, credits to deviantart users designfjotten and AlienByte for creating the cool rainmeter skin and visual style respectively.
Hope you liked this theme. If you have any questions, suggestions or comments, drop them below. Good luck


