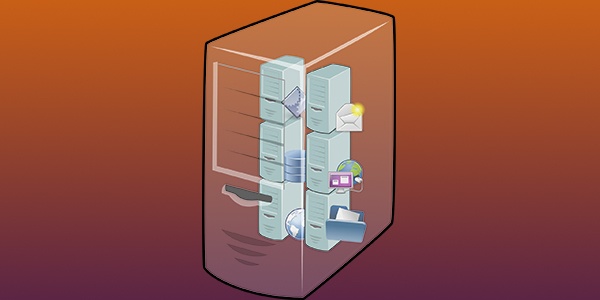
- 🍏 Как запускать приложения Mac на Linux
- Запустите виртуальную машину MacOS (все приложения)
- Использование Darling Translation Layer (только CLI)
- Сборка и установка дорогой Darling
- mattgadient.com
- Getting Tabs Going
- Custom Themes (Profiles)
- BASIC
- GRASS
- HOMEBREW
- MAN PAGE
- NOVEL
- OCEAN
- PRO
- RED SANDS
- SILVER AEROGEL
- A Few Notes
🍏 Как запускать приложения Mac на Linux

macOS и Linux имеют общее наследие.
К сожалению, это не означает, что приложения могут плавно переходить между операционными системами.
Для запуска приложений Mac в Linux вам понадобится виртуальная машина или слой перехода.
Запустите виртуальную машину MacOS (все приложения)
Самый надежный способ запуска приложений Mac в Linux – через виртуальную машину.
С помощью бесплатного гипервизора с открытым исходным кодом, такого как VirtualBox, вы можете запускать macOS на виртуальном устройстве на вашем компьютере с Linux.
Правильно установленная виртуализированная среда MacOS без проблем запустит все приложения MacOS.
Подобная виртуализация рабочего стола требует значительного объема оперативной памяти, поэтому она может работать некорректно на устройствах с ограниченными ресурсами.
Для машин с техническими характеристиками наилучшим вариантом является виртуализация операционных систем через виртуальную машину VirtualBox.
Использование Darling Translation Layer (только CLI)
Вы также можете запустить слой перехода под названием Darling.
Он работает как WINE, которая создает среду перевода с Windows на Linux, которая позволяет вам запускать некоторые приложения Windows в системах Linux.
Darling пытается достичь той же цели между macOS и Linux.
Поскольку macOS и Linux совместно используют одну и ту же базу в стиле UNIX, Darling менее ресурсоемок, чем WINE, и в большинстве случаев дает лучшие результаты.
В настоящее время Darling может работать только с очень простыми приложениями с графическим интерфейсом и несколькими приложениями командной строки.
Хотя поддержка приложений с графическим интерфейсом является целью проекта, эта функция еще не реализована.
По сути, вы можете надежно запускать оболочку macOS в Терминале и, возможно, не сможете эффективно запускать другие приложения.
Он также содержит огромное количество кода, требующего около 12 гигабайт дискового пространства после сборки.
По сути, это дублирует функциональность операционной системы MacOS.
Поэтому, если вы беспокоитесь о том, что удаленные исполняемые файлы могут повредить вашу систему, вы можете избегать пакетов такого размера.
Сборка и установка дорогой Darling
1. Следуйте инструкциям по установке, чтобы загрузить правильные зависимости для вашего дистрибутива Linux со страницы установки Darling.
В зависимости от вашего дистрибутива вам может потребоваться выполнить длинную команду.
Например, для Ubuntu выполните следующую команду терминала, чтобы загрузить зависимости Darling:
Источник
mattgadient.com
There are a few things Mac OS X (now macOS) has done really well that I miss when using other operating systems. One of them is their Terminal program. Specifically, the tabs and the built-in themes, some of which are really easy on the eyes.
Fortunately, the GNOME Terminal that comes default with Ubuntu can be set to use tabs by default, and it supports theming.
Getting Tabs Going
This one is really easy. From the menu bar, head to Edit -> Preferences. I’ll leave a couple screenshots with the appropriate areas highlighted.


If you’re accustomed to Cmd-T on the Mac (aka WindowsKey-T or Super-T), you’ll notice the default here is Shift-Ctrl-T.
If Shift-Ctrl-T kills the muscle memory you developed on macOS, you can change it to Cmd-T (Super-T) here, but keep in mind the Super key will trigger the Activities overlay if you don’t follow through with the T. Ctrl-T isn’t a great option either, because CLI programs often use CTRL-modifiers so you can cause some pickles for yourself if you start binding things with CTRL.
Note that while verifying some of those modifiers I ate a Terminal crash (which is usually quite rare). Long term it’s probably better to get used to the new Shift-Ctrl-T default anyway, if you can manage it.
Custom Themes (Profiles)
On the Mac, I was pretty attached to the “Novel” theme, since it was extremely easy on the eyes. Unsurprisingly, it’s the first one I converted to GNOME Terminal.
For the sake of completeness I went through the rest as well. So here we go.
Start in the menu by going to Edit -> Preferences -> Profiles. Hit the New button.
Give your profile a Name. I prefer choosing a smaller custom font (10-11pt Liberation Mono, Nato Mono, or Ubuntu Mono), but that’s up to you.
Head to the Colors tab, and you’ll see something like this:

Find your favorite(s) below.
You’ll have to click the color boxes, hit the “+”, and manually enter each color for the theme you want – you can copy/paste from the tables below. It’ll take a while but if it makes you feel better, it probably took me longer to write these all down.
Again, just copy/paste the colors. The text is small because tables and mobile frequently don’t get along. Small lessens the pain. It should still be large enough to easily double-click (or triple-click) and CTRL-C though.
BASIC
(Mac OS X font: Menlo Regular 11pt)
(Mac OS used: 20% Blur)
| Default (Text) | Bold (Text) | Cursor (Text) | Highlight (Text) | Default (BG) | Bold (BG) | Cursor (BG) | Highlight (BG) |
| #000000 | #000000 | #000000 | #000000 | #ffffff | #7f7f7f | #a4cdff | |
| Pal 1 and 9 (Black) | Pal 2 and 10 (Red) | Pal 3 and 11 (Green) | Pal 4 and 12 (Yellow) | Pal 5 and 13 (Blue) | Pal 6 and 14 (Magenta) | Pal 7 and 15 (Cyan) | Pal 8 and 16 (White) |
| #000000 | #c33720 | #34bc26 | #afad24 | #532fe1 | #d43bd3 | #34bbc8 | #cccccc |

GRASS
(Mac OS X font: Courier 12pt)
(Mac OS used: 20% Blur)
| Default (Text) | Bold (Text) | Cursor (Text) | Highlight (Text) | Default (BG) | Bold (BG) | Cursor (BG) | Highlight (BG) |
| #fff0a5 | #ffb03b | #fff0a5 | #fff0a5 | #13773d | #8e2800 | #b64926 | |
| Pal 1 and 9 (Black) | Pal 2 and 10 (Red) | Pal 3 and 11 (Green) | Pal 4 and 12 (Yellow) | Pal 5 and 13 (Blue) | Pal 6 and 14 (Magenta) | Pal 7 and 15 (Cyan) | Pal 8 and 16 (White) |
| #000000 | #750000 | #65e550 | #d5d24c | #0200a9 | #7c0080 | #63e1ed | #e2e2e2 |

HOMEBREW
(Mac OS X font: Andale Mono 12pt)
(Mac OS used: 20% Blur, 90% opacity)
(Mac OS X used: 65% opacity for the Selection/Highlight)
| Default (Text) | Bold (Text) | Cursor (Text) | Highlight (Text) | Default (BG) | Bold (BG) | Cursor (BG) | Highlight (BG) |
| #28fe14 | #00ff00 | #28fe14 | #28fe14 | #000000 | #38fe27 | #0900e9 | |
| Pal 1 and 9 (Black) | Pal 2 and 10 (Red) | Pal 3 and 11 (Green) | Pal 4 and 12 (Yellow) | Pal 5 and 13 (Blue) | Pal 6 and 14 (Magenta) | Pal 7 and 15 (Cyan) | Pal 8 and 16 (White) |
| #000000 | #c33720 | #34bc26 | #afad24 | #532fe1 | #d43bd3 | #34bbc8 | #cccccc |

MAN PAGE
(Mac OS X font: Menlo Regular 11pt)
(Mac OS used: 20% Blur)
| Default (Text) | Bold (Text) | Cursor (Text) | Highlight (Text) | Default (BG) | Bold (BG) | Cursor (BG) | Highlight (BG) |
| #000000 | #000000 | #000000 | #000000 | #fef49c | #7f7f7f | #a4cdff | |
| Pal 1 and 9 (Black) | Pal 2 and 10 (Red) | Pal 3 and 11 (Green) | Pal 4 and 12 (Yellow) | Pal 5 and 13 (Blue) | Pal 6 and 14 (Magenta) | Pal 7 and 15 (Cyan) | Pal 8 and 16 (White) |
| #000000 | #bc311b | #26b41c | #a6a519 | #4d2cdd | #ce33cc | #25b2bf | #c2c2c2 |

NOVEL
(Mac OS X font: Courier 12pt)
(Mac OS used: 20% Blur)
(Mac OS X used: 76% opacity for the Selection/Highlight)
| Default (Text) | Bold (Text) | Cursor (Text) | Highlight (Text) | Default (BG) | Bold (BG) | Cursor (BG) | Highlight (BG) |
| #3b2322 | #7f2a19 | #3b2322 | #3b2322 | #dfdbc3 | #3a2322 | #747350 | |
| Pal 1 and 9 (Black) | Pal 2 and 10 (Red) | Pal 3 and 11 (Green) | Pal 4 and 12 (Yellow) | Pal 5 and 13 (Blue) | Pal 6 and 14 (Magenta) | Pal 7 and 15 (Cyan) | Pal 8 and 16 (White) |
| #000000 | #b12512 | #00a401 | #969602 | #4324d4 | #c020c0 | #00a3af | #afafaf |

OCEAN
(Mac OS X font: Menlo Regular 11pt)
(Mac OS used: 20% Blur)
| Default (Text) | Bold (Text) | Cursor (Text) | Highlight (Text) | Default (BG) | Bold (BG) | Cursor (BG) | Highlight (BG) |
| #ffffff | #ffffff | #ffffff | #ffffff | #224fbc | #7f7f7f | #216dff | |
| Pal 1 and 9 (Black) | Pal 2 and 10 (Red) | Pal 3 and 11 (Green) | Pal 4 and 12 (Yellow) | Pal 5 and 13 (Blue) | Pal 6 and 14 (Magenta) | Pal 7 and 15 (Cyan) | Pal 8 and 16 (White) |
| #000000 | #750000 | #65e550 | #d5d24c | #0200a9 | #7c0080 | #63e1ed | #e2e2e2 |

PRO
(Mac OS X font: Monaco 10pt)
(Mac OS used: 0% Blur, 85% opacity)
| Default (Text) | Bold (Text) | Cursor (Text) | Highlight (Text) | Default (BG) | Bold (BG) | Cursor (BG) | Highlight (BG) |
| #f2f2f2 | #ffffff | #f2f2f2 | #f2f2f2 | #000000 | #4d4d4d | #414141 | |
| Pal 1 and 9 (Black) | Pal 2 and 10 (Red) | Pal 3 and 11 (Green) | Pal 4 and 12 (Yellow) | Pal 5 and 13 (Blue) | Pal 6 and 14 (Magenta) | Pal 7 and 15 (Cyan) | Pal 8 and 16 (White) |
| #000000 | #c33720 | #34bc26 | #afad24 | #532fe1 | #d43bd3 | #34bbc8 | #cccccc |

RED SANDS
(Mac OS X font: Menlo Regular 11pt)
(Mac OS used: 20% Blur, 85% opacity)
| Default (Text) | Bold (Text) | Cursor (Text) | Highlight (Text) | Default (BG) | Bold (BG) | Cursor (BG) | Highlight (BG) |
| #d7c9a7 | #dfbd22 | #d7c9a7 | #d7c9a7 | #7a251e | #ffffff | #3d1916 | |
| Pal 1 and 9 (Black) | Pal 2 and 10 (Red) | Pal 3 and 11 (Green) | Pal 4 and 12 (Yellow) | Pal 5 and 13 (Blue) | Pal 6 and 14 (Magenta) | Pal 7 and 15 (Cyan) | Pal 8 and 16 (White) |
| #000000 | #6b0000 | #5bdd48 | #cecb45 | #0200a1 | #ff6eff | #5bd9e6 | #dedede |

SILVER AEROGEL
(Mac OS X font: Menlo Regular 11pt)
(Mac OS used: 100% Blur, 50% opacity)
| Default (Text) | Bold (Text) | Cursor (Text) | Highlight (Text) | Default (BG) | Bold (BG) | Cursor (BG) | Highlight (BG) |
| #000000 | #ffffff | #000000 | #000000 | #7f7f7f | #d9d9d9 | #65668a | |
| Pal 1 and 9 (Black) | Pal 2 and 10 (Red) | Pal 3 and 11 (Green) | Pal 4 and 12 (Yellow) | Pal 5 and 13 (Blue) | Pal 6 and 14 (Magenta) | Pal 7 and 15 (Cyan) | Pal 8 and 16 (White) |
| #000000 | #8c0100 | #007401 | #e4e15a | #1807b9 | #960098 | #73effc | #ebeaeb |

A Few Notes
I may have made a typo somewhere.
Default (Text), Cursor (Text), and Highlight (Text) are all the same color (so you can copy*1 and paste*3 if you want).
Note that Highlight (Text) isn’t really accurate… the only way to set the Highlight (BG) color was unfortunately to also fill in *something* for Highlight (Text) . Ideally we wouldn’t have to fix this to a specific color, but we do, so it’s the same as the Default to at least avoid visibility issues.
The table text is small because tables and mobile always cause me headaches. Really, just copy/paste the stuff. Double-click to select the text (000000). Triple-click if you want to include the # sign (#000000).
Check the images before spending time putting together a profile…Mac OS is a little more stingy when it comes to coloring stuff in the terminal (directories, executables, etc), so it gets away with a few colors that don’t contrast well. You may want to tweak some colors slightly afterwards.
No bulky ads today: instead, a couple YouTube links to churches who have Sunday services online.
Источник


