- Introduction
- Tesseract documentation
- Introduction
- Installation
- Linux
- Tesseract Development Version with LSTM engine and related traineddata
- Ubuntu PPA
- Debian
- AppImage
- Tesseract 4 packages with LSTM engine and related traineddata
- Ubuntu
- Ubuntu PPA
- Debian
- Raspbian
- RHEL/CentOS/Scientific Linux, Fedora, openSUSE packages
- FOR EXPERTS ONLY.
- Windows
- Cygwin
- Installing Tesseract OCR in Linux
- Installing Tesseract OCR in Linux
- Installing Support for Additional Languages in Tesseract OCR
- Using Tesseract OCR to Extract Text from Images
- Extracting Text from a Multi-page PDF File
- Advantages and Disadvantages of Extracting Text in TXT and Searchable PDF Files
- Conclusion
- About the author
- Nitesh Kumar
- Install Tesseract OCR on Linux
- Introduction
- Installing Tesseract 4 on Debian / Ubuntu:
- Tesseract Optimization:
- Training Tesseract:
- Troubleshooting
- About the author
- David Adams
Introduction
Tesseract documentation
Introduction
Tesseract is an open source text recognition (OCR) Engine, available under the Apache 2.0 license. It can be used directly, or (for programmers) using an API to extract printed text from images. It supports a wide variety of languages.
Tesseract doesn’t have a built-in GUI, but there are several available from the 3rdParty page.
Installation
There are two parts to install, the engine itself, and the training data for a language.
Linux
Tesseract is available directly from many Linux distributions. The package is generally called ‘tesseract’ or ‘tesseract-ocr’ — search your distribution’s repositories to find it. Thus you can install Tesseract 4.x and its developer tools on Ubuntu 18.x bionic by simply running:
Note for Ubuntu users: In case apt is unable to find the package try adding universe entry to the sources.list file as shown below.
Packages for over 130 languages and over 35 scripts are also available directly from the Linux distributions. The language packages are called ‘tesseract-ocr-langcode’ and ‘tesseract-ocr-script-scriptcode’, where langcode is three letter language code and scriptcode is four letter script code.
Examples: tesseract-ocr-eng (English), tesseract-ocr-ara (Arabic), tesseract-ocr-chi-sim (Simplified Chinese), tesseract-ocr-script-latn (Latin Script), tesseract-ocr-script-deva (Devanagari script), etc.
For distributions that are supported by snapd you may also run the following command to install the tesseract built binaries(Don’t have snapd installed?):
The traineddata is currently not shipped with the snap package and must be placed manually to
Tesseract Development Version with LSTM engine and related traineddata
5.00 Alpha
Ubuntu PPA
Debian
AppImage
- Download AppImage from releases page
- Open your terminal application, if not already open
- Browse to the location of the AppImage
- Make the AppImage executable:
$ chmod a+x tesseract*.AppImage - Run it:
./tesseract*.AppImage -l eng page.tif page.txt
- Debian: ≥ 10
- Fedora: ≥ 29
- Ubuntu: ≥ 18.04
- CentOS ≥ 8
- openSUSE Tumbleweed
Included traineddata files
- deu — German
- eng — English
- fin — Finnish
- fra — French
- osd — Script and orientation
- por — Portuguese
- rus — Russian
- spa — Spanish
Tesseract 4 packages with LSTM engine and related traineddata
Ubuntu
Ubuntu PPA
Debian
There are also 4.1.x packages for other versions of Debian, check it here https://notesalexp.org/tesseract-ocr/
Raspbian
RHEL/CentOS/Scientific Linux, Fedora, openSUSE packages
For example to install Tesseract with German language traineddata:
For CentOS 8 run the following as root:
For RHEL 7 run the following as root:
For CentOS 7 run the following as root:
For Scientific Linux 7 run the following as root:
For Fedora 32 run the following as root:
For Fedora 31 run the following as root:
For openSUSE Tumbleweed run the following as root:
For openSUSE Leap 15.0 run the following as root:
FOR EXPERTS ONLY.
If you are experimenting with OCR Engine modes, you will need to manually install language training data beyond what is available in your Linux distribution.
Various types of training data can be found on GitHub. Unpack and copy the .traineddata file into a ‘tessdata’ directory. The exact directory will depend both on the type of training data, and your Linux distribution. Possibilities are /usr/share/tesseract-ocr/tessdata or /usr/share/tessdata or /usr/share/tesseract-ocr/4.00/tessdata .
Windows
Installer for Windows for Tesseract 3.05, Tesseract 4 and development version 5.00 Alpha are available from Tesseract at UB Mannheim. These include the training tools. Both 32-bit and 64-bit installers are available.
An installer for the OLD version 3.02 is available for Windows from our download page. This includes the English training data. If you want to use another language, download the appropriate training data, unpack it using 7-zip, and copy the .traineddata file into the ‘tessdata’ directory, probably C:\Program Files\Tesseract-OCR\tessdata .
To access tesseract-OCR from any location you may have to add the directory where the tesseract-OCR binaries are located to the Path variables, probably C:\Program Files\Tesseract-OCR .
Experts can also get binaries build with Visual Studio from the build artifacts of the Appveyor Continuous Integration.
Cygwin
Released version >= 3.02 of tesseract-ocr are part of Cygwin
The latest version available is 4.1.0. Please see announcement.
Источник
Installing Tesseract OCR in Linux
Installing Tesseract OCR in Linux
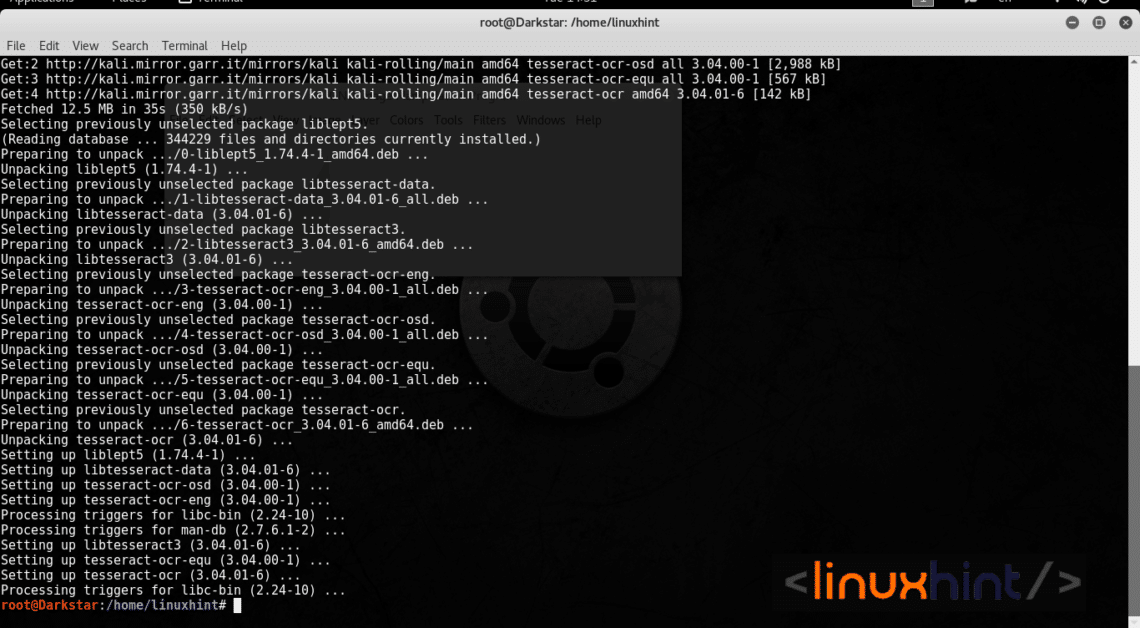
Tesseract OCR is available by default on most Linux distributions. You can install it in Ubuntu using the command below:
Detailed instructions for other distributions are available here. Even though Tesseract OCR is available in repositories of many Linux distributions by default, it is recommended to install the latest version from the link mentioned above for improved accuracy and parsing.
Installing Support for Additional Languages in Tesseract OCR
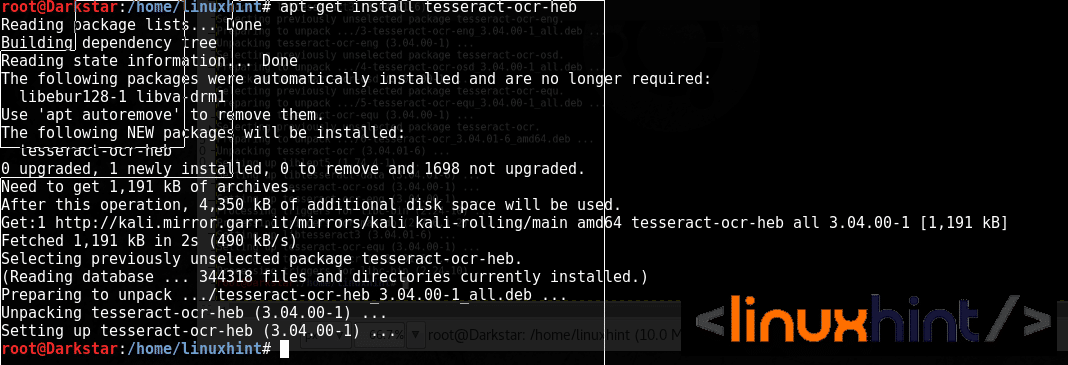
Tesseract OCR includes support for detecting text in over 100 languages. However, you only get support for detecting text in the English language with the default installation in Ubuntu. To add support for parsing additional languages in Ubuntu, run a command in the following format:
The command above will add support for the Hindi language to Tesseract OCR. Sometimes you can get better accuracy and results by installing support for language scripts. For instance, installing and using the tesseract package for Devanagari script “tesseract-ocr-script-deva” gave me much more accurate results than using the “tesseract-ocr-hin” package.
In Ubuntu, you can find correct package names for all languages and scripts by running the command below:
Once you have identified the correct package name to install, replace the string “tesseract-ocr-hin” with it in the first command specified above.
Using Tesseract OCR to Extract Text from Images
Let’s take an example of an image shown below (taken from Wikipedia page for Linux):
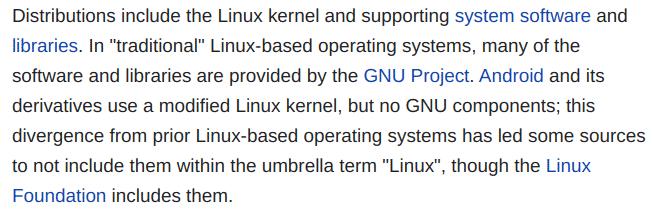
To extract text from the image above, you have to run a command in the following format:
Running the command above gives the following output:
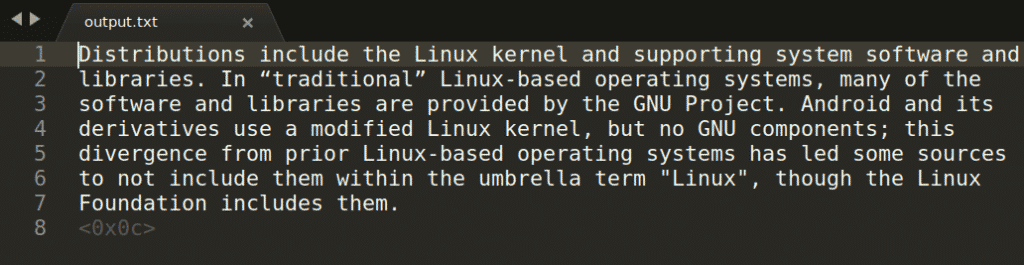
In the command above, “capture.png” refers to the image from which you want to extract the text. The captured output is then stored in the “output.txt” file. You can change the language by replacing the “eng” argument with your own choice. To see all valid languages, run the command below:
It will show abbreviation codes for all languages supported by Tesseract OCR on your system. By default, it will only show “eng” as output. However, if you install packages for additional languages as explained above, this command will list more languages that you can use to detect text (as ISO 639 3-letter language codes).
If the image contains text in multiple languages, define primary language first followed by additional languages separated by plus signs.
If you want to store the output as a searchable PDF file, run a command in the following format:
Note that the searchable PDF file won’t contain any editable text. It includes the original image, with an additional layer containing the recognized text superimposed on the image. So while you will be able to accurately search text in the PDF file using any PDF reader, you won’t be able to edit the text.
Another point you should note that the accuracy of text detection increases greatly if the image file is of high quality. Given a choice, always use lossless file formats or PNG files. Using JPG files may not give the best results.
Extracting Text from a Multi-page PDF File
Tesseract OCR natively doesn’t support extracting text from PDF files. However, it is possible to extract text from a multi-page PDF file by converting each page into an image file. Run the command below to convert a PDF file into a set of images:
For each page of the PDF file, you will get a corresponding “output-1.png”, “output-2.png” file, and so on.
Now, to extract text from these images by using a single command, you will have to use a “for loop” in a bash command:
Running the above command will extract text from all “.png” files found in the working directory and store the recognized text in “output-original_filename.txt” files. You can modify the middle part of the command as per your needs.
If you want to combine all text files containing the recognized text, run the command below:
The process for extracting text from a multi-page PDF file into searchable PDF files is nearly the same. You have to supply an extra “pdf” argument to the command:
If you want to combine all searchable PDF files containing the recognized text, run the command below:
Both “pdftoppm” and “pdfunite” are installed by default on the latest stable version of Ubuntu.
Advantages and Disadvantages of Extracting Text in TXT and Searchable PDF Files
If you extract recognized text into TXT files, you will get editable text output. However, any document formatting will be lost (bold, italic characters, and so on). Searchable PDF files will preserve the original formatting, but you will lose text editing capabilities (you can still copy raw text). If you open the searchable PDF file in any PDF editor, you will get embedded image(s) in the file and not raw text output. Converting the searchable PDF files into HTML or EPUB will also give you embedded images.
Conclusion
Tesseract OCR is one of the most widely used OCR engines today. It is a free, open-source and supports over a hundred languages. When using Tesseract OCR, make sure to use high-resolution images and correct language codes in command-line arguments to improve the accuracy of text detection.
About the author
![]()
Nitesh Kumar
I am a freelancer software developer and content writer who loves Linux, open source software and the free software community.
Источник
Install Tesseract OCR on Linux
Introduction
Tessereact is considered one of the best OCR solutions available. Since 2006 it is sponsored by Google, previously it was developed by Hewlett Packard in C and C++ between 1985 and 1998. The system is capable to identify even handwriting, it can learn increasing it’s accuracy, and is among the most developed and complete in the market.
It easily beats commercial competitors like ABBY, if you are looking for a serious solution for OCR, Tesseract is the most accurate one, but don’t expect for massive solutions: it uses a core per process, which means a 8 core processor (hyperthreading accepted) will be able to process 8 or 16 images simultaneously.
When I used Tesseract we managed thousands of potential customers uploading handwritten content, images with text, etc. We used 48 core servers, with DatabaseByDesign and then with AWS, we never had a resources problem.
We had an uploader which discriminated between text files like Microsoft Office or Open Office files and images or scanned documents. The uploader determined whatever the OCR or PHP scripts would process an order, in the field of text recognition.
Tesseact is a great solution, but before thinking about it you must know, last Tesseract’s versions brought big improvements, some of them mean hard work. While training could last for hours or days, recent Tesserct’s versions training may be of days, weeks, or even months if you are looking for a multilingual OCR solution.
Installing Tesseract 4 on Debian / Ubuntu:
If you are using a different Linux distribution, you’ll need to copy the last github repository version and copy the .traineddata file into ‘tessdata’ (/usr/share/tesseract-ocr/tessdata or /usr/share/tessdata).
By default Tesseract will install the English language pack, to install additional languages run
for example, to add Hebrew:
You can include all languages by running:
In order for Tesseract to work properly, we will need to use the command “convert” (convert between image formats as well as resize an image, blur, crop, despeckle, dither, draw on, flip, join, re-sample, and much more) provided by Imagemagick:
Lets install imagemagick with apt-get:
Now let’s test Tesseract, find an image containing text and run:
If installed properly, Tesseract will extract the text from the image.
When I worked with Tesseract, all we needed was to word count documents. Like with any other program you can, and must, train it, in Word we can define some symbols which can be counted or not, if to count or not numbers, etc. the same with Tesseract.
We can also train it’s sensibility to specific images.
Tesseract Optimization:
Size Optimization: According to official sources, the optimal pixels size for an image to be processed successfully by Tesseract is 300DPI. We’ll need to process any image using the -r parameter to enforce this DPI. Increasing the DPI will also increase the processing time.
Page rotation: If when scanned the page wasn’t properly rotated and stays 180° or 45°, Tesseract’s accuracy will decrease, you can use this Python script to automatically detect and fix rotation issues.
Border Removal: According to Tesseract’s official man, borders can erroneously be picked as characters, especially dark borders and where there is gradation variety. Removing borders may be a good step to achieve the maximal accuracy with Tesseract.
Removing Noise: According to Tesseracts, noise “is random variation of brightness or colour in an image”. We can remove it in the binarization step, which means polarizing it’s colors.
Training Tesseract:
While most of tutorials cover only Tesseract’s installation, I will summarize how to train your OCR system, here we can find a tutorial for all versions. In this article I’ll summarize how to train Tesseract 4 which includes a new “neural network-based recognition engine that delivers significantly higher accuracy (on document images) than the previous versions, in return for a significant increase in required compute power. On complex languages however, it may actually be faster than base Tesseract.”
Before continuing we will need to install additional libraries:
And we will install the training tools by running, within the Tesseract directory:
According to Tesseract’s official wiki, we have 3 current options to train our OCR system:
- “Fine tune. Starting with an existing trained language, train on your specific additional data. This may work for problems that are close to the existing training data, but different in some subtle way, like a particularly unusual font. May work with even a small amount of training data.
- Cut off the top layer (or some arbitrary number of layers) from the network and retrain a new top layer using the new data. If fine tuning doesn’t work, this is most likely the next best option. Cutting off the top layer could still work for training a completely new language or script, if you start with the most similar looking script.
- Retrain from scratch. This is a daunting task, unless you have a very representative and sufficiently large training set for your problem. If not, you are likely to end up with an over-fitted network that does really well on the training data, but not on the actual data.
While the above options may sound different, the training steps are actually almost identical, apart from the command line, so it is relatively easy to try it all ways, given the time or hardware to run them in parallel.”
In this tutorial, we will only run the tesstrain.sh script which will call necessary programs to train a specific language.
First of all lets clone all the files within our /usr/share/tesseract-ocr:

Go to /usr/share/tesseract-ocr/tesseract/training (Tesseract’s default installation directory) and run:
Change “heb” for the language you want to train, and also edit the path to your data.
Within the directory /usr/share/tesseract-ocr/tesseract/training you will find the file language-specific.sh useful to add rules for specific languages.
Troubleshooting
Tesseract is to me the best OCR solution, but recently it made huge changes from the past versions and many users are complaining about changes or things which are no longer working, I wouldn’t worry since the changes seem to give great results. Tesseract’s community is very active, in case you find problems running tesseract, become part of Tesseract’s community here.
About the author
David Adams
David Adams is a System Admin and writer that is focused on open source technologies, security software, and computer systems.
Источник


