- Introduction
- Tesseract documentation
- Introduction
- Installation
- Linux
- Tesseract Development Version with LSTM engine and related traineddata
- Ubuntu PPA
- Debian
- AppImage
- Tesseract 4 packages with LSTM engine and related traineddata
- Ubuntu
- Ubuntu PPA
- Debian
- Raspbian
- RHEL/CentOS/Scientific Linux, Fedora, openSUSE packages
- FOR EXPERTS ONLY.
- Windows
- Cygwin
- Install Tesseract OCR on Linux
- Introduction
- Installing Tesseract 4 on Debian / Ubuntu:
- Tesseract Optimization:
- Training Tesseract:
- Troubleshooting
- About the author
- David Adams
- Как сделать OCR из командной строки Linux, используя Tesseract
- Оптическое распознавание символов
- Установка Tesseract OCR
- Использование Tesseract OCR
- Использование разных языков
- Использование Tesseract OCR с PDF-файлами
- Хорошее решение, когда вам это нужно
Introduction
Tesseract documentation
Introduction
Tesseract is an open source text recognition (OCR) Engine, available under the Apache 2.0 license. It can be used directly, or (for programmers) using an API to extract printed text from images. It supports a wide variety of languages.
Tesseract doesn’t have a built-in GUI, but there are several available from the 3rdParty page.
Installation
There are two parts to install, the engine itself, and the training data for a language.
Linux
Tesseract is available directly from many Linux distributions. The package is generally called ‘tesseract’ or ‘tesseract-ocr’ — search your distribution’s repositories to find it. Thus you can install Tesseract 4.x and its developer tools on Ubuntu 18.x bionic by simply running:
Note for Ubuntu users: In case apt is unable to find the package try adding universe entry to the sources.list file as shown below.
Packages for over 130 languages and over 35 scripts are also available directly from the Linux distributions. The language packages are called ‘tesseract-ocr-langcode’ and ‘tesseract-ocr-script-scriptcode’, where langcode is three letter language code and scriptcode is four letter script code.
Examples: tesseract-ocr-eng (English), tesseract-ocr-ara (Arabic), tesseract-ocr-chi-sim (Simplified Chinese), tesseract-ocr-script-latn (Latin Script), tesseract-ocr-script-deva (Devanagari script), etc.
For distributions that are supported by snapd you may also run the following command to install the tesseract built binaries(Don’t have snapd installed?):
The traineddata is currently not shipped with the snap package and must be placed manually to
Tesseract Development Version with LSTM engine and related traineddata
5.00 Alpha
Ubuntu PPA
Debian
AppImage
- Download AppImage from releases page
- Open your terminal application, if not already open
- Browse to the location of the AppImage
- Make the AppImage executable:
$ chmod a+x tesseract*.AppImage - Run it:
./tesseract*.AppImage -l eng page.tif page.txt
- Debian: ≥ 10
- Fedora: ≥ 29
- Ubuntu: ≥ 18.04
- CentOS ≥ 8
- openSUSE Tumbleweed
Included traineddata files
- deu — German
- eng — English
- fin — Finnish
- fra — French
- osd — Script and orientation
- por — Portuguese
- rus — Russian
- spa — Spanish
Tesseract 4 packages with LSTM engine and related traineddata
Ubuntu
Ubuntu PPA
Debian
There are also 4.1.x packages for other versions of Debian, check it here https://notesalexp.org/tesseract-ocr/
Raspbian
RHEL/CentOS/Scientific Linux, Fedora, openSUSE packages
For example to install Tesseract with German language traineddata:
For CentOS 8 run the following as root:
For RHEL 7 run the following as root:
For CentOS 7 run the following as root:
For Scientific Linux 7 run the following as root:
For Fedora 32 run the following as root:
For Fedora 31 run the following as root:
For openSUSE Tumbleweed run the following as root:
For openSUSE Leap 15.0 run the following as root:
FOR EXPERTS ONLY.
If you are experimenting with OCR Engine modes, you will need to manually install language training data beyond what is available in your Linux distribution.
Various types of training data can be found on GitHub. Unpack and copy the .traineddata file into a ‘tessdata’ directory. The exact directory will depend both on the type of training data, and your Linux distribution. Possibilities are /usr/share/tesseract-ocr/tessdata or /usr/share/tessdata or /usr/share/tesseract-ocr/4.00/tessdata .
Windows
Installer for Windows for Tesseract 3.05, Tesseract 4 and development version 5.00 Alpha are available from Tesseract at UB Mannheim. These include the training tools. Both 32-bit and 64-bit installers are available.
An installer for the OLD version 3.02 is available for Windows from our download page. This includes the English training data. If you want to use another language, download the appropriate training data, unpack it using 7-zip, and copy the .traineddata file into the ‘tessdata’ directory, probably C:\Program Files\Tesseract-OCR\tessdata .
To access tesseract-OCR from any location you may have to add the directory where the tesseract-OCR binaries are located to the Path variables, probably C:\Program Files\Tesseract-OCR .
Experts can also get binaries build with Visual Studio from the build artifacts of the Appveyor Continuous Integration.
Cygwin
Released version >= 3.02 of tesseract-ocr are part of Cygwin
The latest version available is 4.1.0. Please see announcement.
Источник
Install Tesseract OCR on Linux
Introduction
Tessereact is considered one of the best OCR solutions available. Since 2006 it is sponsored by Google, previously it was developed by Hewlett Packard in C and C++ between 1985 and 1998. The system is capable to identify even handwriting, it can learn increasing it’s accuracy, and is among the most developed and complete in the market.
It easily beats commercial competitors like ABBY, if you are looking for a serious solution for OCR, Tesseract is the most accurate one, but don’t expect for massive solutions: it uses a core per process, which means a 8 core processor (hyperthreading accepted) will be able to process 8 or 16 images simultaneously.
When I used Tesseract we managed thousands of potential customers uploading handwritten content, images with text, etc. We used 48 core servers, with DatabaseByDesign and then with AWS, we never had a resources problem.
We had an uploader which discriminated between text files like Microsoft Office or Open Office files and images or scanned documents. The uploader determined whatever the OCR or PHP scripts would process an order, in the field of text recognition.
Tesseact is a great solution, but before thinking about it you must know, last Tesseract’s versions brought big improvements, some of them mean hard work. While training could last for hours or days, recent Tesserct’s versions training may be of days, weeks, or even months if you are looking for a multilingual OCR solution.
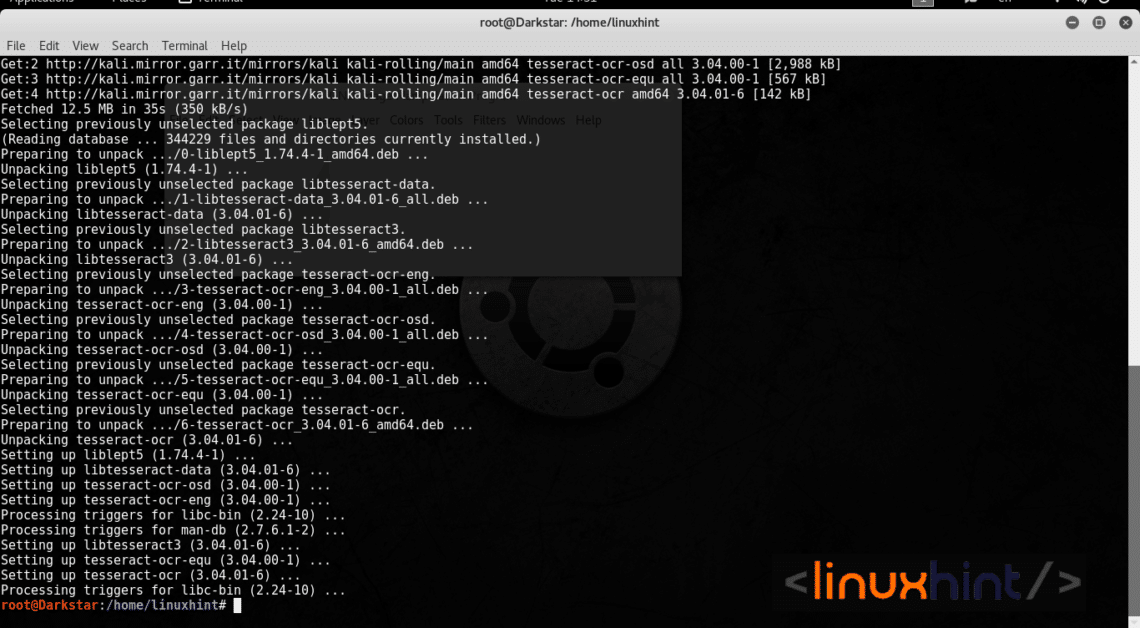
Installing Tesseract 4 on Debian / Ubuntu:
If you are using a different Linux distribution, you’ll need to copy the last github repository version and copy the .traineddata file into ‘tessdata’ (/usr/share/tesseract-ocr/tessdata or /usr/share/tessdata).
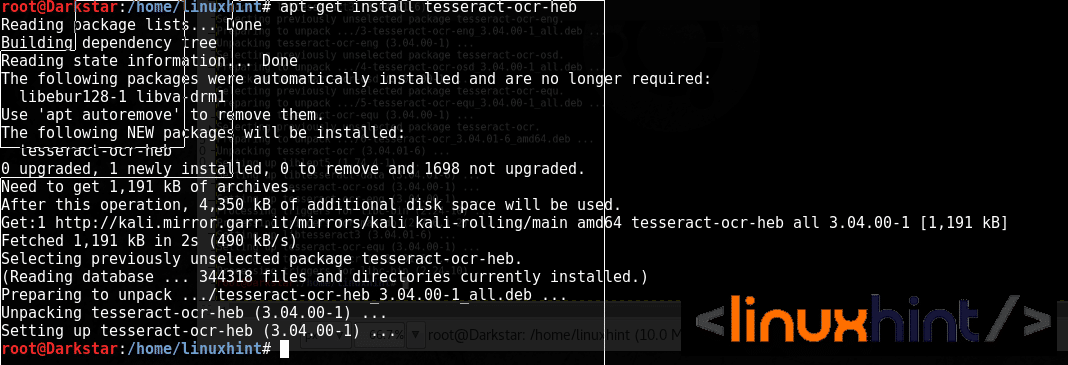
By default Tesseract will install the English language pack, to install additional languages run
for example, to add Hebrew:
You can include all languages by running:
In order for Tesseract to work properly, we will need to use the command “convert” (convert between image formats as well as resize an image, blur, crop, despeckle, dither, draw on, flip, join, re-sample, and much more) provided by Imagemagick:
Lets install imagemagick with apt-get:
Now let’s test Tesseract, find an image containing text and run:
If installed properly, Tesseract will extract the text from the image.
When I worked with Tesseract, all we needed was to word count documents. Like with any other program you can, and must, train it, in Word we can define some symbols which can be counted or not, if to count or not numbers, etc. the same with Tesseract.
We can also train it’s sensibility to specific images.
Tesseract Optimization:
Size Optimization: According to official sources, the optimal pixels size for an image to be processed successfully by Tesseract is 300DPI. We’ll need to process any image using the -r parameter to enforce this DPI. Increasing the DPI will also increase the processing time.
Page rotation: If when scanned the page wasn’t properly rotated and stays 180° or 45°, Tesseract’s accuracy will decrease, you can use this Python script to automatically detect and fix rotation issues.
Border Removal: According to Tesseract’s official man, borders can erroneously be picked as characters, especially dark borders and where there is gradation variety. Removing borders may be a good step to achieve the maximal accuracy with Tesseract.
Removing Noise: According to Tesseracts, noise “is random variation of brightness or colour in an image”. We can remove it in the binarization step, which means polarizing it’s colors.
Training Tesseract:
While most of tutorials cover only Tesseract’s installation, I will summarize how to train your OCR system, here we can find a tutorial for all versions. In this article I’ll summarize how to train Tesseract 4 which includes a new “neural network-based recognition engine that delivers significantly higher accuracy (on document images) than the previous versions, in return for a significant increase in required compute power. On complex languages however, it may actually be faster than base Tesseract.”
Before continuing we will need to install additional libraries:
And we will install the training tools by running, within the Tesseract directory:
According to Tesseract’s official wiki, we have 3 current options to train our OCR system:
- “Fine tune. Starting with an existing trained language, train on your specific additional data. This may work for problems that are close to the existing training data, but different in some subtle way, like a particularly unusual font. May work with even a small amount of training data.
- Cut off the top layer (or some arbitrary number of layers) from the network and retrain a new top layer using the new data. If fine tuning doesn’t work, this is most likely the next best option. Cutting off the top layer could still work for training a completely new language or script, if you start with the most similar looking script.
- Retrain from scratch. This is a daunting task, unless you have a very representative and sufficiently large training set for your problem. If not, you are likely to end up with an over-fitted network that does really well on the training data, but not on the actual data.
While the above options may sound different, the training steps are actually almost identical, apart from the command line, so it is relatively easy to try it all ways, given the time or hardware to run them in parallel.”
In this tutorial, we will only run the tesstrain.sh script which will call necessary programs to train a specific language.
First of all lets clone all the files within our /usr/share/tesseract-ocr:

Go to /usr/share/tesseract-ocr/tesseract/training (Tesseract’s default installation directory) and run:
Change “heb” for the language you want to train, and also edit the path to your data.
Within the directory /usr/share/tesseract-ocr/tesseract/training you will find the file language-specific.sh useful to add rules for specific languages.
Troubleshooting
Tesseract is to me the best OCR solution, but recently it made huge changes from the past versions and many users are complaining about changes or things which are no longer working, I wouldn’t worry since the changes seem to give great results. Tesseract’s community is very active, in case you find problems running tesseract, become part of Tesseract’s community here.
About the author
David Adams
David Adams is a System Admin and writer that is focused on open source technologies, security software, and computer systems.
Источник
Как сделать OCR из командной строки Linux, используя Tesseract
Вы можете извлечь текст из изображений в командной строке Linux, используя механизм распознавания текста Tesseract. Это быстрый, точный и работает на 100 языках. Вот как это использовать.
Оптическое распознавание символов
Оптическое распознавание символов (OCR) — это возможность просматривать и находить слова на изображении, а затем извлекать их как редактируемый текст. Эта простая задача для людей очень трудна для компьютеров. Первые усилия были неуклюжи, если не сказать больше. Компьютеры часто путались, если шрифт или размер не нравились программному обеспечению OCR.
Тем не менее, пионеры в этой области все еще находились в почете. Если вы потеряли электронную копию документа, но у вас все еще была печатная версия, OCR может воссоздать электронную, редактируемую версию. Даже если результаты не были точными на 100%, это все равно помогло сэкономить время.
После некоторой ручной уборки вы получите свой документ обратно. Люди прощали ошибки, которые они допустили, потому что они понимали сложность задачи, стоящей перед пакетом OCR. Плюс, это было лучше, чем перепечатывать весь документ.
С тех пор ситуация значительно улучшилась. Приложение Tesseract OCR, написанное Hewlett Packard, начатый в 1980-х годах как коммерческое приложение. Это было с открытым исходным кодом в 2005 году, и теперь оно поддерживается Google, Он имеет многоязычные возможности, считается одной из самых точных систем распознавания, и вы можете использовать ее бесплатно.
Установка Tesseract OCR
Чтобы установить Tesseract OCR в Ubuntu, используйте эту команду:

На Fedora команда выглядит так:
На Манджаро нужно набрать:

Использование Tesseract OCR
Мы собираемся поставить ряд задач для Tesseract OCR. Наше первое изображение, которое содержит текст, является выдержкой из Recital 63 из Общие положения о защите данных, Посмотрим, сможет ли OCR это прочитать (и не спать).

Это хитрое изображение, потому что каждое предложение начинается со слабого номера надстрочного индекса, что типично для законодательных документов.
Нам нужно дать tesseract командовать некоторой информацией, в том числе:
- Имя файла изображения, который мы хотим обработать.
- Имя текстового файла, который будет создан для хранения извлеченного текста. Нам не нужно указывать расширение файла (оно всегда будет .txt). Если файл с таким именем уже существует, он будет перезаписан.
- Мы можем использовать —dpi возможность рассказать tesseract что за точек на дюйм (dpi) разрешение изображения. Если мы не предоставляем значение dpi, tesseract постараюсь разобраться.
Наш файл изображения называется recital-63.png, и его разрешение составляет 150 точек на дюйм. Мы собираемся создать текстовый файл с именем «recital.txt».
Наша команда выглядит так:

Результаты очень хорошие. Единственная проблема — верхние индексы — они были слишком слабыми, чтобы их можно было правильно прочитать. Хорошее качество изображения жизненно важно для получения хороших результатов.

tesseract интерпретировал числа надстрочных знаков как кавычки («) и символы степени (°), но фактический текст был извлечен идеально (правая сторона изображения должна была быть обрезана, чтобы соответствовать здесь).
Последний символ — это байт с шестнадцатеричным значением 0x0C, который является возвратом каретки.
Ниже еще одно изображение с текстом разных размеров, выделенным жирным шрифтом и курсивом.

Название этого файла — «bold-italic.png». Мы хотим создать текстовый файл с именем «bold.txt», поэтому наша команда:

В этом не было никаких проблем, и текст был извлечен идеально.

Использование разных языков
Tesseract OCR поддерживает около 100 языков, Чтобы использовать язык, вы должны сначала установить его. Когда вы найдете язык, который вы хотите использовать в списке, обратите внимание на его сокращение. Мы собираемся установить поддержку для валлийцев. Его сокращение — «cym», что сокращенно от «Cymru», что означает валлийский.
Инсталляционный пакет называется «tesseract-ocr-» с сокращением языка, помеченным на конце. Чтобы установить файл с валлийским языком в Ubuntu, мы будем использовать:

Изображение с текстом ниже. Это первый стих уэльского государственного гимна.

Давайте посмотрим, справится ли Tesseract OCR с этой задачей. Мы будем использовать -l (язык) вариант, чтобы позволить tesseract знать язык, на котором мы хотим работать:

tesseract отлично справляется, как показано в извлеченном тексте ниже. Da Iawn, Tesseract OCR.

Если ваш документ содержит два или более языков (например, словарь валлийский-английский), вы можете использовать знак плюс ( + ) сказать tesseract добавить другой язык, вот так:
Использование Tesseract OCR с PDF-файлами
tesseract Команда предназначена для работы с файлами изображений, но она не может читать PDF-файлы. Однако, если вам нужно извлечь текст из PDF, вы можете сначала использовать другую утилиту для генерации набора изображений. Одно изображение будет представлять одну страницу PDF.
pdftppm утилита вам нужна должен быть уже установлен на вашем компьютере с Linux. PDF-файл, который мы будем использовать в нашем примере, является копией оригинальной статьи Алана Тьюринга по искусственному интеллекту «Компьютерная техника и интеллект».

Мы используем -png возможность указать, что мы хотим создавать файлы PNG. Имя файла нашего PDF — «turing.pdf». Мы будем называть наши файлы изображений «turing-01.png», «turing-02.png» и так далее:

Бежать tesseract для каждого файла изображения с помощью одной команды, мы должны использовать для цикла, Для каждого из нашихпп.png, »файлы, которые мы запускаем tesseract и создайте текстовый файл с именем «text-» плюс «turing-»пп»Как часть имени файла изображения:

Чтобы объединить все текстовые файлы в один, мы можем использовать cat :
 complete.txt в окне терминала.» width=»646″ height=»57″ onload=»pagespeed.lazyLoadImages.loadIfVisibleAndMaybeBeacon(this);» onerror=»this.onerror=null;pagespeed.lazyLoadImages.loadIfVisibleAndMaybeBeacon(this);»/>
Итак, как это было? Очень хорошо, как вы можете видеть ниже. Первая страница выглядит довольно сложной, хотя. Он имеет разные стили текста и размеров, а также оформление. На правом краю страницы также есть вертикальный «водяной знак».
Однако вывод близок к оригиналу. Очевидно, форматирование было потеряно, но текст правильный.

Вертикальный водяной знак был расшифрован как линия тарабарщины внизу страницы. Текст был слишком мал для чтения tesseract точно, но было бы достаточно легко найти и удалить его. Худшим результатом были бы случайные символы в конце каждой строки.
Любопытно, что отдельные буквы в начале списка вопросов и ответов на второй странице были проигнорированы. Раздел из PDF показан ниже.

Как вы можете видеть ниже, вопросы остаются, но «Q» и «A» в начале каждой строки были потеряны.

Диаграммы также не будут правильно расшифрованы. Давайте посмотрим, что происходит, когда мы пытаемся извлечь приведенный ниже пример из PDF-файла Тьюринга.

Как вы можете видеть в нашем результате ниже, символы были прочитаны, но формат диаграммы был утерян.

Очередной раз, tesseract боролись с небольшим размером подписчиков, и они были отображены неправильно.
Справедливости ради, тем не менее, это был еще хороший результат. Мы не смогли извлечь простой текст, но тогда этот пример был сознательно выбран, потому что он представлял проблему.
Хорошее решение, когда вам это нужно
OCR — это не то, что вам нужно использовать ежедневно. Однако, когда возникает необходимость, приятно знать, что в вашем распоряжении один из лучших механизмов распознавания.
Источник


