- Linux – Determine / Find Ethernet Connection Speed
- How do I determine ethernet connection speed?
- Linux / Unix: Test Internet Connection Speed From SSH Command
- How To Test Internet Connection Speed From SSH Command on Linux or Unix
- Step 1. Find out download url
- Step 2. Use lftp command to test download speed
- A note about wget command
- Step 3. Use lftp command to test upload speed
- How do I test network throughput rate between two Linux or Unix servers?
- Проверка скорости интернета Linux
- Проверка скорости интернета через терминал
- Установка SpeedTest-cli
- Проверка скорости интернет
- Выводы
- Monitoring Network Bandwidth and Speed in Linux
- Tools for Monitoring Internet traffic and speed in Linux
- 1. NetSpeed – GNOME shell extension for desktop users
- 2. Fast – Netflix’s Internet speed tester
- 3. speedtest-cli: check upload and download speed
- 4. NetHogs – Check bandwidth utilization per program basis
- 5. nload – Real-Time internet traffic monitoring
- 6. CBM – Color Bandwidth Meter
- 7. iPerf – Test network performance between two hosts
- 8. vnStat – Network traffic logger
- 9. iftop – The ‘top’ of Network Usage
Linux – Determine / Find Ethernet Connection Speed
Most intelligent network devices use an autonegotiation protocol to communicate what media technologies they support, and then select the fastest mutually supported media technology.
How do I determine ethernet connection speed?
Type the following command to get speed for eth0:
$ ethtool eth0 | less
OR
$ ethtool eth0 | grep -i speed
Sample outputs:
Fig.01: Ubuntu Linux verify the speed of my NIC (network card)
- No ads and tracking
- In-depth guides for developers and sysadmins at Opensourceflare✨
- Join my Patreon to support independent content creators and start reading latest guides:
- How to set up Redis sentinel cluster on Ubuntu or Debian Linux
- How To Set Up SSH Keys With YubiKey as two-factor authentication (U2F/FIDO2)
- How to set up Mariadb Galera cluster on Ubuntu or Debian Linux
- A podman tutorial for beginners – part I (run Linux containers without Docker and in daemonless mode)
- How to protect Linux against rogue USB devices using USBGuard
Join Patreon ➔
🐧 Get the latest tutorials on Linux, Open Source & DevOps via
| Category | List of Unix and Linux commands |
|---|---|
| Documentation | help • mandb • man • pinfo |
| Disk space analyzers | df • duf • ncdu • pydf |
| File Management | cat • cp • less • mkdir • more • tree |
| Firewall | Alpine Awall • CentOS 8 • OpenSUSE • RHEL 8 • Ubuntu 16.04 • Ubuntu 18.04 • Ubuntu 20.04 |
| Linux Desktop Apps | Skype • Spotify • VLC 3 |
| Modern utilities | bat • exa |
| Network Utilities | NetHogs • dig • host • ip • nmap |
| OpenVPN | CentOS 7 • CentOS 8 • Debian 10 • Debian 8/9 • Ubuntu 18.04 • Ubuntu 20.04 |
| Package Manager | apk • apt |
| Processes Management | bg • chroot • cron • disown • fg • glances • gtop • jobs • killall • kill • pidof • pstree • pwdx • time • vtop |
| Searching | ag • grep • whereis • which |
| Shell builtins | compgen • echo • printf |
| Text processing | cut • rev |
| User Information | groups • id • lastcomm • last • lid/libuser-lid • logname • members • users • whoami • who • w |
| WireGuard VPN | Alpine • CentOS 8 • Debian 10 • Firewall • Ubuntu 20.04 |
Comments on this entry are closed.
Is there any similar functionality on Windows?
I want to see the Duplex and Speed on Windows as well.
yes you have to go to your Ethernet card properties which can me done through device manger and there select advance option and change the LAN link speed either to 10 or 100 Mbps full or half duplex
I’m using Ubuntu 8.10 alpha 3 32bits.
I tried “ethtool eth0 | grep -i speed ” but needed to add sudo to execute it.
Without sudo:
Cannot get device settings: Operation not permitted
Cannot get wake-on-lan settings: Operation not permitted
Cannot get link status: Operation not permitted
jp@jp-desktop810:
$ sudo ethtool eth0 | grep -i speed
Speed: 100Mb/s
Talk about difficult to find out what my nic link speed is with linux (fedora 8) …
I would have expected “settings/network or network status” to show me.
On windows just look at the properties/status of the network card object and it shows link speed, duplex and real time packet count.
On Windows, you type in a fairly long command to get it, instead of just “ethtool “, which is shorter. You’re comparing the graphical tools available on Windows to the command line of Linux. Apples and oranges.
Tried this on ubuntu, uhm, 8 or something (was some old usb livestick i often use to revive data from dead computers and laptops).
I had to install the ethtool first, but a permission denied. This command worked though:
sudo apt-get install ethtool
Then I tried the first command in this article, which gave me no info and I didn´t know howto get out of the program. Closed the terminal and opened it up again, then ran the second command. Permission denied. But a sudo !! did the trick. In short, this would work after doing the apt-get-install:
sudo ethtool eth0 | grep -i speed
Hope this helps others out who are just as newb as me 🙂
apt-get and ethtool are administrator tools hence the need to use sudo before the actual commands. Users are normally not able to use them as they can affect the system and possibly cause major failures in connectivty or software.
On amazon Linux on EC2, ethtool only says whether a link is detected or not.
ifconfig -a
cat /proc/net/bonding/bond0
cat /proc/net/bonding/bond1
If you don’t have ethtool installed, you may have mii-tool:
# mii-tool
eth0: negotiated 1000baseT-FD flow-control, link ok
eth1: negotiated 100baseTx-FD flow-control, link ok
Can any one tell me ,How to get Ethernet Link Speed(through command prompt i e Terminal ) in MAC OS X ?
Thank you
If your interface name is en6, enter:
ifconfig en6 | grep media
media: autoselect (100baseTX )
If your interface name is en0, enter:
ifconfig en0 | grep media
Источник
Linux / Unix: Test Internet Connection Speed From SSH Command
I have recently rented a dedicated server for my hobby projects and learning CentOS Linux server. I was informed that I am connected to the 100M/s port. How do I test my Internet connection download speed from the console over the ssh session without using HTML5 or Adobe flash/Java applets based websites? How do I test my upload speed from the console?
| Tutorial details | |
|---|---|
| Difficulty level | Easy |
| Root privileges | No |
| Requirements | lftp or wget+wput/ftp |
| Est. reading time | N/A |
I recommend that you use lftp command to test Internet upload and download speed from console. You can run lftp using the ssh client:
How To Test Internet Connection Speed From SSH Command on Linux or Unix
You can use the following yum command to install lftp and iperf under RHEL / CentOS / Fedora Linux:
# yum install lftp iperf
OR use the following apt command/apt-get command under Debian or Ubuntu Linux/Mint Linux:
$ sudo apt-get install lftp iperf
Step 1. Find out download url
You need a large size file to test download speed. For example, you can visit the home page of “Linux kernel” to grab Centos Linux ISO file.
Step 2. Use lftp command to test download speed
Fig.01: lftp testing internet speed
A note about wget command
You can use the wget command as follows for testing download speed:
$ wget -O /dev/null https://mirrors.edge.kernel.org/centos/7.5.1804/isos/x86_64/CentOS-7-x86_64-DVD-1804.iso
Sample outputs:
Fig.02: wget command in action
Step 3. Use lftp command to test upload speed
The sytnax is as follows:
In this example, I am uploading a file to my private ftp server:
- No ads and tracking
- In-depth guides for developers and sysadmins at Opensourceflare✨
- Join my Patreon to support independent content creators and start reading latest guides:
- How to set up Redis sentinel cluster on Ubuntu or Debian Linux
- How To Set Up SSH Keys With YubiKey as two-factor authentication (U2F/FIDO2)
- How to set up Mariadb Galera cluster on Ubuntu or Debian Linux
- A podman tutorial for beginners – part I (run Linux containers without Docker and in daemonless mode)
- How to protect Linux against rogue USB devices using USBGuard
Join Patreon ➔
Fig.03: lftp upload speed test in action
How do I test network throughput rate between two Linux or Unix servers?
Consider the following setup:
Iperf is a tool to measure maximum TCP bandwidth, allowing the tuning of various parameters and UDP characteristics. Iperf reports bandwidth, delay jitter, datagram loss. On server A start iperf as follows:
# iperf -s -B 202.54.1.1
On server B type the same command as follows:
# iperf -c 202.54.1.1 -d -t 60 -i 10
Sample outputs:
Fig.04: iperf client in action
Recommended readings
And there you have it. We just test Internet connection speed from SSH command or ssh based session or just old good terminal from your Linux or Unix desktop. See the following man pages for information:
man lftp
man wget
man iperf
🐧 Get the latest tutorials on Linux, Open Source & DevOps via
Источник
Проверка скорости интернета Linux
Скорость подключения к интернету — это очень важный параметр работы сети. При подключении к интернету в офисе или дома может понадобиться проверить скорость интернета linux. Обычно, для этого достаточно открыть какой-либо сайт и скачать файл. Но это не единственный способ.
Проверка скорости интернета Linux может быть выполнена с помощью специального сервиса — speedtest.net. Вы можете открыть сайт проекта в браузере, программа определит ближайший к вам сервер, а затем покажет скорость доступа к этому серверу. Для работы сервиса используется флеш-плеер. Но не это тема нашей статьи. Сегодня мы рассмотрим как узнать скорость сети linux через терминал.
Проверка скорости интернета через терминал
Конечно, вы могли бы скачать файл с помощью wget и таким образом узнать скорость интернета. Но тогда на скорость загрузки будет влиять не только пропускная способность вашей сети, но и скорость отдачи сервера. Поэтому лучше использовать сервис speedtest, это, возможно, даже из командной строки.
speedtest-cli — это скрипт, написанный на Python, который позволяет измерить скорость интернета linux в двух направлениях. Вы можете проверять скорость сети на определенном расстоянии или для конкретных серверов, а также делиться своим результатом в интернете.
Установка SpeedTest-cli
Утилита может быть установлена двумя способами. Или из репозитория пакетов Python, либо прямо с Github, мы рассмотрим оба способа. Начнем с более сложного.
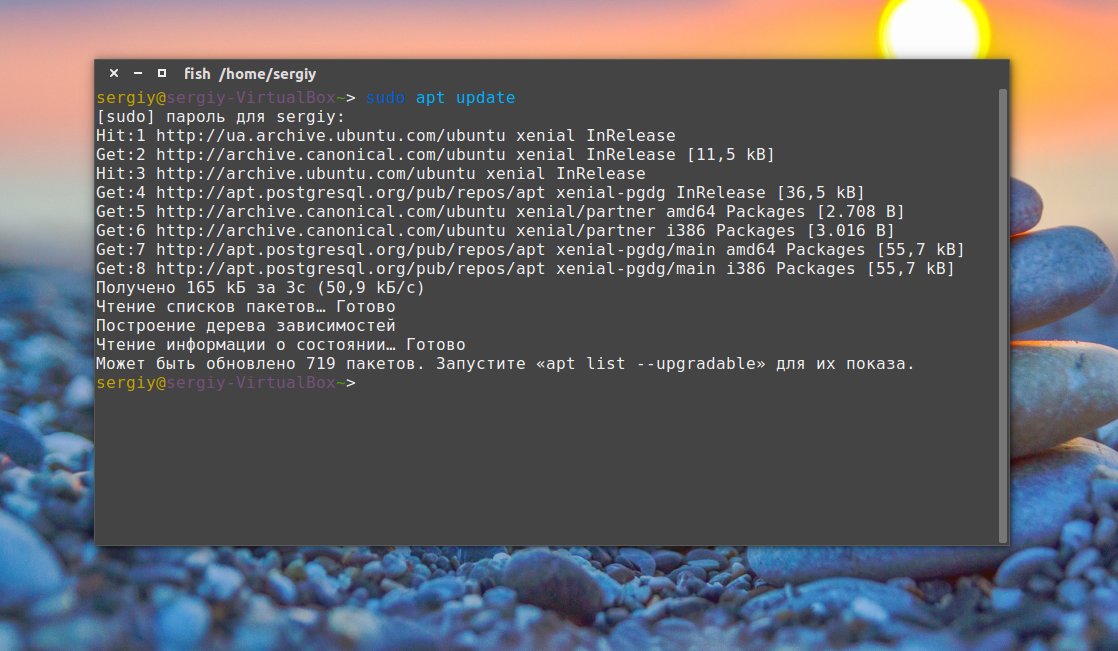
Сначала обновите систему до самой последней версии:
sudo apt update
Установите скрипт установки пакетов python:
sudo apt install python-pip

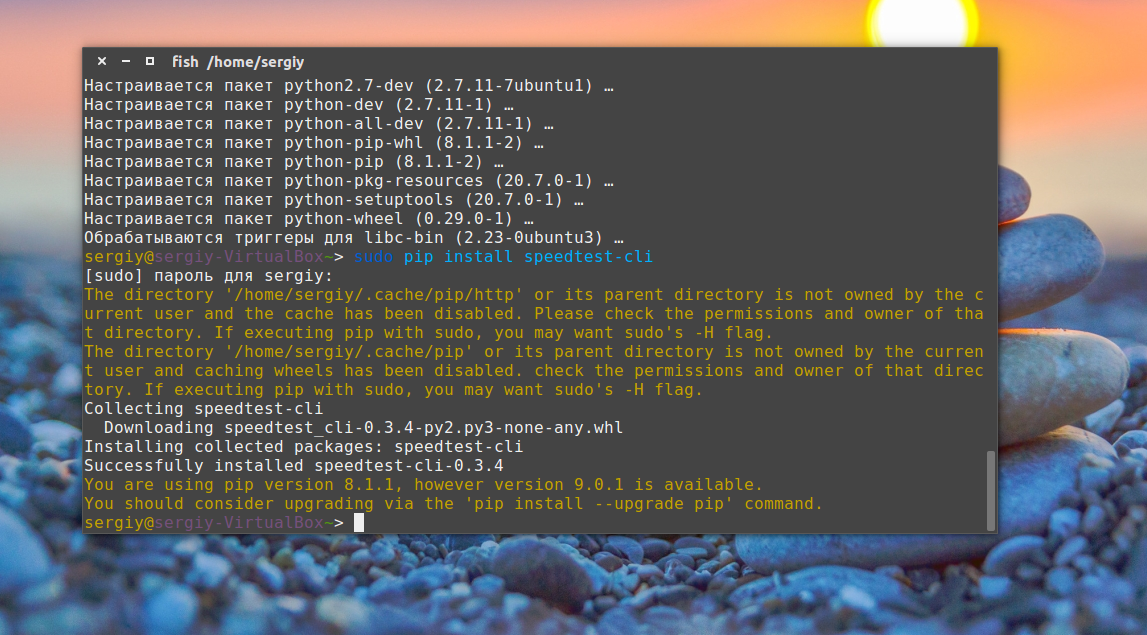
Затем установите саму программу speedtest-cli с помощью pip:
sudo pip install speedtest-cli
Второй способ еще проще, сначала скачайте файл программы с GitHub и дайте ему права на выполнение:
wget -O speedtest-cli https://raw.github.com/sivel/speedtest-cli/master/speedtest_cli.py
$ chmod +x speedtest-cli
Вы можете скопировать скрипт в папку /bin или выполнять его прямо из этой папки.
Проверка скорости интернет
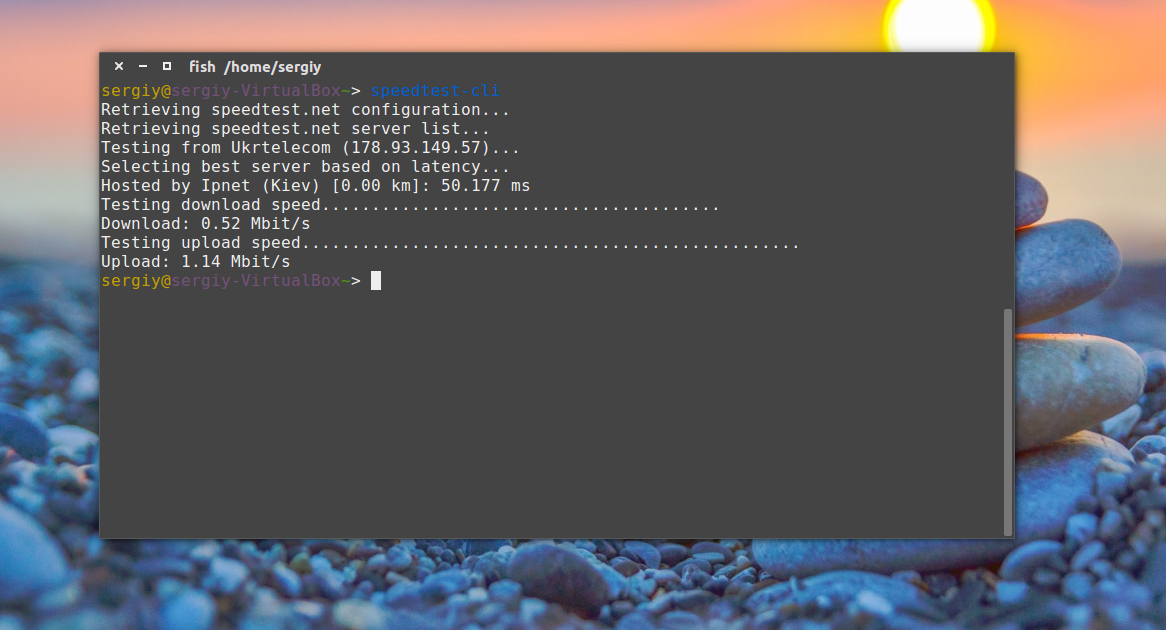
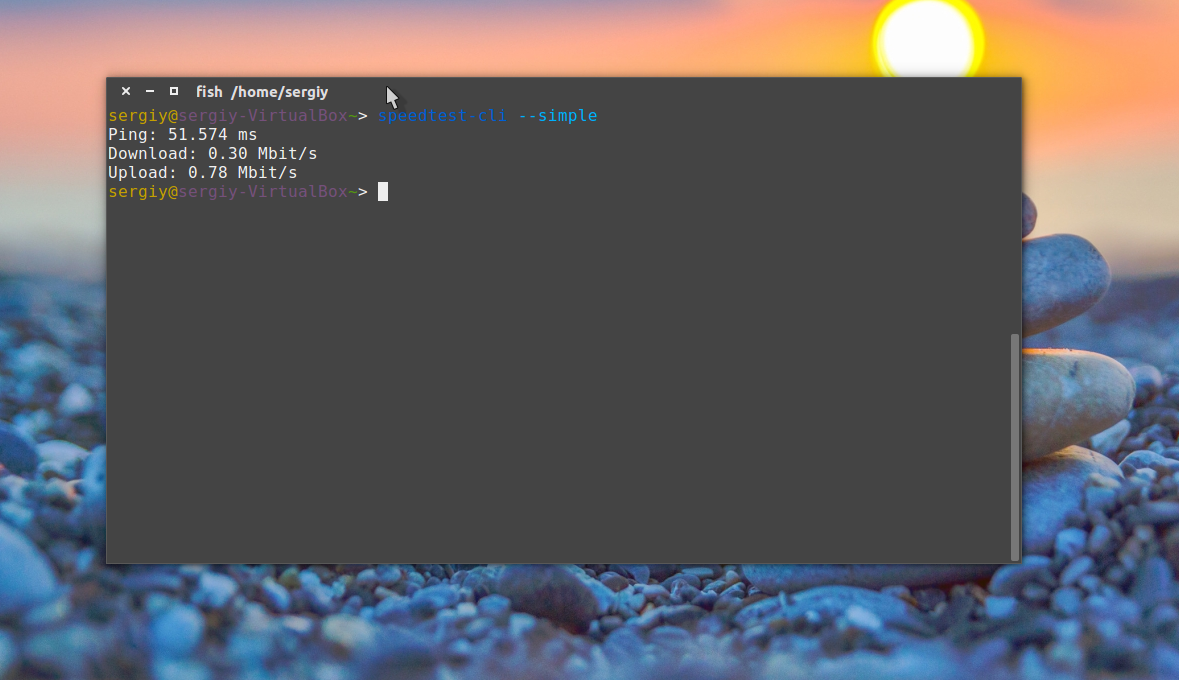
Чтобы проверить скорость интернет linux достаточно запустить скрипт без параметров:
Вы можете посмотреть результат проверки в байтах, а не в битах:

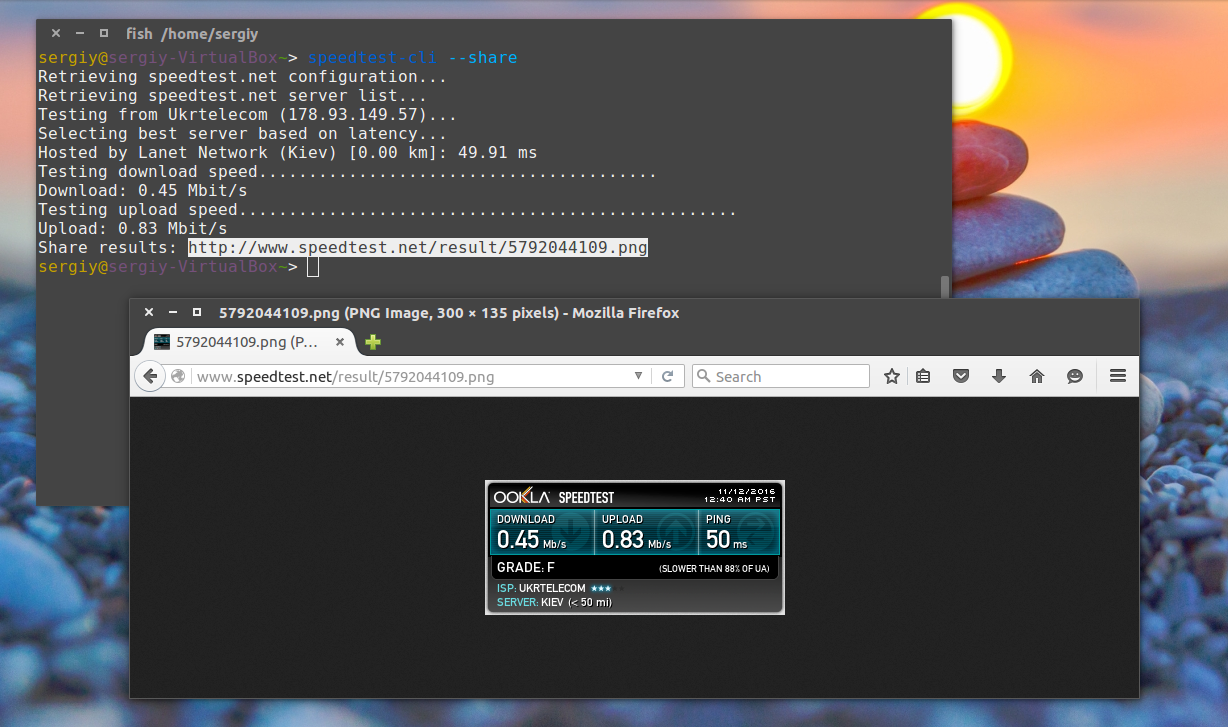
Если хотите поделиться результатом с друзьями, можно попросить программу создать изображение:
Для получения информации только о ping, скорости загрузки и отдачи:
Посмотреть список доступных серверов можно с помощью параметра —list:
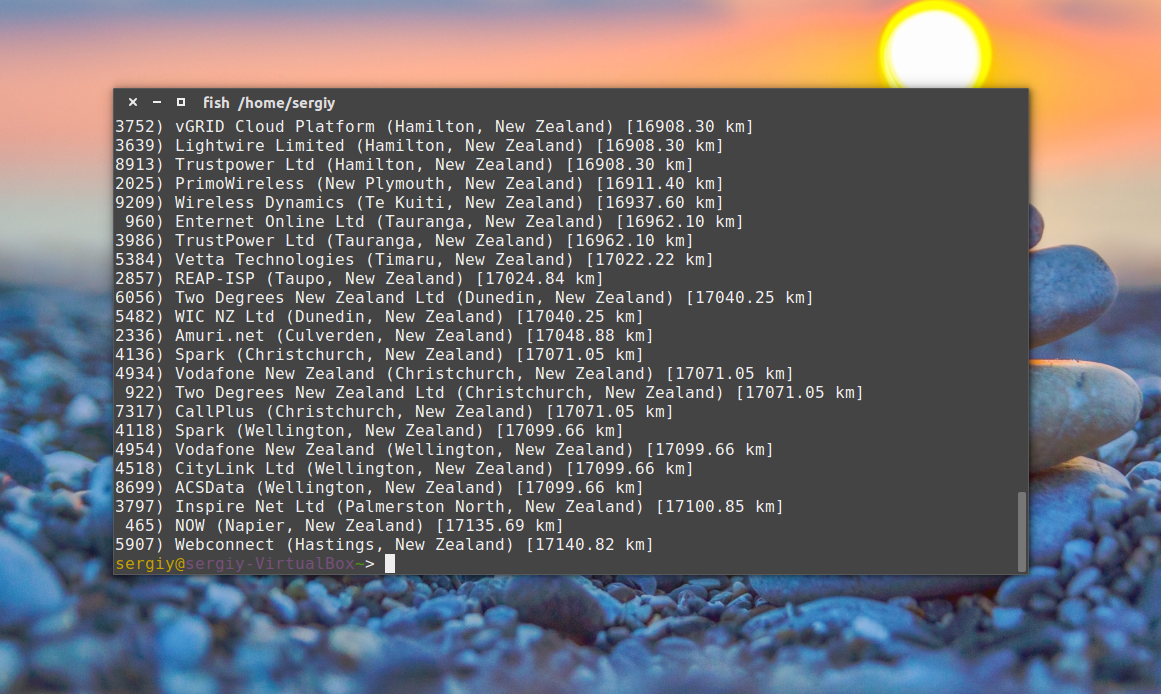
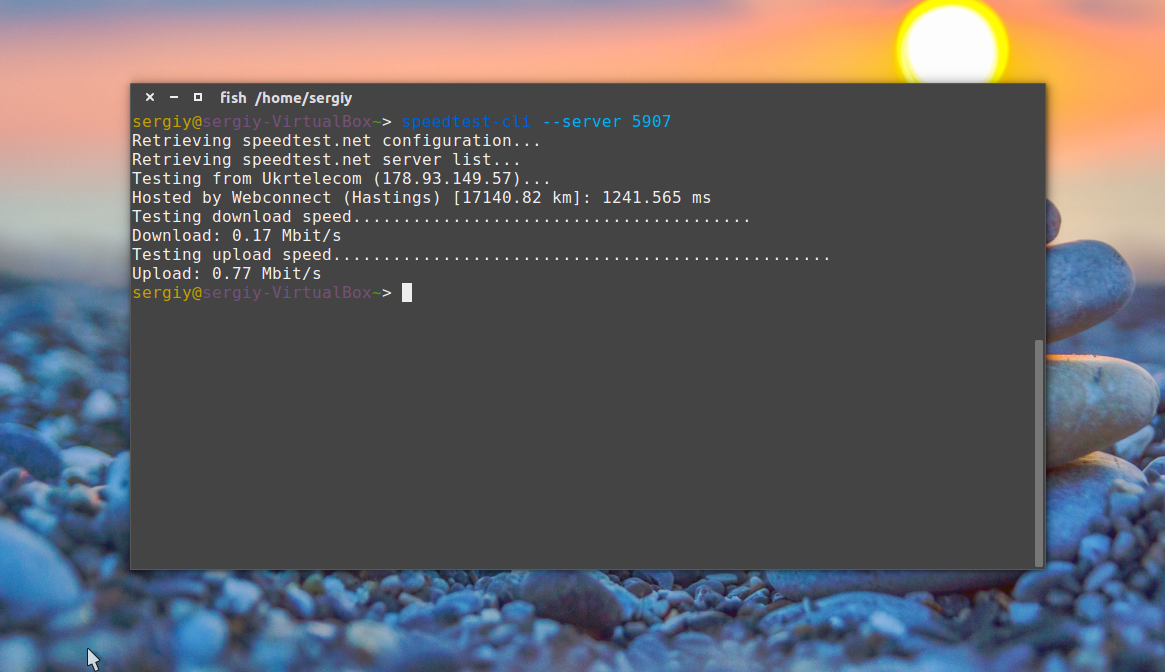
Теперь вы можете определить скорость соединения с нужным сервером, для этого достаточно указать ид сервера:
speedtest-cli —server 5907
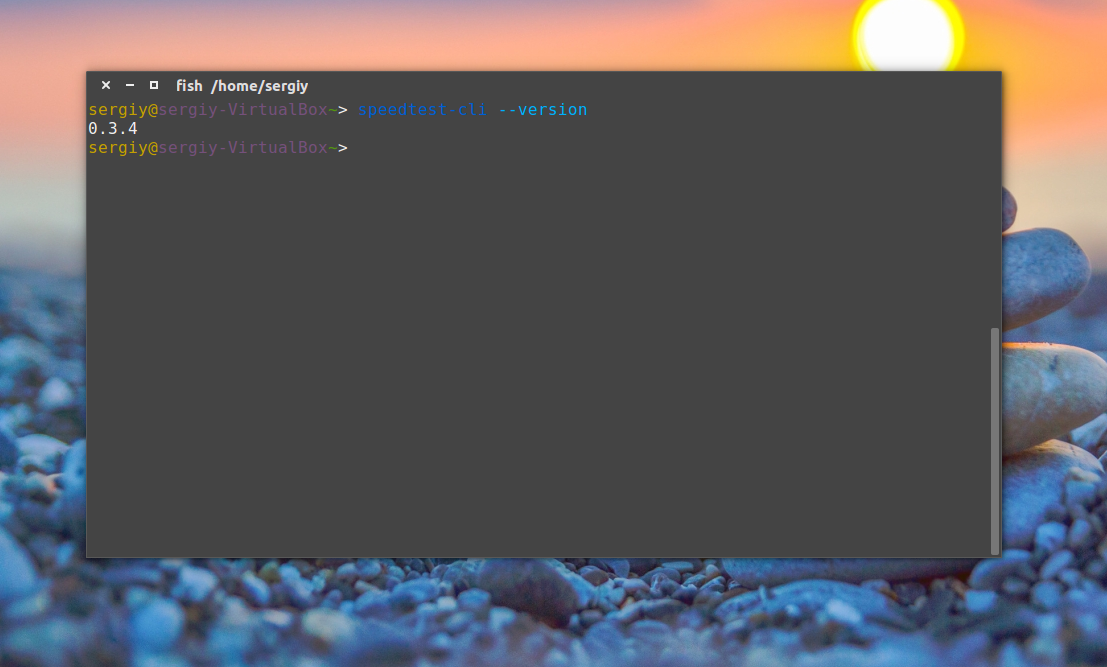
Чтобы вывести версию утилиты выполните:
А для просмотра всех возможных опций программы:
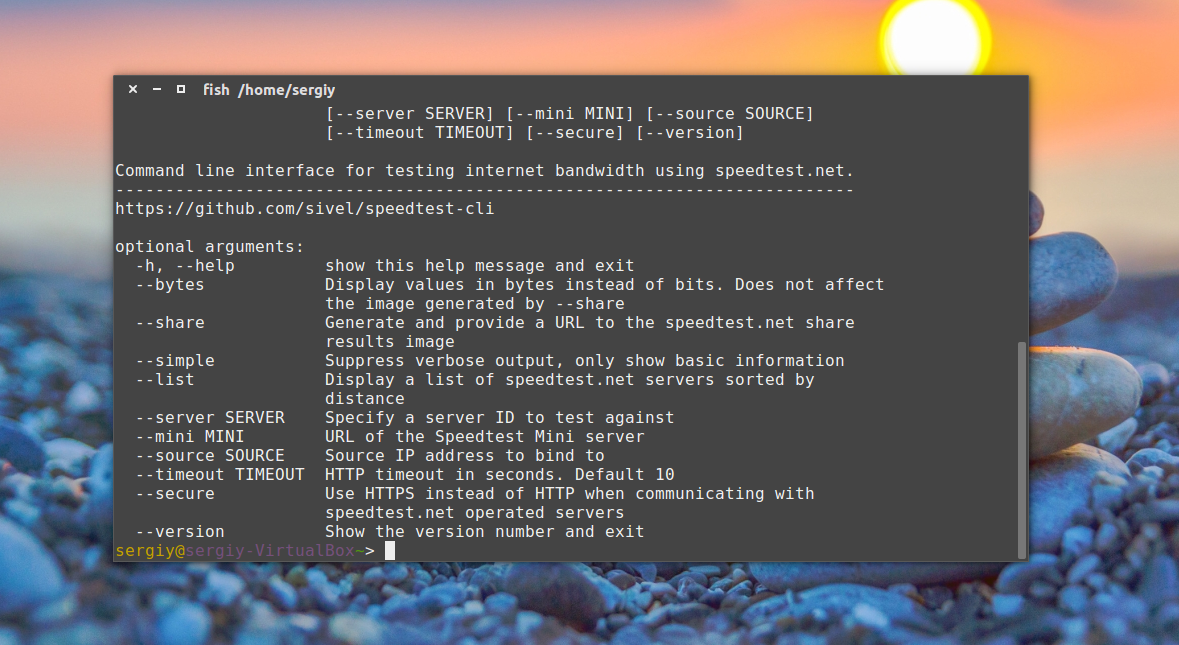
Выводы
Утилита speedtest-cli очень проста в использовании и в то же время может оказаться очень полезной. Во всяком случае теперь вы знаете как выполняется проверка скорости интернета linux. Если у вас остались вопросы, спрашивайте в комментариях!
Источник
Monitoring Network Bandwidth and Speed in Linux
Last updated October 7, 2020 By Sergiu 25 Comments
Brief: In this article, we list some open source utilities to monitor the network traffic, bandwidth and internet speed in Linux.
Monitoring internet speed can be a crucial step in understanding your connection and it can help you find possible problems. It will also help you troubleshoot any connectivity problems you might have and find possible bottlenecks.
Tools for Monitoring Internet traffic and speed in Linux

I am going to present you different tools to help monitor your internet speed. I have provided installation instructions for Ubuntu/Debian based distributions but the tools can be easily installed in other distributions.
It doesn’t matter if you are a beginner that wants a simple, working solution, a guru looking to get as much information about your network as possible, if you prefer GUI or CLI programs, I’ll help you find the right tool for the job.
1. NetSpeed – GNOME shell extension for desktop users
NetSpeed is a GNOME shell extension that displays the sum of your download and upload speed in your gnome panel. Clicking on it displays the separate values in a drop-down.
It is applicable only if you use the GNOME desktop environment. If you are not familiar already, read this tutorial to know how to use GNOME Shell extensions.
2. Fast – Netflix’s Internet speed tester
Fast is an open-source CLI utility powered by Netflix fast.com service. Although the code for the website itself isn’t open-source, Netflix have explained how it works here. Fast is the perfect tool for someone that just wants to check the download speed in a very simple manner.
You can install it using snap. Make sure to enable Snap support in your distribution and then run the following command:
Once installed, you can run the utility by typing in:
Once again, after a few seconds, you’ll get your result:
3. speedtest-cli: check upload and download speed
speedtest-cli is an open-source command line interface for testing internet bandwidth using speedtest.net (which, itself, isn’t open-source). It is a quick little tool for checking your download and upload speed.
speedtest-cli is available in most distros and can easily be installed using the package manager. On Debian/Ubuntu, you can use the following command:
Once installed, simply run:
After a few seconds, you’ll get information about which server was used for checking your connection, as well as the details concerning your internet speed. Use man speedtest to learn about additional options (such as not performing download test with –no-download).
4. NetHogs – Check bandwidth utilization per program basis
NetHogs is a simple open-source utility that runs in the terminal. Instead of breaking the traffic down per protocol or per subnet, it groups bandwith by process. It is very helpful for finding the PID of a hanging program or just for seeing what is eating your bandwidth. It relies mostly on /proc, so most features are Linux-only.
Luckily, NetHogs is included in many distros. That means you can install and remove it using your normal package manager. On Debian/Ubuntu, you can use this:
To run it, simply use:
Conveniently, you can specify devices after the command (such as sudo nethogs eth0). You also have additional parameters, such as choosing a delay for the refresh rate (-d), version info (-V), tracemode (-t) and a few others which you can check out in the man pages (man nethogs).
5. nload – Real-Time internet traffic monitoring
nload is an open-source console application that allows you to monitor network traffic and bandwidth usage in real time. It visualizes incoming and outgoing traffic using graphs, while also providing additional information (total amount of transferred data, min/max network usage etc.). It’s a simple to use tool that can be really helpful at times.
You can install it in Debian and Ubuntu based distributions using the command:
To run it, simpy type in:
You can control its various aspects from the manpage (man nload).
6. CBM – Color Bandwidth Meter
CBM is a very simple tool that displays (in color) network traffic on all connected devices, in a very stripped-down manner.
CBM is a slightly older piece of software that can be found in most distro repositories. This makes installing and removing it using the package manager very easy.
Using CBM is just as easy as installing it. You run:
The commands are displayed in the bottom of your terminal so that you can control them easily.
7. iPerf – Test network performance between two hosts
iPerf is tool used for network performance measurement and tuning and can produce standardized performance measurements for any network. It has client and server functionality, and can create data streams to measure bandwidth, loss and other parameters between the two ends in one or both directions. There are two implementations: the original iPerf (iPerf2) and a non-backwards compatible implementation iPerf3.
The easiest way to install (or remove) iPerf or iPerf3 is using the package manager. For example, in Ubuntu:
Then you can just run the one you want:
Note: For all further examples, if you are using iPerf3 simply replace all instances of iperf with iperf3.
However, doing so will only display your options. To run iPerf, you need a minimum of 2 machines: one to act as a client and one to act as a server. For the server, you’ll use:
This will open the machine for listening on port 5001. To connect to another machine and run a test, you’ll use:
Where server_address is, of course, the address of the server you are trying to connect to. This can be either an IP address, or something like ping.online.net. The iPerf3 team has a list of servers to use for testing purposes.
iPerf is a widely used tool that has a lot of specific uses and many options. I won’t go into those, since it is beyond the scope of this article. However, you can check out the manpage (man iperf / man iperf3) or the documentation.
8. vnStat – Network traffic logger
vnStat is an open-source console-based network traffic monitor that uses the network interface statistics provided by the kernel as information source for its periodic logs. This means that vnStat won’t actually be sniffing any traffic and also ensures light CPU usage. It can be run without root permissions.
As with many other networking tools, vnStat is include in most distribution repositories. This means you can very easily install (and remove) it using your package manager.
To use it in the most basic way, simply enter:
vnStat offers you more advanced features too, such as the ability to use databases (importing them or exporting output to a file). You can check these out in the manpage (man vnstat). More examples can be found on the official website.
9. iftop – The ‘top’ of Network Usage
iftop is a free open-source software command-line system monitor tool that produces a frequently updated list of network connections between pairs of hosts. The connections can be ordered by different parameters, but they ordered by default by bandwidth usage, with only the “top” bandwidth consumers shown.
Wrapping Up
In this article I showed you multiple tools you can use to monitor different statistics concerning the performance of your network. There is a tool that is right for everyone, and you can pick and choose the one that fits your specific needs. I hope this article was a good introduction to the world of internet monitoring.
What is your favorite tool and how are you using it? Let us know in the comments section!
Like what you read? Please share it with others.
Источник


