- How To Configure And Test 5.1 Surround Sound On Windows 10
- Update Sound Card Drivers
- Configuring 5.1 Surround Sound In Windows 10
- Testing 5.1 Surround Sound In Windows 10
- Welcome to Audio Check
- Test your audio equipment, online
- Navigation
- Quick Sound Check and Browser Compatibility Test
- What’s new?
- Warning
- Help Me Help You!
- Fix sound problems in Windows 10
How To Configure And Test 5.1 Surround Sound On Windows 10
Here’s a simple guide on how to configure and test a 5.1 surround sound configuration on Windows 10. Enjoy your surround sound today!

If you’ve lucked out and are among the fortunate few with a 5.1 surround sound setup, then Windows 10 is fully geared to make use of its limitless audio and atmospheric possibilities. The question is, how does one go about configuring 5.1 surround sound in the OS?
As is probably the most maligned aspect of Microsoft’s flagship product, the process is somewhat hidden away safely, but relatively straight forward. As always, in our guide, we provide all the steps necessary to set it up, test it, and have everything working smoothly in no time.
It is worth noting that real 5.1 surround sound has a few prerequisites, chiefly that the PC has to be 5.1 enabled through its sound card or inbuilt motherboard audio outputs.
From here on, we’ll assume that because you’ve spent hard-earned cash on a 5.1 surround sound system, you’ve done your research and have a sound card cable of 5.1 output.
Table of Contents Show
Update Sound Card Drivers
As a precautionary measure, we always recommend updating the computer’s sound drivers before configuring 5.1 surround sound in Windows 10.
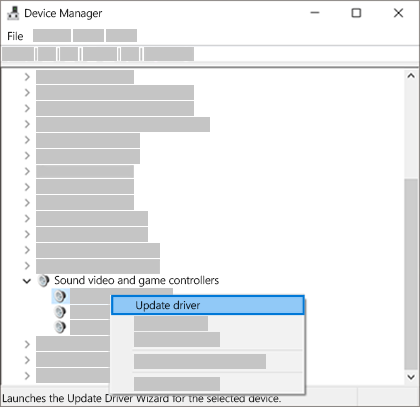
- Right-click on the Windows Start menu icon in the bottom left of the desktop and then ‘’Device Manager’’ in the top portion of the listed options.

- In Device Manager, expand the ‘’Sound, video, and game controllers’’ option.
- Locate and click on the sound card connected to the 5.1 surround sound speakers then select ‘’Properties’’ from the contextual menu that pops up.
- Navigate to the ‘’Driver’’ tab.

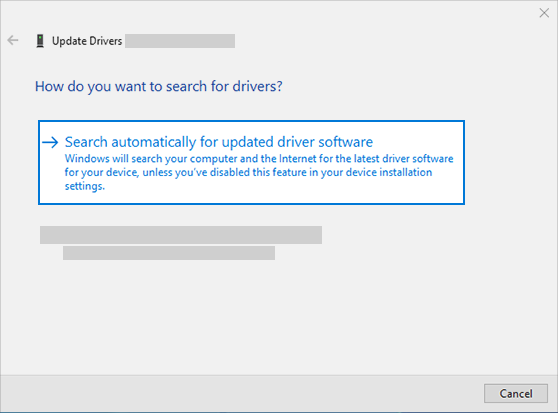
- Click ‘’Update Driver’’, then ‘’Search automatically for updated driver software’’.
- Windows will search for the latest driver and install it if it has yet to be uninstalled.
- Alternatively, you can visit the sound card manufacturer’s website then navigate to the support page and download the latest drivers.
- Once downloaded, run the executable file and follow the installation steps.
- A restart is often required.
Configuring 5.1 Surround Sound In Windows 10
With the sound card refurbished withe latest driver, we can set Windows to run 5.1 surround sound.
- To begin, right-click on the speaker icon in the Windows system tray and click on ‘’Sounds’’.
- In the Sounds window, navigate to the ‘’Playback’’ tab.

- Click on the 5.1 surround sound enabled sound card among the list of audio devices and then hit the ‘’Set Default’’ button just below.
- Click ‘’Configure’’ to the left of the Set Default button.

- When the Speaker Setup window opens, choose 5.1 Surround from the ”Audio Channels” list on the left.
- Click ”Next”.
- On the ‘’Customize your configuration’’ window that follows, tick all the boxes next to the ”Optional speakers” if you have a full array of speakers (subwoofer, center, side pair, and rear pair) or select them according to your specific setup.
- Click ‘’Next’’.

- On the following ‘’Select full-range speakers’’, tick the box next to the speakers in your setup that have full dynamic range capabilities.
- Click ‘’Next’’, and you’ll land on the ‘’Configuration complete’’ screen.

- Click ‘’Finish’’ to apply the new settings.
Testing 5.1 Surround Sound In Windows 10
Now that we’ve set up the 5.1 surround setup in Windows 10, we need to check whether our settings work. Luckily Windows 10 has its very own testing protocol, which simplifies matters significantly. Here’s how to use Windows 10’s inbuilt configuration testing feature.
- Open the Playback tab in the ‘’Sound’’ properties window again. If in doubt, refer to steps 1 and 2 in the section above.
- Select the 5.1 enabled sound card and hit ‘’Configure’’.
- Note the ‘’Test’’ button below the list of ‘’Audio Channels’’.

- Make sure the speakers are on, and the volume is sufficiently turned up then hit ‘’Test’’.
- Windows 10 will push sounds through the speakers one at a time. You can refer to the visual diagram on the right of the Speaker Setup window to know which speaker is being tested.
- Listen attentively and make sure audio is coming out of each of the speakers.
- If everything sounds good, click ‘’Cancel’’ to exit the Speaker setup window.
- Close down the ‘’Sound’’ window.
- Open up an audio player of your choice (iTunes, Spotify, Winamp, etc.) or load up YouTube other browser-based media platform and play a song/video/movie.
- Make sure the audio is coming out of all the speakers.
Finally, we want to test the setup with a snippet of actual 5.1 designed audio.

- Load up this YouTube video.
- Hit play and allow it to run its course, listening out as the sounds transition from speaker to speaker, and making sure everything is working swimmingly.
That’s pretty much all there is to configuring and testing 5.1 surround sound in Windows 10. From here you can enjoy movies in all the glory of 5.1 surround sound or partake in the latest 5.1 enabled AAA gaming titles knowing you won’t miss a sound.
Welcome to Audio Check
Test your audio equipment, online
AudioCheck gives you access to an extensive collection of sound tests, playable online and downloadable in high-quality for patrons. The audio material provided here will help you assess the audio equipment connected to your computer. Using this website, you will be able to:
- Test your hearing, speakers, headphones, digital-to-analog converters. and more!
- Design your own sound tests using our high quality waveform generators.
- Download our sound files to your favorite audio player, and use your player as a portable audio test device.
These tests are for personal and educational use only. No commercial use is allowed without permission.
Navigation
This site is organized into four main sections, accessed from the top menu.
- Sound Tests — Our themed sound tests, playable directly from your web browser.
- Test Tones — Individual audio test tones, for experts.
- Tone Generator — Generate custom audio test tones on the fly, download them as high quality .wav files.
- Blind Tests — Critical listening tests and audio training files for sound and studio engineers!
Quick Sound Check and Browser Compatibility Test
To confirm your browser compatibility with the html5 audio standard used on this site, click the play button and listen: Do you hear the associated voiceover? If you are a patron, does clicking the download button trigger a high quality .wav file download?
What’s new?
Stay informed through our Facebook Page or follow @audiosampling on Twitter.
Latest pages added:
- MATT as a Listening Test: using MATT and. your ears NEW
- THD Test Tones — the Extended Set: more distortion. tests! NEW
- THD Test Tones: how little distortion can you hear? NEW
- How good is your room? MATT will help you find out!
- Timing Blind Test: when shortest is the best!
- The whole site has been redesigned. Enjoy the new (responsive) look!
- The 16-bit v/s 8-bit Blind Test, Part 2: featuring Neil Young 😉
- Perceptual Sine Sweep: the sweep, sweet to your ears
- The non-linearities of the Human Ear: you think your ear is perfect, right?
- The 16-bit v/s 8-bit Blind Test: can you hear a difference?
- Dynamic Range, Dithering and Noise Shaping: when noise becomes your best friend
- The Subwoofer Kick Test: give your subwoofer a kick (or two. or six!)
- Subwoofer Midrange Frequency Test: use your sub only for what your sub is meant to!
- Low Frequency Sound Localization Test: the reason why you don’t want to hear where your basses come from.
- Stereo Perception and Sound Localization . and the human auditory cues.
- Subwoofer Harmonic Distortion Test: how good is your bass extension?
Most popular pages:
- Headphone (and Earbud) Benchmarking Test Files: the ultimate headphone sound test. UPDATED
- High Frequency Sound Check: test the upper limit of your hearing.
- Low Frequency Sound Check: evaluate the lowest bound of your audio equipment.
Warning
Loud sounds can cause equipment/hearing damage with even a single, brief exposure. Always turn your audio system level down to a reasonable level, before playing our sound files.
Help Me Help You!
Is AudioCheck free? Not for me. Your support keeps this site running . Any donation will be rewarded with • uncompressed .wav files downloads for every test • increased durations and sample rates up to 192 kHz in the Tone Gen section • a feedback/suggestion box on every page
 ← EU residents click here ← EU residents click here |
| Proceed to Secure Payment |
 |
If you already are a patron, please log in.
Fix sound problems in Windows 10
If you’re having audio problems, the following suggestions might help. The tips are listed in order, so start with the first one, see if that helps, and then continue to the next one if it doesn’t.
If multiple audio output devices are available, check that you have the appropriate one selected. Here’s how:
Select the Speakers icon on the taskbar.
Next, select the arrow to open a list of audio devices connected to your computer.
Check that your audio is playing to the audio device you prefer, such as a speaker or headphones.
If this doesn’t help, continue to the next tip.
The audio troubleshooter might be able to fix audio problems automatically.
To run the troubleshooter
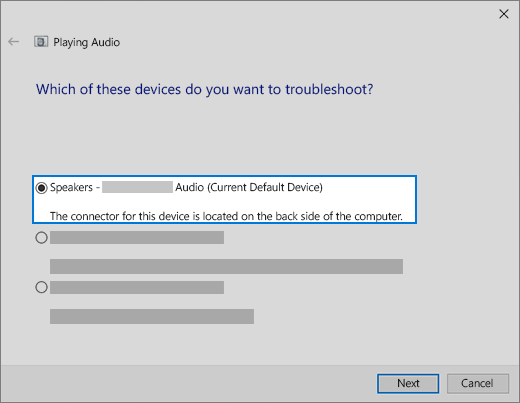
In the search box on the taskbar, type audio troubleshooter, select Fix and find problems with playing sound from the results, then select Next.
Select the device you want to troubleshoot and then continue through the troubleshooter.
You can also launch the troubleshooter from audio Settings. Select Start > Settings > System > Sound > Troubleshoot.
If running the troubleshooter doesn’t help, continue to the next tip.
To check for updates
Select Start > Settings > Update & Security > Windows Update > Check for updates.
Do one of the following:
If the status says «You’re up to date, go to the next tip.
If the status says «Updates are available,» select Install now.
Select the updates you want to install, then select Install.
Restart your PC and see if your sound is working properly.
If that didn’t solve your problem, continue to the next tip.
Try these steps
Check your speaker and headphone connections for loose cords or cables. Make sure all cords and cables are plugged in.
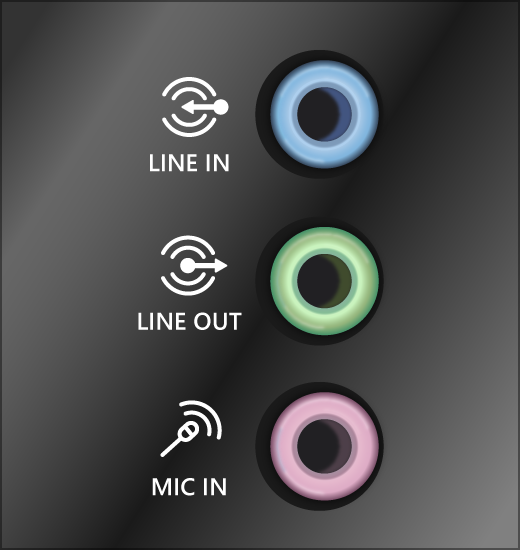
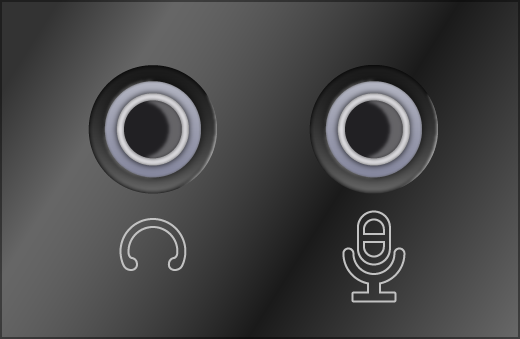
If you have multiple 5mm jacks to plug into, especially on a surround sound system, make sure all cords and cables are plugged into the correct jack.
If it’s not clear which jack goes with which cord, consult your hardware manufacturer, or try the most obvious outputs one at a time and see if they work.
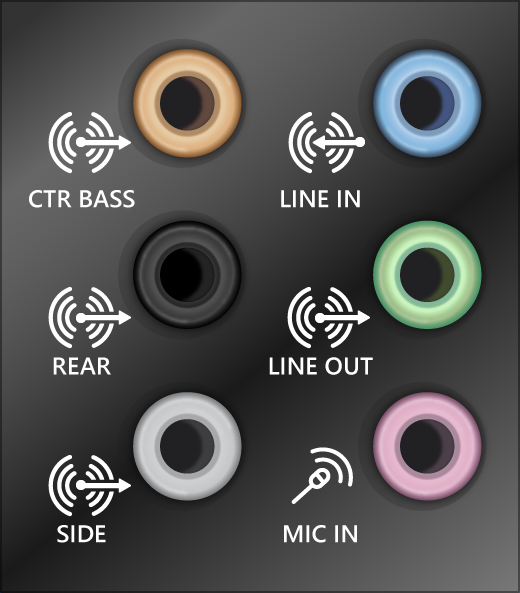
Note: Some systems use a green jack for output and pink for mic input and others will be labeled «headphone» or «microphone.»
Make sure the power is turned on and check the volume level.
Make sure the mute setting is not turned on, and try turning up all the volume controls.
Remember some speakers and apps have their own volume controls. Be sure to check them all.
Try connecting your speaker and headphones to a different USB port.
It’s possible that your speakers won’t work when your headphones are plugged in. Unplug your headphones and see if that helps.
If your cables and volume are OK, see the next sections for additional troubleshooting.
Check to make sure your audio devices aren’t muted and haven’t been disabled.
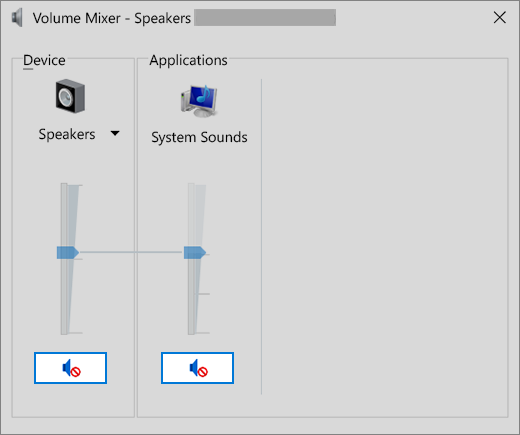
Right-click the Speakers icon on the taskbar, and then select Open Volume mixer.
You’ll see a set of volume controls for your devices. Make sure none of them are muted. If any of them are muted, you’ll see a red circle with a line through it next to the volume control. In that case, select the volume control to unmute.
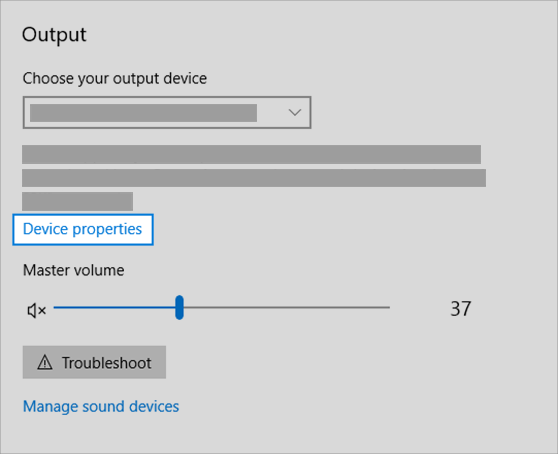
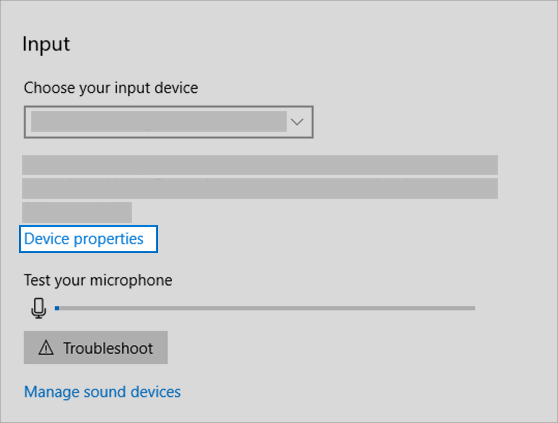
Check your device properties to make sure that your devices have not been disabled by mistake. Select Start > Settings > System > Sound .
Select your audio device, and then select Device properties. Be sure to select Device properties for both the output and input devices.
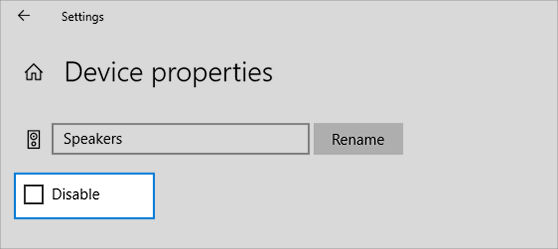
Make sure the Disable check box is cleared for the output and input devices.
If that didn’t solve your problem, continue to the next tip.
Hardware problems can be caused by outdated or malfunctioning drivers. Make sure your audio driver is up to date and update it if needed. If that doesn’t work, try uninstalling the audio driver (it will reinstall automatically). If that doesn’t work, try using the generic audio driver that comes with Windows. If you’re having audio issues after installing updates, try rolling back your audio driver.
To update your audio driver automatically
In the search box on the taskbar, type device manager, then select it from the results.
Select the arrow next to Sound, video and game controllers to expand it.
Right-click the listing for your sound card or audio device, such as headphones or speakers, select Update driver, then select Search automatically for updated driver software. Follow the instructions to complete the update.
If Windows doesn’t find a new driver, look for one on the device manufacturer’s website and follow those instructions. If that doesn’t work, try uninstalling your audio driver.
To uninstall your audio driver
In the search box on the taskbar, type device manager, then select it from the results.
Select the arrow next to Sound, video and game controllers to expand it.
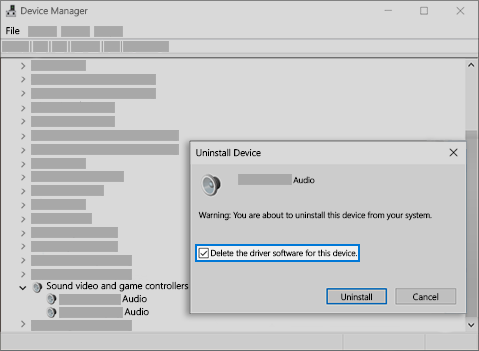
Right-click the listing for your sound card or audio device, select Uninstall device, select the Delete the driver software for this device check box, and then select Uninstall.
Restart your PC.
Note: Be sure to save documents and any other current work before you restart.
This restart will automatically prompt your PC to reinstall your audio driver.
To restart, select Start > Power > Restart .
If those options didn’t work, try using the generic audio driver that comes with Windows.
To use the generic audio driver that comes with Windows
In the search box on the taskbar, type device manager, then select it from the results.
Select the arrow next to Sound, video and game controllers to expand it.
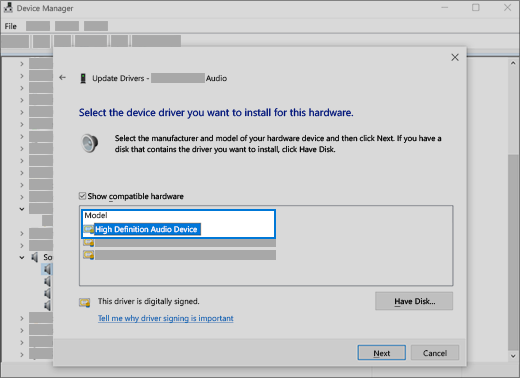
Right-click the listing for your sound card or audio device, then select Update driver > Browse my computer for driver software > Let me pick from a list of device drivers on my computer.
Select the audio device whose driver you want to update, select Next, and then follow the instructions to install it.
If these steps didn’t solve your audio issue, visit your device manufacturer’s website and install the most recent audio/sound drivers for your device. Following is an example of a driver download page for a sound device manufacturer.
If you have audio issues after installing updates
If your audio was working before you ran Windows Update and now isn’t working, try rolling back your audio driver.
To roll back your audio driver
In the search box on the taskbar, type device manager, then select it from the results.
Select the arrow next to Sound, video and game controllers to expand it.
Right-click the listing for your sound card or audio device, then select Properties.
Select the Driver tab, then select Roll Back Driver.
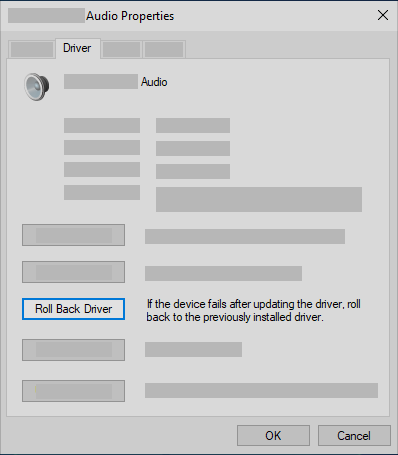
Read and follow the instructions and then select Yes if you want to roll back your audio driver.
If rolling back your audio driver didn’t work or wasn’t an option, you can try to restore your PC from a system restore point.
Restore your PC from a system restore point
When Microsoft installs updates on your system, we create a system restore point in case problems arise. Try restoring from that point and see if that fixes your sound problems. For more info, see «Restore from a system restore point» in Recovery options in Windows 10.
If you’re connecting to an audio device—such as headphones or speakers—using USB or HDMI, you might need to set that device as the default audio device. If you’re using an external monitor that doesn’t have built-in speakers, make sure that the monitor isn’t already selected as your default output device. if it is, you won’t have any audio. You can check that when you set your default output audio device. Here’s how:
In the search box on the taskbar, type control panel, then select it from the results.
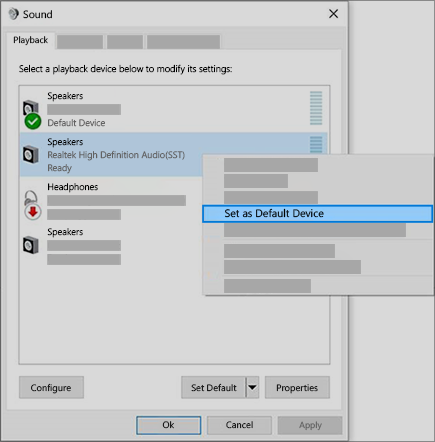
Select Hardware and Sound from the Control Panel, and then select Sound.
On the Playback tab, right-click the listing for your audio device, select Set as Default Device, and then select OK.
If setting your audio device as the default device doesn’t help, continue to the next tip for additional troubleshooting.
Sometimes having audio enhancements on can result in audio issues. Disabling them may resolve your issue.
In the search box on the taskbar, type control panel, then select it from the results.
Select Hardware and Sound from the Control Panel, and then select Sound.
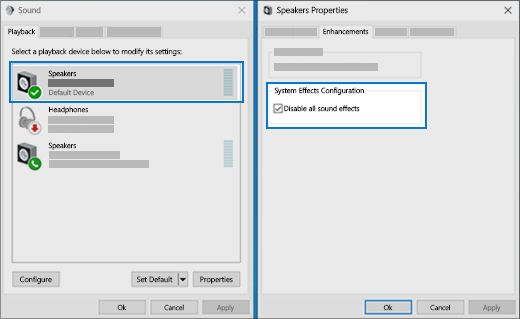
On the Playback tab, right-click the Default Device, and then select Properties.
On the Enhancements tab, select either the Disable all enhancements or the Disable all sound effects check box (depending on which option you see), select OK, and try to play your audio device.
If that doesn’t work, on the Playback tab, select another default device (if you have one), select either the Disable all enhancements or the Disable all sound effects check box (depending on which option you see), select OK, and try to play audio again. Do this for each default device.
If turning off audio enhancements doesn’t help, see the next sections for additional troubleshooting.
In the search box on the taskbar, type services, then select it from the results.
Select each of the following services, right-click, and then select Restart:
Windows Audio Endpoint Builder
Remote Procedure Call (RPC)
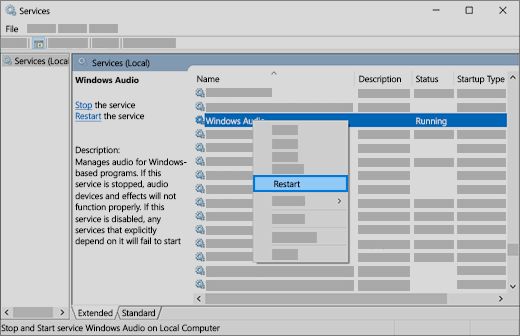
If restarting these services doesn’t resolve your issue, see the next sections for more troubleshooting.
In the search box on the taskbar, type control panel, and then select it from the results.
Select Hardware and Sound from the Control Panel, and then select Sound.
On the Playback tab, right-click (or press and hold) Default Device, and then select Properties.
On the Advanced tab, under Default Format, change the setting, select OK,and then test your audio device. If that doesn’t work, try changing the setting again.
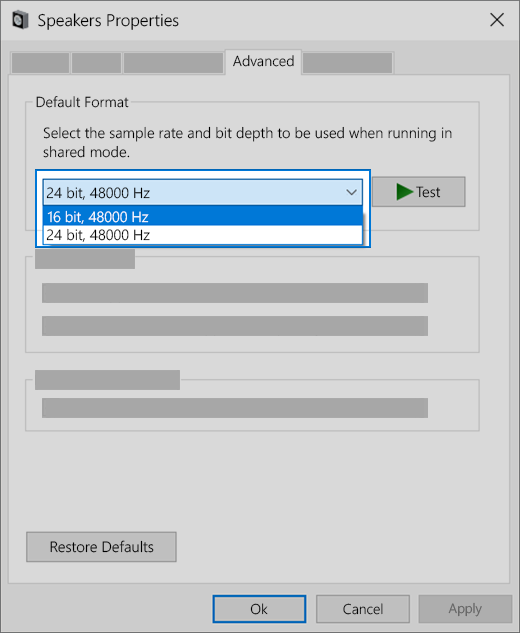
If trying different audio formats doesn’t help, see the next sections for additional troubleshooting.
Many updates require you to restart your device.
To check and see if you have installed updates pending and need to restart
Save your work and close all open applications.
Select Start > Power . If you have installed updates pending, you’ll see options to Update and restart and Update and shut down.
Select one of those restart options to apply the updates
If restarting doesn’t help, see the next section for additional troubleshooting.
Some audio problems might be caused by an issue with the audio system’s IDT High Definition Audio CODEC. This can be fixed with a manual driver update which allows you to choose the sound driver you want to use.
Note: Not all systems will have an IDT High Definition Audio CODEC.
To check and see if you have one, and to manually update the driver
In the search box on the taskbar, type device manager, then select it from the results.
Select the arrow next to Sound, video and game controllers to expand it.
Look for IDT High Definition Audio CODEC. If it’s listed, right-click it and select Update driver, then select Browse my computer for driver software > Let me pick from a list of device drivers on my computer.
You’ll see a list of pre-installed drivers. Select High Definition Audio Device, and then select Next.
1. Select Start > Settings > Privacy , and then select Microphone from the left menu.
Under Allow access to the microphone on this device, select Change. Make sure the toggle is turned On.
If you’re having this issue with a specific app, scroll down to Choose which Microsoft Store apps can access your microphone and make sure that the toggle next to that app is turned On as well.


