- Remote Desktop Session Shadowing Mode in Windows 10
- How to Shadow (Remote Control) a User’s RDP session on RDS Windows Server 2016/2019?
- Shadow Connection Options in the Windows RDP Client (mstsc.exe)
- Using Remote Desktop Shadow from the Windows GUI
- Configuring RDS Shadow Rules on Windows Using GPO
- Shadowing RDP Session with PowerShell
- How-to Allow Non-admin Users to Shadow RDS Sessions?
Remote Desktop Session Shadowing Mode in Windows 10
Besides Remote Assistance, you can use Remote Desktop Session Shadowing to remotely connect to the Windows 10 user’s desktop. Most administrators are using this feature to connect to user sessions on the RDS servers running Windows Server 2012 R2 / Server 2016. However, a few of them know that session shadowing can be used to remotely view and manage a user desktop console session in Windows 10 as well. Let’s see how it works.
As you remember, if you try to connect to a Windows 10 computer using RDP, the session of a user working locally is knocked out (even if you enable multiple concurrent RDP sessions in Windows 10). However, you can connect to a console user session directly without locking it.
Suppose, you want to connect from a server running Windows Server 2012 R2 to the desktop of a user working locally on a workstation running Windows 10 Pro.
In order to establish shadow connection to a user session, you must use the standard RDP tool mstsc.exe. The command looks like this:
Mstsc.exe /shadow: /v:
You can also use one of the following options:
- /prompt – request a user credentials to connect (if not specified, you will be connected with the current user credentials);
- /control – the mode that allows to interact with the user session. If the parameter is not set, you will be connected to a user session in a view mode, i. e. you won’t be able to control a user’s mouse or enter data from the keyboard;
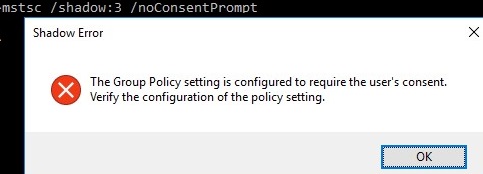
- /noConsentPrompt – allows not to prompt the user for confirmation to connect to a session.
Remote shadowing setting is configured using a Group Policy or by registry modification. You can configure whether you need to request the user confirmation to connect, and whether view or control is allowed in the shadow session.
The policy is located in the GPO editor section Computer Configuration -> Policies -> Administrative Templates -> Windows components -> Remote Desktop Services -> Remote Session Host -> Connections and called Set rules for remote control of Remote Desktop Services user sessions.
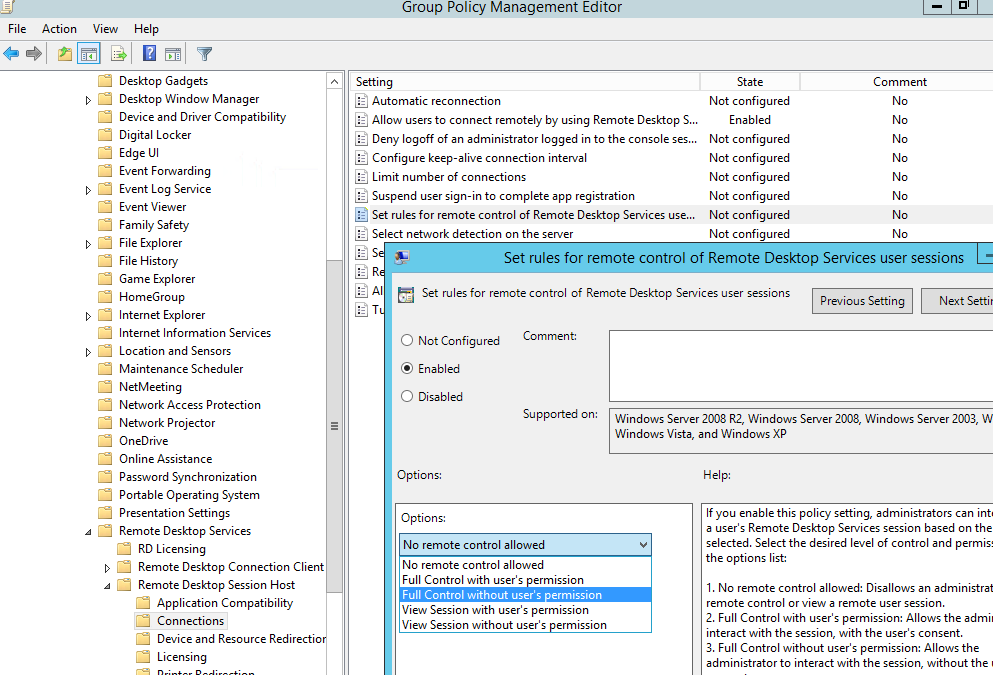
Instead of enabling the policy, you can set the necessary value in the DWORD registry parameter Shadow in the HKLM\SOFTWARE\Policies\Microsoft\Windows NT\Terminal Services registry key. The allowed values are:
0 – disable remote control;
1 — full control with user’s permission;
2 — full control without user’s permission;
3 — view session with user’s permission;
4 — view session without user’s permission.
By default, this registry parameter is not set and the shadow connection is performed in full control mode with user permissions.
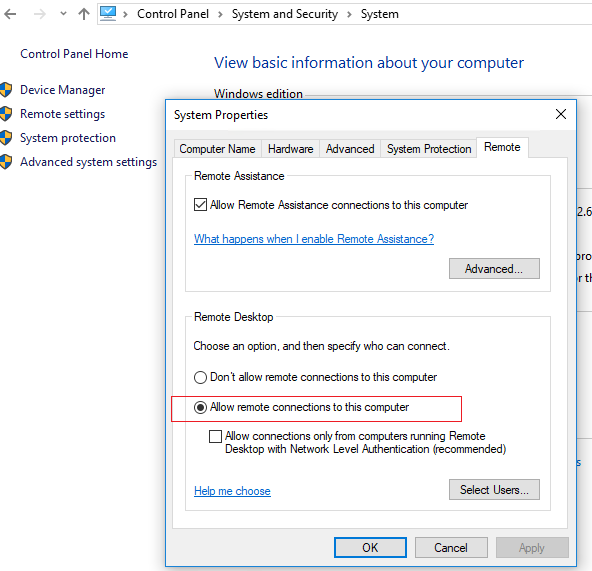
To connect to a user session remotely using shadowing, the connecting account must have the administrator permissions and Remote Desktop (RDP) enabled on the Windows 10 computer (in the System Properties).
Let’s remotely request the list of sessions on Windows 10 workstation using this command:

As you can see, there is one console user session with the on this computer.
Let’s try to remotely connect to the user session 1 via a shadow connection. Run the command:
Mstsc /shadow:1 /v:10.10.11.60

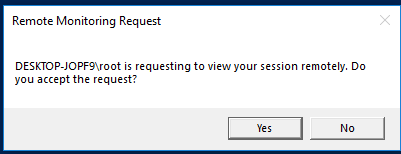
The Windows 10 user will see the following request on the screen:
Remote connection request
PC\admin is requesting to view your session remotely. Do you accept the request?
If the user accepts the connection, you’ll connect to the Windows 10 console session and see the users’ desktop. You will see all user actions, but won’t be able to control this session.
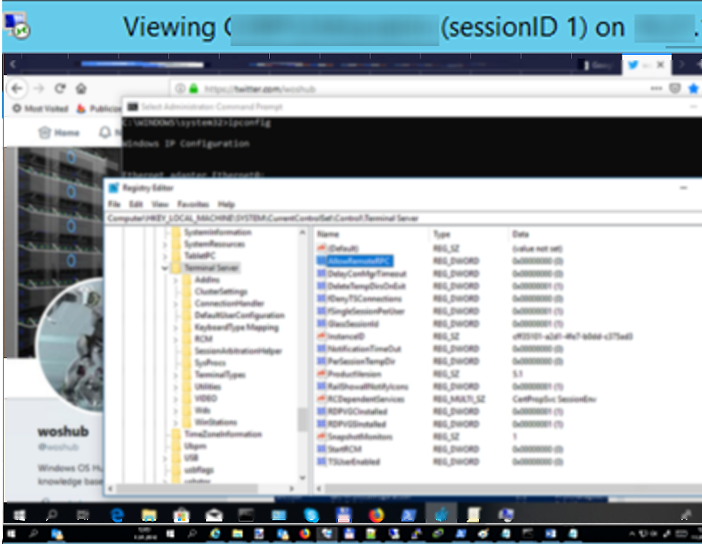
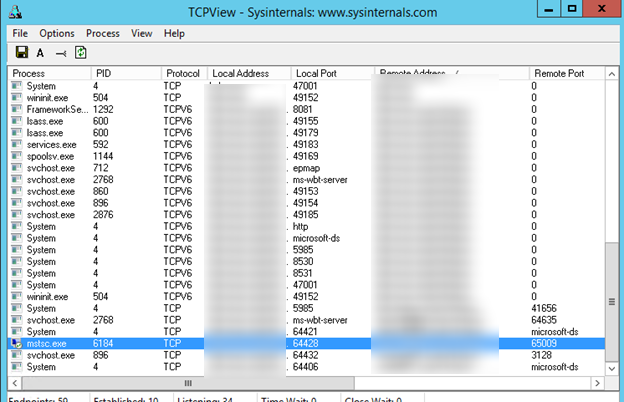
If you check the network connections using TCPView, you can see that it is the RemoteRPC connection (not an RDP one using port TCP/3389). It means that a random TCP port from high RPC range is used for shadow connection. Mstsc.exe establishes the connection on the side of a connecting computer, and rdpsa.exe or rdpsaproxy.exe (depending on the Windows 10 build) processes the connection on the client side. So RemoteRPC must be enabled on the client:
HKLM\SYSTEM\CurrentControlSet\Control\Terminal Server
“AllowRemoteRPC”=dword:00000001
Remote Desktop Shadowing is available in Windows 10 / 8.1 and Windows Server 2012 R2 / 2016 / 2019. To allow shadowing on Windows 7 SP1 (Windows Server 2008 R2) clients, you will need to install the RDP client version 8.1 – KB2830477 (requires installation of the following updates – KB2574819 and KB2857650).
Thus, Remote Desktop Shadowing can be used as the substitute of Remote Assistance or TeamViewer in a local or corporate network.
How to Shadow (Remote Control) a User’s RDP session on RDS Windows Server 2016/2019?
Shadow session mode allows RDS administrators to view and interact with the user’s desktop. Remote Desktop Shadowing mode works on all modern versions of Windows starting from Windows Server 2012 R2 and Windows 8.1 (except for Windows Server 2012, due to the transfer of the RDP stack from kernel to user mode). In this article, we’ll look at how to configure and use RDS Shadowing to connect and manage active RDP user sessions on Windows Server 2016 and Windows 10.
Shadow Connection Options in the Windows RDP Client (mstsc.exe)
On Windows Server 2016/Windows 10, the built-in RDP client ( mstsc.exe ) has several special options that can be used to remotely shadow connect to an active RDP session of any user:
Mstsc.exe [/shadow:sessionID [/v:Servername] [/control] [/noConsentPrompt] [/prompt]]
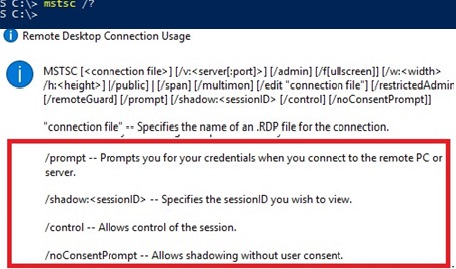
- /shadow:ID – connect to the user’s RDP session with the specified ID;
- /v:servername – you can specify the hostname or IP address of the remote RDP/RDS host. If not set, connections are made to local user sessions on the current host;
- /control – allows to interact with the user session (desktop). The administrator can control the user’s mouse, input data from the keyboard. If this parameter is not set, the user’s session view mode is used;
- /noConsentPrompt – the option allows the administrator to force the connection to any session without asking the user to confirm the connection;
- /prompt – allows to connect with other credentials. The user name and password are requested to connect to the remote computer.
Shadow sessions can be used to connect to user sessions on computers and servers in both an Active Directory domain and a workgroup. In addition, it is not necessary to have administrator privileges on the RDS host on this the user’s RDP session is running . Administrators can delegate RDS Shadowing permissions to any user account, even for non-admins (more on this below).
Using Remote Desktop Shadow from the Windows GUI
You can connect to a user session using mstsc.exe or directly from Server Manager graphical console. To do it, open the Server Manager console on the RDS server, go to the Remote Desktop Services section -> select your collection, for example QuickSessionCollection .
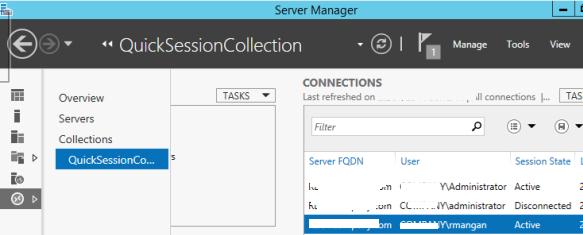
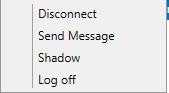
The list on the right will contain a list of users who have sessions on this RDS server. Right-click on the user session you want, select Shadow from the drop-down menu.
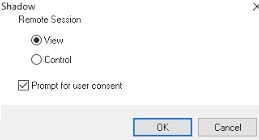
A window with Shadow connection parameters will appear. You can either View or Control a user’s RDP session. You can also check Prompt for user consent option.
If this option is checked, the following request appears in the user’s RDP session:
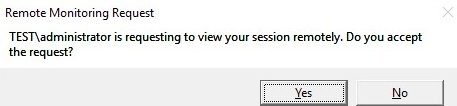
If the user confirms the connection, the administrator will see his desktop in View mode, but won’t be able to interact with it.
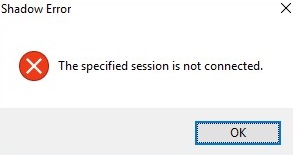
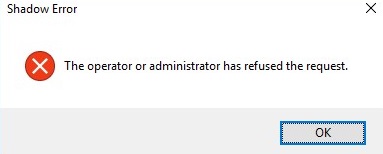
If a user rejects the administrative Shadow RDS connection, the following message appears:
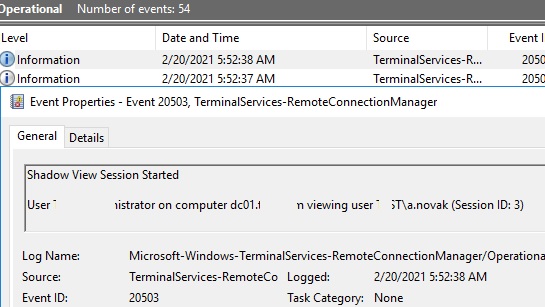
If you need to audit RDS shadow connection events for user sessions, use the following filtered events from the Microsoft-Windows-TerminalServices-RemoteConnectionManager/Operational log:
- Event ID 20508: Shadow View Permission Granted;
- Event ID 20503: Shadow View Session Started;
- Event ID 20504: Shadow View Session Stopped.
Configuring RDS Shadow Rules on Windows Using GPO
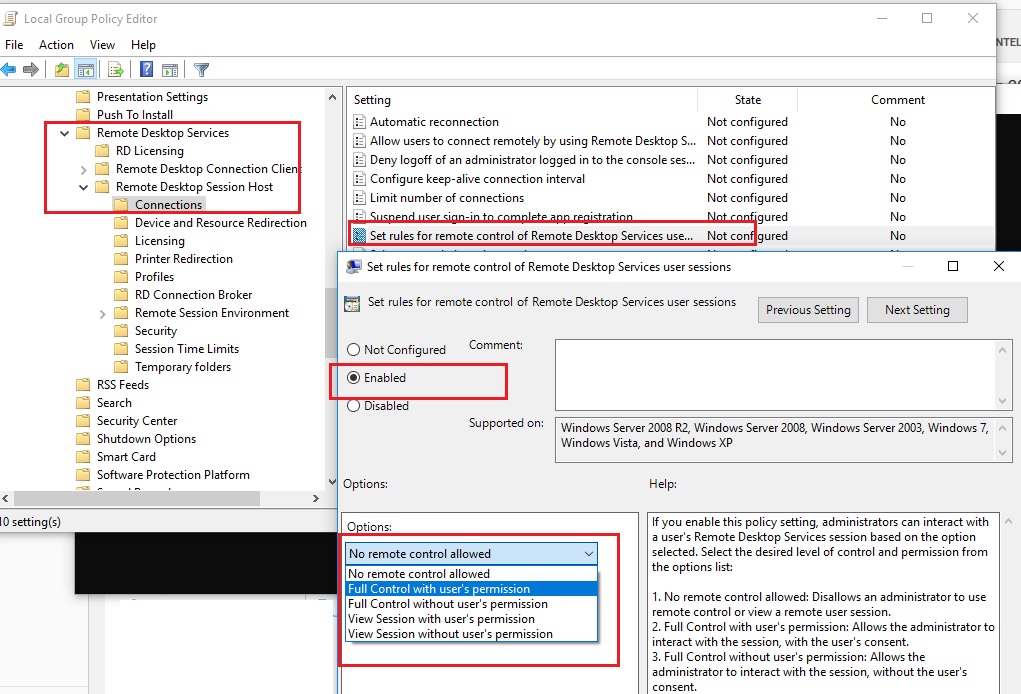
The settings for remote connections to RDS user sessions are configured using the Group Policy parameter Set rules for remote control of Remote Desktop Services user sessions, which is located under the User and Computer sections of the GPO: Policies -> Administrative Templates -> Windows components -> Remote Desktop Services -> Remote Session Host -> Connections. This policy corresponds to the DWORD Shadow parameter under the registry key HKLM\SOFTWARE\Policies\Microsoft\Windows NT\Terminal Services (the values of this parameter corresponding to the policy settings are specified in brackets).
This policy can be used to configure the following RD Shadow connection options:
- No remote control allowed (corresponds to the value of the registry parameter Shadow = 0 );
- Full Control with user’s permission ( 1 );
- Full Control without user’s permission ( 2 );
- View Session with user’s permission ( 3 );
- View Session without user’s permission ( 4 ).
reg add «HKEY_LOCAL_MACHINE\SOFTWARE\Policies\Microsoft\Windows NT\Terminal Services» /v Shadow /t REG_DWORD /d 4
You can configure rules for remote shadow connections in the AD domain from the gpmc.msc console using the policy parameter described above, or by using Group Policy Preferences, which directly modify the registry parameter (the latter option allows you to more accurately target the policy to specific computers using the Group Policy Item Level Targeting).
Shadowing RDP Session with PowerShell
You can also use the Remote Desktop Services Shadow features to connect to a user’s session from PowerShell. First of all, you need to get a list of sessions on the RDS host (user sessions will be grouped according to their state):
Get-RDUserSession | ft Username, UnifiedSessionId, SessionState, HostServer, ApplicationType -GroupBy Sessionstate 
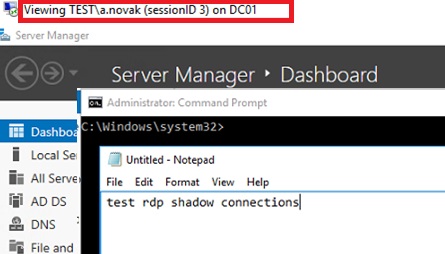
There are three active RDP user sessions on this server. Let’s connect to the user session with the session ID 3:
Mstsc /shadow:3 /control
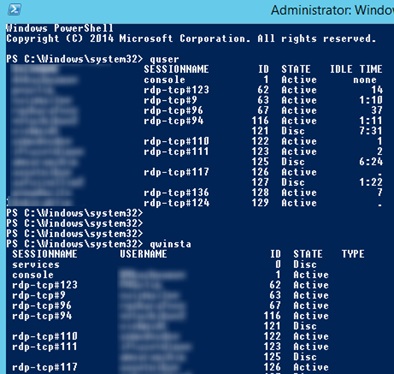
Also, to get a list of all RDP sessions on the server (or on the Windows 10 desktop to which multiple RDP connections are allowed), you can use the command:
The screen will display a list of RDP user sessions, their IDs and states: Active or Disconnected .
To show the list of sessions on a remote server, run the following command:
query session /server:servername
To connect to a user session on a remote server, use the command:
mstsc /v:rdsh2:3389 /shadow:3 /control
For more convenient shadow connection to RDP user sessions, you can use the following batch script. It prompts you to enter the name of the remote RDS server, displays a list of all sessions and prompts you to specify the session (ID) to which you want to connect to:
shadow.bat
@echo off
set /P rcomp=»Enter name or IP of a Remote PC: »
query session /server:%rcomp%
set /P rid=»Enter RDP user ID: »
start mstsc /shadow:%rid% /v:%rcomp% /control
You can save this bat file in the %Windir%\System32 directory. As a result, you just need to run the shadow command to start the shadow connection.
You can also use the following PowerShell script with a simple GUI (shadow_user_rdp_session.ps1) for shadow connection:
Add-Type -assembly System.Windows.Forms
$Header = «SESSIONNAME», «USERNAME», «ID», «STATUS»
$gForm = New-Object System.Windows.Forms.Form
$gForm.Text =’Shadow Session Connect’
$gForm.Width = 400
$gForm.AutoSize = $true
$dBttn = New-Object System.Windows.Forms.Button
$dBttn.Text = ‘Control’
$dBttn.Location = New-Object System.Drawing.Point(15,10)
$gForm.Controls.Add($dBttn)
$dList = New-Object System.Windows.Forms.ListView
$dList.Location = New-Object System.Drawing.Point(0,50)
$dList.Width = $gForm.ClientRectangle.Width
$dList.Height = $gForm.ClientRectangle.Height
$dList.Anchor = «Top, Left, Right, Bottom»
$dList.MultiSelect = $False
$dList.View = ‘Details’
$dList.FullRowSelect = 1;
$dList.GridLines = 1
$dList.Scrollable = 1
$gForm.Controls.add($dList)
foreach ($column in $Header) <
$dList.Columns.Add($column) | Out-Null
>
$(qwinsta.exe | findstr «Active») -replace «^[\s>]» , «» -replace «\s+» , «,» | ConvertFrom-Csv -Header $Header | ForEach-Object <
$dListItem = New-Object System.Windows.Forms.ListViewItem($_.SESSIONNAME)
$dListItem.Subitems.Add($_.USERNAME) | Out-Null
$dListItem.Subitems.Add($_.ID) | Out-Null
$dListItem.Subitems.Add($_.STATUS) | Out-Null
$dList.Items.Add($dListItem) | Out-Null
>
$dBttn.Add_Click(
<
$SelectedItem = $dList.SelectedItems[0]
if ($SelectedItem -eq $null) <
[System.Windows.Forms.MessageBox]::Show(«Select a user session to connect «)
>else <
$session_id = $SelectedItem.subitems[2].text
$(mstsc /shadow:$session_id /control)
#[System.Windows.Forms.MessageBox]::Show($session_id)
>
>
)
$gForm.ShowDialog()
This script displays a simple graphical form with a list of active RDP sessions on the local host. You just need to select a user account and click the Connect button.
You can use the shadow user connection not only on Windows Server with the Remote Desktop Services role, but also to connect to users’ desktops running Windows 10 (Using Remote Desktop Session Shadowing Mode in Windows 10).
How-to Allow Non-admin Users to Shadow RDS Sessions?
In the examples above, using the shadow connection to RDS user sessions requires local administrator privileges on the RDS server. However, you can allow a non-admin user to shadow RDP sessions without granting local admin permissions on the computer/server.
For instance, you want to allow members of the AllowRDSShadow group to use a shadow connection to RDP user sessions. Open the elevated command prompt (cmd.exe) and run the command:
wmic /namespace:\\root\CIMV2\TerminalServices PATH Win32_TSPermissionsSetting WHERE (TerminalName=”RDP-Tcp”) CALL AddAccount “woshub\AllowRDSShadow”,2


