- PROCESSOR-SDK-OMAPL138
- Processor SDK for OMAPL138 Processors for Linux and TI-RTOS Support
- PROCESSOR-SDK-OMAPL138
- Overview
- PROCESSOR-SDK-AM57X
- Processor SDK for AM57x Sitara Processors — Linux, TI-RTOS and Android Support
- PROCESSOR-SDK-AM57X
- Overview
- PROCESSOR-SDK-AM335X
- Processor SDK for AM335x Sitara Processors — Linux and TI-RTOS support
- PROCESSOR-SDK-AM335X
- Overview
- 1.1. Getting Started Guide
- 1.1.1. Linux SD Card Creation Guide
- 1.1.1.1. Overview
- 1.1.1.2. Common Steps
- 1.1.1.3. Installing SD Card Content
- 1.1.1.4. SD Card Using Default Images
- 1.1.1.5. SD Card Using Custom Images
- 1.1.1.6. SD Card Using Partition Tarballs
- 1.1.2. Windows SD Card Creation Guide
- 1.1.3. Download and Install the SDK
- 1.1.4. Program EVM User Guide
- 1.1.4.1. Overview
- 1.1.4.2. Files Provided
PROCESSOR-SDK-OMAPL138
Processor SDK for OMAPL138 Processors for Linux and TI-RTOS Support
PROCESSOR-SDK-OMAPL138
Overview
Processor SDK (Software Development Kit) is a unified software platform for TI embedded processors providing easy setup and fast out-of-the-box access to benchmarks and demos. All releases of Processor SDK are consistent across TI’s broad portfolio, allowing developers to seamlessly reuse and migrate software across devices. Developing scalable platform solutions has never been easier than with the Processor SDK and TI’s embedded processor solutions.
Processor SDK includes support for both Linux and TI RTOS operating systems.
Linux Highlights:
- Long-Term Stable (LTS) mainline Linux kernel support
- U-Boot bootloader support
- Yocto Project™ OE Core compatible file systems
RTOS Highlights:
- TI RTOS kernel, a light-weight real-time embedded operating system for TI devices
- Chip support libraries, drivers, and basic board support utilities
- Optimized C674x algorithm libraries
Features
Linux Features:
- Open Linux support
- Linux kernel and Bootloaders
- File system
- Example applications, including:
- ARM benchmarks Dhrystone, Linpack, Whetstone
- Code Composer Studio™ IDE for Linux development
- Documentation
RTOS Features:
- Full driver availability
- Debug and instrumentation utilities
- Board support package
- Demonstrations and examples
- Code Composer Studio™ IDE for RTOS development
- Documentation
Yocto Project Support:
The Yocto Project is an open-source collaboration spearheaded by the Linux Foundation to simplify the framework for building embedded Linux software distributions. TI makes this available through its Arago distribution. The Arago Project provides a verified, tested and supported subset of packages, built with a free and open tool chain. Additional resources on Yocto Project and TI’s Arago distribution are available at arago-project.org.
The Processor SDK is free and does not require any run-time royalties to Texas Instruments.
Источник
PROCESSOR-SDK-AM57X
Processor SDK for AM57x Sitara Processors — Linux, TI-RTOS and Android Support
PROCESSOR-SDK-AM57X
Overview
Processor SDK (Software Development Kit) is a unified software platform for TI embedded processors providing easy setup and fast out-of-the-box access to benchmarks and demos. All releases of Processor SDK are consistent across TI’s broad portfolio, allowing developers to seamlessly reuse and migrate software across devices. Developing scalable platform solutions has never been easier than with the Processor SDK and TI’s embedded processor solutions.
Processor SDK v.02.xx includes support for Linux, TI-RTOS and Android operating systems.
Linux Highlights:
- Long-Term Stable (LTS) Linux kernel support
- U-Boot bootloader support
- Linaro GNU compiler collection (GCC) tool chains
- Yocto Project™ OE Core compatible file systems
RTOS Highlights:
- TI-RTOS kernel, a light-weight real-time embedded operating system for TI devices
- Chip support libraries, drivers, and basic board-support utilities
- Interprocessor communication for communication across cores and devices
- Optimized C66x algorithm libraries
- Basic networking stack and protocols
- Bootloaders and boot utilities
- Linaro GNU compiler collection (GCC) tool chains
Android Highlights:
- Based upon Linux Long-Term Stable (LTS) Linux kernel
- U-Boot bootloader support
- Google Android GNU compiler collection (GCC) tool chain
- Includes a complete application framework
- Allows for easy integration of customer developed applications via Java
- Multimedia, graphics and graphical user interface are included out of the box
Linaro Toolchain Support
The Linaro toolchain is comprised of robust, commercial-grade tools which are optimized for Cortex-A processors. The tool chain is fully supported by TI and the entire Linaro community including Linaro staff engineers, member company developers and others in the open source community. Linaro tools, software and testing procedures are included in this latest release of the Processor SDK.
Yocto Project™ Support
The Yocto Project is an open-source collaboration spearheaded by the Linux Foundation to simplify the framework for building embedded Linux software distributions. TI makes this available through its Arago distribution. The Arago Project provides a verified, tested and supported subset of packages, built with a free and open tool chain. Additional resources on Yocto Project and TI’s Arago distribution are available at arago-project.org.
Features
Linux features
- Open Linux support
- Linux kernel and Bootloaders
- File system
- Qt/Webkit application framework
- 3D graphics support
- Integrated WLAN and Bluetooth® support
- GUI-based application launcher
- Example applications, including:
- ARM benchmarks: Dhrystone, Linpack, Whetstone
- Webkit web browser
- Soft Wifi access point
- Cryptography: AES, 3DES, MD5, SHA
- Multimedia: GStreamer/FFMPEG
- Programmable Realtime Unit (PRU)
- Host tools including Flash Tool and Pin Mux Utility
- Code Composer Studio™ IDE for Linux development
- Documentation
RTOS features
- Full driver availability
- File system
- Bare metal secondary bootloader
- Debug and instrumentation utilities
- Board support package
- Demonstrations and examples
- Host tools including Pin Mux and Clock Tree utilities
- Code Composer Studio™ IDE for RTOS development
- Documentation
Android features
- Linux kernel and bootloader
- 3-D graphics drive and libraries
- Example applications, including:
- Multimedia video and 3-D graphics
- Programmable realtime unit (PRU) ethernet
- Android web browser
- Host tools
- Debugging options
- Documentation
The Processor SDK is free, and does not require any run-time royalties to Texas Instruments.
Источник
PROCESSOR-SDK-AM335X
Processor SDK for AM335x Sitara Processors — Linux and TI-RTOS support
PROCESSOR-SDK-AM335X
Overview
Processor SDK (Software Development Kit) is a unified software platform for TI embedded processors providing easy setup and fast out-of-the-box access to benchmarks and demos. All releases of Processor SDK are consistent across TI’s broad portfolio, allowing developers to seamlessly reuse and migrate software across devices. Developing scalable platform solutions has never been easier than with the Processor SDK and TI’s embedded processor solutions.
Processor SDK v.02.xx includes support for both Linux TI-RTOS operating systems.
Linux Highlights:
- Long-Term Stable (LTS) Mainline Linux kernel support
- U-Boot bootloader support
- Linaro GNU compiler collection (GCC) tool chains
- Yocto Project™ OE Core compatible file systems
RTOS Highlights:
- TI-RTOS kernel, a light-weight real-time embedded operating system for TI devices
- Chip support libraries, drivers, and basic board-support utilities
- Basic networking stack and protocols
- Bootloaders and boot utilities
- Linaro GNU compiler collection (GCC) tool chains
Linaro Toolchain Support
The Linaro toolchain is comprised of robust, commercial-grade tools which are optimized for Cortex-A processors. The tool chain is fully supported by TI and the entire Linaro community including Linaro staff engineers, member company developers and others in the open source community. Linaro tools, software and testing procedures are available in this latest release of the TI Processor SDK.
Yocto Project™ Support
The Yocto Project is an open-source collaboration spearheaded by the Linux Foundation to simplify the framework for building embedded Linux software distributions. TI makes this available through its Arago distribution. The Arago Project provides a verified, tested and supported subset of packages, built with a free and open tool chain. Additional resources on Yocto Project and TI’s Arago distribution are available at arago-project.org.
Features
Linux features
- Open Linux support
- Linux kernel and Bootloaders
- File system
- Qt/Webkit application framework
- 3D graphics support
- Integrated WLAN and Bluetooth® support
- GUI-based application launcher
- Example applications, including:
- ARM benchmarks: Dhrystone, Linpack, Whetstone
- Webkit web browser
- Soft Wifi access point
- Cryptography: AES, 3DES, MD5, SHA
- Multimedia: GStreamer/FFMPEG
- Programmable Realtime Unit (PRU)
- Host tools including Flash Tool and Pin Mux Utility
- Code Composer Studio™ IDE for Linux development
- Documentation
RTOS features
- Full driver availability
- File system
- Bare metal secondary bootloader
- Board support package
- Demonstrations and examples
- Host tools including Pin Mux and Clock Tree utilities
- Code Composer Studio™ IDE for RTOS development
- Documentation
The Processor SDK is free, and does not require any run-time royalties to Texas Instruments.
Источник
1.1. Getting Started Guide
Welcome to the Linux Getting Started Guide
Thanks for your interest in learning more about the Linux Software Development Kit (SDK). The SDK as we affectionately call it is our attempt to provide a great starting point to develop an embedded system on a TI Processor running Linux. Given this goal, we wanted to provide something that is more than just a typical Board Support Package (BSP) containing a bootloader, Linux kernel, and filesystem. While these are certainly necessary elements, we feel they are just a starting point, especially for those that aren’t experts in developing with Linux. So, the SDK also contains tools for developing on TI Processors (a validated cross-compiling toolchain, for example), pre-built libraries that you can use without having to rebuild them yourself, and some documentation to help explain how all of these pieces work together. We package all of this together with a working Linux Embedded System that has been built with all of the things mentioned above, and it contains a featured application called “Matrix” (derived from the fact that it is basically a simple Graphical User’s Interface (GUI) of icon’s arranged in a “matrix”). Matrix is a fairly simple embedded Linux system that highlights some of the key features of the TI Processor offering (LCD display, graphics, networking, etc.).
What it really serves as is a “known good” starting point. One of the big challenges with starting development on a new platform (not to mention, a new Operating System (OS) for many), is getting an environment set up where you can build and debug code on hardware. The SDK attacks this problem with providing everything you need to do development, and it is validated on standard TI hardware platforms (EVMs) (see here for more details). It wraps all of this up into one simple installer that helps get everything you need in the right place to do development. For example, you can start off with simply re-building the Linux Embedded System that we provide to validate that everything is working on your system. This simple step gives you confidence that you can move forward from a good baseline.
As you go along your development journey and have questions, there is documentation and support available to you. Make sure to save a pointer to the Processor SDK Linux Software Developer’s Guide. If you don’t find what you need, take a look at the active E2E Processor Support Forum and see if the topic has been covered before. If not, post a new thread and we’ll do our best to provide some guidance.
What would you like to do with the SDK?
As described above, the SDK has a lot to it. Let’s break it down to two pieces to simplify things a bit:
- The example Embedded Linux System starring Matrix. Essentially, a working bootloader (U-Boot), Linux kernel, and filesystem that can be put on an SD card and ran on a TI EVM, or even one of the very popular Beaglebones (either the original “white” or the newer “black”). For K2H/K2K, K2E, and K2L platforms which are not using SD cards, U-Boot is loaded to NOR, Linux kernel is fetched from TFTP server, and filesystem is on NFS.
- Everything needed to create the above embedded system from “scratch”:
- U-Boot sources and configuration files
- Kernel sources and configuration files
- An ARM cross-compiling toolchain as well as other host binaries and components
- A Yocto/OE compliant filesystem and sources for example applications in Matrix
- A variety of scripts and Makefiles to automate certain tasks
- Other components needed to build an embedded Linux system that don’t fit neatly into one of the above buckets
With these two pieces more clearly defined, we can now get back to that all important question, “What would you like to do with the SDK?”. If the answer is clearly “I want to build something and I’m ready to start developing now!”, then go ahead and skip down to the “I want to Develop!” (or, Developing with the Linux SDK section below for instructions on installing the SDK on a Linux Host System. This is a somewhat involved process focusing on the second of the two parts of the SDK listed above and may be more than some people want to start with. However, it provides access to the full spectrum of development from rebuilding the SDK from sources to fully adapting it with new device drivers and applications.
For K2H/K2K, K2E, and K2L platforms which are not using SD cards, please also go ahead and skip down to the “I want to Develop!” (or, Developing with the Linux SDK section.
So, if you’re not quite there yet, let’s discuss some other options. Maybe you’d like to evaluate the SDK a bit to see if it is how you’d like to get started.
If this is not good enough and you really want to get your hands on something, check out the next section which shares how to play with the embedded Linux system featuring Matrix, the first piece of the SDK mentioned earlier. All you’ll need is access to a Windows/Linux computer, a SD card, a SD card reader, some free, open-source software, and a supported Hardware Platform.
Evaluating the SDK Embedded Linux System and Matrix
If you’re a hands on person, reading documentation and looking at presentations gets old fast. So, if you want to see an example of what you can build with the SDK and actually hold it in your hands and play with it (or show it to someone else that needs help understanding what you want to do with it), with minimal effort, you can simply run the SDK Embedded Linux System with Matrix on a supported Hardware platform. This will allow you to poke and prod and interact. It’s a powerful way to get the imagination active and engaged.
If you’ve recently purchased a TI EVM or Starterkit, it should have came with a SD card with the SDK on it. If that is the case, simply plug the card in, boot it up, and let your imagination run wild. However, if you’re like us and the boards you are given never have all of the stuff they came with, or if you purchased a Beaglebone or Beaglebone Black, you might not have a SD card with the SDK on it. Or, maybe, the SDK on your SD card is simply a few revisions old and you want the latest and greatest. If that is the case, check out the Creating a SD Card with Windows page. Just remember, you won’t be able to build or change anything, simply evaluate the SDK Embedded Linux System with Matrix as delivered. But, even this is enough to get the imagination going and all some folks want to do.
The above is not applicable to K2H/K2K, K2E, and K2L platforms, which are not using SD card.
Start your Linux Development
OK, you’re all in. Either you’ve known this is what you wanted to do, or you’ve gone through the above steps and you want to do more. It’s time to develop! Here’s a high level overview:
- Get a Linux host up and running if you don’t already have one
- Install the SDK and run some scripts to get everything set up
- Put the SDK Embedded Linux System on a SD card or TFTP/NFS to play with
- Build something to validate set up – the SDK for example
- Add something to the SDK, like a simple Hello World app
After completing these steps, you’ll have a known good baseline from which you can start development.
Configure a Linux Host — If you already have a Linux host machine, go to Step 2.
To do Linux development with the SDK, you’ll need a host PC running Linux. The Linux host is generally much faster and has a lot more memory (both RAM and hard disk space) than the typical embedded system. While it is certainly possible to do all development natively, we feel the advantages of using a host provide a better way to go and what is supported out of the box with the SDK.
There are many, many ways to get access to a Linux host. We simply can’t validate all possibilities and iterations, therefore we focus on validating using Ubuntu as the host Linux distribution, running natively. We validate the Long-term Support (LTS) versions of Ubuntu at the time of a SDK release (for example, at the time of this writing, Ubuntu 16.04 and Ubuntu 18.04 are the currently supported LTS versions).
Can you use other versions of Ubuntu or even other distributions? Theoretically, yes, as long as you can get it to work and there may be more “assembly” required. If you can use the Ubuntu version validated against the SDK, it will be the smoothest path and we will be able to help you more if you do run into trouble.
Likewise, we would strongly recommend getting a native 64-bit Ubuntu LTS machine set up for development. For the cost of a little bit of hard drive space, Ubuntu can have direct access to the host’s hardware. Virtual Machines (VMs) have come a long way over the years, and many people use them daily without problems. However, when you are working with a target embedded system (that may be a prototype board), whether it be a TI board or eventually your own, removing the complexity of a VM from the get go can avoid a lot of frustration (i.e. wasted time). When using a VM while connecting and disconnecting hardware components, you have to be very diligent about making sure what is connected to what. You might prefer using an hour to get more work done than debugging a perceived problem caused by the fact the virtual host grabbed a USB port when you weren’t watching.
When you’re ready to proceed, Ubuntu provides a great overview for how to install natively.
Install the SDK — Within your Linux host machine, Install the Linux SDK
Processor SDK Installer is 64-bit, and installs only on 64-bit host machine. Support for 32-bit host is dropped as the cross-compile toolchain is available only for 64-bit machines
At least 20 GB of free space is required on the host machine for installing Processor SDK Linux
Create a SD Card — using the SDK Create SD Card Script, or One-time Program EVM for K2H/K2K, K2E, and K2L — following directions for Program EVM User Guide
You will need a >8GB SD Card and the capability to connect that card to your Linux Host machine (using a USB SD Card reader, for example).
If using a virtual machine as your Linux host, you may need to import the SD Card reader into your virtual machine (disconnect it from the host and connect it to the VM so that the Linux VM can see it).
For K2H/K2K, K2E, and K2L platforms which are not using SD card, one-time EVM programming is needed if u-boot has not been loaded before or the previous u-boot is somehow corrupted. Please see details at Program EVM User Guide.
Configure your development environment
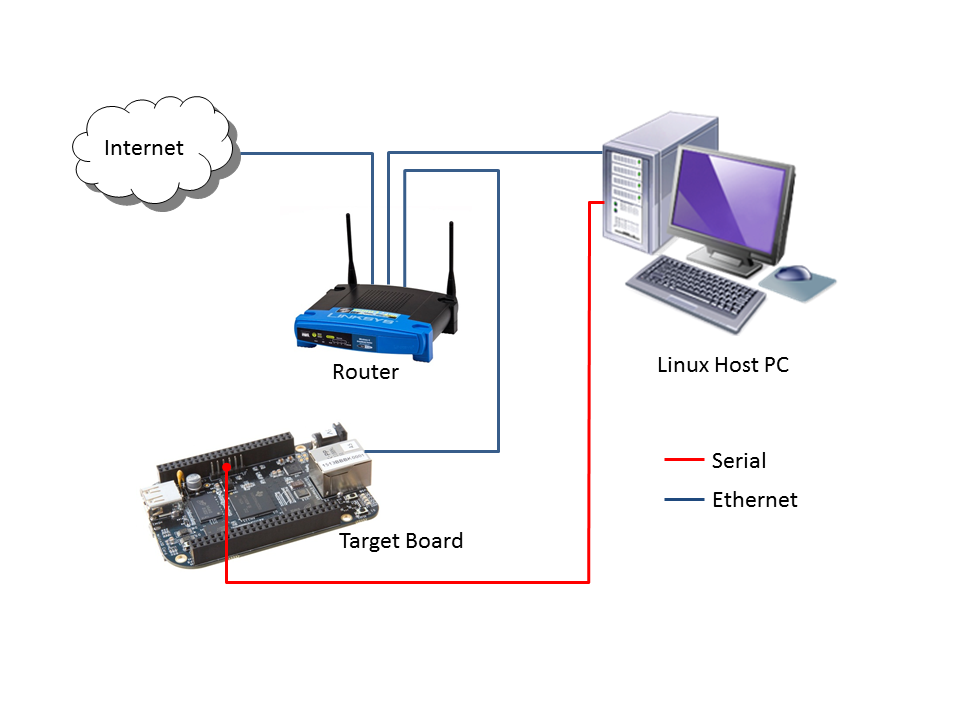
There are many ways to connect the host development platform and the target board. These connections will vary depending on how you like to develop and what you are trying to do. Here is an example of a common set up with a serial connection for console and ethernet for networking (TFTP, NFS, etc.):
The recommended setup is to use TFTP for booting the kernel and NFS for hosting the target root filesystem. Since the SDK provides full cross-compile development environment for the x86 host, this configuration will simplify the transfer of files to and from the target platform.
Use the SD Card to boot the target board properly connected for your development environment
This is not applicable to K2H/K2K, K2E, and K2L platforms. For those platforms, power up the EVM and stop at the U-boot prompt as described in Program EVM User Guide
Run the Setup Script — Once the SDK has been installed, Run the Setup.sh Script on your host to guide you through the remaining development environment configuration.
If using a virtual machine as your Linux host, you will likely need to import the target board into the virtual machine as a mass storage device.
Rebuild sources using the top-level Makefile in the SDK root directory. For example:
- make all rebuilds all components in the SDK
- make linux configures and builds the kernel
- make u-boot-spl builds u-boot and u-boot-spl
The file system can be rebuilt following the instructions at Building the SDK.
Starting with Processor SDK 3.3, some components such as Jailhouse Hypervisor needs a newer make (> 3.81) that what comes by default with Ubuntu 14.04. Please check your make version (make -v) and upgrade to latest using following instructions. You can make it your default make by prefixing /usr/local/bin to your $PATH variable in your shell startup file; for instance, in .profile or .bashrc if you use the bash shell. Don’t try to install a self-compiled make (or anything else that doesn’t come from the distribution’s package manager) into /bin or /usr/bin; doing that will confuse your package manager.
What Would You Like to do Next?
Now that you have a solid baseline set up, you can choose what you’d like to do next based on what you need to do. Here are some of the many possibilities:
| Link | Summary |
| AM335X, AM437X, AM57X, 66AK2Ex, 66AK2Gx, 66AK2Hx, 66AK2Lx | Download the SDK |
| Processor SDK Linux Software Developer’s Guide | The SDK’s Homepage, a must have link for SDK users. |
| Processor SDK Training Series | This series provides an introduction to the Processor SDK and how to use this software to start building applications on TI embedded processors. |
| Processor SDK Linux Training: Hands on with the Linux SDK | The next step in learning about the Processor SDK Linux. This lab walks through how to use the SDK and Code Composer Studio with examples applications. |
| Debugging Embedded Linux Systems Training Series | This series teaches the techniques of debugging kernel issues that may be encountered in embedded Linux systems. It explains the Linux kernel logging system and logging API, illustrates how to locate a particular device driver, and demonstrates how to read kernel oops logs. |
| Processor SDK Linux How-To Guides | The SDK How-To pages. The Hands On with the SDK has some great information for developing your first Linux application. |
| Processor SDK Linux Kernel | More information on the Linux Kernel provided with the SDK (how to build it, for example). |
| Processor SDK Linux U-Boot | Everything you want to know about U-Boot, the bootloader provided with the SDK. |
| Processor SDK Linux Filesystem | Details about the various Filesystems delivered with the SDK, and their contents. |
| Processor SDK Linux Tools | Documentation for all of the various tools included with the SDK. |
1.1.1. Linux SD Card Creation Guide
1.1.1.1. Overview
The Linux SDK includes a script in the /bin directory named create-sdcard.sh. The purpose of this script is to create SD cards for the following high-level use cases:
- Create the SD Card using default images from the Processor SDK for Linux
- Create the SD card using custom images
- Create the SD card using partition tarballs (This is not common and is used most often by board vendors)
The script will give you information about each step, but the following sections will go over the details for the use cases above and walk you through how to use the script as well.
1.1.1.2. Common Steps
No matter which use case above that you are creating an SD card for the following steps are the same. |
Invoking the Script
The create-sdcard.sh script can be run from any location but must be run with root permissions. This usually means using the sudo command to start execution of the script. For example:
sudo /bin/create-sdcard.sh If you fail to execute the script without root permissions you will receive a message that root permissions are required and the script will exit.
Select the SD Card Device
The first step of the script will ask you to select the drive representing the SD card that you want to format. In most cases your host root file system drive has been masked off to prevent damage to the host system. When prompted enter the device number corresponding to the SD card. For example if the output looks like:
You would enter 1 to select the sdb device
NOTE: For most common installations, this script works fine. However, if you are using more advanced disk slicing and volume management, the presented list of device nodes are off by one; in the best case (picking the last item) it will flag a range error, and in the worst case (anything in the middle) the wrong DASD can be destroyed. The problem originates when it attempts to determine the $ROOTDRIVE to “mask” the volume where “/” is mounted from the selection list using a “grep -v $ROOTDRIVE” For the naive partitioning case, its heuristic is fine, yielding something like “sda” — but for LVM, it grabs some chunk of the device name, e.g. “mapp” (out of “/dev/mapper/kubuntu–vg-root on / type . ”)
Re-Partitioning the SD Card
Any partitions of the device that are already mounted will be un-mounted so that the device is ready for partitioning.
If the SD Card already has partition you will see a prompt like the following asking you if you would like to repartition the card. If the card was not already partitioned then this step will be skipped and you can move on to the next step.
- Options:
- y — This will allow you to change the partitioning of the SD card. For example if you have a 3 partition card and want to create a 2 partition card to give additional storage space to the root file system you would select y here. NOTE: This operation WILL ERASE the contents of your SD card
- n — If the SD card already has the desired number of partitions then this will leave the partitioning alone. If you select n here skip on to the Installing SD Card Content section.
Select Number of Partitions
You should now see a prompt like the following which will ask you how many partitions you want to create for the SD card.
- Options:
- 2 — This is the most common use case and will give the most space to the root file system.
- 3 — This case should only be used by board manufacturers making SD cards to go in the box with the EVM. This requires access to the partition tarballs used for Out-Of-Box SD cards. This option should be selected if you are going to follow the SD card using partition tarballs steps below
After selecting the number of partitions, move on to the next section.
1.1.1.3. Installing SD Card Content
After the SD card is partitioned, you will be prompted whether you want to continue installing the file system or safely exit the script.
- Options:
- y — Selecting yes here will begin the process of installing the SD card contents. This operation WILL ERASE any existing data on the SD card. Refer to one of the following sections for additional instructions depending on which use case you are creating an SD card for
- Create the SD card using default images
- Create the SD card using custom images
- Create the SD card using partition tarballs
- n — Selecting no here will allow you to have partitioned your card but will leave the partitions empty.
- y — Selecting yes here will begin the process of installing the SD card contents. This operation WILL ERASE any existing data on the SD card. Refer to one of the following sections for additional instructions depending on which use case you are creating an SD card for
1.1.1.4. SD Card Using Default Images
The purpose of this section is to cover how to use the create-sdcard.sh script to populate an SD card that can be used to boot the device using the default images that ship with the Processor SDK for Linux.
- The Processor SDK for Linux is installed on your host system
- The SD card you wish to create is inserted into the host system and has a size sufficiently large (16GB or larger) to hold at least the bootloaders, kernel, and root file system.
- You have started running the script as detailed in the SD Card Common Steps section above.
Choose Install Pre-built Images
You should now see a prompt like:
You should choose option 1 to create an SD card using the pre-built images from the SDK.
If you executed this script from within the SDK then the script can determine the SDK path automatically and will start copying the contents to the SD card. Once the files are copied the script will exit.
If you executed the script from outside of the SDK (i.e. you copied it to some other directory and executed it there) please see the next section.
NOTE: option 1 will only work with the format of the default SDK directory name, which makes the Hands on with the SDK training easiest. If you have to change the directory name, use option 2 to enter the custom file paths.
Choose rootfs tarball for K2G
For K2G, you should now see a prompt like:
In the case that the script was invoked from a directory without the SDK installation in the path, i.e. the script was copied to your home directory and executed there, you may see a prompt like
Enter the path to the SDK installation directory here. For example if the SDK was installed into the home directory of the sitara user the path to enter would be /home/sitara/ti-processor-sdk-linux- — . You will be prompted to confirm the installation directory. The SD card will then be created using the default images and the script will exit when finished.
1.1.1.5. SD Card Using Custom Images
Often times you will use TFTP and NFS during development to transfer you kernel images and boot your root file systems respectively. Once you are done with your development you may want place these images onto an SD card so that they can be used stand-along without requiring a network connection to a server.
- The Processor SDK for Linux is installed on your host system
- The SD card you wish to create is inserted into the host system and has a size sufficiently large (16GB or larger) to hold at least the bootloaders, kernel, and root file system.
- You have started running the script as detailed in the SD Card Common Steps section above.
Choose Custom Images
You should now see a prompt like:
Select option 2 to create an SD card with your custom images.
Select Boot Partition
You will now be prompted to provide a path to the location of the boot partition files. The prompt will explain the requirements of the files to be placed at the path, but the basic options are:
- Point to a tarball containing all of the files you want placed on the boot partition. This would include the boot loaders and the kernel image as well as any optional files like uEnv.txt
- Point to a directory containing the files for the boot partition like those in the first option.
The script is intelligent enough to recognize whether you provided a tarball or a directory path and will copy the files accordingly. You will be given a list of the files that are going to be copied and given the option to change the path if the list of files is not correct.
Select Root Partition
You will now be prompted to provide a path to the location of the root file sysetm partition files. The prompt will explain the requirements of the files to be placed at the path, but the basic options are:
- Point to a tarball of the root file system you want to use
- Point to a directory containing the root file sysetm such as an NFS share directory.
The script is intelligent enough to recognize whether you provided a tarball or a directory path and will copy the files accordingly. You will be given a list of the files that are going to be copied and given the option to change the path if the list of files is not correct.
1.1.1.6. SD Card Using Partition Tarballs
This option is meant for board vendors to create SD cards to go in the box with the EVM. It requires access to the three tarballs representing the the partitions of the SD card shipped with the EVM.
- The Processor SDK for Linux is installed on your host system
- The SD card you wish to create is inserted into the host system and has a size sufficiently large (16GB or larger) to hold at least the bootloaders, kernel, and root file system.
- You have started running the script as detailed in the SD Card Common Steps section above.
Provide Tarball Location
After the SD card has been partitioned you will be prompted to
Point to the directory containing the following tarball files:
- boot_partition.tar.gz
- rootfs_partition.tar.gz
- start_here_partition.tar.gz
The script will show you the contents of the directory given and ask you to verify that the tarballs are present in that directory. The SD card will then be populated with the contents of the tarballs and be ready for inclusion in the box with the EVM.
Additional Step for OMAPL138 after SD Card Creation
For OMAP-L138 LCDK, boot loader needs to be updated after the SD card is created as above. The pre-built u-boot-omapl138-lcdk.ais needs to be written to the SD card using the dd command. /dev/sd below corresponds to the SD card device listed from the host machine.
1.1.2. Windows SD Card Creation Guide
This page details how to use an image file to create a SD Card containing the embedded Linux system provided with the Linux SDK. This allows a user to evaluate the embedded system on a supported hardware platform.
- Access to a Windows PC
- A valid Linux SDK image for the appropriate processor (AM335x, for example)
- Software to decompress a zip file (ex. 7-zip)
- Software to write an image file to a SD card
- A SD card appropriate for the required hardware platform, must be 16GB or larger
- A SD card reader/writer
Steps to Follow
Here is the process to follow to create the SD card.
Download the Processor SDK for Linux image file that you want to use.
On a Windows PC, you’ll need software to decompress a zip file. Windows 7 can do this natively. If you don’t already have something that works, the open source software 7-zip is a great choice. Since this image is created with lots of empty space, this step saves about 700 MB of download time.
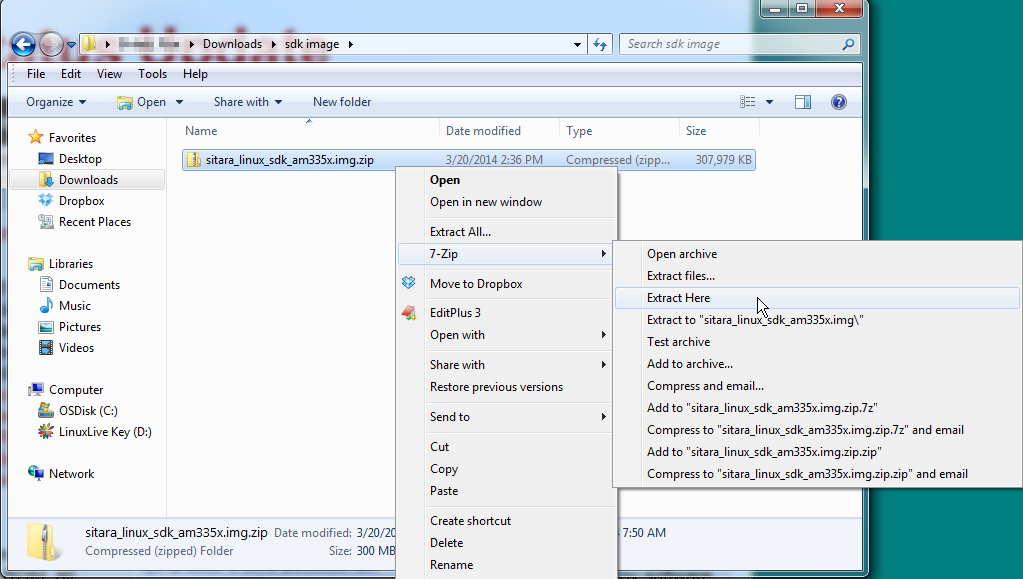
Use the decompression software to decompress the zipped file to an image file. Here’s how to do it with 7-zip:
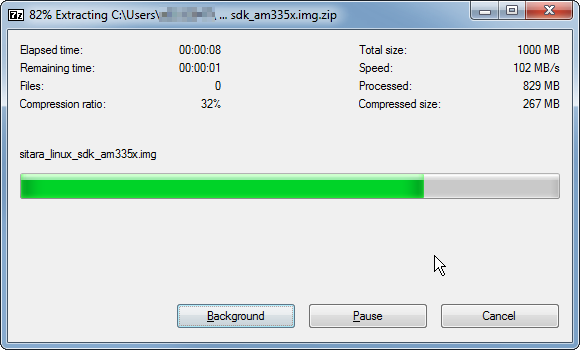
You should see a status bar as the image is decompressed:
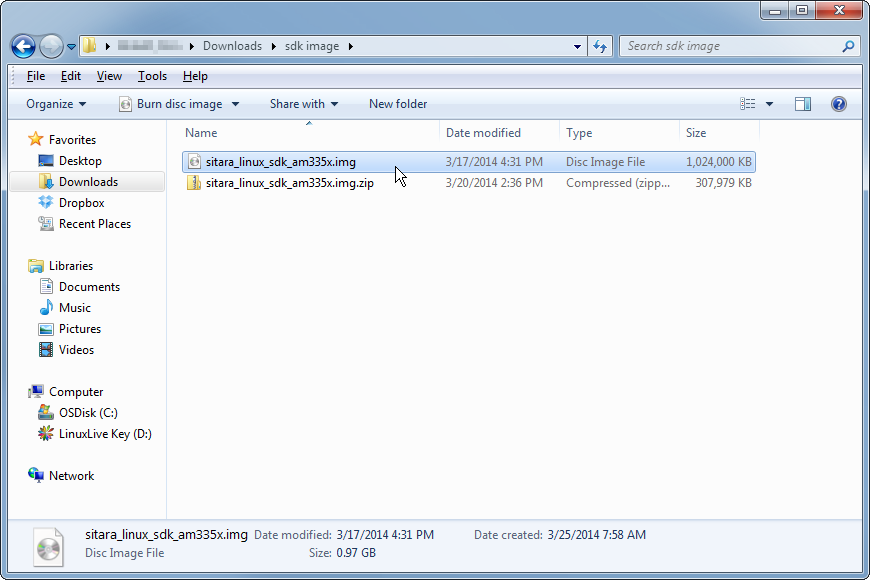
And this is what you should have when it is finished:
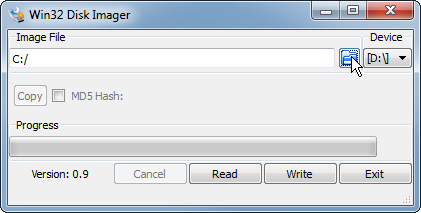
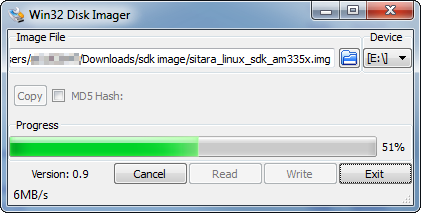
If you don’t have it already, download a program to write the image file to the SD card. The open source Win32 Disk Imager is a good option.
Use the software for writing an image to disk to write the decompressed .img file to the SD card.
Plug the SD card into the SD card reader/writer.
Insert the SD card reader/writer into the PC.
Launch the disk writer software, if needed.
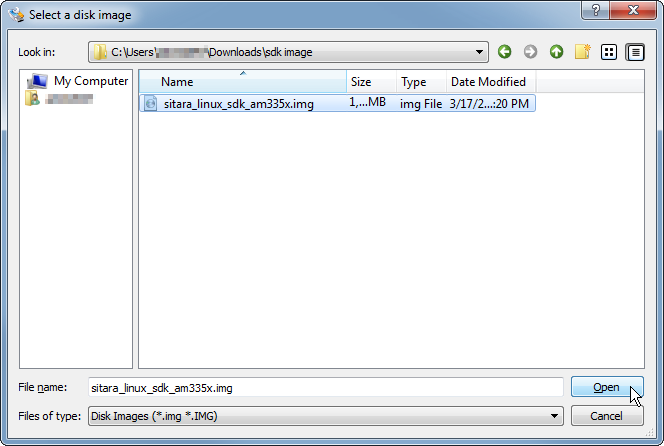
Choose the image file for the SDK that you want to write.
And select the appropriate SDK Image file:
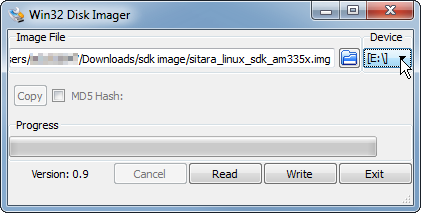
Choose the SD card as the destination.
Write the image to the SD card.
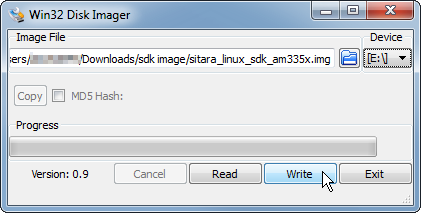
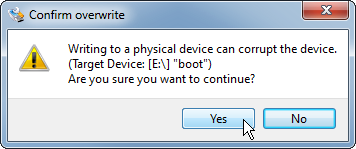
You’ll likely get the below confirmation box. This command will overwrite whatever disk you point it to, please make sure and choose the correct disk:
You should see the following status bar as the image is being written to the disk:
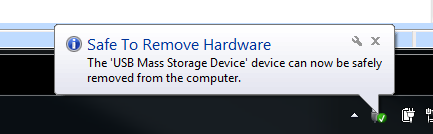
And when the write is complete, you should get a notification:
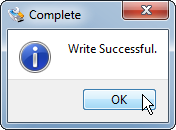
You can now close the image writing program:

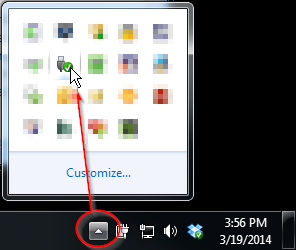
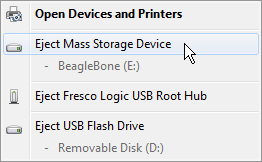
Safely eject the SD card from the computer. Here’s an example using Windows 7:
- Plug it into a supported hardware platform and boot the platform from the SD card.
- If the platform has a display (Starterkit, for example), you should see the Matrix application from the SDK. If the hardware does not have a display, you should be able to access Matrix remotely through a web browser if the PC and the board are on a common network. You can also connect to the board using a terminal emulator (ex. Tera Term) in order to view the serial console and interact with the embedded Linux system (ex. run ifconfig to get the IP address of the target board in order to connect to it to view remote matrix).
1.1.3. Download and Install the SDK
The Processor SDK Installer (ti-processor-sdk-linux-[platformName]-evm-xx.xx.xx.xx-Linux-x86-Install.bin) will install the necessary components to start your development on the TI microprocessor. The SDK consists of source for the Matrix App launcher starting point application, a development filesystem, a target filesystem, example applications, toolchain and board support package, ease of use scripts and documentation. The Processor SDK now includes the ARM GCC toolchain. The Processor SDK was built and tested against a specific Linux Distribution name and version, Ubuntu 16.04 and 18.04. Note this does not prevent the user from installing the SDK on other Linux distributions.
How to Get the SDK Installer
There are two ways you can get the installer:
From a file downloaded from the SDK download page. This will always host the latest version of SDK.
The second way below is not applicable to K2H/K2K, K2E, and K2L platforms, which are using SD card.
From the SD Card included with a TI EVM. This may not be the latest version of the SDK. We recommend checking the above site and using the latest version if at all possible. Before running the SDK Installer from the SD card, the SD Card from the EVM box needs to be mounted to your Linux Host PC (using a USB SD Card reader). The SDK Installer is found in the START_HERE partition of the SD card.
How to Run the SDK Installer
Make sure that the execute permissions are set. Bring up a terminal window and change directories to the where the installer is located (probably the Downloads directory if downloaded or the START_HERE partition mounted from the SD Card) and run the following commands:
chmod +x ./ti-processor-sdk-linux-[platformName]-evm-xx.xx.xx.xx-Linux-x86-Install.bin ./ti-processor-sdk-linux-[platformName]-evm-xx.xx.xx.xx-Linux-x86-Install.bin |
Alternatively, you can give execute permissions and run the SDK Installer by double clicking on it within your Linux host PC.
If nothing seems to happen, you are probably running a 32-bit version of Linux. The installer is 64-bit, and will not execute properly.
Additional Installer Options
Invoking the installer with argument –help will list available options for the installer (e.g. text installer, etc.):
./ti-processor-sdk-linux-[platformName]-evm-xx.xx.xx.xx-Linux-x86-Install.bin –help |
SDK Installer Execution Steps
- Confirm User is to confirm if loading the Processor SDK is ok. This is important to note if the user is trying to over-install on an existing directory and has made changes to the directory.
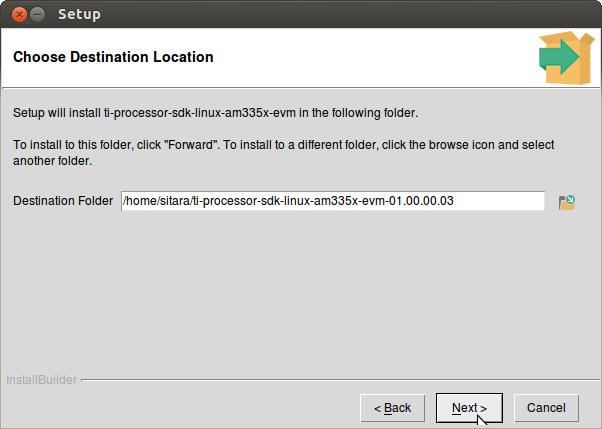
- Directory Install Location The user will be prompted for a location on where to put the Processor SDK. An example is given below.
- Installation of software The software is installed.
Where to install the Processor SDK package
The default selection of where to install is the user’s home directory. In this particular example the name of the user is ‘sitara’.
1.1.4. Program EVM User Guide
1.1.4.1. Overview
This release provides the images for the factory to program on the eeprom, nand and nor for EVMK2H, EVM2E, and EVMK2L. The mechanism only applies to the devices with DSP core, and won’t work for devices without DSP, such as AM5K2E02 and AM5K2E04 devices.
1.1.4.2. Files Provided
The files used for programming the EVMs are provided under bin\program_evm\binaries\[evmk2h, evmk2e, evmk2l].
Источник


