- Установка TigerVNC на Ubuntu Server 18.04 LTS
- Установка Gnome
- Установка TigerVNC
- Подключение к серверу
- Рабочее окружение Gnome
- Подключение с удаленного хоста
- Безопасное подключение
- Создание файла сервиса
- STEP BY STEP TIGERVNC SERVER CONFIGURATION – A REMOTE DESKTOP APPLICATION FOR LINUX
- Introduction
- Follow the below steps to configure TigerVNC Server (Remote Desktop Application for Linux)
- Server Side :
- Step : 1 Install Required Packages
- Step : 2 Create Users for TigerVNC Server
- Step : 3 Generate VNC Password Users
- Step : 4 Configure the Resolution for Users in VNC Server
- History
- Downloads
- Community
- Documentation
- Bounties
- RFB Protocol
- Development
- TigerVNC
- Contents
- Installation
- Running vncserver for virtual (headless) sessions
- Initial setup
- Starting and stopping tigervnc
- Expose the local display directly
- Running x0vncserver to directly control the local display
- Starting x0vncserver via xprofile
- Starting and stopping x0vncserver via systemd
- Running Xvnc with XDMCP for on demand sessions
- Connecting to vncserver
- Passwordless authentication
- Example GUI-based clients
- Accessing vncserver via SSH tunnels
- On the server
- On the client
- Connecting to a vncserver from Android devices over SSH
- Tips and tricks
- Connecting to an OSX system
- Recommended security settings
- Toggling fullscreen
- Workaround for mouse back and forward buttons not working
- Substituting mouse back/forward buttons with keyboard keys XF86Back/XF86Forward
- Mapping the keyboard key presses back to mouse button clicks on the server
- Troubleshooting
- Terminals in vncserver start in / (root dir)
- Unable to type ‘
- Black rectangle instead of window
- Empty black window with mouse cursor
- No mouse cursor
- Copying clipboard content from the remote machine
- «Authentication is required to create a color managed device» dialog when launching GNOME 3
- No window decoration / borders / titlebars / cannot move windows around
- systemd service unit run as user
Установка TigerVNC на Ubuntu Server 18.04 LTS
VNC (Virtual Network Computing) — это система удалённого доступа, которая позволяет использовать клавиатуру и мышь для взаимодействия с графическим интерфейсом рабочего стола удалённого сервера. С её помощью можно управлять файлами, программным обеспечением и настройками удалённого сервера, не обращаясь к командной строке.
Установка Gnome
Тут есть три варианта — Vanilla Gnome (минимальный), Ubuntu Gnome Minimal Desktop (что-то среднее) и Ubuntu Gnome Desktop (полная установка):
Запускаем службу GDM (Gnome Display Manager) и добавляем ее в автозагрузку:
Установка TigerVNC
Установим VNC-сервер и VNC-клиент:
При первом запуске vncserver предложит ввести пароль, который можно будет использовать для подключения к компьютеру, а также ввести пароль для подключения в режиме «только просмотр». Обратите внимание, что утилиту необходимо запускать от имени обычного пользователя, а не суперпользователя. Кроме того, будет создана конфигурация в каталоге
Остановим сервер, потому что первый запуск нужен только для пароля и конфигурации:
Подключение к серверу
Теперь запустим VNC-сервер с рабочем окружением в виде терминала:
Вариант подключения нам был предложен в сообщении от vncserver (см. выше):
Мы указываем тип авторизации и передаем файл с паролем, который создали при первом запуске VNC сервера.

Посмотреть список запущенных серверов можно командой:
Чтобы завершить запущенный VNC-сервер — используем опцию kill и идентификатор дисплея:
Теперь запустим vncserver с рабочем окружением в виде браузера и с разрешением экрана 1024×768:
И подключимся к запущенному серверу:

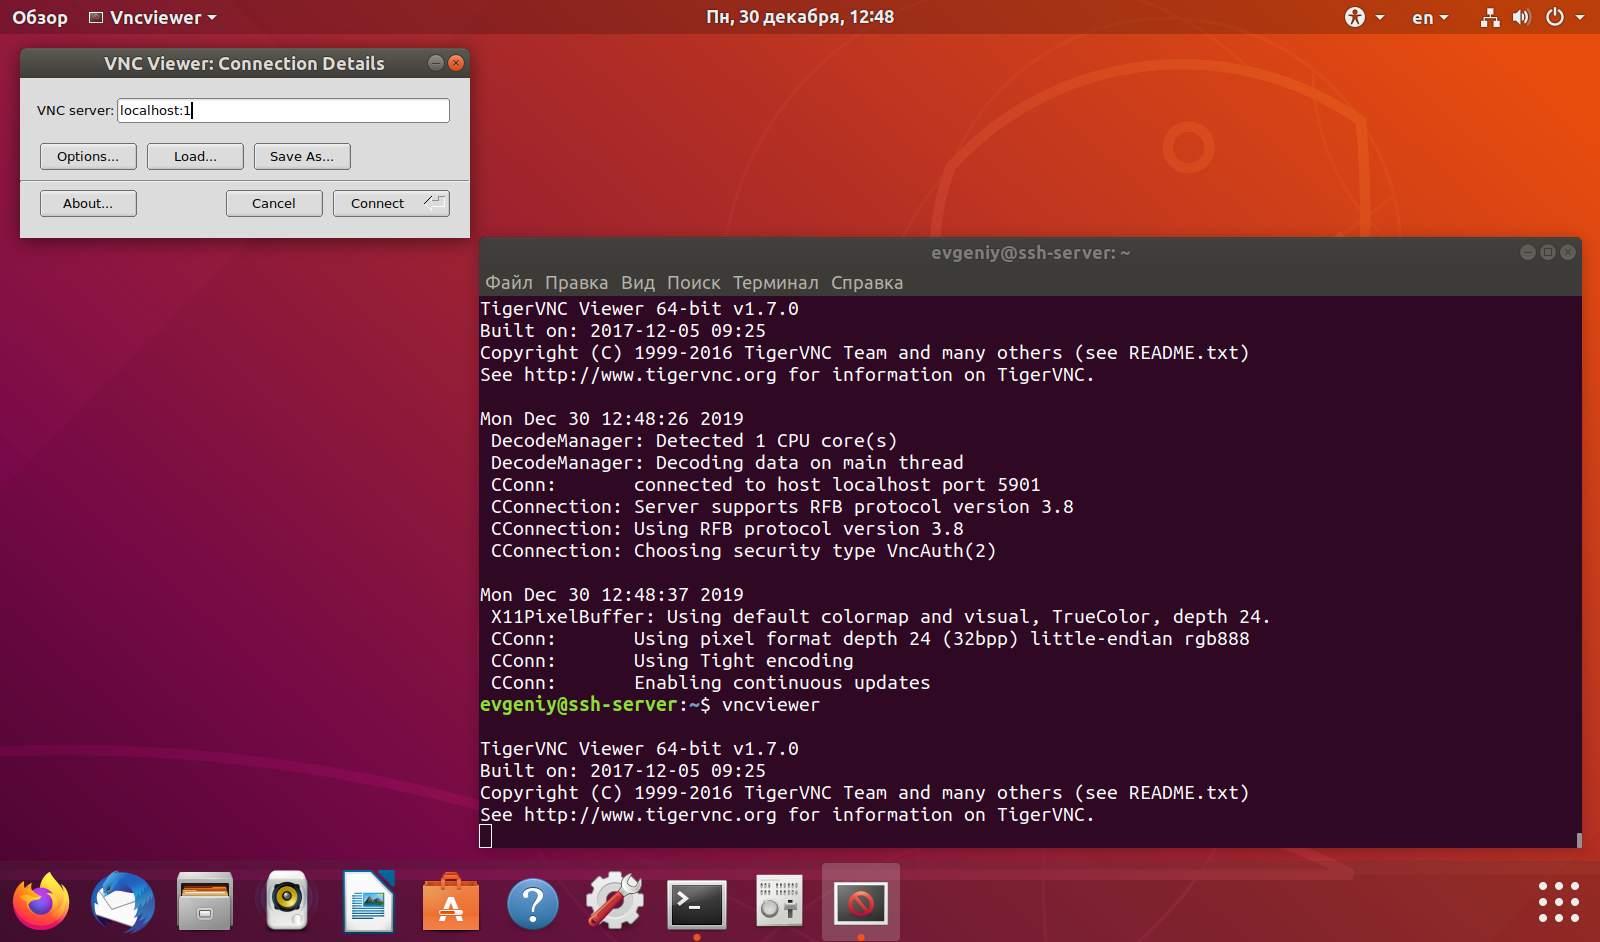
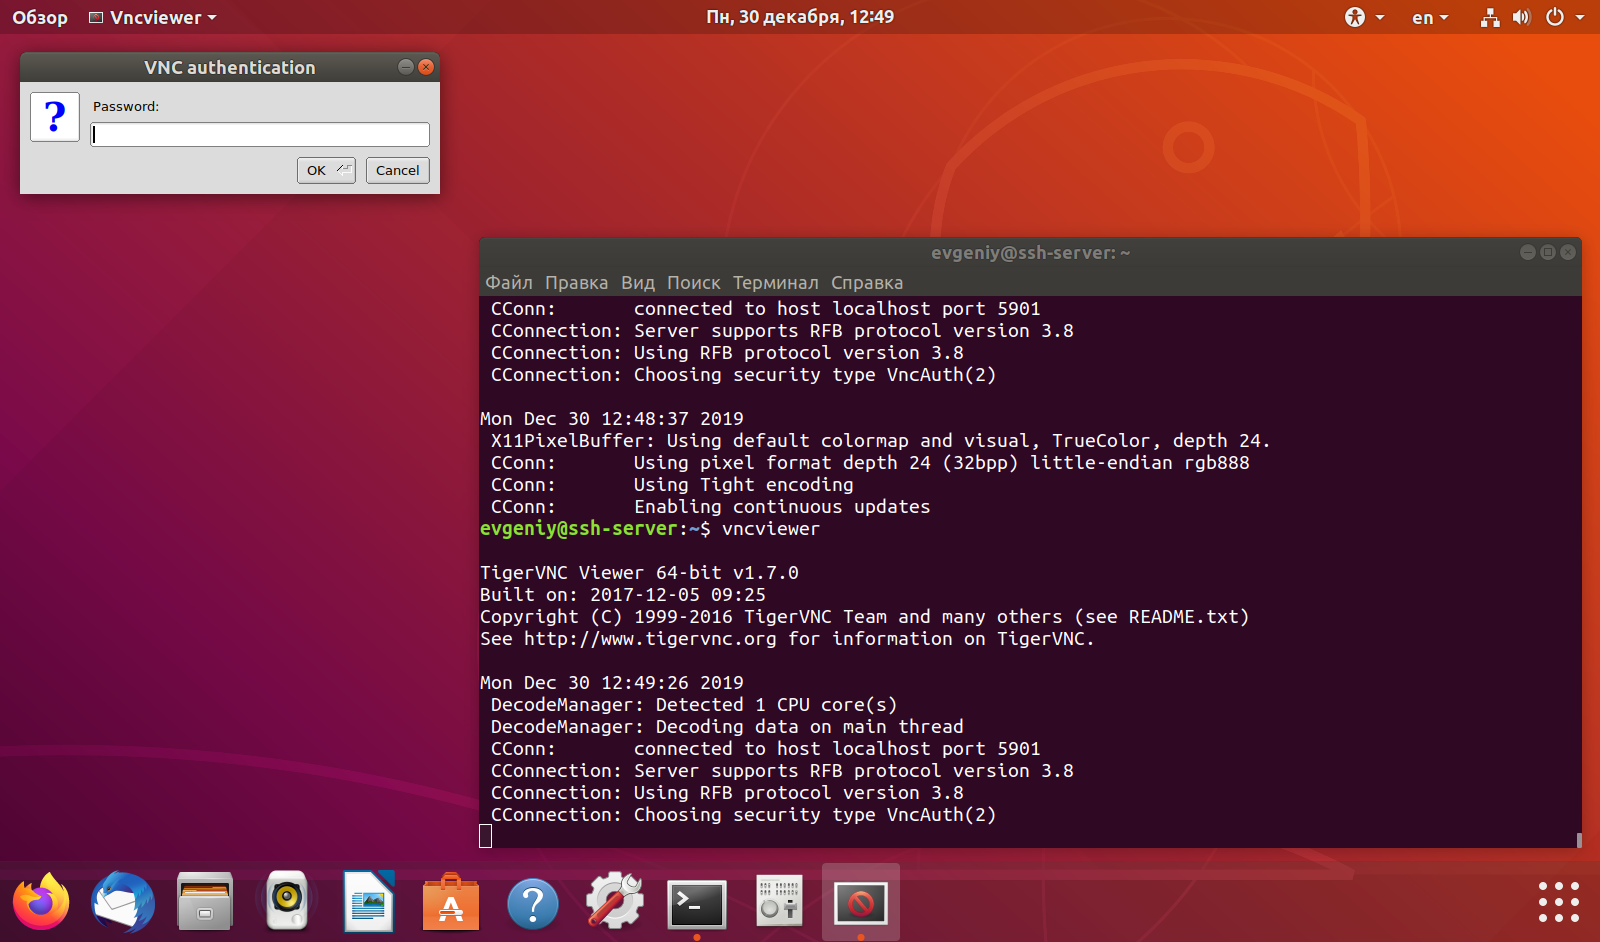
Также можно запустить vncviewer без параметров, тогда утилита откроет окно, где нужно ввести ip-адрес машины (на которой запущен сервер) + номер дисплея или порта + пароль:
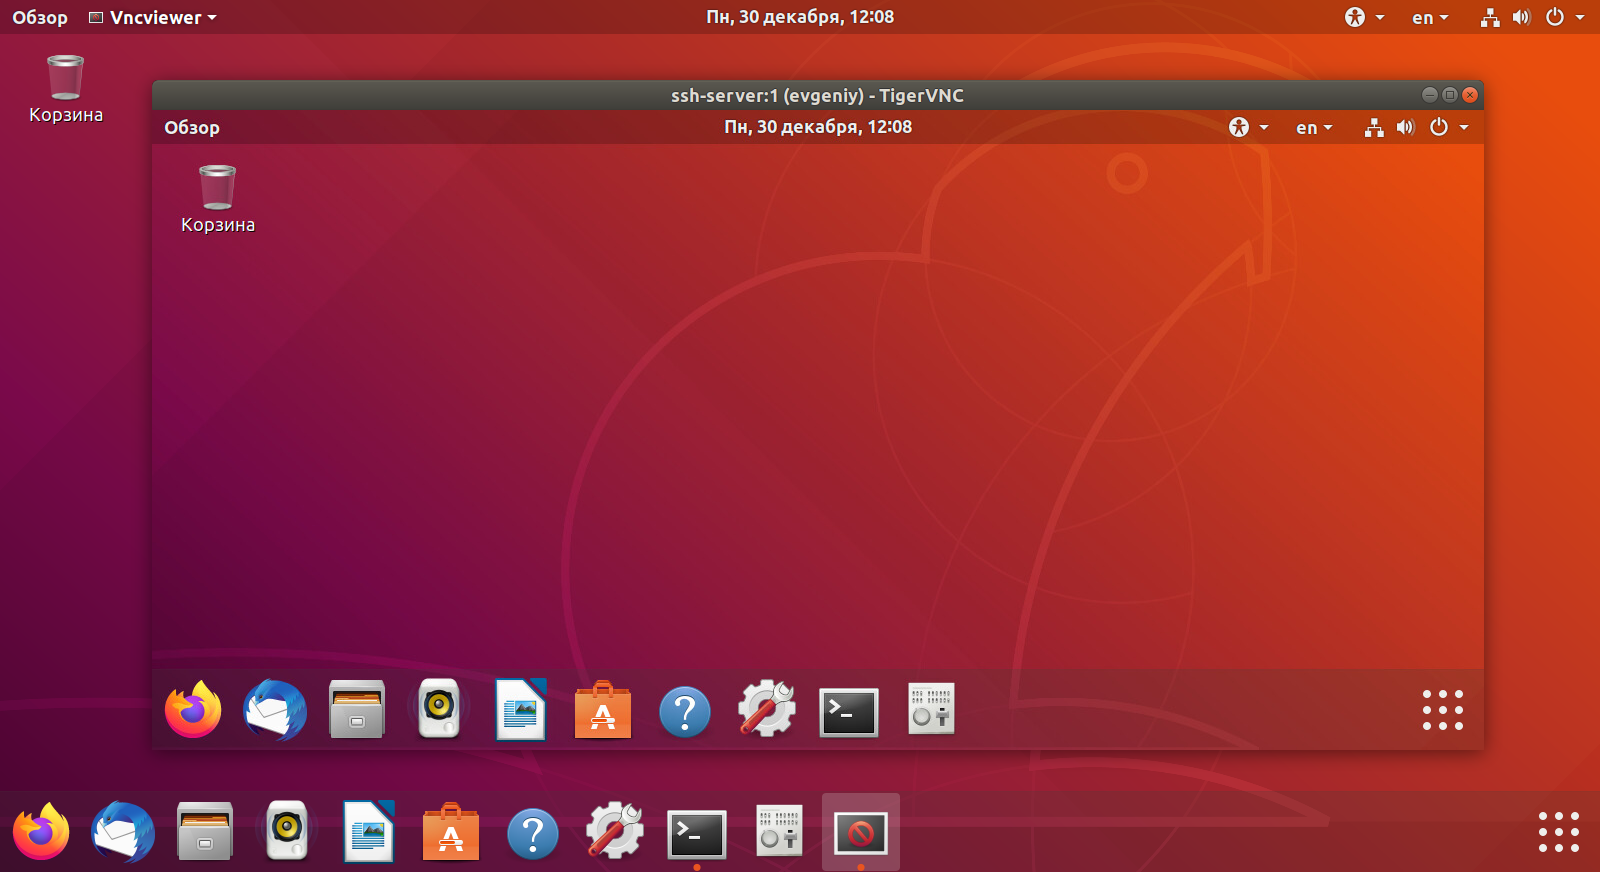
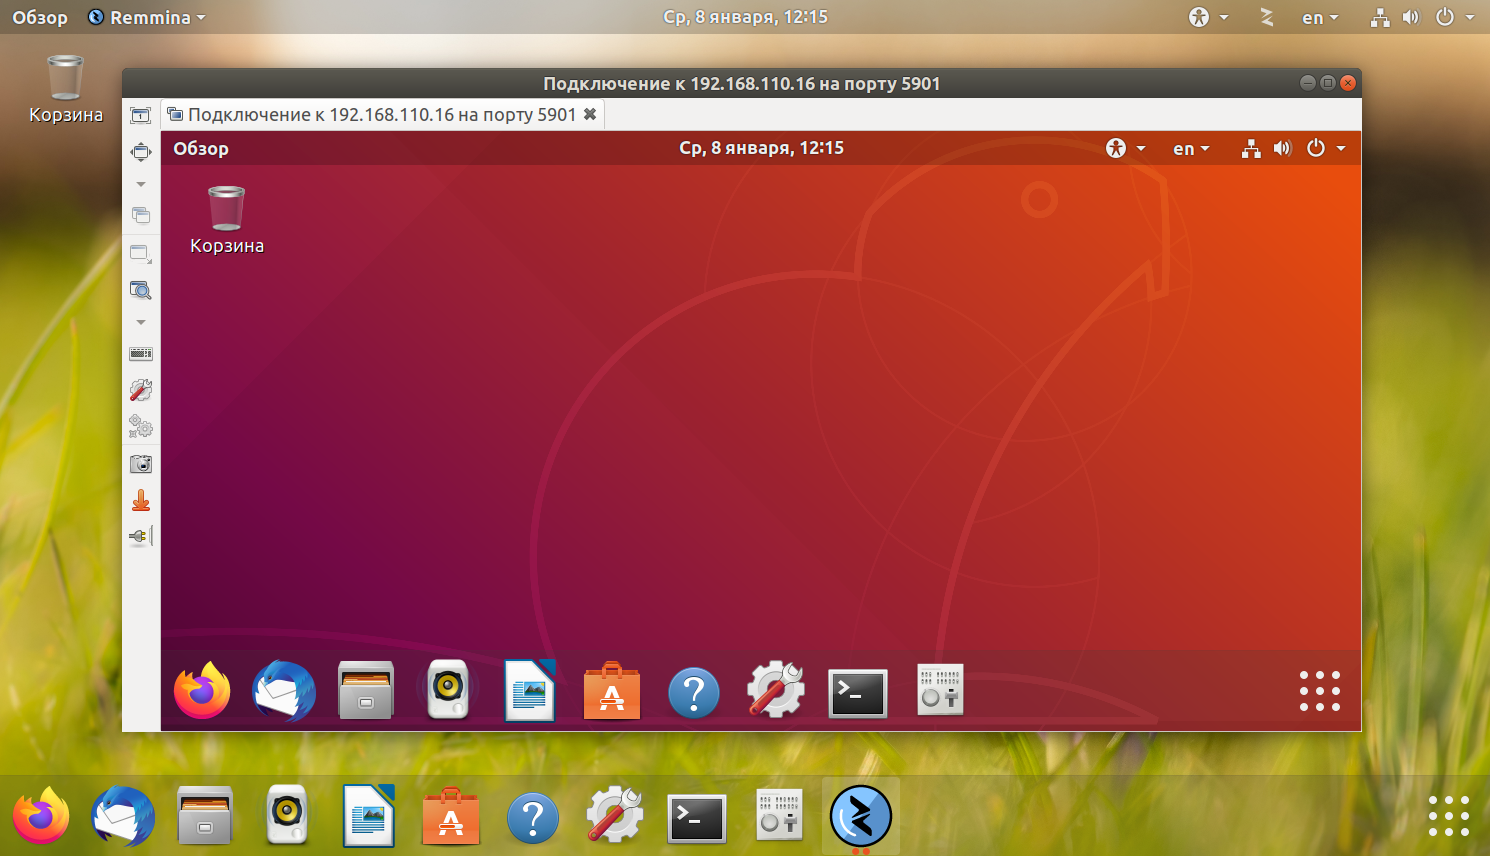
Рабочее окружение Gnome
Мы запускали vncserver с рабочем окружением в виде терминала и браузера, но теперь нам нужно полноценное рабочее окружение Gnome. Чтобы его настроить, создаем файл
/.vnc/xstartup со следующим содержимым:
Это скрипт, который запускает рабочее окружение Gnome, но можно запускать и другие окружения. Теперь при запуске vncserver опция xstartup не нужна.
И подключимся к запущенному серверу:
Подключение с удаленного хоста
Перед подключением надо открыть несколько портов на той машине, где установлен VNC-сервер, чтобы фаервол не блокировал подключение:
А сам VNC-сервер должен быть запущен с опцией -localhost no , иначе он не будет принимать подключения с других хостов, а только с localhost :
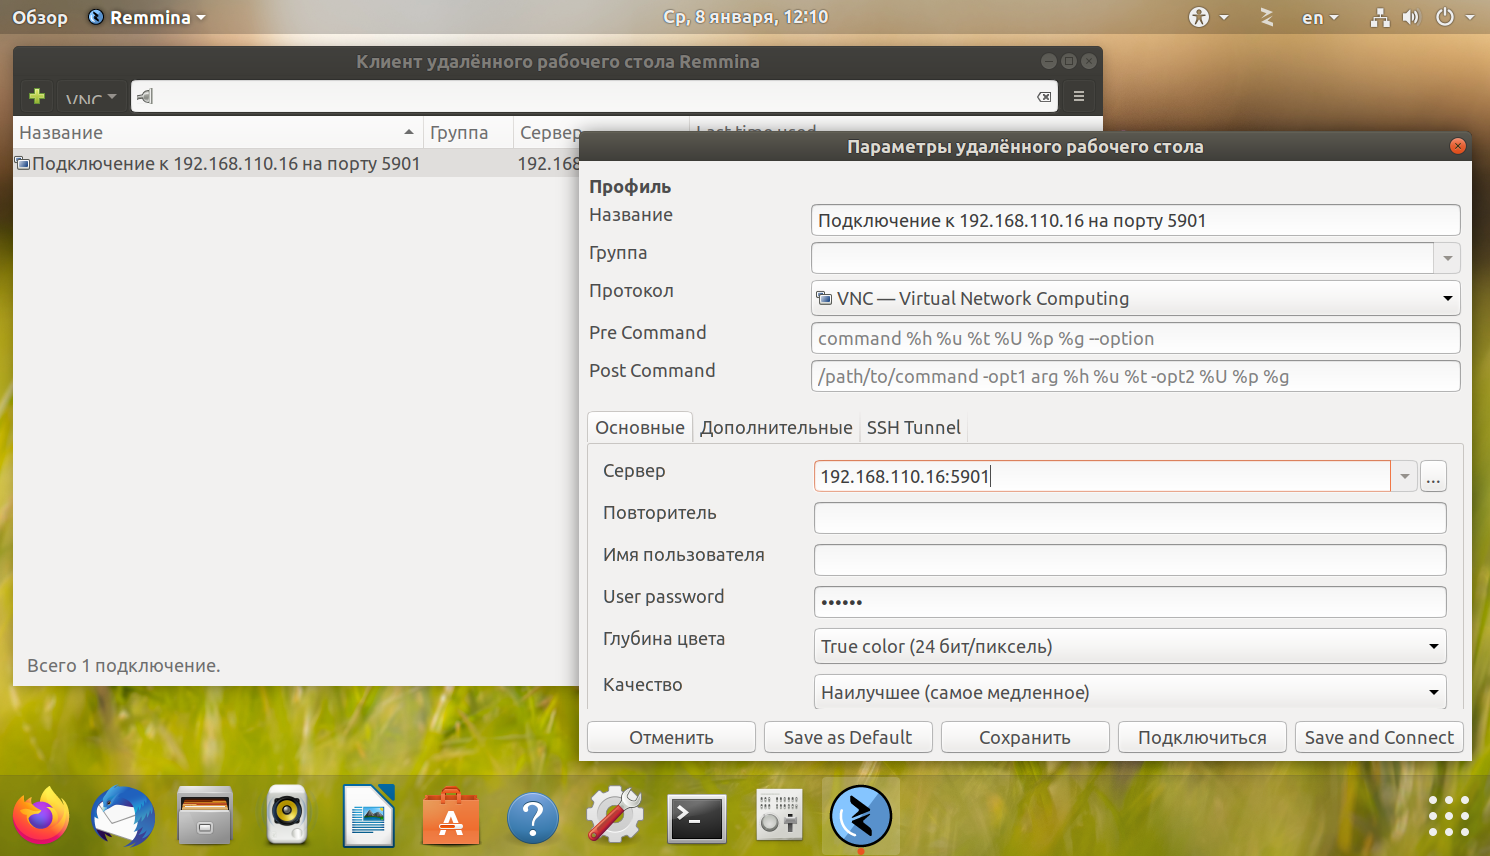
На другом компьютере, с которого будем подключаться к VNC-серверу, используем приложение Remmina:
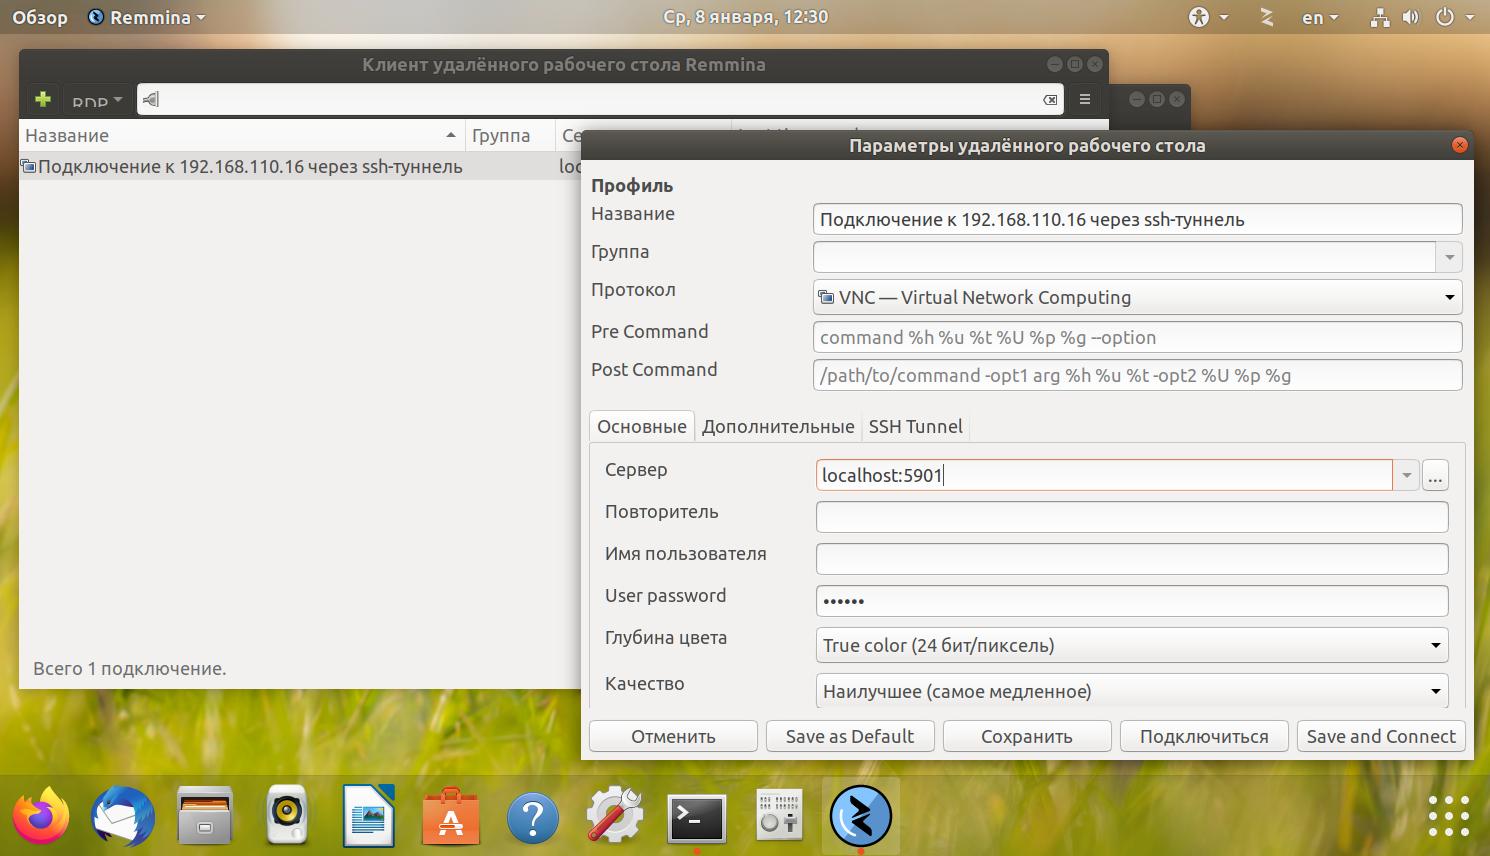
Безопасное подключение
При подключении VNC не использует безопасные протоколы. Давайте создадим SSH-туннель для безопасного подключения к серверу (для этого на машине с VNC-сервером должен быть установлен SSH-сервер):
Теперь при подключении к VNC-серверу указываем не 192.168.110.16:5901 , а localhost:5901 . Мы как бы подключаемся к локальной машине, но соединение будет проброшено через ssh-туннель на машину с VNC-сервером.
При этом на машине с установленным VNC-сервером должен быть открыт 22-ой порт:
Держать открытыми порты 5901:5903 больше не нужно, так что закрываем. А VNC-сервер теперь можно запускать без ключа -localhost no :
Создание файла сервиса
Теперь нужно настроить сервер VNC как сервис Systemd, чтобы он запускался при загрузке системы. Для этого создаем новый unit-файл:
Символ @ в конце имени файла позволит нам передать аргумент, который можно использовать в конфигурации сервиса. С его помощью можно указать порт VNC, который нужно использовать при управлении сервисом.
Команда ExecStartPre останавливает VNC, если сервис уже запущен. Команда ExecStart запускает VNC-сервер, а команда ExecStop — останавливает. Давайте сообщим системе про новый unit-файл:
Добавляем три службы в автозагрузку:
Теперь, после загрузки системы, VNC-сервер будет прослушивать три порта: 5901, 5902 и 5903. И мы можем подключиться на любом из них. Кроме того, мы можем вручную запустить или остановить VNC-сервер, как любую другую службу:
При подключении к VNC-серверу нужно на клиенте создать три ssh-туннеля:
Но такая команда вряд ли будет нужна, потому как три экземпляра VNC-сервера нужны, чтобы можно было одновременно подключиться с трех разных машин. А перед каждым подключением — создать ssh-туннель, чтобы пропускать через него tcp-соединение на порт 5901, 5902, 5903.
Источник
STEP BY STEP TIGERVNC SERVER CONFIGURATION – A REMOTE DESKTOP APPLICATION FOR LINUX
by Balamukunda Sahu · Published March 4, 2017 · Updated April 18, 2017

TigerVNC Server Configuration – A Remote Desktop Application for Linux
Introduction
I n this article we are going to discuss on How to configure TigerVNC Server in RHEL/CentOS/Fedora. VNC stands for Virtual Network Computing is a open source application used to share the desktop remotely in GUI (Graphical User Interface) format. It uses RFB (Remote Frame Buffer) protocol to transfer data over network. TigerVNC Server is a independent application comes for all kinds of operating systems i.e Windows, Linux, MacOS. VNC was first invented on year 1998 at AT&T lab in Cambridge. Usually the port number of TigerVNC Server is 5901, 5902 but we can customize the port Number. In TigerVNC Server also we need a Server to instalkl Server application and a client from where we can take remote of VNC Server. From client side we have tool called VNC Viewer. Here also we have one disadvantage in TigerVNC Server is it used RFB protocol to transfer data over network which is completely not secure but better then telnet. Like telnet TigerVNC Server not transfers data plain in text format. But we can implement extra security layer for VNC Server.
So Let’s have a look at configuration steps of TigerVNC Server in RHEL/CentOS/Fedora Linux.
Follow the below steps to configure TigerVNC Server (Remote Desktop Application for Linux)
Server Side :
IP Address – 192.168.0.105
First configure the Ethernet Card, Here in my practice Lab its eth0 and IP address is 192.168.0.105 as shown on the output below.
Step : 1 Install Required Packages
Before we start the configuration of TigerVNC Server we have to install required packages and dependencies. So let’s go ahead and install Desktop Environment and X Windows System packages.
Now install TigerVNC Server package using yum repository as shown below.
Step : 2 Create Users for TigerVNC Server
As we can see above TigerVNC Server package installed successfully, now we have to create users for VNC Server. So create users using useradd command as shown below.
Now I am going to create two users i.e. “elinuxbook” and “helpdesk“, Follow the steps below.
Note : Here as an example I have created Two users but you can create as much user you want as per your Scenario and Requirement.
So creating the 1st User i.e. “elinuxbook”
Creating the 2nd User i.e. “helpdesk”
Also Read :
Step : 3 Generate VNC Password Users
Once users created we need to Switch to both users using su command and have to generate password for VNC Server. This password will used to authentication with TigerVNC Server while taking remote.
Generate Password for 1st User i.e. “elinuxbook”
Generate Password for 2nd User i.e. “helpdesk”
Users passwords are stores in a file called passwd which is located at .vnc/passwd.
Note : .vnc is a hidden directory can be seen by using ls -a command and located at home directory of User. Refer the output below.
Step : 4 Configure the Resolution for Users in VNC Server
Now we have to configure the main configuration file of TigerVNC Server i.e. /etc/sysconfig/vncsevers where we have to define users which we created on Step : 3 and also have to set the resolutions. So Follow the below steps to do the same. Configuration parts are highlighted in Red color.
Here we have set Resolution for both user is 800×600 means while we take remote of TigerVNC Server the screen will come in-front of us with 800×600 resolution.
Here I configured user “elinuxbook” with port no.1 and “helpdesk” with port no. 2. You can use different ports as per your requirement.
All required configuration are done, Now we have start the TigerVNC Server service.
After start the VNC Server service it creates script file (xstartup) and log file which is located at .vnc directory as shown on the outout above.
Start the TigerVNC Server service at startup.
Stop the Linux Firewall so that we can take remote of VNC Server from client side.
So we have done with all required configuration from client side, So let’s go ahead and test from client side to confirm if TigerVNC Server is working properly or not.
To take remote of VNC Server just download the VNC client application i.e. VNC Viewer which is freely available. SO download it and install it on your client system.
Now open the VNC Viewer application and enter the IP Address of the TigerVNC Server.
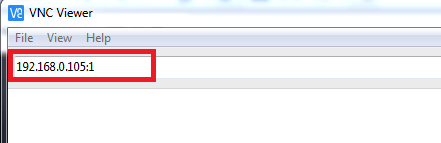
Enter the IP Address of TigerVNC Server
Click on continue button.
Click on Continue Button
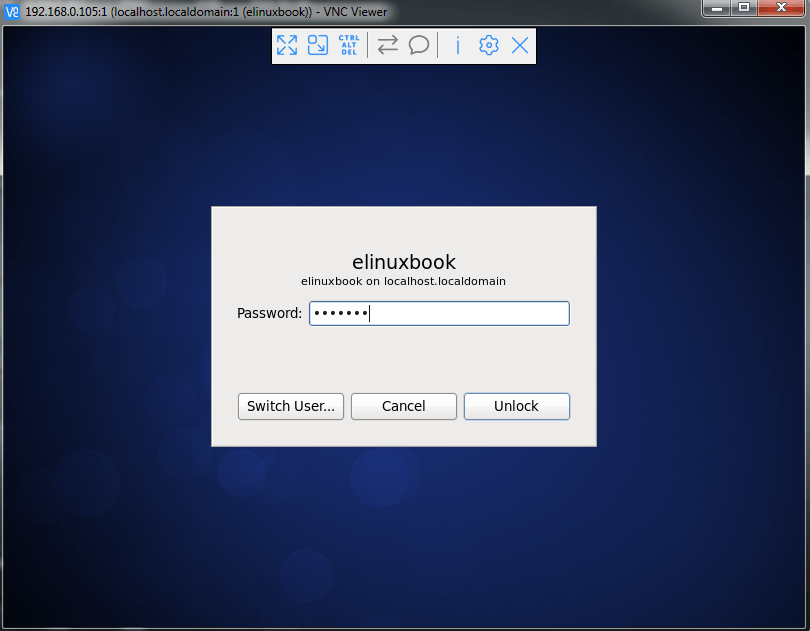
Now here TigerVNC server asking for Password, So enter the password of user “eliuxbook” which we have created on Step : 3. Here we are using password of user “elinuxbook” as we are taking the remote of TigerVNC Server using port :1 with IP Address (192.168.0.105:1) which we have configured in /etc/sysconfig/vncservers configuration file on Step : 4.
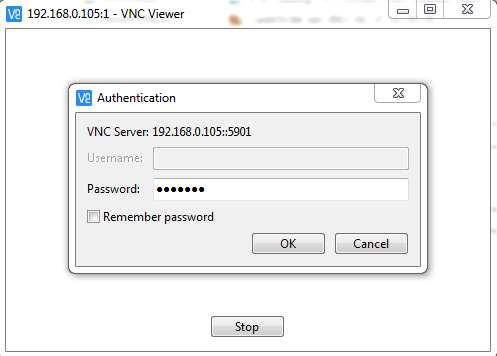
Enter the Password of TigerVNC Server
And we successfully able to take the remote of Linux Operating System using TigerVNC Server Refer the snapshots below.
Here enter the password of user “elinuxbook” to login linux operating system.
Note : This is the normal password to login Linux Operating System which we set after user creating on Step : 2 not that one which we have generated for VNC Server, So dont get confused.
Enter the Password of User

Taken Remote using TigerVNC Server
So This is how we are able to successfully configured TigerVNC Server in RHEL/CentOS/Fedora.
If you found this article useful then Like Us, Share Us, Subscribe our Newsletter OR if you have something to say then feel free to comment on the comment box below.
Источник
History
TigerVNC was originally based on the (never-released) VNC 4 branch of TightVNC. More information regarding the motivation for creating this project can be found in the project announcement.
Downloads
The latest release of TigerVNC can be downloaded from our GitHub release page. Besides the source code we also provide self-contained binaries for 64-bit and 32-bit Linux, installers for 64-bit and 32-bit Windows and a universal binary for Intel-based Macs. We also try to provide packages for various distributions when we easily can.
Pre-release builds of the experimental next-generation code can be found here.
Community
The project has three mailing lists:
Moderated announcement list for new releases and other important news.
Support and general discussion list for users of TigerVNC. Please use this list for bug reports.
Discussion list for TigerVNC developers. This list can be used for patch submissions and other development ideas.
Documentation
The man pages for the different programs are available here in HTML form:
This documentation is for the Unix programs but is mostly relevant for the equivalent Windows programs as well.
Bounties
If there is an issue you’d really like to get fixed, or if you’re a programmer that could use some extra cash, head over to Bountysource for information on how to trade bugs and features for the almighty buck. You can also make a general donation, which we (the TigerVNC admins) can distribute as bounties on existing issues.
RFB Protocol
A community maintained version of the VNC/RFB specification is maintained by the rfbproto project.
Development
Assorted documentation about TigerVNC and development can be found in the development section of the wiki.
Источник
TigerVNC
TigerVNC is an implementation of the Virtual Network Computing (VNC) protocol. This article focuses on the server functionality.
Contents
Installation
Running vncserver for virtual (headless) sessions
Initial setup
For a quick start, see the steps below. Users are encouraged to read vncserver(8) for the complete list of configuration options.
- Create a password using vncpasswd which will store the hashed password in
/.vnc/passwd .
/.vnc/config and at a minimum, define the type of session desired with a line like session=foo where foo corresponds to whichever desktop environment is to run. One can see which desktop environments are available on the system by seeing their corresponding .desktop files within /usr/share/xsessions/ . For example:
Starting and stopping tigervnc
Start an instance of the vncserver@.service template and optionally enable it to run at boot time/shutdown. Note that the instance identifier in this case is the display number (e.g. instance vncserver@:1.service for display number :1 ).
Expose the local display directly
Tigervnc comes with libvnc.so which can be directly loaded during X initialization which provides better performance. Create a following file and restart X:
Running x0vncserver to directly control the local display
tigervnc also provides x0vncserver(1) which allows direct control over a physical X session. After defining a session password using the vncpasswd tool, invoke the server like so:
Starting x0vncserver via xprofile
A simple way to start x0vncserver is adding a line in one of the xprofile files such as:
Starting and stopping x0vncserver via systemd
In order to have a VNC Server running x0vncserver, which is the easiest way for most users to quickly have remote access to the current desktop, create a systemd unit as follows replacing the user and the options with the desired ones:
Running Xvnc with XDMCP for on demand sessions
One can use systemd socket activation in combination with XDMCP to automatically spawn VNC servers for each user who attempts to login, so there is no need to set up one server/port per user. This setup uses the display manager to authenticate users and login, so there is no need for VNC passwords. The downside is that users cannot leave a session running on the server and reconnect to it later.
To get this running, first set up XDMCP and make sure the display manager is running. Then create:
Use systemctl to start and enable xvnc.socket . Now any number of users can get unique desktops by connecting to port 5900.
If the VNC server is exposed to the internet, add the -localhost option to Xvnc in xvnc@.service (note that -query localhost and -localhost are different switches) and follow #Accessing vncserver via SSH tunnels. Since we only select a user after connecting, the VNC server runs as user nobody and uses Xvnc directly instead of the vncserver script, so any options in
/.vnc are ignored. Optionally, autostart vncconfig so that the clipboard works (vncconfig exits immediately in non-VNC sessions). One way is to create:
Connecting to vncserver
Any number of clients can connect to a vncserver. A simple example is given below where vncserver is running on 10.1.10.2 port 5901, or :1 in shorthand notation:
Passwordless authentication
The -passwd switch allows one to define the location of the server’s
/.vnc/passwd file. It is expected that the user has access to this file on the server through SSH or through physical access. In either case, place that file on the client’s file system in a safe location, i.e. one that has read access ONLY to the expected user.
The password can also be provided directly.
Example GUI-based clients
TigerVNC’s vncviewer also has a simple GUI when run without any parameters:
Accessing vncserver via SSH tunnels
For servers offering SSH connection, an advantage of this method is that it is not necessary to open any other port than the already opened SSH port to the outside, since the VNC traffic is tunneled through the SSH port.
On the server
On the server side, vncserver or x0vncserver must be run.
When running either one of these, it is recommended to use the localhost option in
/.vnc/config or the -localhost switch (for x0vncserver) since it allows connections from the localhost only and by analogy, only from users ssh’ed and authenticated on the box. For example:
Make sure to Start or Restart the vncserver@.service , for example (see also #Initial setup):
or for x0vncserver:
On the client
The VNC server has been setup on the remote machine to only accept local connections. Now, the client must open a secure shell with the remote machine (10.1.10.2 in this example) and create a tunnel from the client port, for instance 9901, to the remote server 5901 port. For more details on this feature, see OpenSSH#Forwarding other ports and ssh(1) .
Once connected via SSH, leave this shell window open since it is acting as the secured tunnel with the server. Alternatively, directly run SSH in the background using the -f option. On the client side, to connect via this encrypted tunnel, point the vncviewer to the forwarded client port on the localhost.
What happens in practice is that the vncviewer connects locally to port 9901 which is tunneled to the server’s localhost port 5901. The connection is established to the right port within the secure shell.
What it does is that the -f switch will make ssh go in the background, it will still be alive executing sleep 10 . vncviewer is then executed and ssh remains open in the background as long as vncviewer makes use of the tunnel. ssh will close once the tunnel is dropped which is the wanted behavior.
Alternatively, vncviewer’s -via switch provides a shortcut for the above command:
(Notice the double colon – vncviewer’s syntax is [host]:[display#] or [host]::[port] .)
Connecting to a vncserver from Android devices over SSH
To connect to a VNC server over SSH using an Android device as a client, consider having the following setup:
- SSH running on the server
- vncserver running on server (with -localhost flag for security)
- SSH client on the Android device: ConnectBot is a popular choice and will be used in this guide as an example
- VNC client on the Android device: androidVNC used here
In ConnectBot, connect to the desired machine. Tap the options key, select Port Forwards and add a port:
In androidVNC connect to the VNC port, this is the local address following the SSH connection:
Tips and tricks
Connecting to an OSX system
Recommended security settings
If not #Accessing vncserver via SSH tunnels where the identification and the encryption are handled via SSH, it is recommended to use X509Vnc, as TLSVnc lacks identity verification.
Issuing x509 certificates is beyond the scope of this guide. However, Let’s Encrypt provides an easy way to do so. Alternatively, one can issue certificates using OpenSSL, share the public key with the client and specify it with the -X509CA parameter. An example is given below the server is running on 10.1.10.2:
Toggling fullscreen
This can be done through vnc client’s menu. By default, vnc client’s mkey is F8 .
Workaround for mouse back and forward buttons not working
The VNC protocol currently only uses 7 mouse buttons (left, middle, right, scroll up, scroll down, scroll left, scroll right) which means if your mouse has a back and a forward button these are not usable and input will be ignored.
evrouter can be used to work around this limitation by sending keyboard key presses when clicking the mouse back/forward buttons. Optionally xte found in xautomation and xbindkeys can be used on the server to map the keyboard key presses back to mouse button clicks if needed.
Substituting mouse back/forward buttons with keyboard keys XF86Back/XF86Forward
This method is simple and suitable if you only need a way to navigate backward/forward while using web browsers or file browsers for example.
Install evrouter AUR and xautomation on the client. Configure evrouter, see Mouse buttons#evrouter and evrouter man pages for instructions and tips on how to find the correct device name, window name, button names etc. Example config:
Start evrouter on the client. With above configuration keyboard key XF86Back is sent to the VNC server when clicking the back button on the mouse, and XF86Forward is sent when clicking the forward button.
Mapping the keyboard key presses back to mouse button clicks on the server
If needed it’s possible to map the keyboard keys back to mouse button clicks on the server. In this case it might be a good idea to use keyboard keys which are never on the client or server. In the example below keyboard keys XF86Launch8/XF86Launch9 are used as mouse buttons 8/9.
Evrouter configuration on the client:
Install xautomation and xbindkeys on the server. Configure xbindkeys to map keyboard keys XF86Launch8/XF86Launch9 to mouse buttons 8/9 with xte.
Start xbindkeys $ xbindkeys -f
/.xbindkeysrc . The server will now map XF86Launch8/XF86Launch9 to mouse buttons 8/9.
Troubleshooting
Terminals in vncserver start in / (root dir)
Unable to type ‘
If pressing on a remote client emits the > character, try remapping the incoming key [1] [dead link 2020-04-03 ⓘ] :
Black rectangle instead of window
Most probably this is due to the application strictly requiring the composite Xorg extension. For example webkit based app: midori, psi-plus, etc.
Restart vncserver in this case using something like following:
It looks like Composite extension in VNC will work only with 24bit depth.
Empty black window with mouse cursor
Verify that the user is not logged into a physical X session, unless this option was configured with x0vncserver . Multiple X sessions for a single user are not supported, see https://github.com/TigerVNC/tigervnc/issues/684#issuecomment-494385395.
Conversely, trying to log into a local X session while a VNC server service is running for that user will likely not work, and you may get stuck on a splash screen when using a desktop environment.
No mouse cursor
If no mouse cursor is visible when using x0vncserver, start vncviewer as follows:
Alternatively, put DotWhenNoCursor=1 in the TigerVNC configuration file, which is at
/.vnc/default.tigervnc by default.
Copying clipboard content from the remote machine
If copying from the remote machine to the local machine does not work, run autocutsel on the server, as mentioned in [2]:
Now press F8 to display the VNC menu popup, and select Clipboard: local -> remote option.
«Authentication is required to create a color managed device» dialog when launching GNOME 3
A workaround is to create a «vnc» group and add the gdm user and any other users using vnc to that group. Modify /etc/polkit-1/rules.d/gnome-vnc.rules with the following[3]:
No window decoration / borders / titlebars / cannot move windows around
Start a window manager to fix an empty xterm frame. For example, on Xfce, run xfwm4 & .
systemd service unit run as user
Create the following template:
Start/enable tigervnc@:9 to run the template instance on display 9.
Источник


