- How To Install and Access TightVNC Remote Desktop In Linux?
- Install Ubuntu, Debian, Mint, Kali
- Install CentOS, Fedora, RHEL
- Start VNC Server
- xstartup Configuration File
- Set Desktop Environment For KDE
- Set Desktop Environment For GNOME
- Set Desktop Environment For XFCE
- Set Desktop Environment For LXDE
- Kill VNC Server or Session
- Start Server or Session
- Connect with VNC Client
- Как установить VNC Server на Linux Mint 20
- Как установить VNC Server на Linux Mint 20
- Установить VNC Server на Linux Mint 20 Ulyana
- Шаг 1. Перед запуском приведенного ниже руководства важно убедиться, что ваша система обновлена, выполнив следующие apt команды в терминале:
- Шаг 2. Установка окружения рабочего стола.
- Шаг 3. Установка VNC-сервера на Linux Mint 20.
- Шаг 4. Настройте VNC.
- Шаг 5. Создайте сценарий запуска системы VNC-сервера.
- Шаг 6. Подключение к VNC-серверу.
- Remote GUI access to a Linux computer using Tightvnc with systemd
- TightVNC vs Real VNC
- Installing a start-up script using Systemd
- Choosing TightVNC
- Client server model
- Install the TightVNC server software
- Start server and configure a password
- Adding Tightvnc to systemd startup
- Installing Tightvnc viewer (VNC client) on a Linux computer
- Installing Tightvnc view on a Windows computer
- Securing TightVNC
- Starting your window manager
How To Install and Access TightVNC Remote Desktop In Linux?
TightVNC is a very handy remote desktop application which is based on VNC protocol. TightVNC is mostly used for Linux systems in order to manage a remote desktop environment with GUI. In this tutorial, we will look at how to install and configure properly to run desktop environments like KDE, GNOME, XFCE, etc. with TightVNC.
Install Ubuntu, Debian, Mint, Kali
We can use the following command to install deb based distributions.
Install CentOS, Fedora, RHEL
We can use the following command to install rpm based distributions.
Start VNC Server
Now we need to specify a desktop environment for our VNC session. Actually, we have not created a VNC session yet but we will create a new one to create default configuration files. We run the following command by providing a password for the VNC session.
We can see that during VNC server start a password is specified which will be asked to the VNC clients want to connect this VNC server. Then the question wheter we want to create a view-only password. View-only password can be used to only view VNC sessions but can not control it. New VNC server session is create with the number 1 which means the server port is 5901 which is also called as ubuntu:1 .
xstartup Configuration File
All VNC Server related configuration is held in a file named xstartup which is located in the user’s home directory .vnc folder. Let’s print the default configuration. In this case, the VNC configuration file is located /home/ismail/.vnc/xstartup .
Set Desktop Environment For KDE
In order to enable KDE desktop environment with a new VNC session, we need to add the following line to the xstartup file.
Set Desktop Environment For GNOME
In order to enable GNOME desktop environment with a new VNC session, we need to add the following line to the xstartup file.
Set Desktop Environment For XFCE
In order to enable GNOME desktop environment with a new VNC session, we need to add the following line to the xstartup file.
Set Desktop Environment For LXDE
In order to enable GNOME desktop environment with a new VNC session, we need to add the following line to the xstartup file.
Kill VNC Server or Session
As we have started a VNC server or session to create default configuration files. We need to kill it we can kill the VNC server with the -k option and the session ID. In this example, we will kill the session ID 1 .
Start Server or Session
Now we can start a new server with the command vncserver where the default configured desktop will be fired-up.
Connect with VNC Client
VNC servers start with port number 5900 and count one by one with the session ID. For example, if we have given session ID 3 the port number will be configured as 5903 . We can connect with a VNC client which is explained in the following tutorial in detail.
Источник
Как установить VNC Server на Linux Mint 20

Как установить VNC Server на Linux Mint 20
В этом руководстве мы покажем вам, как установить VNC Server на Linux Mint 20. Для тех из вас, кто не знал, Node.js — это платформа Javascript для программирования, которая позволяет пользователям очень быстро создавать сетевые приложения. Если вы используете Javascript как во внешнем, так и в серверном интерфейсе, это означает, что ваша разработка может быть более последовательной и разрабатываться в рамках одной и той же системы.
В этой статье предполагается, что у вас есть хотя бы базовые знания Linux, вы знаете, как использовать оболочку, и, что наиболее важно, вы размещаете свой сайт на собственном VPS. Установка довольно проста и предполагает, что вы работаете с учетной записью root, в противном случае вам может потребоваться добавить ‘ sudo ‘ к командам для получения привилегий root. Я покажу вам пошаговую установку VNC Server на Linux Mint 20 (Ульяна).
Установить VNC Server на Linux Mint 20 Ulyana
Шаг 1. Перед запуском приведенного ниже руководства важно убедиться, что ваша система обновлена, выполнив следующие apt команды в терминале:
Шаг 2. Установка окружения рабочего стола.
Выполните следующую команду, чтобы установить рабочий стол XFCE:
Шаг 3. Установка VNC-сервера на Linux Mint 20.
Установите сервер TightVNC, используя следующую команду:
После завершения установки введите следующую команду:
Вам будет предложено установить пароль для VNC-сервера. Введите пароль, а затем подтвердите его повторным вводом.
Шаг 4. Настройте VNC.
Сначала остановите сеанс VNC с помощью следующей команды:
Затем создайте резервную копию файла сценария запуска по умолчанию:
Теперь отредактируйте xstartup файл:
Вставьте в этот файл следующие строки:
Сделайте xstartup файл исполняемым:
И, наконец, начнем vncserver снова:
Шаг 5. Создайте сценарий запуска системы VNC-сервера.
Еще раз остановим VNC-сервер, чтобы мы могли изменить файлы конфигурации:
Теперь создайте новый файл модуля для VNC. Юнит-файл кодирует информацию о сервисе:
Вставьте следующее, заменив idroot его своим именем пользователя. Вы также 1280×800 можете выбрать желаемое разрешение:
Теперь перезагрузите systemd процессы, используя следующую команду, чтобы изменения вступили в силу:
Шаг 6. Подключение к VNC-серверу.
Чтобы получить доступ к удаленному рабочему столу на сервере VNC из системы Windows, в вашей системе должна быть установлена программа просмотра VNC. Доступны различные программы просмотра VNC. Загрузите любой и установите его в своей системе, например:

Поздравляю! Вы успешно установили VNC . Благодарим за использование этого руководства для установки последней версии VNC Server в системе Linux Mint. Для получения дополнительной помощи или полезной информации мы рекомендуем вам посетить официальный сайт VNC .
Источник
Remote GUI access to a Linux computer using Tightvnc with systemd
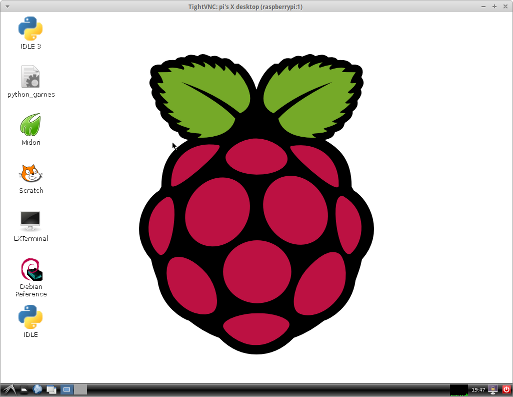
This is a guide to installing TightVNC on the Raspberry Pi. The latest version of Raspbian now includes the RealVNC which is an alternative remote desktop tool. If you would prefer to use RealVNC then it is easily enabled through the raspi-config tool, this guide will be useful for those wanting to understand about creating other applications to run on start-up through systemd.
The command line is a great way to manage a remote Linux computer if you don’t mind typing in commands, but sometimes you need to be able to view a GUI. Short of a very long cable one of the best ways of doing this is using the VNC protocol (Virtual Network Computing).
TightVNC vs Real VNC
The TightVNC server creates a different virtual window which is replicated on a different machine using the TightVNC client. This differs from RealVNC which normally usually echos the default screen.
When most people think of a remote desktop tool then they usually think of the way that RealVNC operates. In this case when you move the mouse, or launch an application it displays the same output on a physically attached screen (normally HDMI) and on a remote client over the network.
TightVNC is useful if you want to run something different to what is on the main screen. For example you could use it so that you can have a status display on the main screen (via HDMI) with a different display used for the configuration which is displayed on a laptop.
Another advantage of TightVNC is that it is FREE open source software. As such it has no restrictions on use and you can view and modify the source code. Real VNC is a commercial version of VNC and needs to be licensed. Real VNC is free to use for personal use on the Raspberry Pi, but does have restrictions if you want to do other things with it which may require a commercial license. This includes running the Raspbian Desktop image on a PC as that does not included the commercial software.
Installing a start-up script using Systemd
The following are instructions on how to configure this on the Raspberry Pi (Debian based distribution). It should be similar for any other Debian based distribution (eg. Ubuntu) which uses Systemd start-up files. Some other distributions use different software install tools and possibly different init setup tools.
If this is used in combination with the guide to running the Raspberry Pi headless with Debian Linux then it can be used to setup a Raspberry Pi for remote access without ever needing to connect it to a monitor.
Choosing TightVNC
There are several software projects that support VNC. I have chosen to use TightVNC because it is free open source software (GPL2), provides compression to allow it to work over a slow network (Internet) and is readily available in the software repositories.
Client server model
VNC follows the traditional client sever model. The server software runs on the host to be accessed, and client software runs on the local machine that wishes to control the host. The server and client do not have to be the same (eg. the client can be RealVNC when the server is TightVNC), but some features may only work when the same client and server are used.
Install the TightVNC server software
First refresh the software repository information using
sudo apt update
This is particularly important if you have just installed the operating system as the repository information may be incomplete.
Install the server software from the repositories:
sudo apt install tightvncserver
Start server and configure a password
The first time you run the server it will prompt you to set a password. This is the password that you use when connecting remotely.
There is no need to create a view only password, unless you have a specific need.
When the server starts it will tell you which virtual desktop has been setup. In this case:
New ‘X’ desktop is raspberrypi:1
says that it’s virtual desktop 1. You would connect to this using :1 at the end of the IP address in the client, this is the one we will setup to start automatically later.
You can run multiple instances. Each time you start tightvncserver it will use the next available desktop, but in most cases you will just need one.
Adding Tightvnc to systemd startup
To have Tightvnc startup automatically we need to create a new startup file, which needs to be stored in the /etc/systemd/system/ directory and end with the suffix «.service». I called this tightvncserver.service. This needs to be created as the root user so using sudo
sudo nano /etc/systemd/system/tightvncserver.service
You may need to change the user name on line 8. It is currently set to pi which is the default username on the Raspberry Pi Raspbian image. Set this to whatever username you want to login to TightVNC as. Do not put root as the user.
Change the file so it is owned by root
sudo chown root:root /etc/systemd/system/tightvncserver.service
Make the file executable by running
sudo chmod 755 /etc/systemd/system/tightvncserver.service
It’s a good idea to test the script at this point rather than waiting until after a reboot. This is done using:
sudo systemctl start tightvncserver.service
Don’t worry if you get the following error message, which is because you’ve already started tightvnc
A VNC server is already running as :1
Enable startup at boot using
sudo systemctl enable tightvncserver.service
TightVNC will now start at startup. I’d recommend you reboot at this point to make sure it’s working but youc an just stop and start the service using the systemctl command instead.
Note that this is designed for running only one instance of TightVNC on the computer. If you want to be able to start and stop specific instances of TightVNC then you will need to tweak the startup script appropriately.
Installing Tightvnc viewer (VNC client) on a Linux computer
On a Linux computer you can install the viewer with
sudo apt install xtightvncviewer
or if that is not in the repositories try:
sudo apt-get install ssvnc
This will work with Debian / Ubuntu based distributions only, for other distributions use the normal package manager.
Note that ssvnc — which is the version I installed on my Kubuntu computer is based on tightvnc, but also has the ability to configure the ssh tunnelling (see later) through the GUI.
Login using
xtightvncviewer 192.168.1.6:1
(replace with your own IP address as appropriate)
Installing Tightvnc view on a Windows computer
To access from Windows or using the Java Client download from TightVNC.com
Securing TightVNC
TightVNC allows anyone that knows the password to login as the user that it’s running under. It also does this without encryption so anyone can snoop in on the session. Fortunately there is a secure solution, which is to tunnel the connection over an ssh (secure shell) login.
First step is to restrict Tightvnc to the local computer only. This is done by adding the option -localhost when starting the tightvncserver. To do this edit line 7 in the /etc/systemd/system/tightvncserver.service file to read:
Then restart the server.
To login using ssh — first login to the host computer using ssh
ssh pi@192.168.1.6 -L 5901:localhost:5901
The -L option creates the tunnel, from the current computer (default) port 5901 to the host computer (as localhost) port 5901. Port 5901 is the default port for display 1, 5902 for display 2 etc.
To connect using tightvnc now use the command
xtightvncviewer 127.0.0.1:1
Note that your previous terminal will now be logged into the Raspberry Pi so you will need to start a new terminal or tab to run the viewer.
If using Windows then the ssh tunnel can be created from within PuTTY 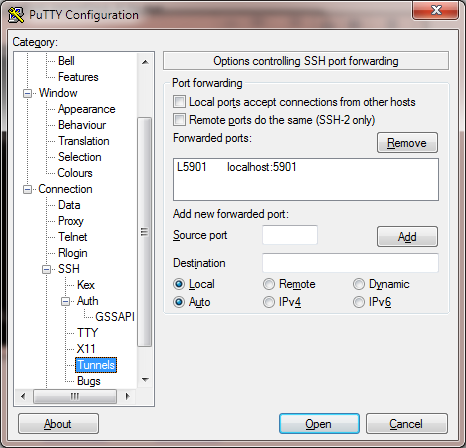
Then connect using the vnc client using 127.0.0.1:1.
You can now use the GUI to run applications on the Raspberry Pi without needing a monitor or keyboard. If you have port forwarding set on your router you can do this over the Internet.
Starting your window manager
The instructions above are sufficient for the Raspberry Pi running Raspbian (Debian). On other systems you may need to make a further configuration change to start your normal window manager / application launcher. If you get a blank screen when connecting edit the file
/.vnc/xstartup and replace the line /etc/X11/Xsession with one of the following as appropriate.
For instance with Ubuntu you would use the entry for gnome, for xubuntu you would use xfce and for kubuntu use kde. The Raspberry Pi uses lxde, but this is started automatically on the Raspberry Pi there is no need to add it to the xstartup file.
Источник


